
Last Updated on April 22, 2025
Curious about SharePoint lists?
In this guide, let’s talk about what these lists are and how to create one to keep your data organized.
Let’s get started.
Table of Contents:
A SharePoint List is basically a table of data you can use to store and manage information within a SharePoint site.
It’s basically like an Excel spreadsheet, but built right into your SharePoint environment, made up of rows and columns.
The rows are your individual items (like tasks or contacts), and the columns are the data fields for each item (like names or dates).
What makes it even more useful is that you can add features like:
- Drop-down choices
- Date pickers
- Attachments
- Custom rules or workflows
People use lists for all sorts of things, like tracking tasks, managing inventory, or just organizing basic info.
It’s simple to use but powerful enough to handle more complex processes when paired with tools like Power Automate.
Sign up for exclusive updates, tips, and strategies
Creating a list is actually pretty simple, and you’ve got a few ways to go about it, depending on what kind of list you need.
The main methods are:
- Starting from blank
- Using a template
- Importing from a Microsoft Excel spreadsheet/CSV
- Copying an existing list
But regardless of what method you use, you need to start by pressing the “New” button and then the “List” option.
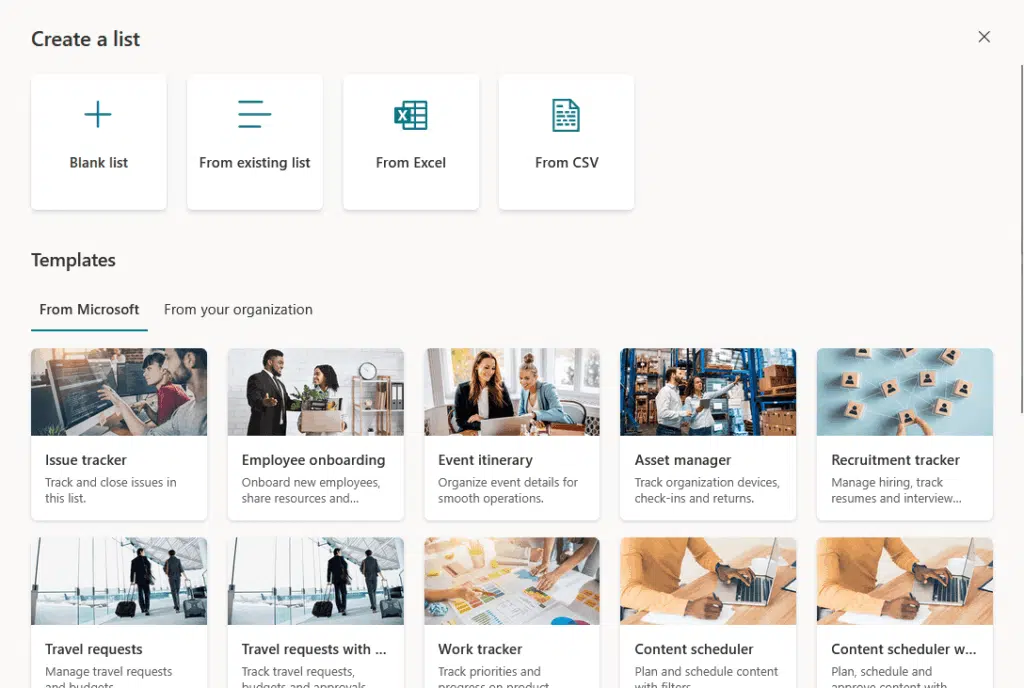
Then you will be able to select an option on how to create the list:
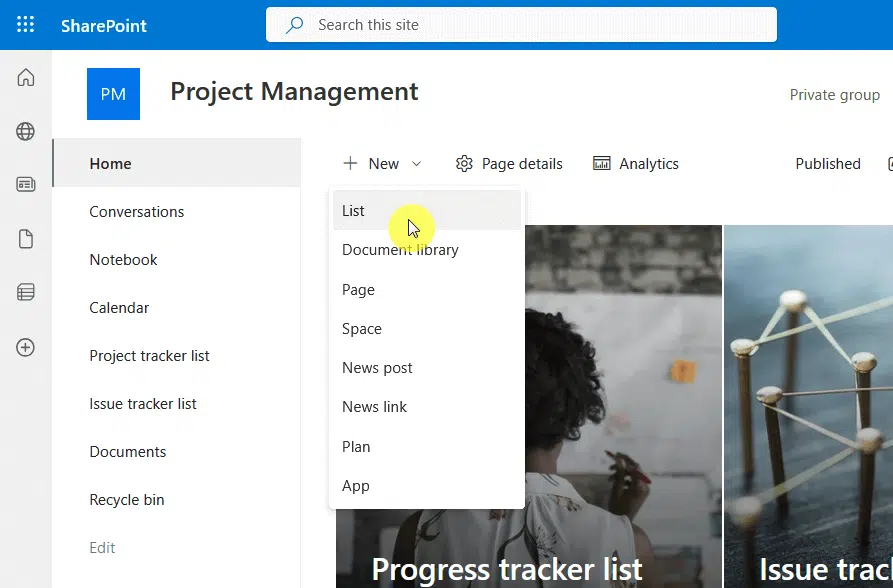
That option is available on both the home page of the site and in the site contents. 🙂
1. Starting from a blank list
Starting from a blank list is perfect when you want full control over what your list looks like and what kind of data it holds.
From the earlier option, select the “Blank list” button, and this is what you will see:
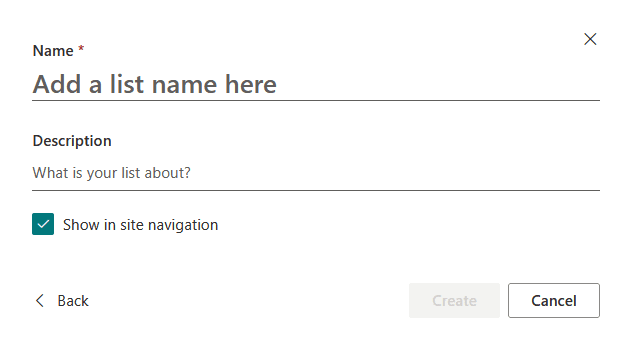
Give it a name, an optional description, and choose whether to show it in site navigation, then click the “Create” button.
Starting from a blank list is ideal when:
- You have specific data requirements
- You’re building a unique workflow
- You want full control over structure and design
Once the list is created, you will see a simple table with just a “Title” column, then you can start adding your own columns.
SharePoint gives you options for formatting each column, setting default values, or even creating validation rules.
It’s a clean slate that you can shape however you need. 👍
2. Using a template
Using a template in SharePoint is a quick way to set up a list without building everything from scratch.
The structure, columns, and formatting are already done for you; all you have to do is plug in your data into the list.
From the window, scroll down to see all the templates, and then click on the template that you want to apply.

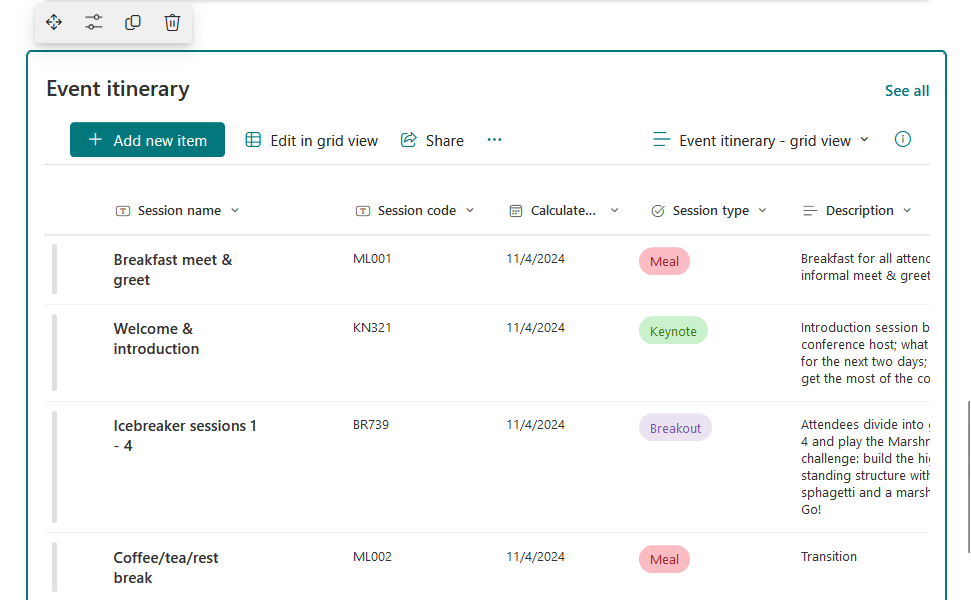
Once you click on a template, you will be able to see a preview of it along with its features (views, design, and column settings).
Hit the “Use template” button if it fits your needs:
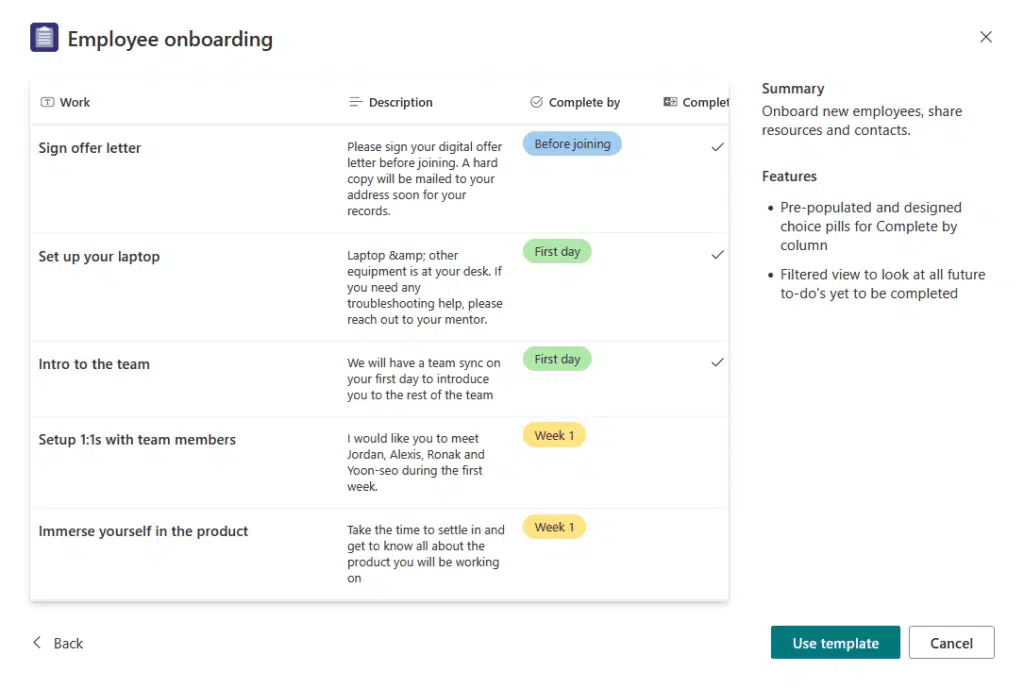
Then, as usual, name the list, adjust the options, and then click the “Create” button.
Templates are great for getting up fast, as each one is built for a specific task, like tracking issues or managing inventory.
If you ask me, using a template is ideal when:
- You need to set up a list quickly
- Your task matches a common scenario
- You want a good starting point, but plan to tweak later
They come with the right columns already set up (like status, priority, or due dates), which means less work for you.
You can still customize them later too, however you want, add or remove columns, change view layouts, or apply rules.
By the way, it’s also possible to create your own custom list template, and it will show up in the “From your organization” tab.
3. From Excel or CSV
This option is perfect when you already have data and just want to bring it into SharePoint without retyping everything.
Select the “From Excel” or From CSV” option, and you should see the following page:

From there, you can upload your file or choose a file that’s already on the site.
The next part would be to map your columns to SharePoint column types (text, number, date, etc.):
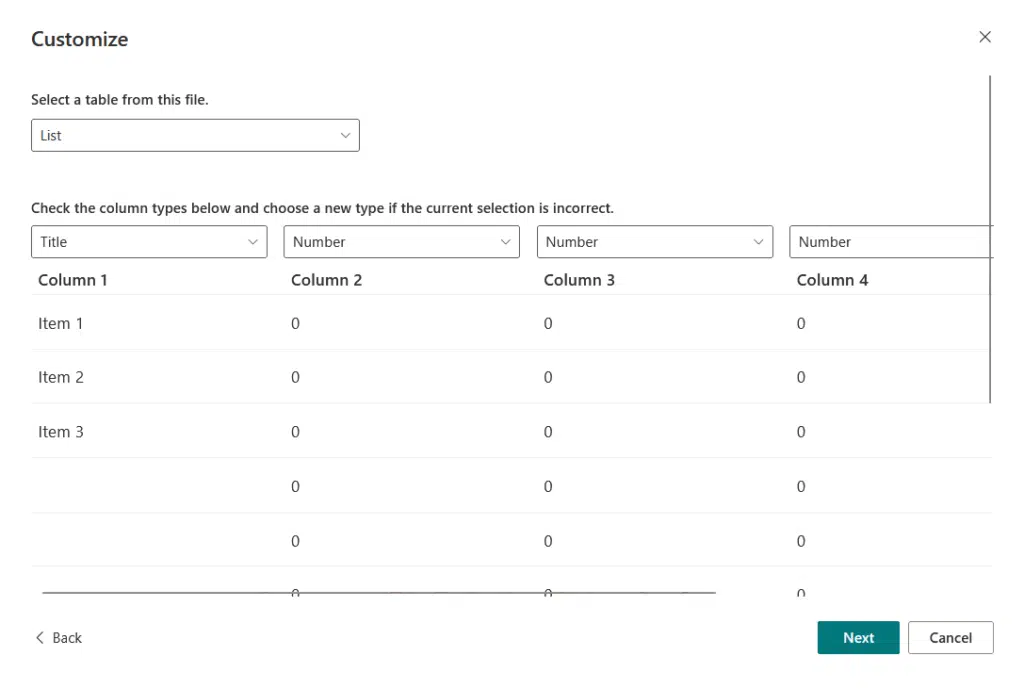
Then name your list and hit the “Create” button.
SharePoint will automatically use the first row of your file as column headers, though you will get a preview of the list.
This method is ideal when:
- You already have data in spreadsheets
- You want a quick setup with lots of entries
- You need to preserve specific column names and formats
It’s helpful for those who already use Excel but want the added benefits of SharePoint, like sharing, version control, and automation.
It’s not just for importing either, as you can keep the structure, update the data, or even customize the whole list later too.
4. Copying from an existing list
This method is super helpful when you already have a setup that works and want to use the same structure elsewhere.
It’s like cloning as SharePoint gives you the same columns, views, formatting, and rules, but without the list data.
From this method, click the “From existing list” button, and you should see the following:
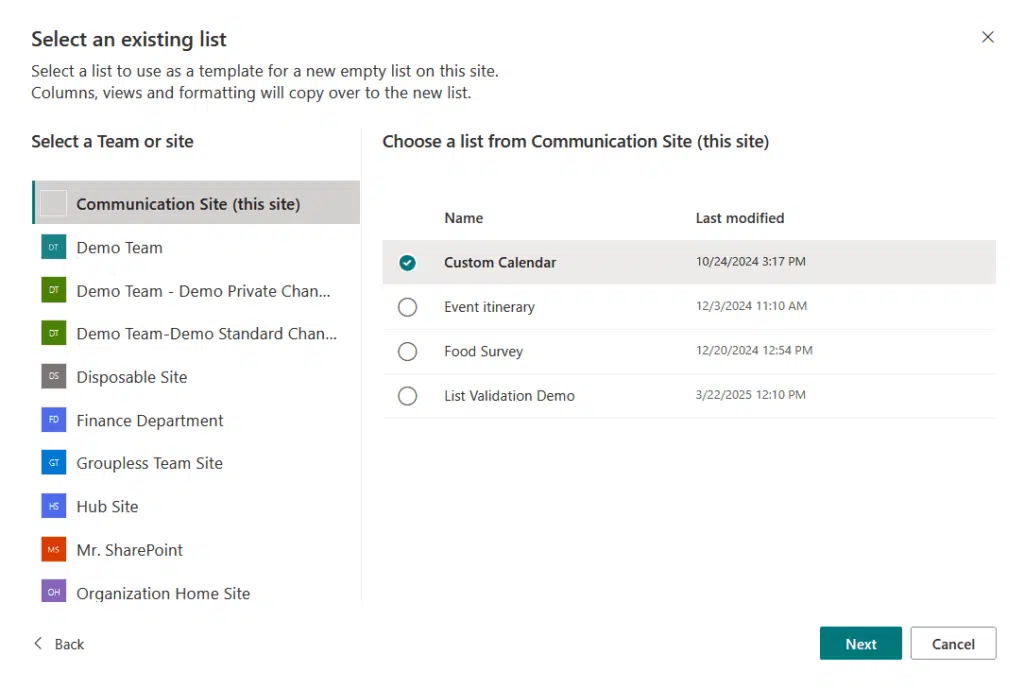
Pick the site and list you want to copy from, go through the usual part of naming the list, and then click the “Create” button.
This is ideal when:
- You’ve already set up a list you like
- You’re running similar projects
- You want to test changes without affecting the original
No need to rebuild every column or setting from scratch, just make your copy and adjust what’s needed.
But remember that it doesn’t copy over any of the items (just structure), so you get a clean version to start fresh with.
Once your list is up and running, customizing it is where the real magic happens.
Here’s what you can customize:
- Columns
- Views
- Formatting
If you’re into automation, you can link your list with Power Automate to send notifications or trigger workflows based on changes.
Adding and configuring columns
This is one of the first things you will do to shape your SharePoint list.
Each column is like a field where you collect specific data, so setting them up right is key to making your list functional.
Examples of column types you can use are:
- Single line of text
- Choice
- Date and time
- Number or currency
- Yes/No
To add a column, go to your list, click the “+ Add column” button at the top, and pick the column type you need.
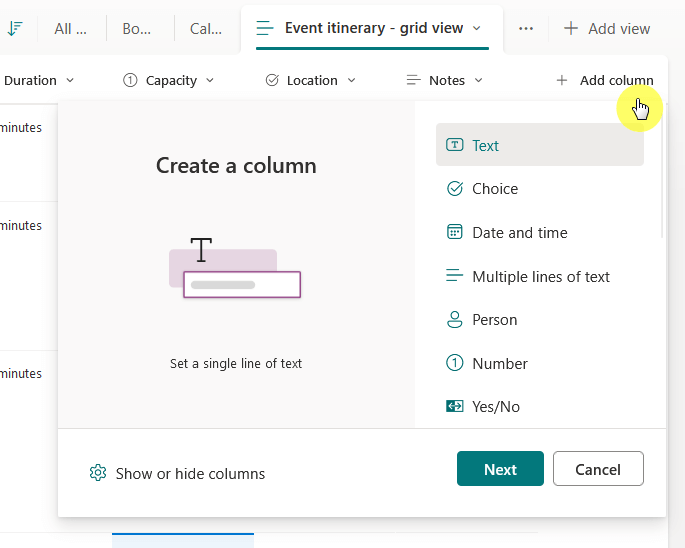
After you add a column, SharePoint gives you a bunch of settings to control what users can or can’t do with it.
For example, in a number column, you can define min and max values, decimal places, and how numbers are displayed.
You can also edit an existing column anytime, just click the column header, and find the column settings button.
Then click the “Edit” button:
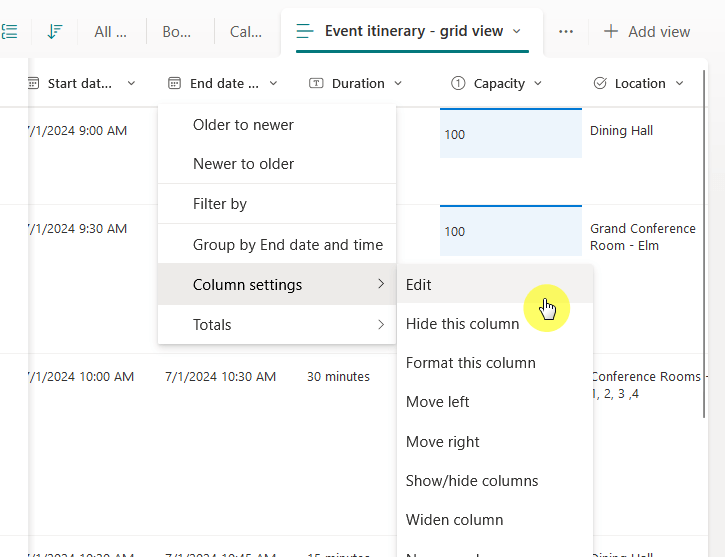
You can also do this from list settings (under the gear icon) if you want a more detailed view of all columns at once.
So if you ever need to rename something, change a dropdown’s options, or make a column required, you don’t need to delete and start over.
Setting up views and filters
Setting up views and filters lets you control how list data is displayed, which helps people find what they need faster.
For this, simply click the + add view button at the top of the list:
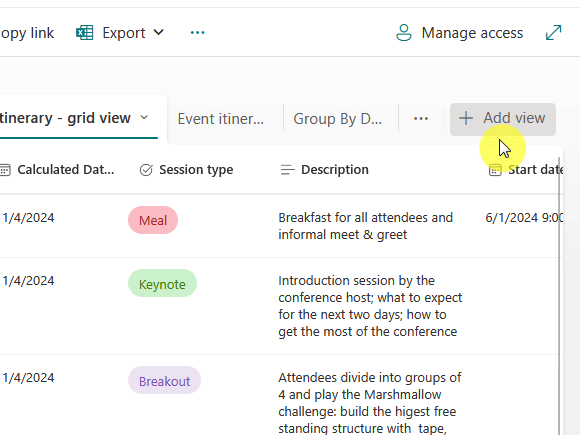
From there, all you need to do is pick a layout:
- List
- Calendar
- Gallery
- Board
Each view will look different, for example, this is what you will see with a board view:
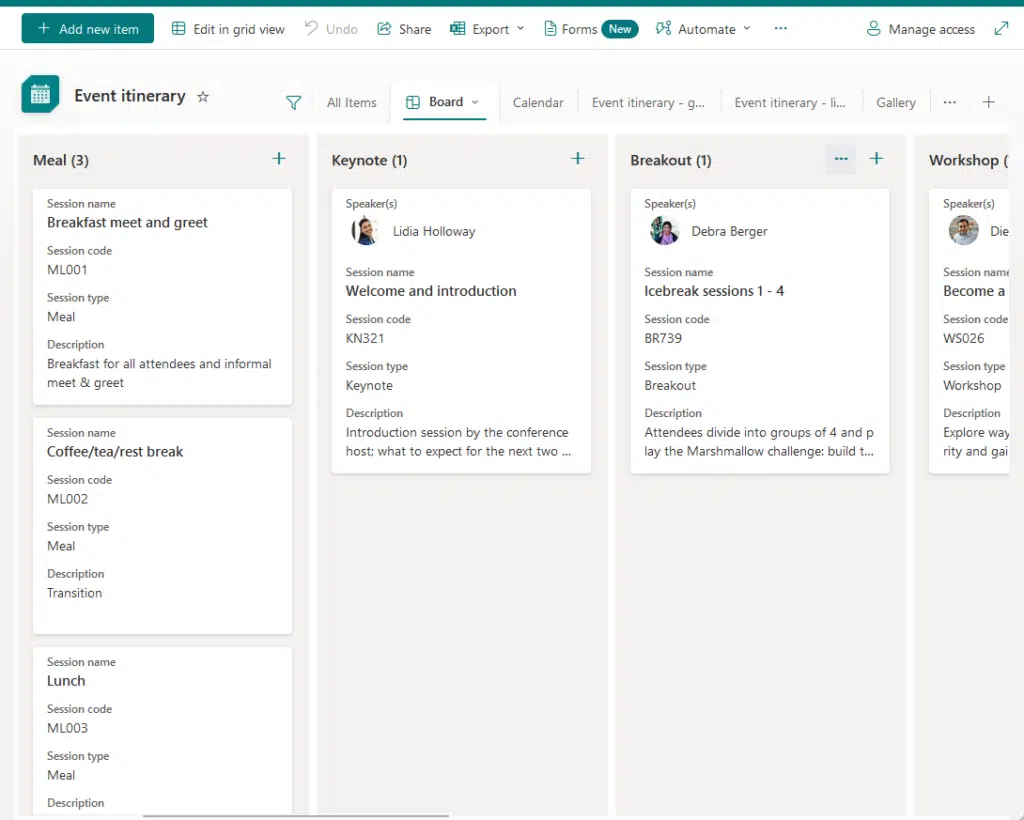
After that, choose the columns you want to display, add filters if needed, and sort or group the items as you like.
Some examples of creative and useful views you can create are:
- “My Tasks This Week” View
- “High Priority Only” View
- “Recently Updated Items” View
These kinds of views let you slice and dice the data in ways that fit your real-world workflow.
You can also create as many views as you want for different needs, which makes working with long lists way more manageable.
Managing a SharePoint List is about keeping things organized, secure, and running smoothly as more people start using it.
Permissions and access control
The truth is that not everyone needs full access to the list; sometimes you just want people to view info, not edit it.
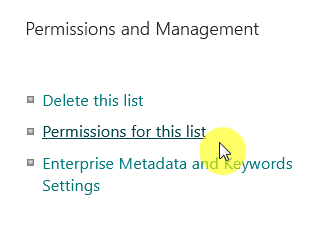
You can manage these through the gear icon by going to list settings, then to the permissions for this list page.
When you get to this page, you’ve got a few key things you can do to manage access:
- View current permission levels
- Break inheritance
- Grant access
- Remove access
- Create custom permission levels
This page gives you full control over who sees or edits the list, so it’s the spot to fine-tune how open or restricted your list is.
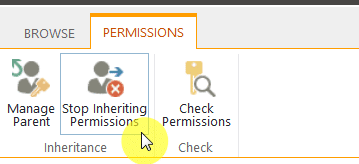
For example, if you want people to only view info in a SharePoint list and not edit it, you have to stop inheriting permissions first.
After that, find the group or users you want to limit, edit their permissions, and select the read option only.
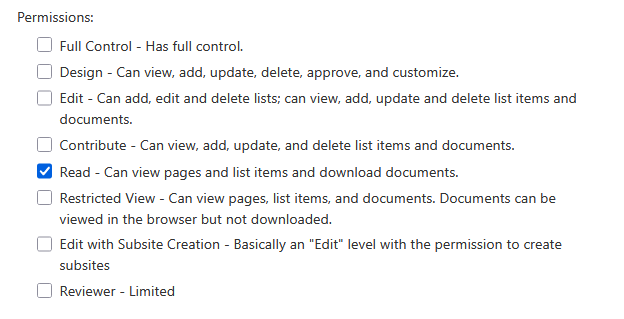
Now, those users can open and view the list, but can’t make any changes, a good setup when you need transparency.
If your list has sensitive info or needs approval, proper permissions help avoid accidental edits or leaks.
You can even assign permissions at the item level if needed.
Version History
Versioning helps you keep control over your list’s content, especially when multiple people are making changes.
Each list item has a version history button when you click the three dots (…) next to the item name:
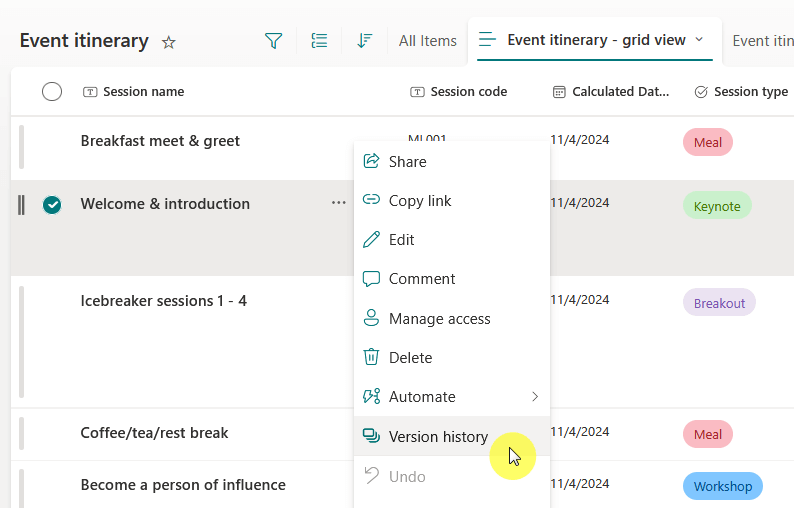
A panel will appear showing all the versions of that item: who made each change, when, and what changed (when viewed).
You can even restore or delete older versions from there.

If someone makes a mistake or deletes something by accident, you can easily roll back to an earlier version.
You can track how data evolves, which is especially useful when multiple people are working on the same list.
Using Lists for Better Data Management
If you want your lists in SharePoint to really support better data management, start with clear, specific column names.
When everyone understands exactly what each field is for, it cuts down on mistakes and keeps the data cleaner.
Filtering or grouping your data also makes it way easier to focus on what matters, especially when your list starts growing.
Anyway, do you have any questions about these lists in SharePoint Online? Let me know below.
For any business-related queries or concerns, contact me through the contact form. I always reply. 🙂


Hello! Do you have any idea how to create a Current date column in a list? There is a possibility to enter current date by default when creating a new record, but it is not updated each day. Thanks in advance!
Kate.
You can leverage a Power Automate workflow to loop through the list and update the column each day.
Hi, do you have to be a site Admin to create a sharepoint list?
No, you do not have to be a site admin to create a list.
Can SharePoint list could collect data from a MS form to create a list item?
Yes, it can.
Let me know if you have any questions.