Last Updated on April 29, 2024
For the past few years, the issue of security has been a major concern — not only for organizations — but also for individuals.
In fact, it has now become an important practice that everyone has now known better to adopt — especially if you have diverse SharePoint sites tailored to meet different purposes.
Each site is built to consciously fulfill that need for security. You don’t want to be part of a system that is prone to hack or can have its content easily saturated to the public.
In this article, you will learn about making and maintaining the best practices for security as you use Microsoft SharePoint.
Let’s get started.
Table of Contents:
While some common practices for security are known such as locking your computer while you’re away, being wary of suspicious emails, and using secure wifi connections, there are those that may seem peculiar to you.
Read on as we discuss these practices:
One of the newly introduced functions of SharePoint Online is its ability to share almost anything with a single link.
Users belonging to any particular site can decide to share media contents, files, and even lists and libraries.
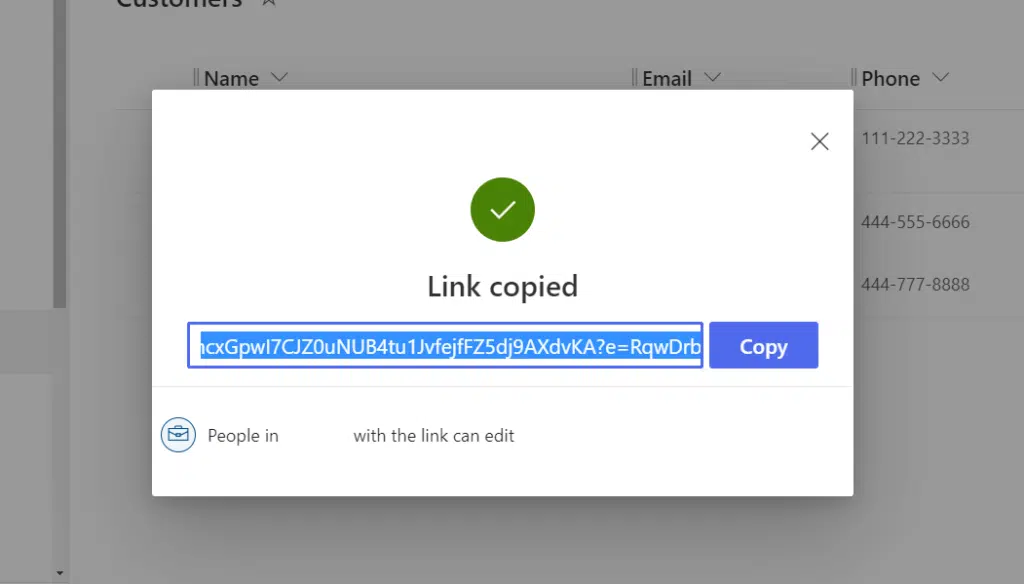
The only limitations to this are the permission levels of the user. Furthermore, sharing can also be done externally, that is, to those not belonging to the organization.
While sharing allows the interdisciplinary collaboration of members on a project, this function comes with potential risks and must be used with extreme caution.
Anyone who wants to share anything must be well aware of the contents they share and the possible security risks that these shared contents can pose to the organization.
2. Make use of Groups for user management
SharePoint allows collaborators to be grouped and to work in these groups. These groups allow users belonging to it to be assigned different tasks and have common privileges.
This makes grouping users one of the best practices in SharePoint security as this not only classifies members under one umbrella but this makes managing permissions more efficient too.
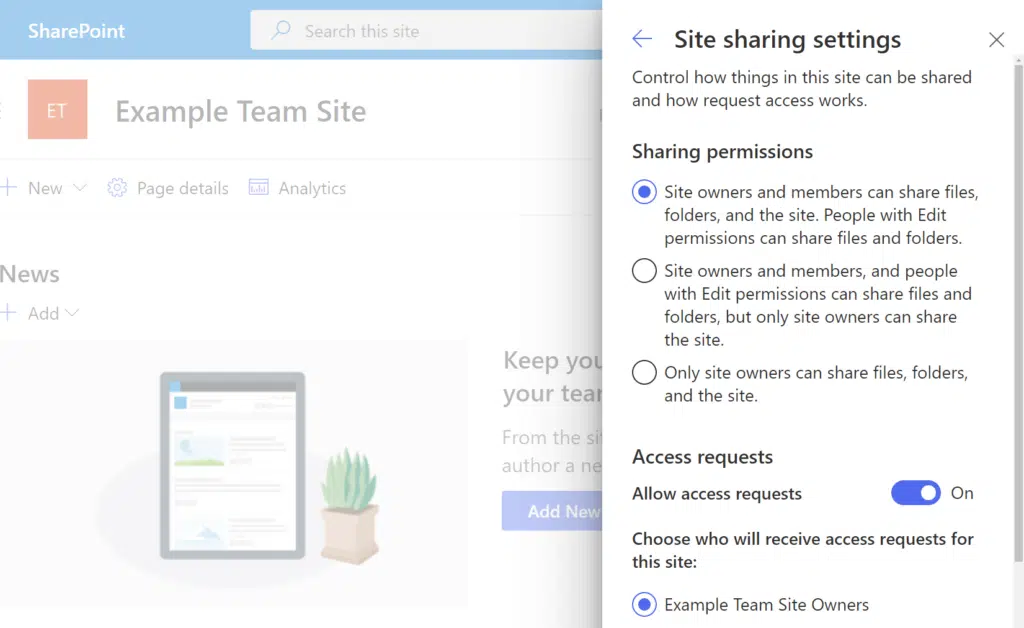
One key thing to note with Groups is that changes made to the Groups permissions affect all users.
This means that if you need to change the permission level, you can tweak the group permission settings instead of diving down on each user’s accounts.
Since you can easily move one member from one group to another, this method of managing security is more efficient and manageable.
3. Avoid document or item level permissions
Contrary to managing group-level permissions, some users manage permissions at a lower level (like for each document or each item instead).
Yes, it’s quite easy to set permissions at the file level. Unfortunately, there are numerous potential problems that might arise from this approach.
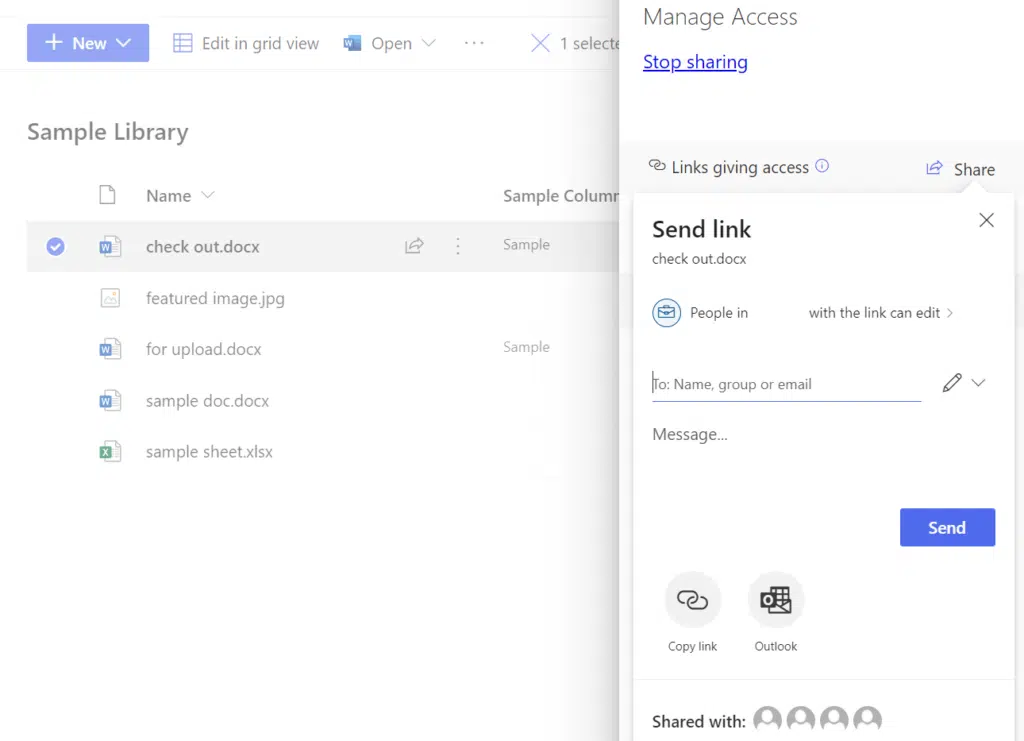
For one, it will be close to impossible to monitor all shared items or documents, especially when you have so many sites to manage.
As you know already, SharePoint actively relies on the use of permission inheritance, and setting permission at low levels breaks this functionality.
In addition, you will not get a single list of all those individual accounts that you shared a file or two, which makes management and maintenance non-existent.
4. Get one administrator per site or site group
Like we discussed earlier, groups can be created, and administrators can be chosen for each group to oversee everything that goes on in their group.
Choosing administrators is a good security practice. But a better one is to keep only one administrator per site or site group.
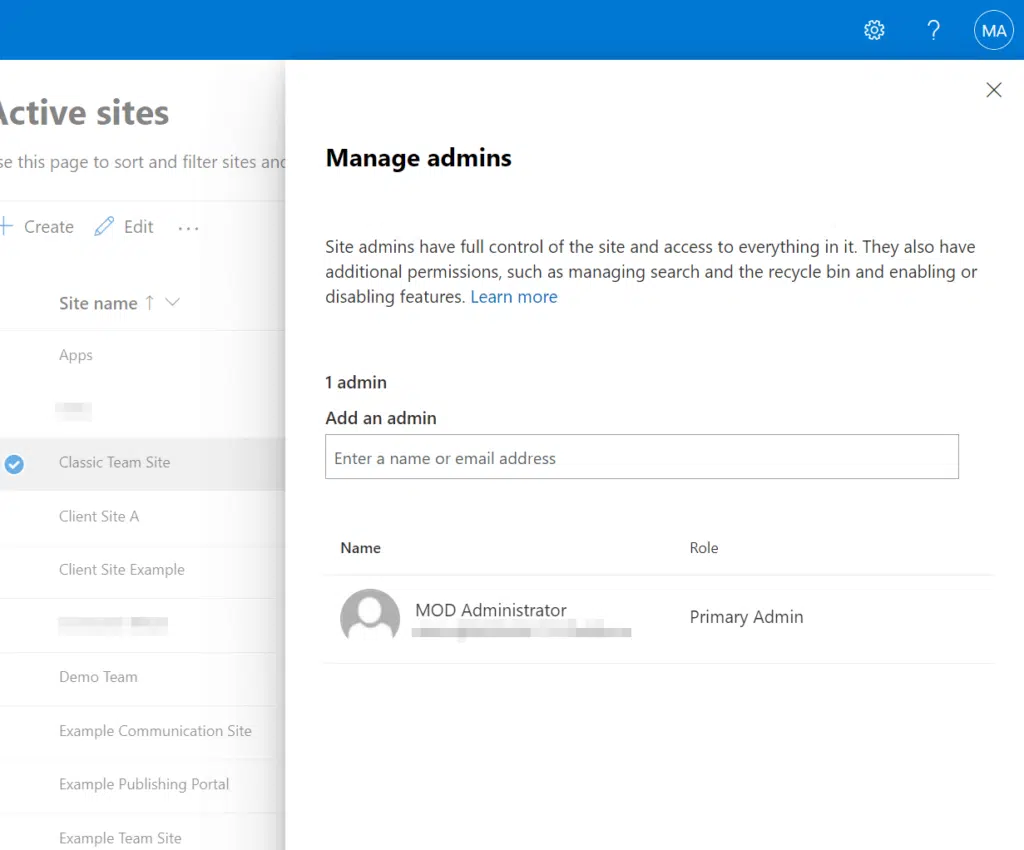
This makes sure that the administrator is solely responsible for everything that goes on in the group.
Since there’s only one administrator, he or she will be held accountable for every sharing that goes on in the group.
The administrator has a higher privilege than the others and can set permission on what contents to share and what to keep private, which is why it’s important that you trust him or her.
5. Take advantage of Microsoft’s security features
Microsoft has some built-in security features that can help you improve the security of your account.
These features are also incorporated into the SharePoint system because of the increase in the number of people who now largely depend on it based on its flexibility.
Among these features, two are widely known and used — encryption and virus detection.
Encryption
The Microsoft environment offers many levels of protection including — access security, data security, application security, physical data center security, and network security.
The encryption is largely divided into two phases, in-transit encryption and at rest encryption.
In transit
There are two cases in which data enters and leaves the data centers.
- Movement of data between data centers: Data can be moved between data centers and the major reason this occurs is to enable disaster recovery for geo-replication. The encryption occurs when this data is being transmitted using a private network. Data transferred can include blob storage deltas and transaction logs
- Server and client communication: Communications across the Internet generally are made using SSL/TLS connections. These SSL connections are secured using 2048-bit keys.
At rest
For the encryption of data at rest, there are two components involved — encrypting customer content with per-file encryption and the BitLocker disk-level encryption.
Both forms of encryption are available on the SharePoint online platform.
- BitLocker encryption: This type of encryption encrypts all data in the storage.
- Per-file encryption: As the name implies, this one encrypts each file with unique encryption. The encryption also goes further by encrypting every update that occurs on the file and the keys to every encryption that occurs are stored in a location separate from the encrypted content.
This encrypted content is usually stored across multiple containers within the data centers, with each container having its unique credential. The credentials, just like the encryption, are also stored in a different location.
Each encryption is made using a Federal Information Processing Standard (FIPS) 140-2 standard which is the Advanced Encryption Standard (AES) with 256-bit keys.
Virus detection
The detection of viruses is another feature that occurs on SharePoint Online. The feature checks every content that is within a site.
It’s usually automated and uses a highly sophisticated anti-virus engine to scan for malware and viruses.
The engine warns users of a site if it attempts to save any infected file to their local device, or do something shady on it.
Although the virus detection feature is good, it is often limited.
For instance, it does not check files that are larger than 25MB. It’s often a good idea to have a separate anti-virus detection software that can check larger files and can work offline.
6. Teach users about good security etiquettes
Apart from the added security features that SharePoint offers, users must also be aware of measures they have to personally take to avoid being a victim of security traps.
These common measures include:
- Locking personal devices: With the increased involvement of personal devices in business transactions and organizational matters, it’s always a good idea to not only keep personal devices well but also lock them in case they get stolen or are temporarily accessed by foreign parties. Since SharePoint is a cloud-based feature, it can be easily accessed from any device. A step ahead is to keep these devices locked to prevent unauthorized access.
- Logging off public devices: Yes, there are cases when our devices are out of reach or can’t be used due to one reason or the other. We usually resort to using public computers like hotels, business centers, and cybercafes. We must be careful, however, to make sure that we log off these devices as soon as we are done using them. This keeps the next user of that device from unexpected access to confidential individual and organizational matters.
- Installing anti-virus software: Since SharePoint is largely operated online, there are possibilities of receiving files and contents that can be potentially harmful to our devices. Having a good anti-virus is a safe bet.
- Using a strong password: Using a strong password is a must. A strong password often includes upper-case and lower-case letters, numbers, unique symbols, and is often of considerable length. It is also a good security practice not to use the same password across several platforms, and to also change your passwords after about 90 days.
- Backing up important files: If your files are temporarily unavailable due to a virus attack, software update, or a hardware failure, a good security practice is to back up files that are important to you.
It’s also important to be more conscious and use more common sense. There are security breaches that can be safely avoided by simply using common sense.
For example, if someone sends you a text or an email using an unidentified address and asks you to go to a certain page and log in with your username and password, you can be sure this is phishing.
Sign up for exclusive updates, tips, and strategies
Here are some questions you might be asking when it comes to SharePoint security:
Microsoft SharePoint, coupled with Microsoft OneDrive, is protected with multiple layers of security, which makes SharePoint almost impenetrable to attack.
SharePoint is stored in a Microsoft cloud-based storage, which is subject to different levels of protection including encryption, anti-virus, and anti-malware engines,
On the other hand, nothing is perfect. That is why you must consider applying the best practices you have read earlier.
It’s always better to buff up security as much as possible and teach your users good security practices. Prevention is always better.
Related: Microsoft Teams Security Best Practices: Compliance & Governance
Site admins can manage permissions to give people access or restrict a certain person from access to content.
SharePoint works in an inheritance manner, that is, all sites inherit permission settings from the site that is directly above them in the hierarchy.
Since groups are best used to manage permissions, here are the steps to create groups and to add users.
First off, navigate to the site where you want to view or manage permissions.
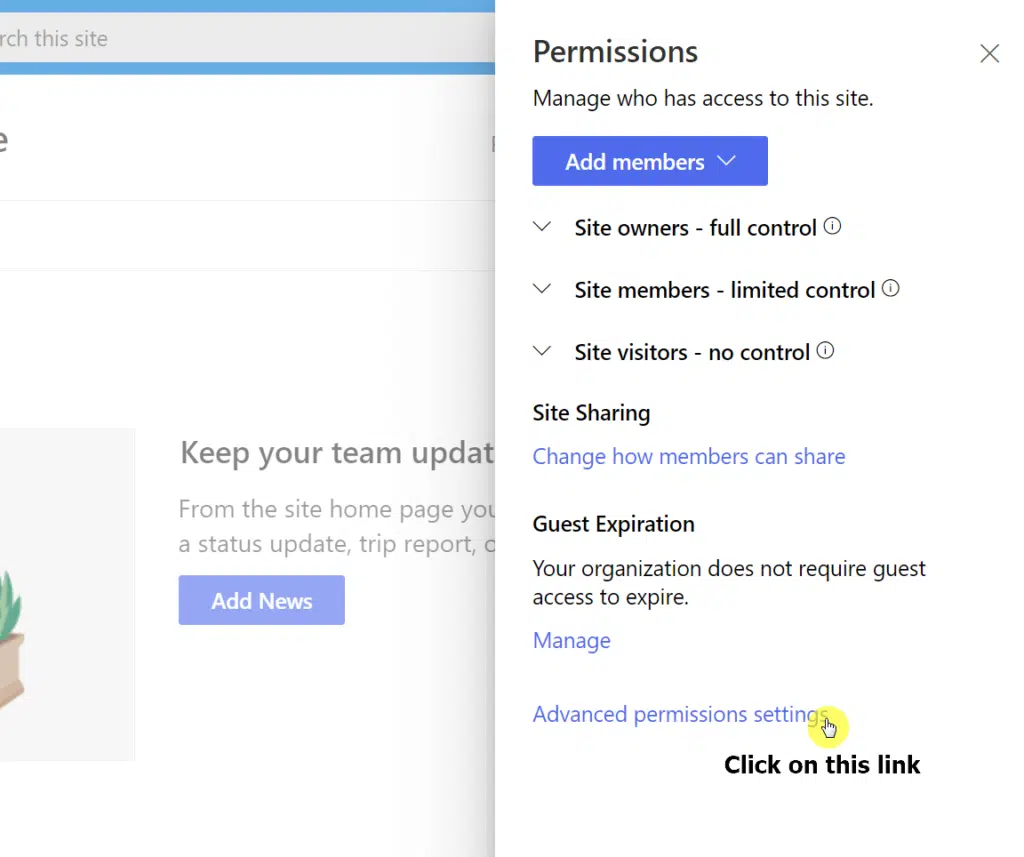
Once there, click on the gear icon on the upper-right side of the page to open the settings panel and click on “Site permissions”.

You will then need to go deeper. Click on the “Advanced permissions settings” link on the bottom part.
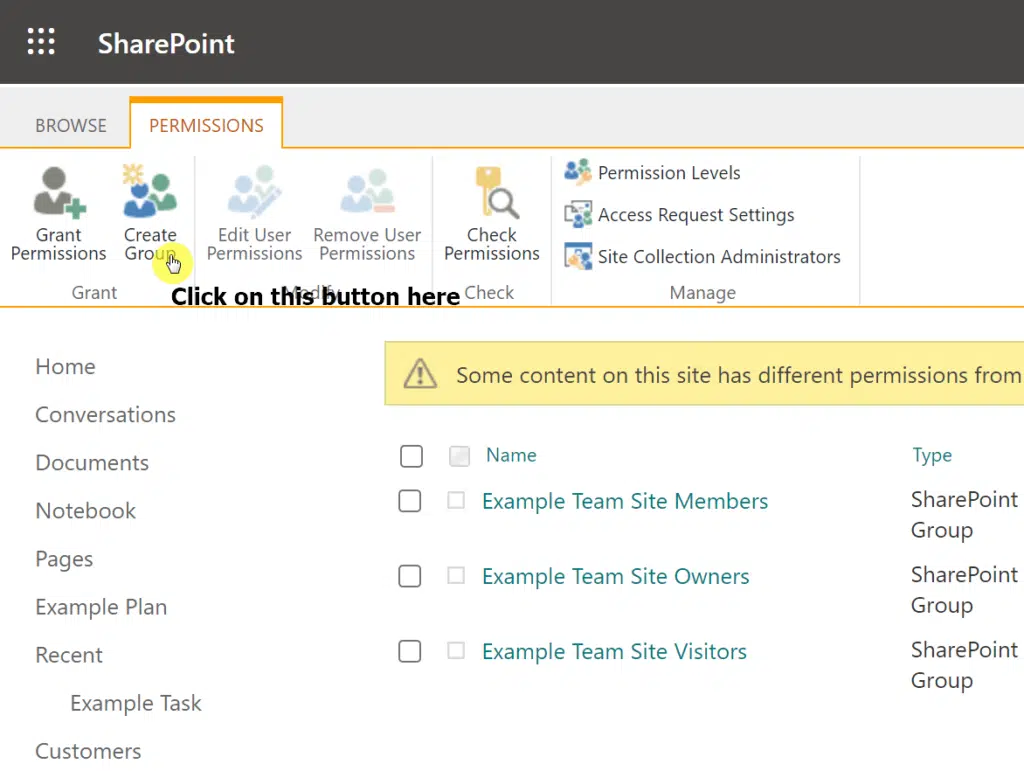
The system will bring you to a classic-looking portal. On the ribbon above, click on the “Create Group” button.
This will open a page where you can create a group. Go through the fields and fill them out.

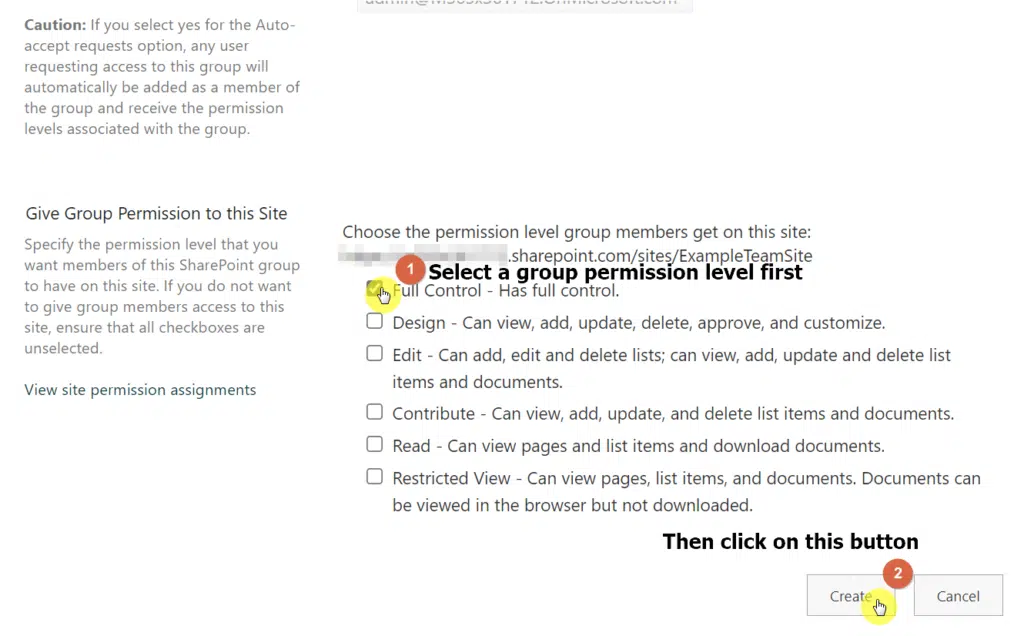
Now, on the bottom part, you will be able to specify the group permission to the site. You will see lots of choices there with a good explanation of what they do.
Simply select the group permission you want to give and click on the “Create” button to finish it up.
After that, the system will bring you to the group page, where you can add new members and even change the settings of that page.
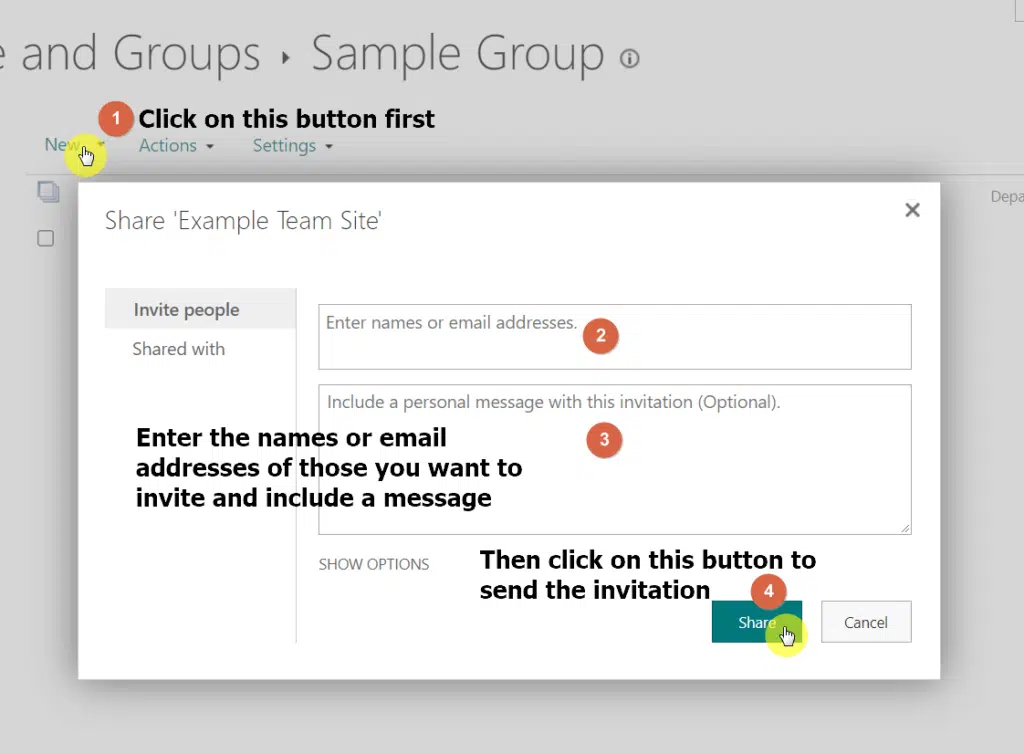
To add new members, click on the “New” button in the toolbar where you will be able to invite people to the group.
Enter the names or email addresses of the users you want to invite and you can even include your own personal message.
Then, click on the “Send” button.
When the time comes when you need to add or remove users, simply go back to this page and repeat the steps here.
This makes it easy to manage permissions on the site since all you have to do is add/remove a person in the group and that person’s permissions settings will change.
Unfortunately, you can’t password protect a SharePoint site. You can only set restrictions to users accessing the site or break the permission inheritance.
However, although you won’t be able to lock the site as a whole with a password, you can protect files on your sites with a password.
To password-protect files, do this:
Navigate to the site and the library where the file is stored. Once there, select the file and click on the share button of that file.
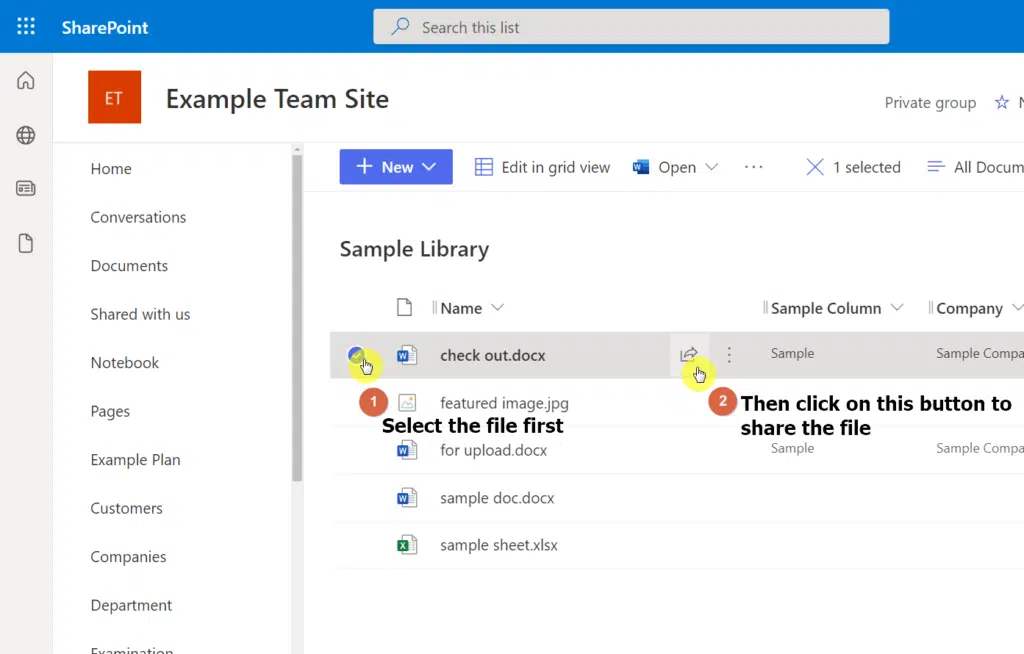
This will open the share window. The first thing to do then is to click on the link above the field where you can write the name, group, or email.
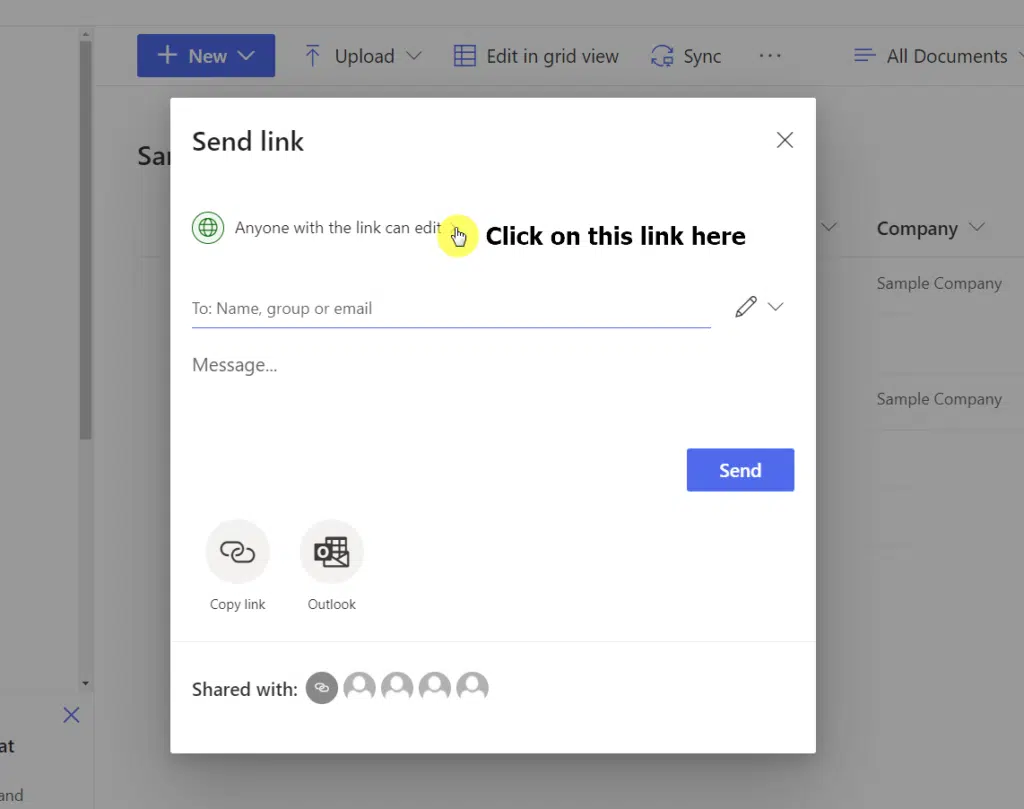
On the next page, make sure the link setting is set to “Anyone with the link”. Otherwise, the password option will not work.
You will then find a “Set password” field below where you write a strong password for the file. Click on the “Apply” button to finish it up.
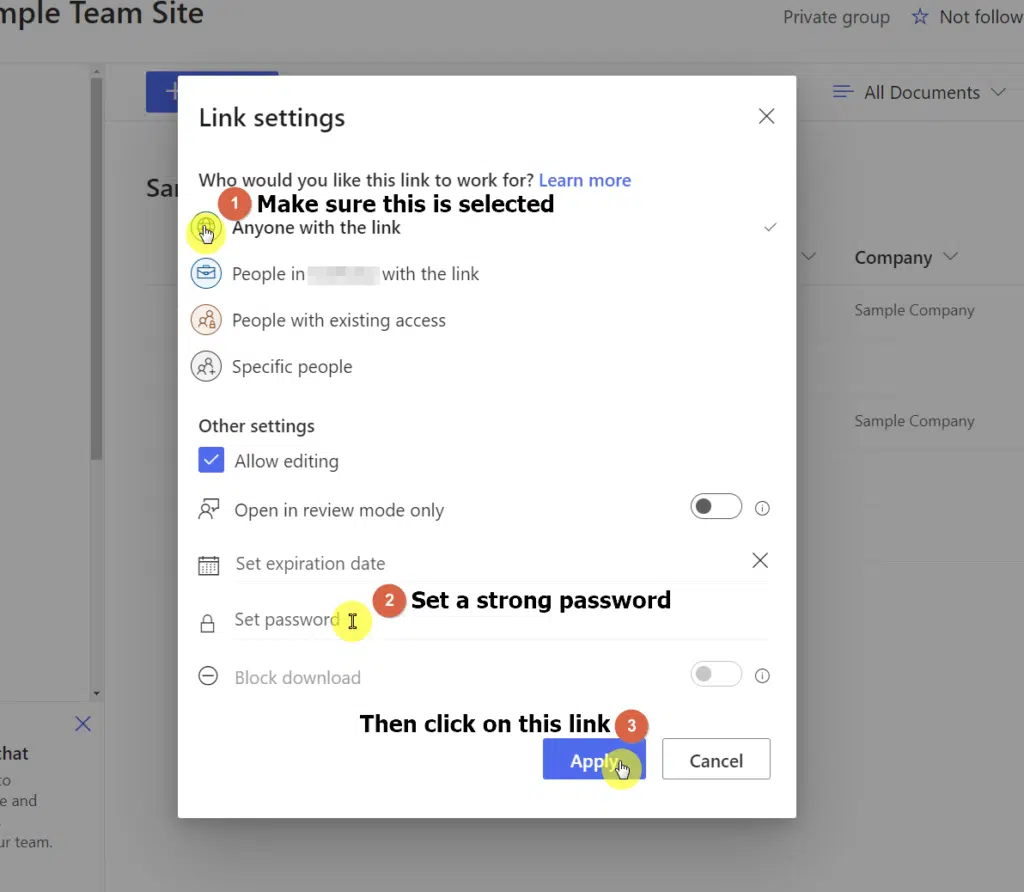
After you share the link, those who don’t have the password will not be able to view the file. This is a good workaround to ensure your files are well-protected.
Now, what if you don’t want to share your files or documents anymore? Fortunately, it’s quite easy to make your files or documents private again.
Simply follow these steps:
Navigate to the file first that you want to stop sharing. Select it and click on the info button on the command bar.
Once the panel is open, click on the “Manage access” link.

You will then see a “Stop sharing” link at the top of the panel. Click on it.
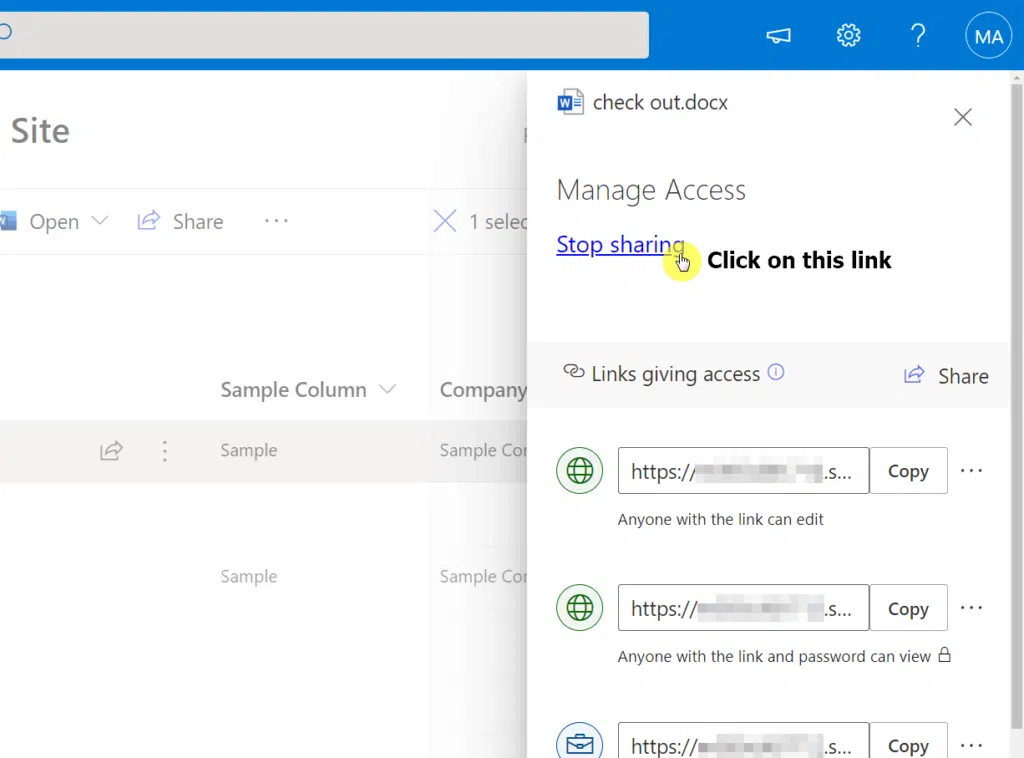
After clicking on the link, the system will confirm with you if you want to delete all links that give access to the file.
Simply click on the “Stop sharing” button and the file will be inaccessible to whom you shared it.
Microsoft may have good security features in place. Unfortunately, those don’t stop users from giving others unauthorized access.
There’s always a security threat — which is why it’s important to make security a priority especially if you’re handling sensitive information on your site.
Aside from implementing good practices on your side, make sure to teach your users how they can help keep the site more secure and safe.
Do you have questions regarding SharePoint security? If so, drop them down in the comment section below. For inquiries, use my contact page to reach me directly.


Point #1 is a problem, not a solution. Recommend adding navigation steps and recommendations for 1) Limiting external sharing to certain folders, and 2) Reducing the default sharing value for Shares so that it’s not going to everyone.
If it’s not possible in Sharepoint, then recommend providing 3rd party options (cross-advertizing done in the right way).
Point #2 – Just navigation instructions here (and, to prevent confusion, the version of SharePoint for which the navigation applies.)
Point #3 – You give some alternative recommendations “You can only set restrictions to users accessing the site or break the permission inheritance.”, but no instructions on how to do them or what they mean. Perhaps linking these recommendations to their own webpage with the nav, etc.?
Great site and recommendations; thank you for posting.