

Last Updated on February 12, 2024
Can’t add a rich text field in a library?
In this guide, I will show you how to easily create a rich text field column in a modern library in SharePoint Online.
Let’s get started.
Table of Contents:
What is a rich text field?
Having a rich text field in SharePoint, especially in a document library, can help with clarity.
That’s because users can freely express their ideas with more than just plain text.
Imagine being able to:
- Highlight important points in bold
- Underline critical information
- Insert hyperlinks directly into your document library items
However, as you can see later on, there’s a bit of a problem…
Sign up for exclusive updates, tips, and strategies
How to Add a Rich Text Field in a Modern Library
I have both good news and bad news:
The bad news is that you can’t add a rich text field in modern document libraries by default.
Fortunately, there’s something you can do that will allow you to do it.
The Problem
First up, since we’re talking about “texts” here, there are two types of columns for texts:
- Single line
- Multiple lines of text
Only the multiline text field can accommodate a lot of text, so that’s the main column used for a rich text field.
However, as you can see below, there’s no option that allows you to add rich text formatting:
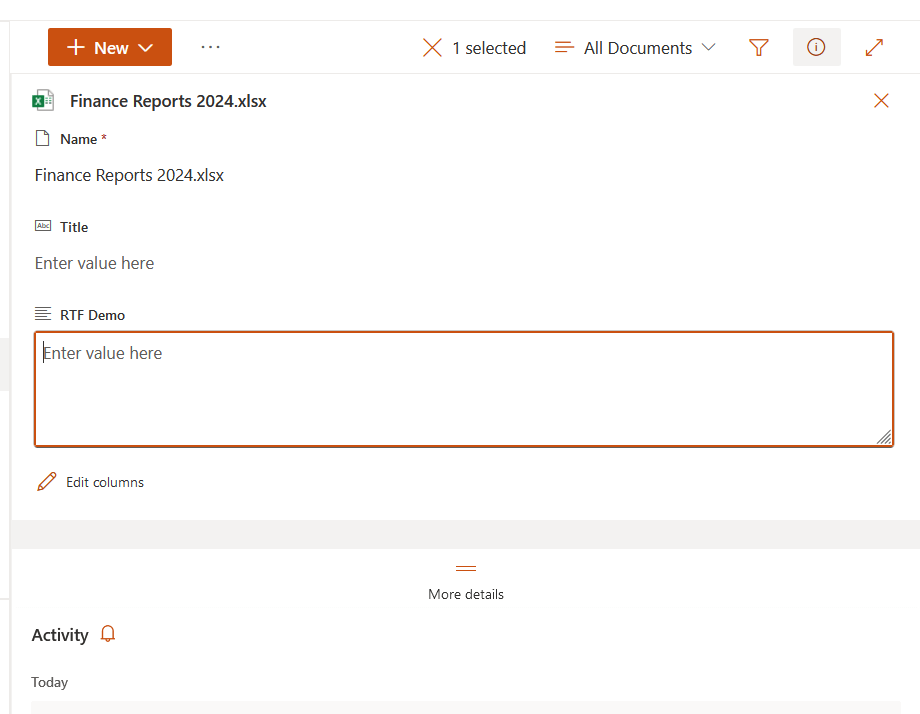
Even during the creation process of the column, there is no button (even on the backend) where you can enable rich text formatting.
Related: SharePoint Column Types Explained: Overview and Use Cases
The Solution
The solution here is to use PowerShell to enable rich text formatting in a field.
Here’s the script:
Connect-PnPOnline -Url https://tenant.sharepoint.com/sites/sitename/ -Interactive
$libraryURL = "Name of library"
$internalName = "InternalNameOfField"
$field = Get-PnPField -List $libraryURL -Identity $internalName
[xml]$schemaXml = $field.SchemaXml
$schemaXml.Field.SetAttribute("RichTextMode", "FullHtml")
$schemaXml.Field.SetAttribute("RichText", "TRUE")
Set-PnPField -List $libraryURL -Identity $internalName -Values @{SchemaXml=$schemaXml.OuterXml}
For the library URL, you can simply use the name of the library (including the spaces in the name if there are any).
The internal name refers to the actual column name and not only the display name.
This is relevant for 2 reasons:
- The display name and the internal name can be different especially if you have renamed the column
- The script only reads the internal name
The internal name is simply the name of the column without spaces.
However, you can check the actual internal name from the library settings > columns > click the column name:
- Check the URL of the page where you can edit the column
- The internal name is the text after “Field=” (usually at the end of the URL)
For example, the end of my URL is Field=RTFDemo so RTFDemo is the internal name of the column.
After applying the code, you will then see an edit icon within the field:
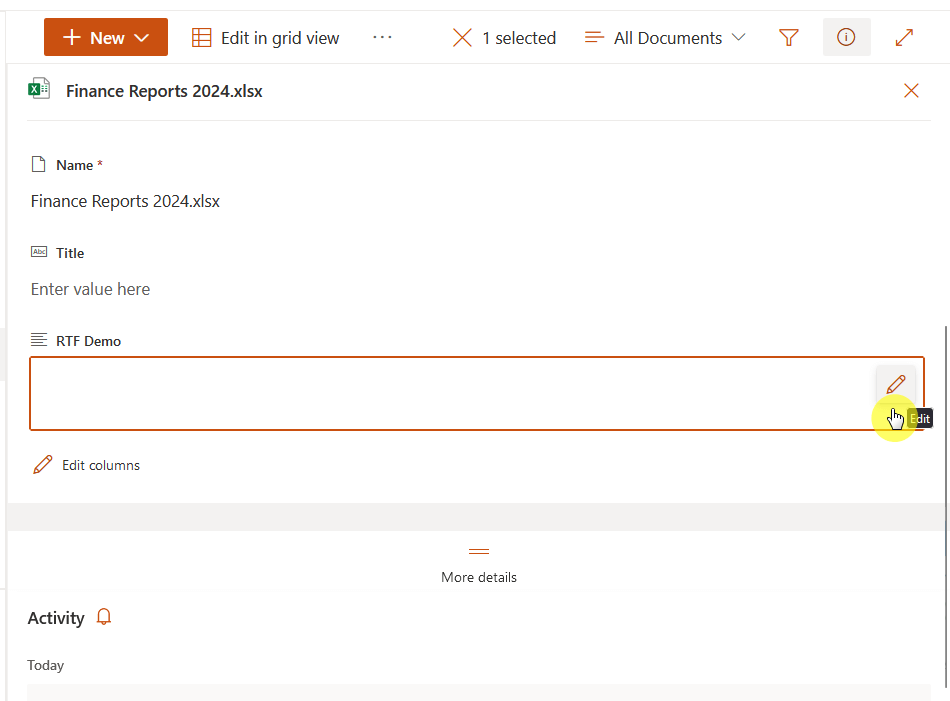
You can check the previous image — that button wasn’t there earlier.
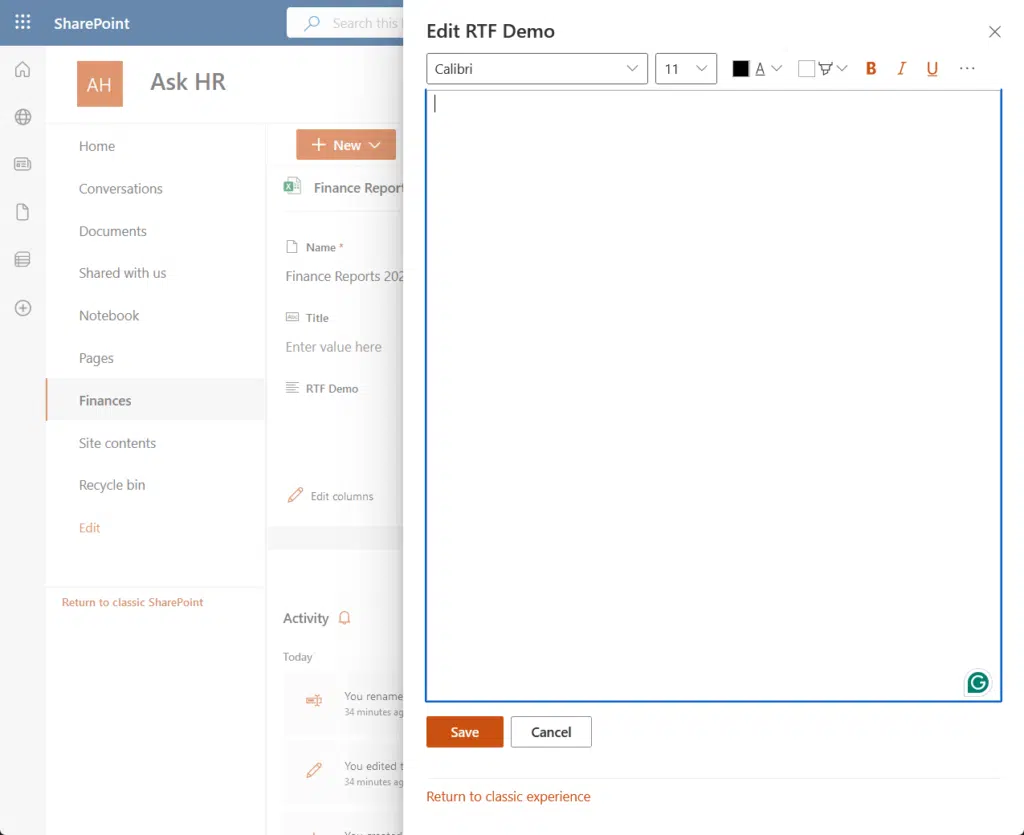
If you click on it, you will be able to enter an enhanced rich text:
Not that hard, right? 🙂
Why add a rich text field?
Numerous organizations lived and lost without knowing the steps above.
But why indeed add a rich text field now that you know you can?
Well, it’s not only about aesthetics, it helps in creating content with clarity and emphasis.
We all know how important that is especially in drafting policies, sharing updates, or creating guidelines.
If you have more questions about rich text fields in SharePoint libraries, feel free to leave a comment.
For business inquiries or any business-related concerns, please use the site’s contact form. I’ll respond asap.


Hi,
Thanks for this guide.
I’m new to sharepoint tuning
Could you please explain where you actually put this code in sharepoint ?
Thanks
That code is PowerShell and you run it from your computer, you don’t add it anywhere in the site.