

Last Updated on January 5, 2024
The quick launch navigation menu is a default feature you see on modern SharePoint sites.
Unfortunately, not everyone knows about its specifics like whether or not it’s possible to customize it.
In this article, I’ll share everything there is to know about the SharePoint Online quick launch navigation menu.
Let’s get started.
Table of Contents:
- What is the quick launch feature in SharePoint?
- How to edit or customize the quick launch navigation menu in SharePoint
- How to add a link in the quick launch navigation menu of SharePoint
- How to move up or down a link in the quick launch menu (change the order)
- How to edit or remove a link from the quick launch navigation menu
- What does the sub-link option do in the quick launch navigation menu?
- What does the “Enable site navigation audience targeting” option do?
- How to hide the SharePoint quick launch menu?
- What are the best practices in using the quick launch navigation menu in SharePoint?
- Using the quick launch navigation menu
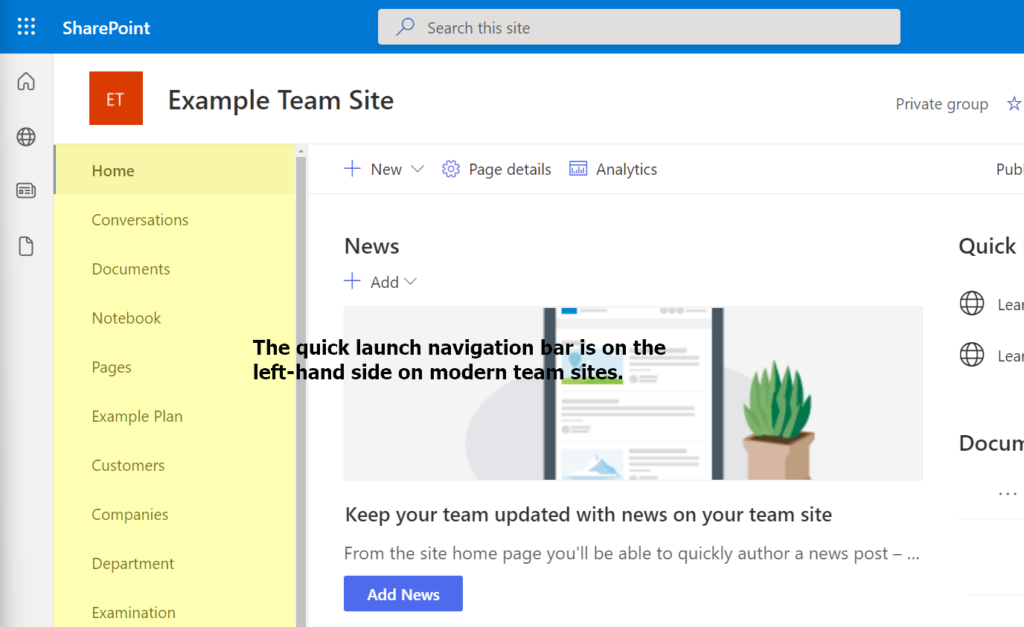
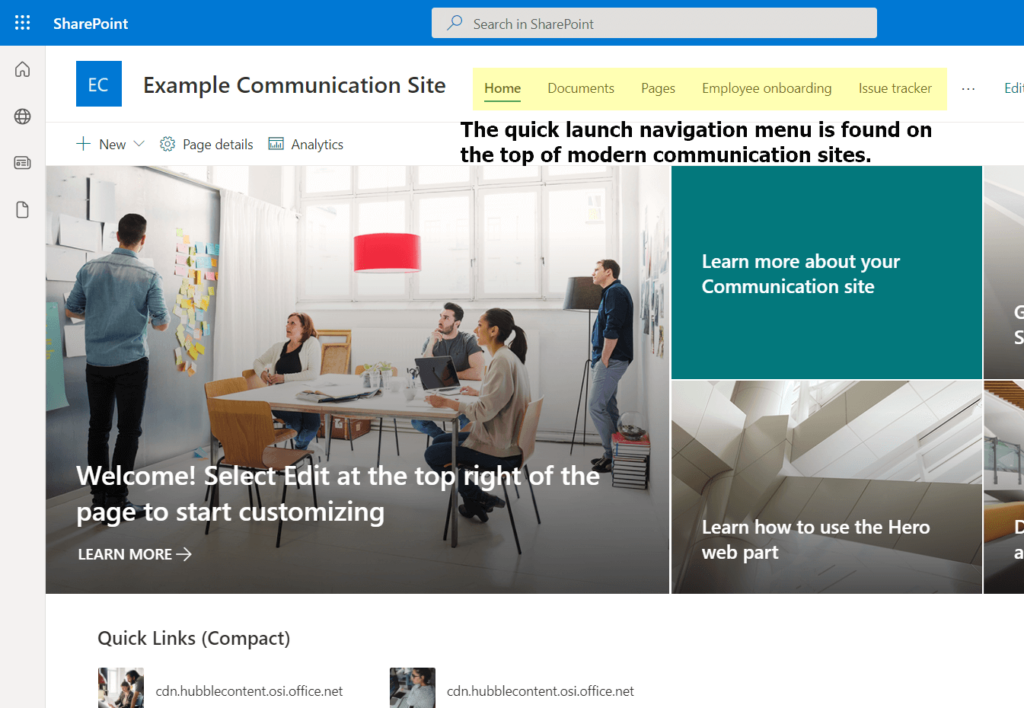
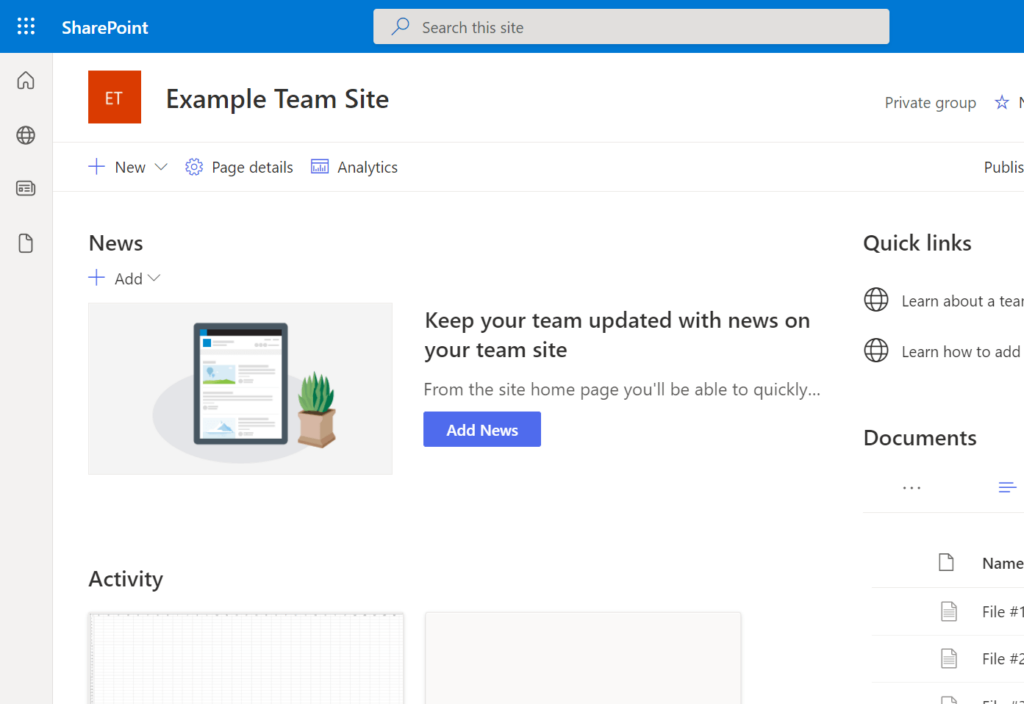
From the name itself, the quick launch menu is a menu panel that you see either at the top of the site or on the left-hand side of a modern site.
On a modern team site, you can see it on the left-hand part:
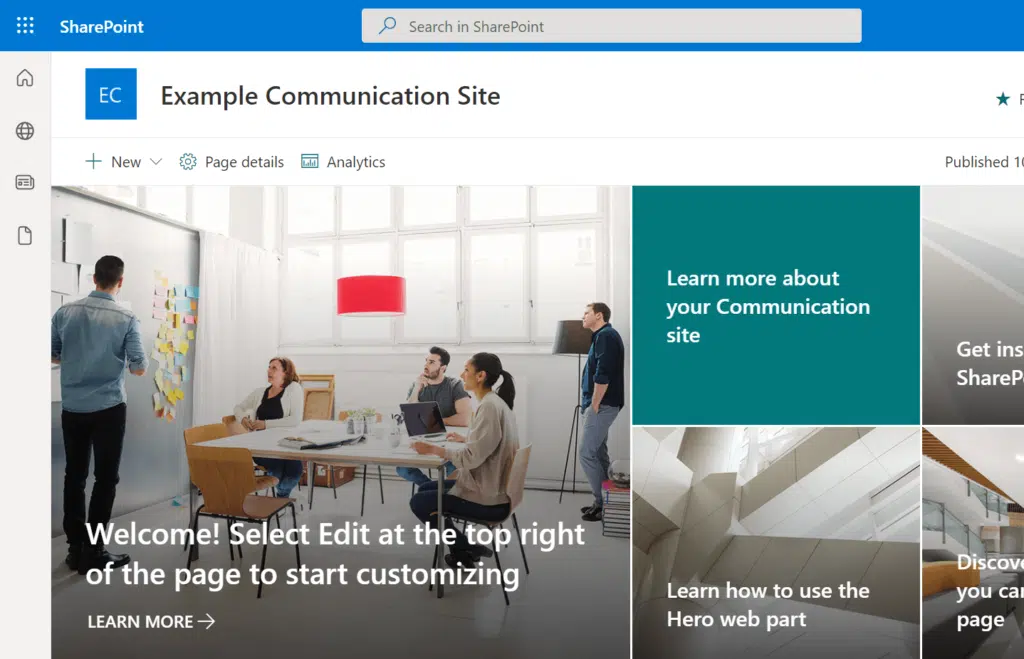
While on modern communication sites, it’s on the top part of the page, in line with the site name:
Its main purpose is to enable the user to quickly go anywhere on the site — on the default pages, and even on new lists or libraries.
Sign up for exclusive updates, tips, and strategies
The quick launch navigation menu will appear immediately after creating a modern site as it’s a built-in feature that comes with the modern experience.
Sometimes, you may want to add or remove a link to it, or maybe change the order of the links in the navigation menu.
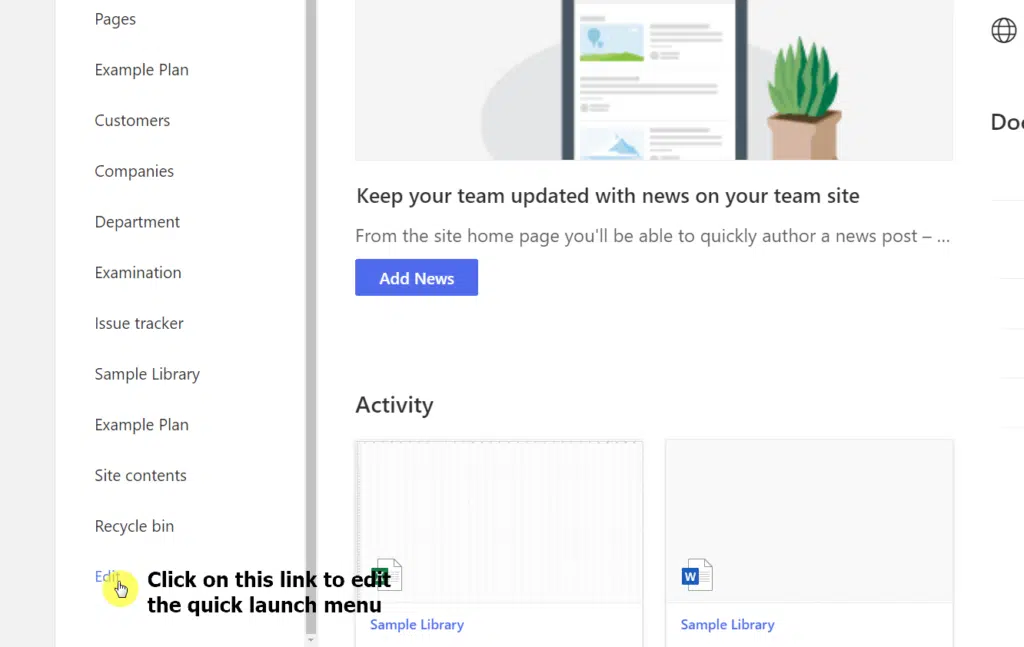
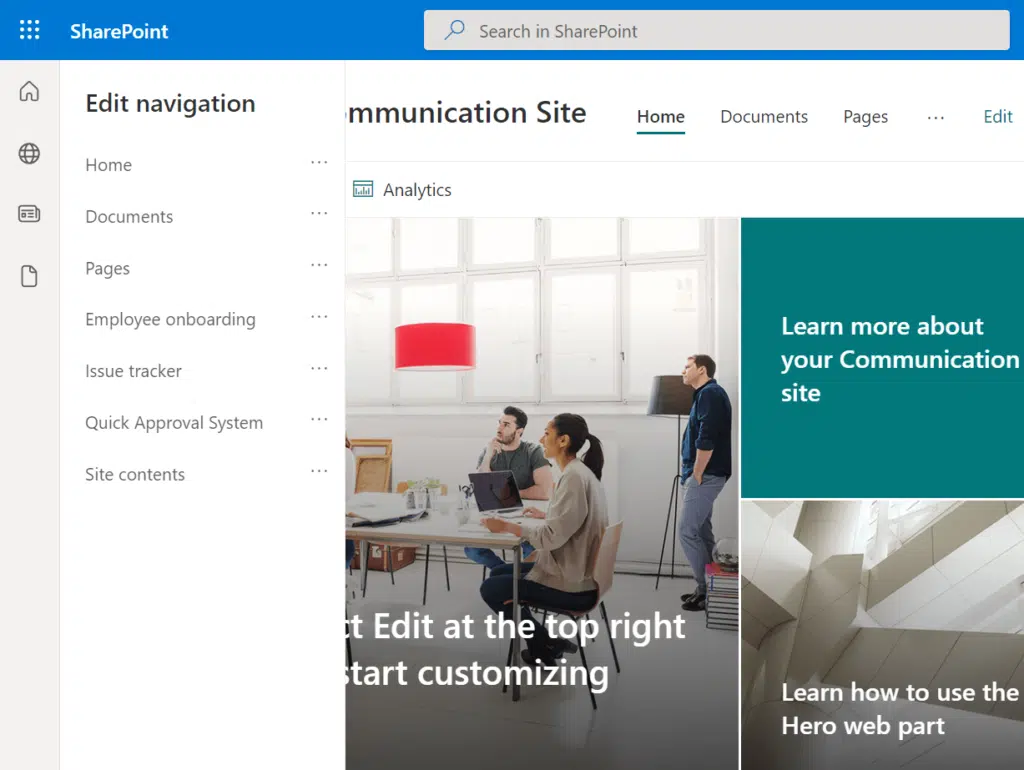
To do that, you must find the “Edit” link first in the quick launch navigation menu and click on it.
On communication sites, the link is easy to find since you can easily see it no matter how you zoom in or out of the navigation menu.
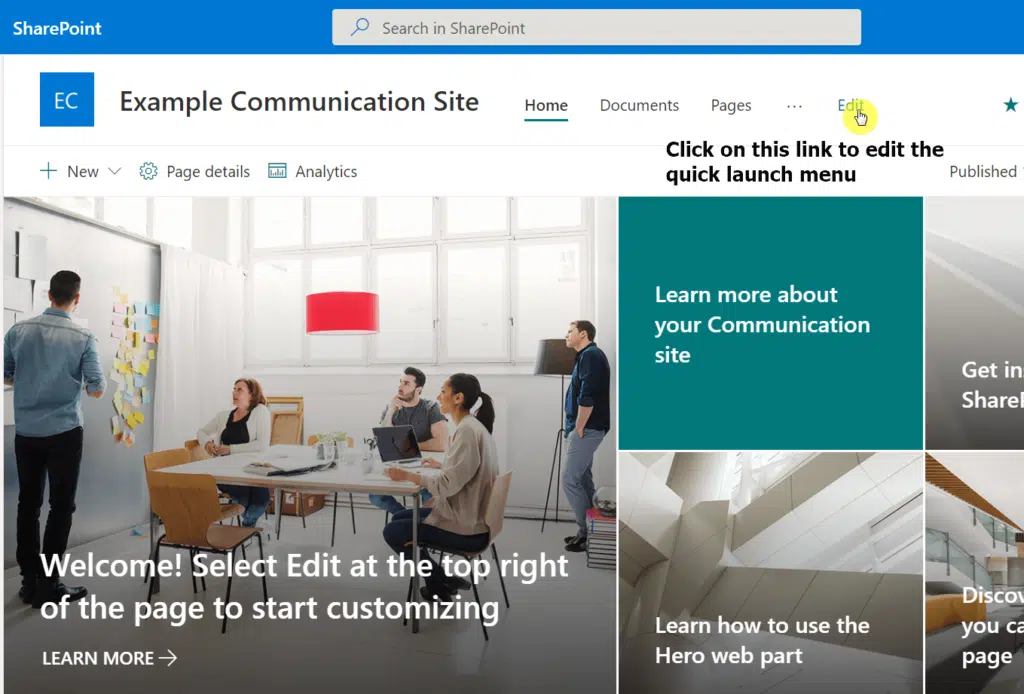
On team sites, there’s a chance the link may be buried especially if you have lots of links in the quick launch menu.
If that’s the case, simply scroll down on the quick launch menu until you find the link at the bottom.
After that, the panel will change to “Edit navigation” where you can customize the quick launch navigation menu.
Editing the quick launch menu is fairly similar whether it’s on a communication site or on a team site.
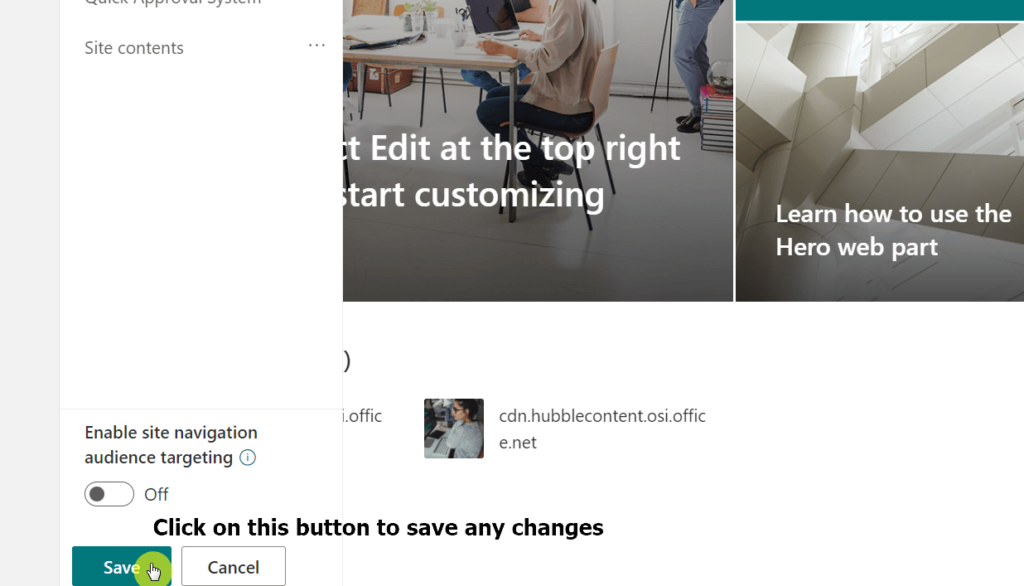
After making any changes to the quick navigation, don’t forget to click on the “Save” button at the bottom of the panel.
Pages, lists, and libraries can be added to the quick launch menu. But besides that, you can practically add any link to any website or page.
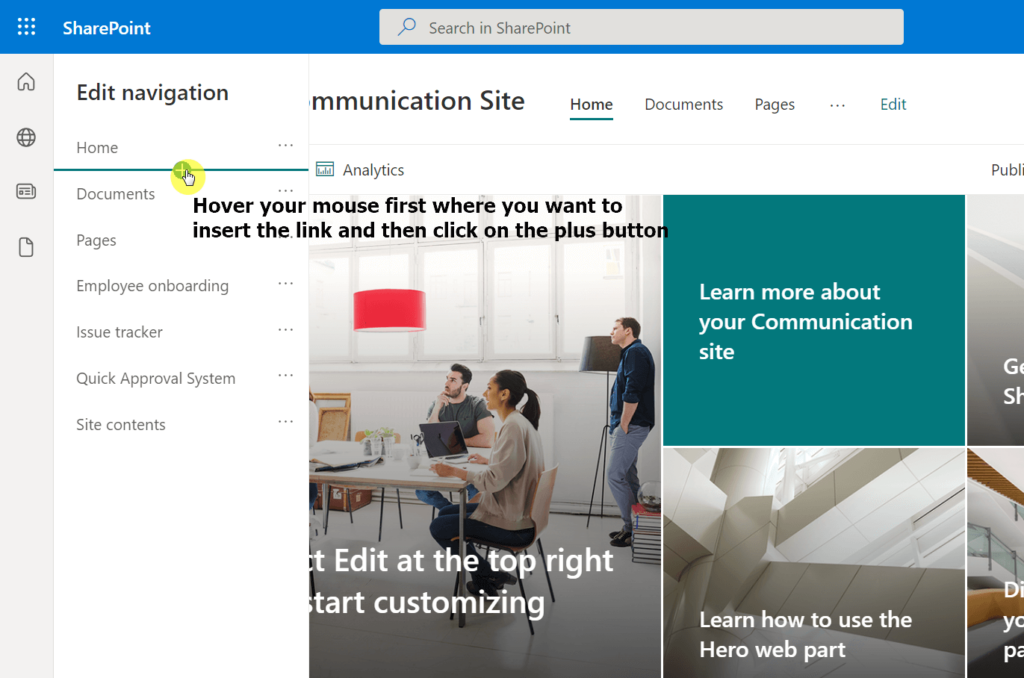
To do that, make sure you’re in the “Edit navigation” panel (steps explained earlier).
Then, on the panel, hover your mouse over the part where you want to insert a new link. Then, click on the plus (+) button.
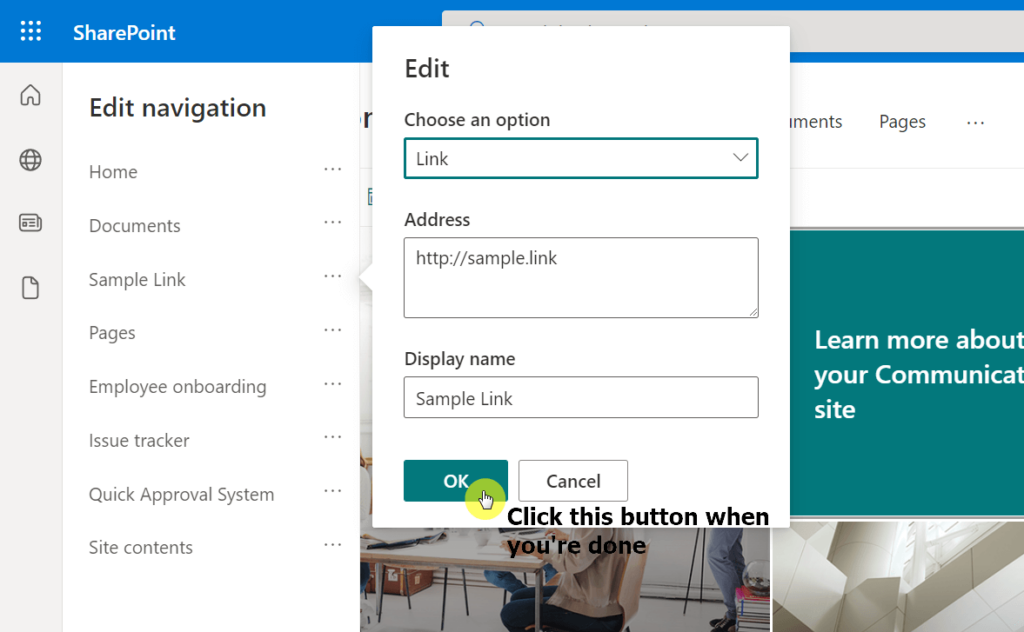
A mini window will then appear where you can specify the address and the display name of the link.
Make sure to select the “Link” option at the top and click on the “OK” button once you’re done.
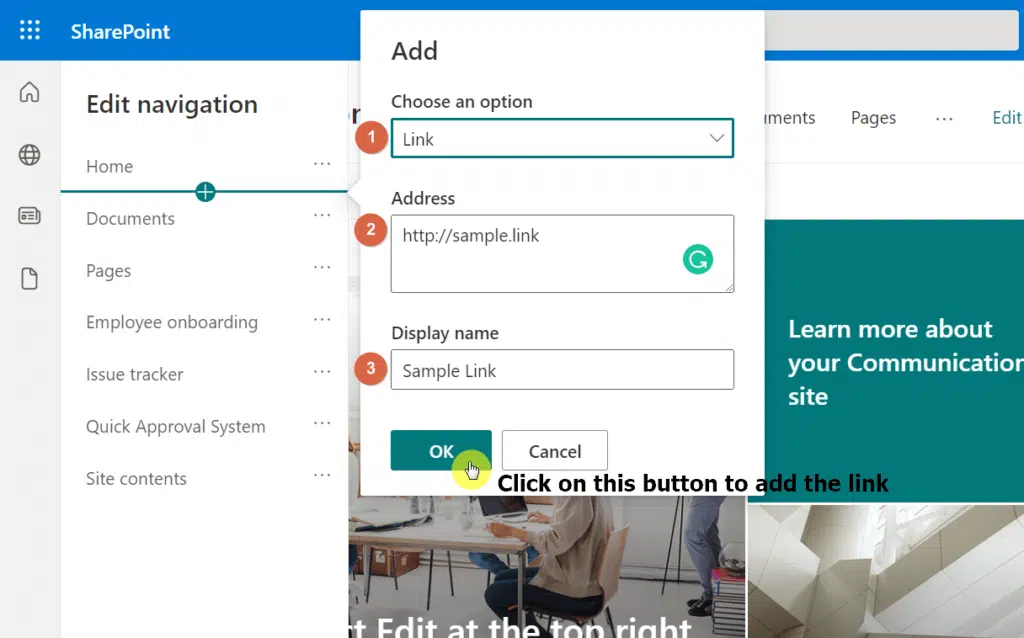
You will then see the link you added on the space where you indicated.
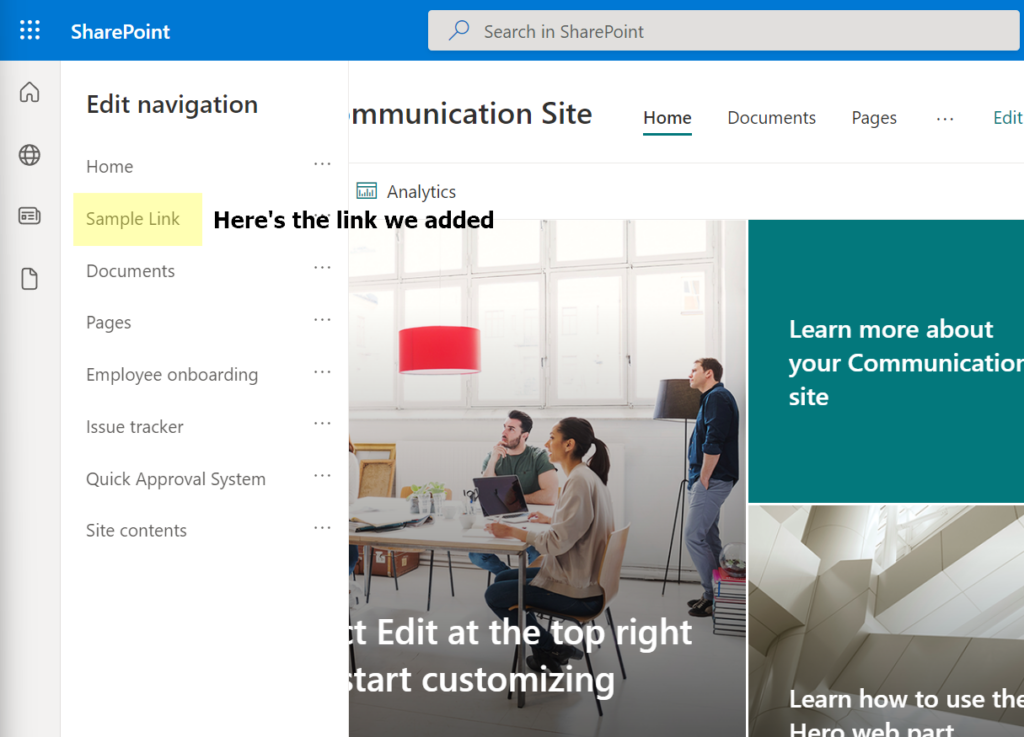
Make sure to save the changes by clicking on the “Save” button at the bottom of the “Edit navigation” panel.
It’s easy to move a link in the quick launch menu up or down depending on how you want it.
Open the “Edit navigation” panel (by clicking on the “Edit” button on the quick launch navigation menu).
Then, click on the ellipsis (…) button of the link you want to move up or down. You will then see an option to either move it up or move it down.
Click on the action you want to do.
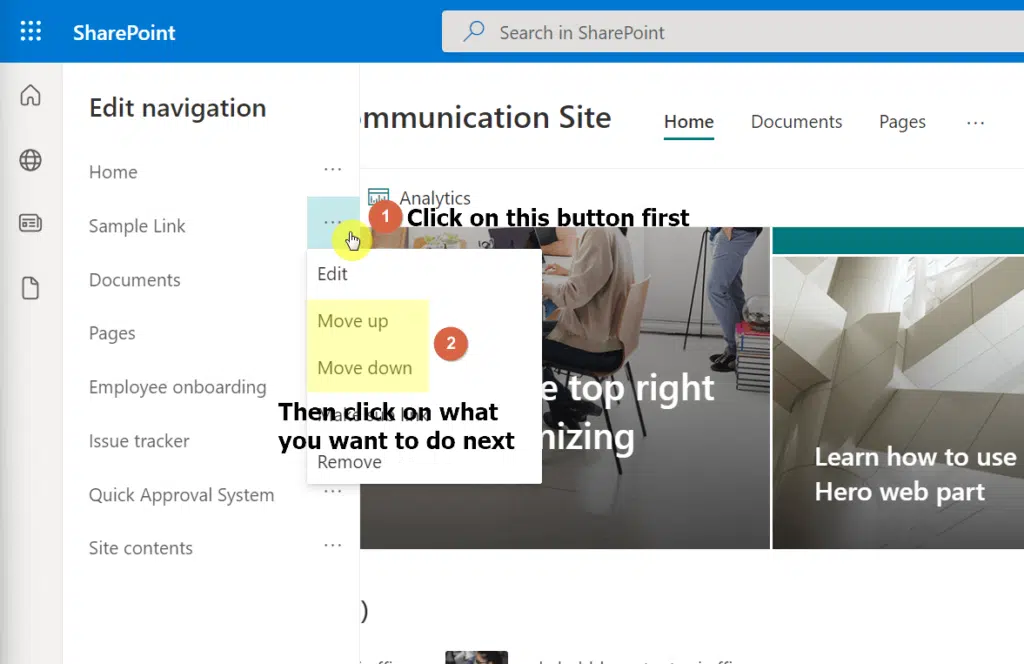
For example, you can move it down one step:

Note that you can only move a link up or down one step at a time. You will have to repeatedly move it up or down if you want to take the link further.
Don’t forget to save the changes once you’re done.
But what if you want to edit or even remove the link? Well, the steps are quite similar to moving a link up or down.
Make sure you’re in the “Edit navigation” mode.
To edit a link, click on the ellipsis (…) button of the link first and click on the “Edit” option.
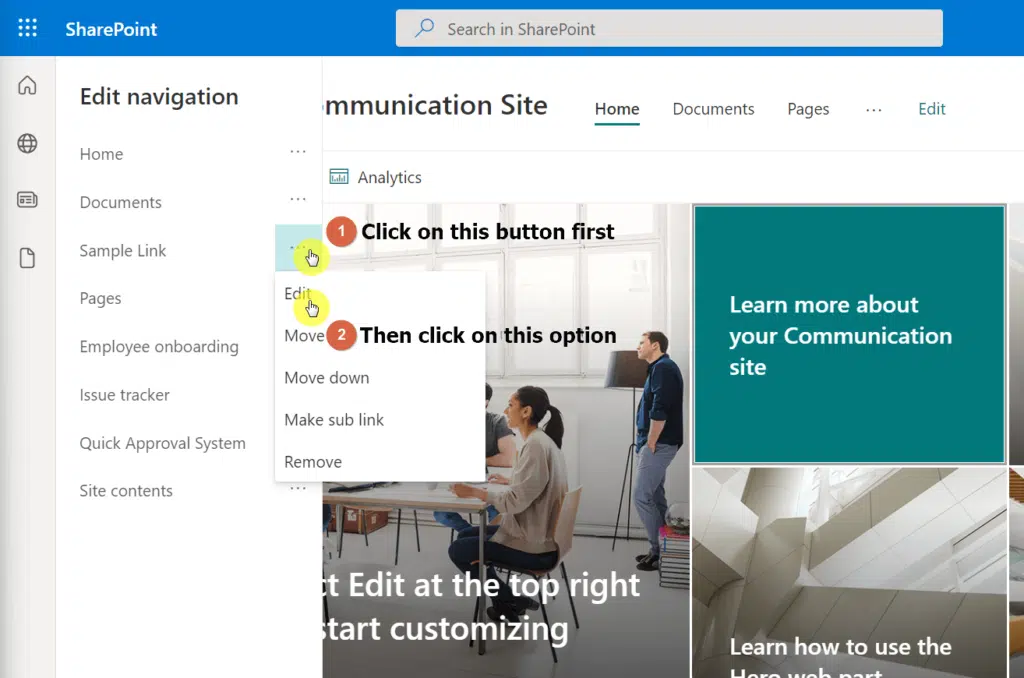
You will then see a similar window when adding a new link. Simply make the change and click on the “OK” button once you’re done.
On the other hand, if you want to completely remove a link from the quick launch navigation menu, simply click on the “Remove” option.
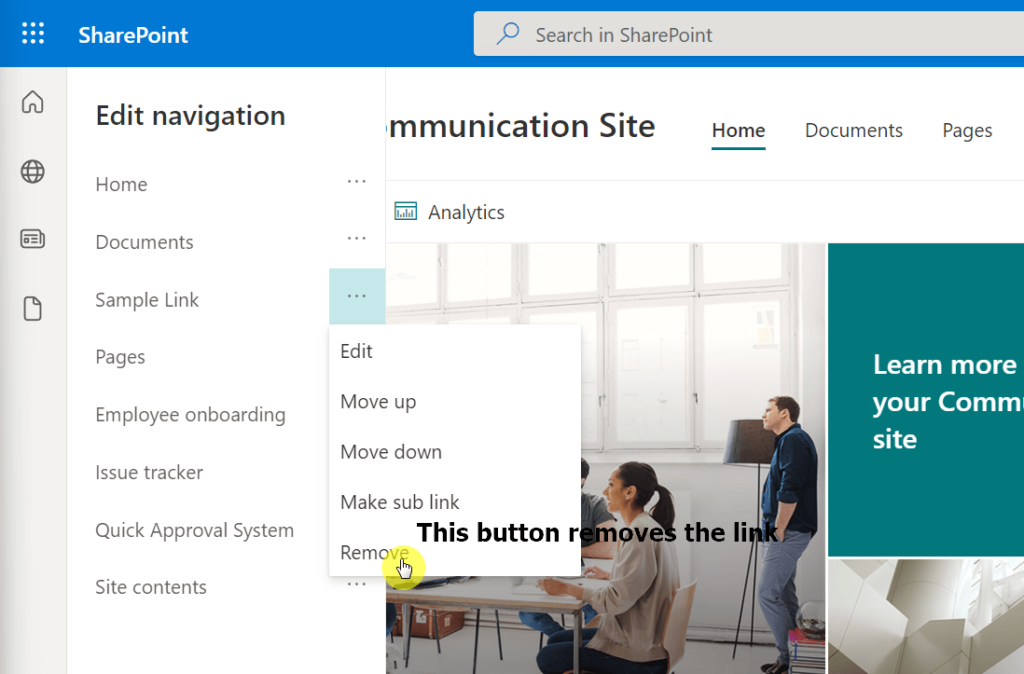
That will delete your link from the navigation menu. This is an irreversible action so make sure you know what you’re doing.
Click on the “Save” button on the “Edit navigation” panel to save the changes.
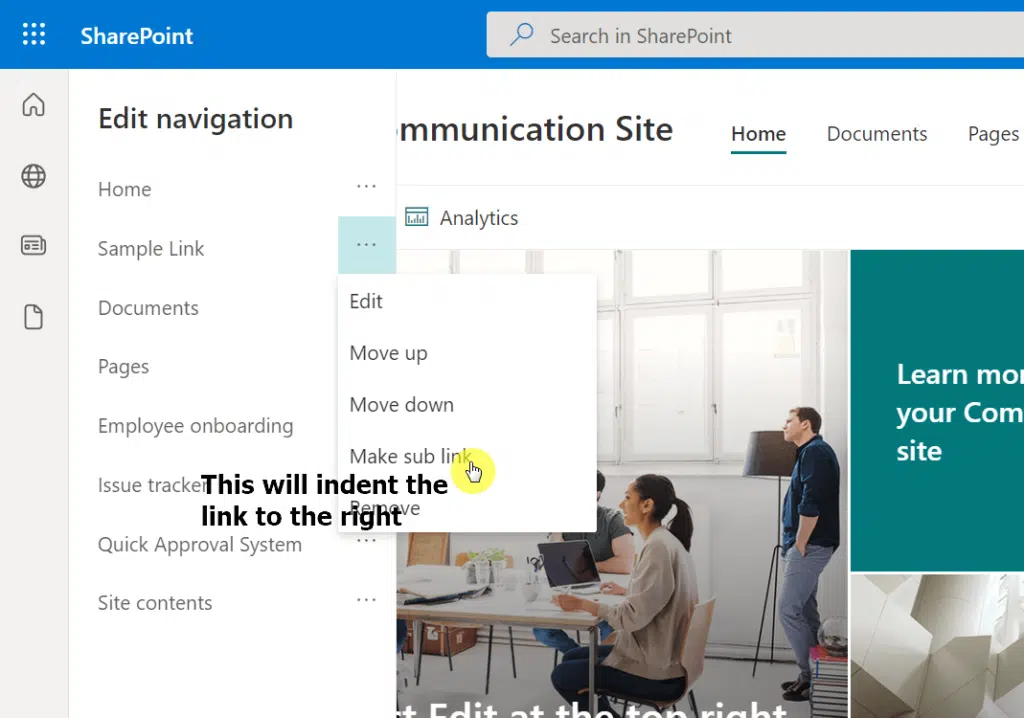
After clicking on the ellipsis button, there’s a “Make sub link” option near the bottom.
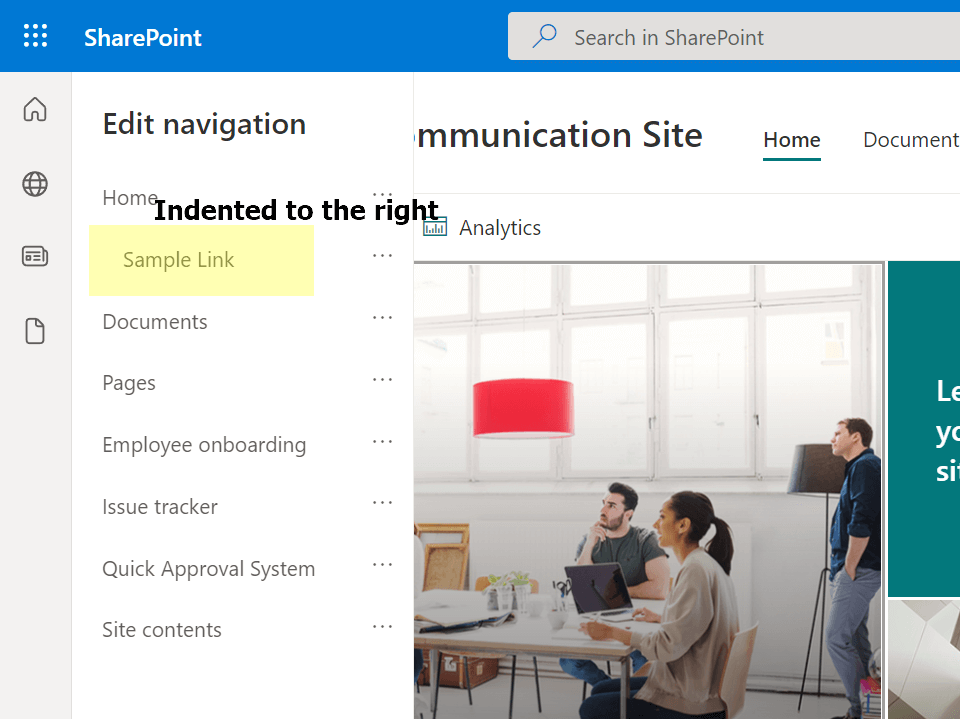
What this does is indent the link to the right and make it seem like a sublink of the link above it.
It looks like this:
To return the link to normal, simply click on the ellipsis (…) button and select the “Promote sub link” option.
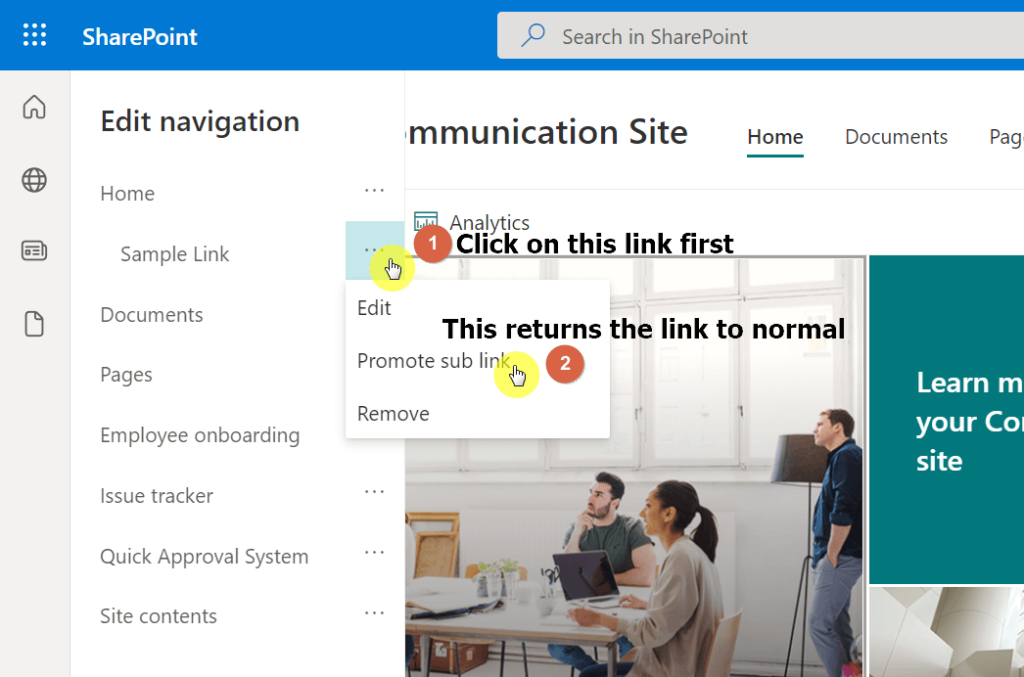
Don’t forget to click on the “Save” button on the “Edit navigation” panel.
Another thing you will notice in the quick launch navigation menu is the section at the bottom of the “Edit navigation” panel.
It’s the option where you can enable or disable site navigation audience targeting.
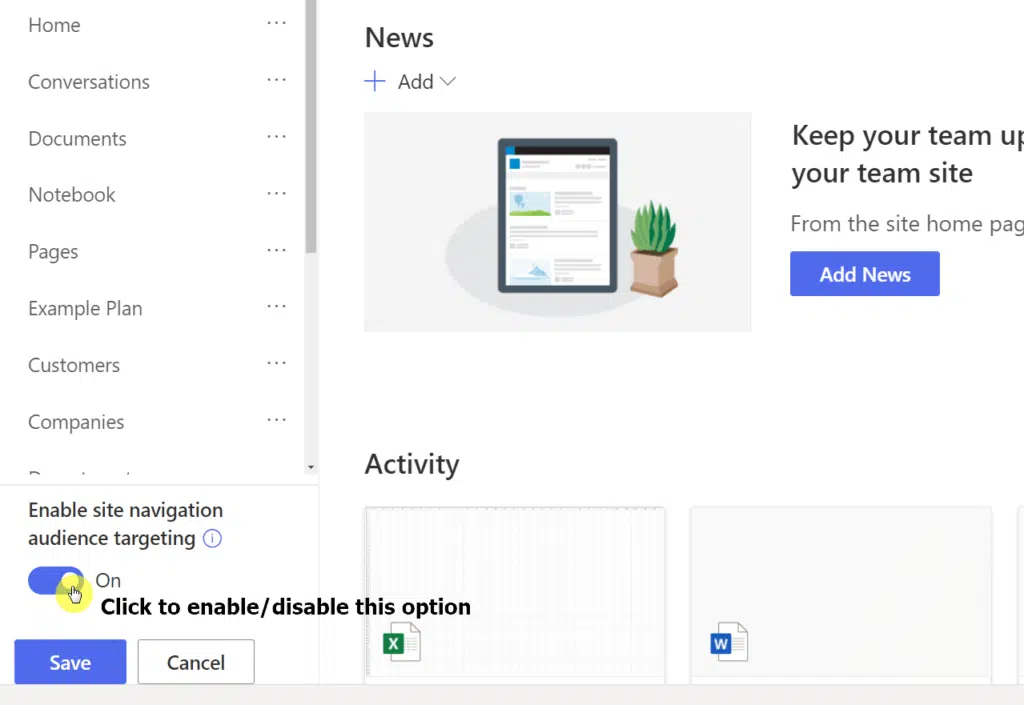
Basically, what this feature does is show relevant content to the right audience by promoting specific links.
For this to take effect, the site owner must enable the audience target feature for site navigation (read more about the audience target feature here).
The site owner can then target Azure AD groups like Microsoft 365 groups, dynamic groups, or even security groups.
If you’re not sure how this affects your site, you don’t have to touch or change the default option (set to off).
The quick launch navigation menu in SharePoint Online is a useful feature. Unfortunately, it eats up some space, especially on team sites.
For this reason, a lot of site owners may want to remove it, even if SharePoint doesn’t make it that easy to do so.
For team sites
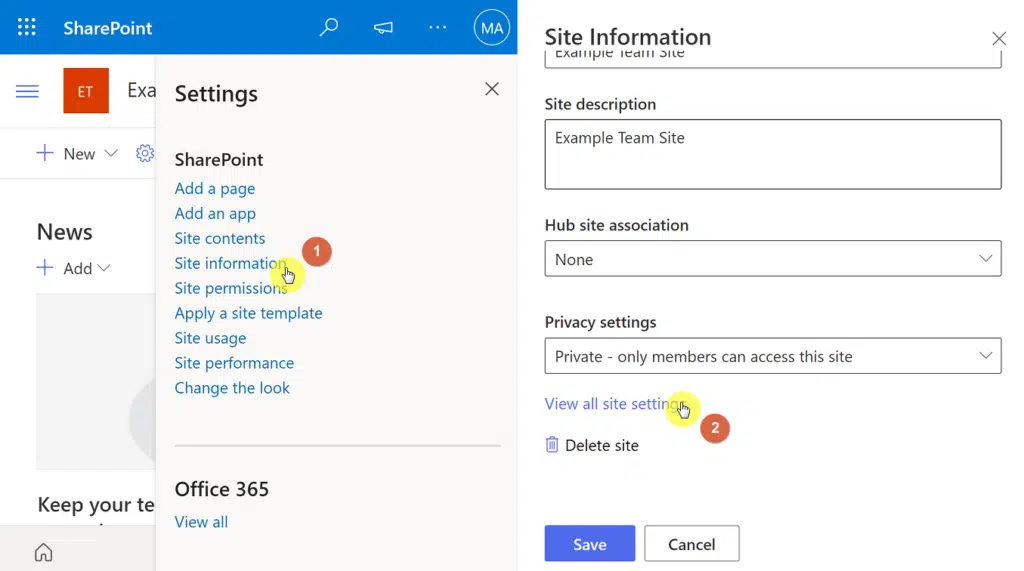
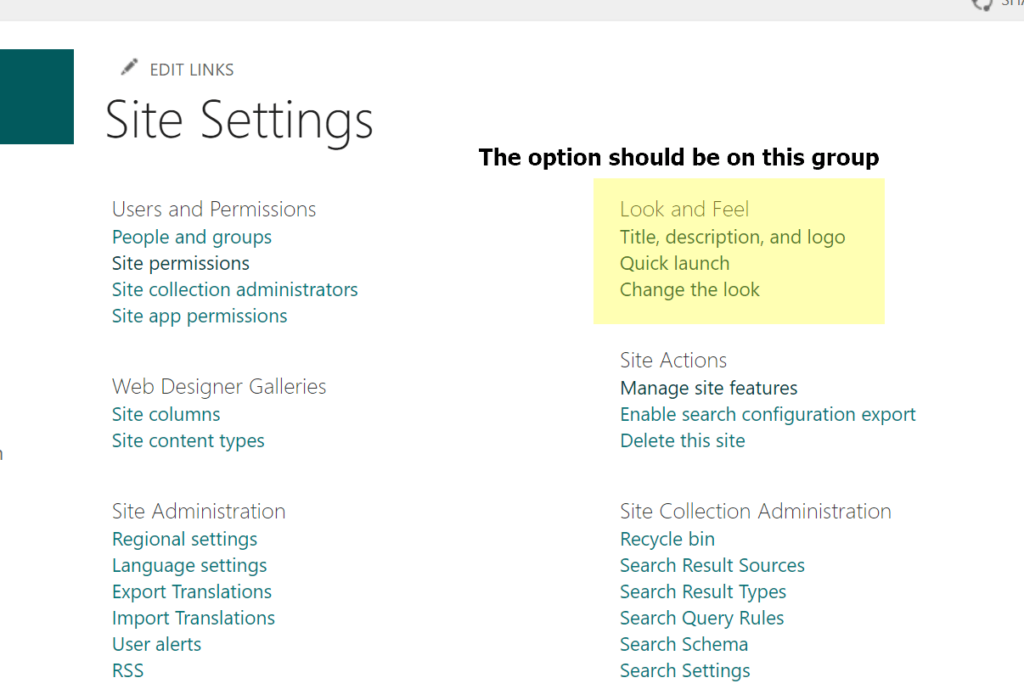
Now, it’s easier to hide the quick launch in team sites. First off, you need to go to the site settings page.
To get there, click on the gear icon first and select “Site information” from the options.
Then, on the next page, click on the “View all site settings” link at the bottom.
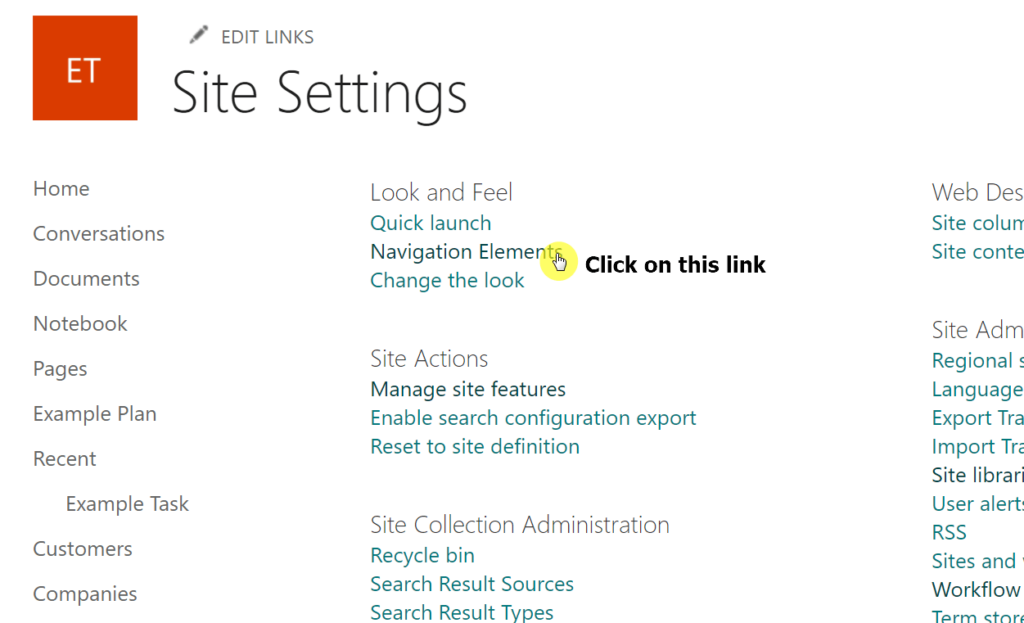
On the site settings, look for “Navigation Elements” and click on it.
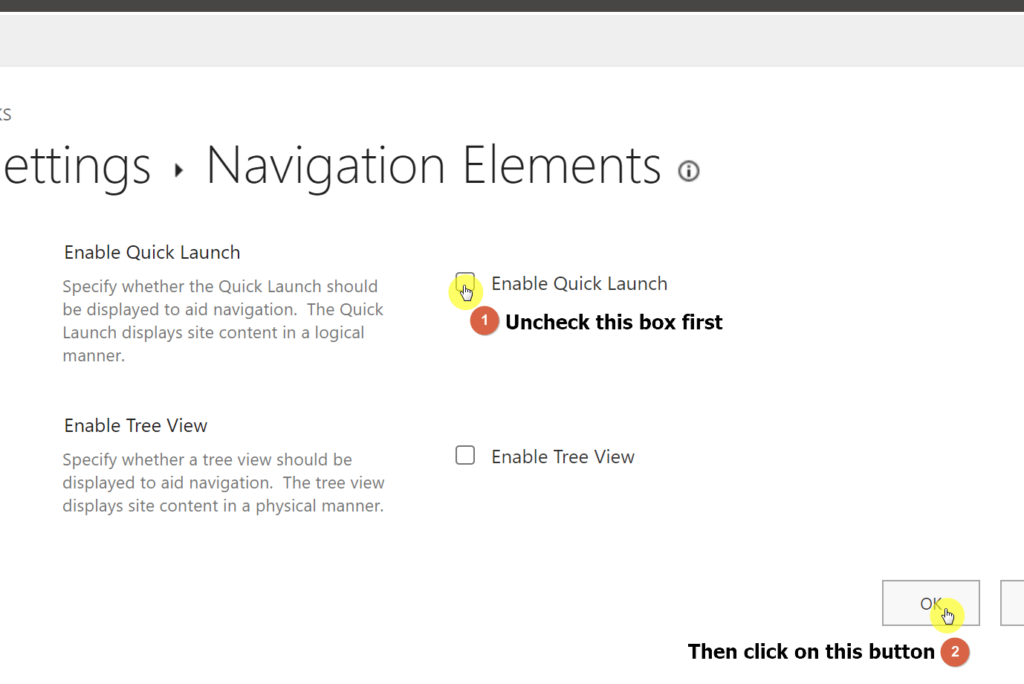
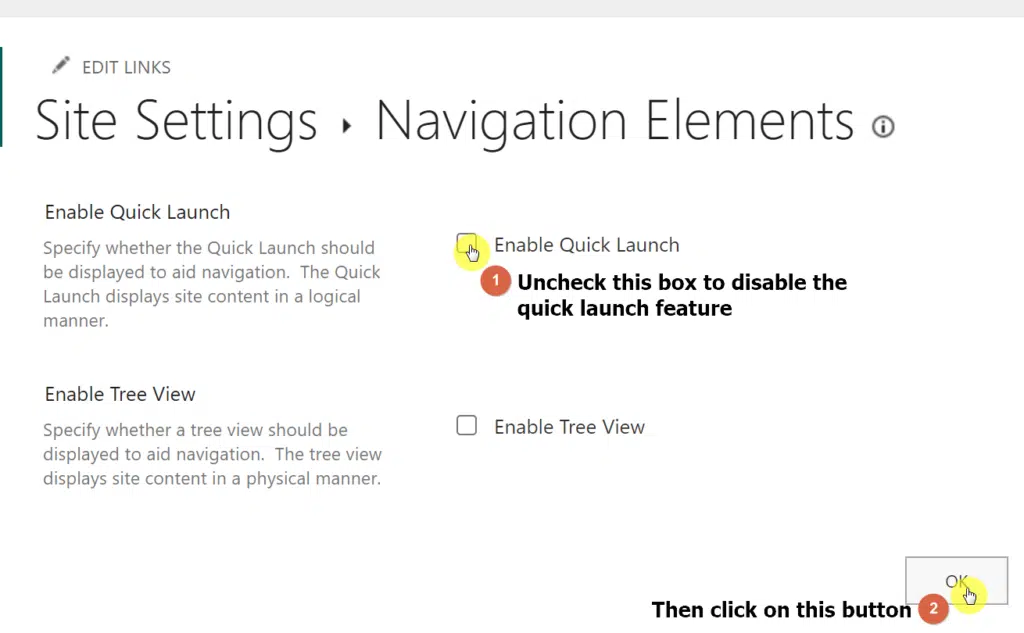
On the next page, simply uncheck the box to disable the quick launch. Then, click on the “OK” button to save the changes.
You can also use PnP PowerShell to hide the quick launch menu on a team site.
Run the Windows PowerShell application as an administrator first (and you got the latest updates installed).

Then, run the code below:
CLS
$siteURL="https://yourtenantsite.sharepoint.com/sites/yourteamsitehere/"
$userName = "EnterYourUsernameHere"
$passWord = "EnterYourPasswordHere"
$encPassWord = convertto-securestring -String $passWord -AsPlainText -Force
$cred = new-object -typename System.Management.Automation.PSCredential -argumentlist $userName, $encPassWord

Connect-PnPOnline -Url $siteURL -Credentials $cred

$web = Get-PnPWeb
$web.QuickLaunchEnabled = $False
$web.Update()
Invoke-PnPQuery
After that, the quick launch menu will disappear from your team site and will look like this:
For communication sites
Removing the quick launch from a communication site is fairly the same. But the problem is, you will not see the “Navigation Elements” option in the site settings.
Take a look:
The truth is, that option is actually there even if you can’t find a link from the site settings page.
To go to the navigation elements option in a communication site, you need to add the following extension on the link after the name of your communication site:
/_layouts/15/navoptions.aspx
Here’s an example of how it looks on the browser:

Related: How to Change the SharePoint Site URL (Rename Site Address)
Once you get to the navigation elements page, simply uncheck the box that will disable the quick launch feature and click on the “OK” button.
After that, the quick launch bar at the top of your communication site will disappear, leaving the site looking like this:
If you find the empty space intimidating or boring, you can always enable the quick launch bar again by checking the box on the navigation elements settings.
As for a code, I don’t know of one yet that will work with a communication site:
That’s because the top bar in the communication bar has a different code compared to the left-hand side panel of a team site.
Because the quick launch menu is one of the most visible aspects of a modern site (when it’s enabled), it’s important to use it in the best way possible.
Now, some of the things I’ll be discussing might be obvious to others. But these practices are what I think will make your use of quick launch more efficient.
Let’s start with the first one:
1. Don’t add too many links
The quick launch navigation menu will lose its purpose if you add too many links. It’s meant to help users navigate to the most important parts of your site faster.
But if there are too many links in it — which will require the user to scroll through it in the menu — that defeats the purpose.
If you really need to add more links, use the page body more and add a quick links web part or a hero web part (or a link web part if there’s only one link).
2. Delete the default links
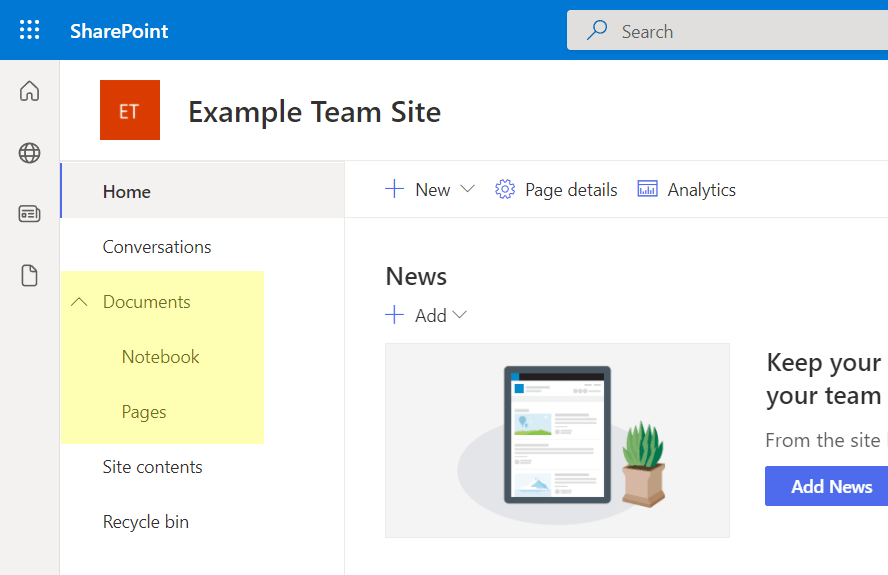
The quick launch navigation menu is added by default right after you create a site.
If you have noticed, it also adds a lot of default links — links to your home page, documents, notebook, pages, site contents, and even to your site’s recycle bin.
On the other hand, you need to remember that your average user doesn’t need to navigate to your site contents page or see all your site pages.
For this reason, feel free to delete all the default links you think are unnecessary for your users to see (this is also part of decluttering the space).
Don’t be afraid to delete all those links. If you need, you can easily restore any of them using the steps I explained earlier in this article.
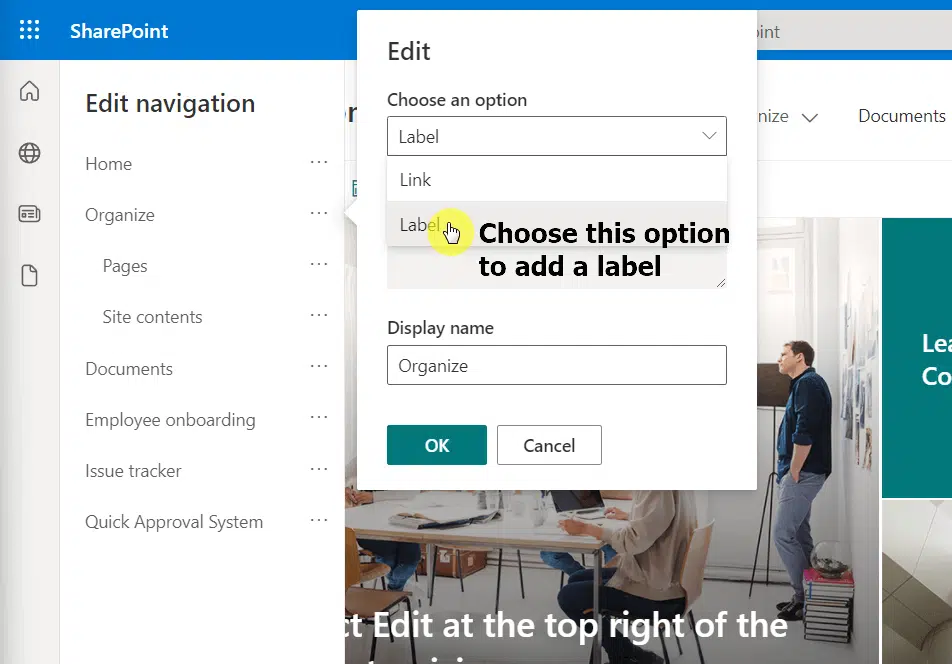
3. Organize your quick launch with labels and sublinks
One way to make your quick launch menu look more user-friendly is to add a label (only for communication sites) or use the sublink feature.
Since the quick launch menu in a communication site is found at the top, the label function will add a submenu effect.
It looks like this:

To add a label to a communication site’s quick launch, follow the steps of how to add a link. But this time, choose the “Label” option.
Then, convert the links you want to include under that label as sublinks (steps mentioned earlier in the article).
Unfortunately, for team sites, the most you can do is the sublink option. However, when used logically, this could make your team site’s quick launch more efficient to use.
In addition, the parent link will hide the sublinks by default, which will declutter the team site as you group links logically or those with a parent-child relationship.
4. Link to relevant Microsoft 365 group assets
As you may know, there are various types of sites in SharePoint Online. If you have a team site with a Microsoft 365 group, you may be using various apps.
For example, you may be using the Calendar application, which is likely if you’re in the Microsoft ecosystem.
For your team the hassle of navigating through those applications when you use them together, it’s a good idea to add links to those group assets to the quick launch.
The cool thing is, you can quickly add those group asset links if the quick launch menu supports them by selecting them from the option.
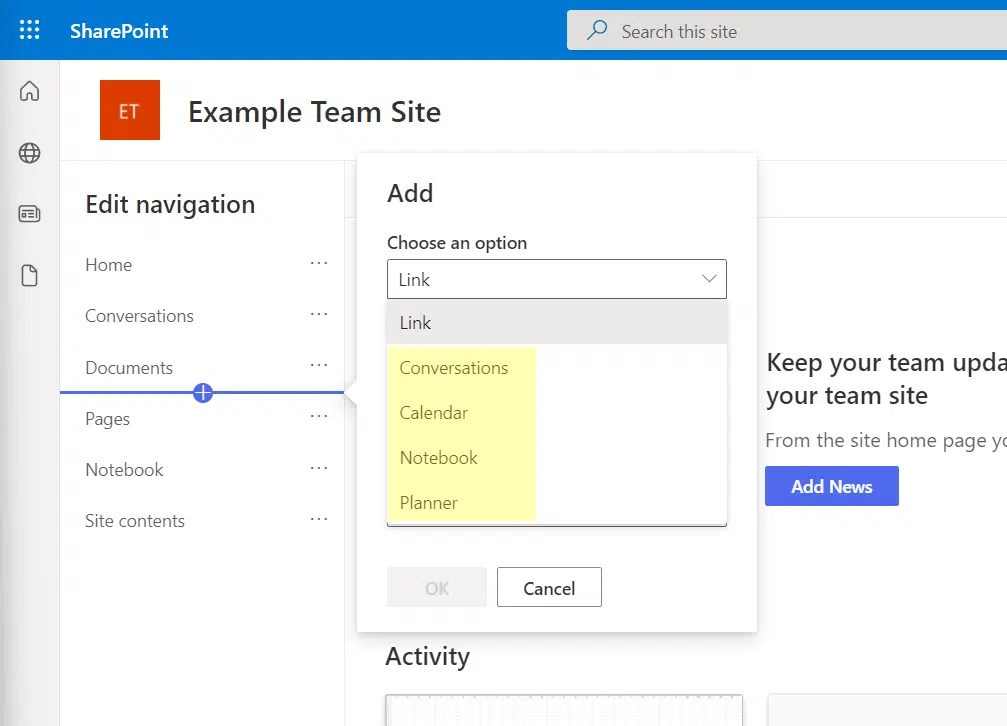
The quick launch feature will then automatically provide the link for those group assets since they’re all connected under the same group.
5. Add the correct links
Naturally, if the application or website you want to add isn’t supported by default, you can always add them easily.
But make sure you add the correct link. You don’t want to get your users to the wrong page or worse, poke through the pages they don’t need to see.
Furthermore, it’s important to use the proper links when linking to lists or libraries. Make sure to use the root link and not the view link.
The default link to a library looks something like this:
https://yourtenant.sharepoint.com/sites/site-name/Sample%20Library/Forms/AllItems.aspx
As for a list, the regular link looks like this:
https://yourtenant.sharepoint.com/sites/ExampleTeamSite/Lists/Issue%20tracker/AllItems.aspx
It’s also important to make sure that your users have access to the links you’re sharing on the quick launch.
If not, your users will end up seeing an access denied message, which defeats the purpose of the quick launch menu.
That’s it! The quick launch navigation menu may seem like a simple feature, but it’s useful in terms of user experience and efficiency.
It’s actually one of the features that have long existed with SharePoint, though it has become so much better with the modern experience.
It’s good to learn how to efficiently use the quick launch feature. However, make sure to read up and apply the best practices too.
Is everything clear? Do you have any questions or concerns regarding the quick launch navigation menu in SharePoint Online?
Share your thoughts in the comment section below. For inquiries and messages, send them to me through my contact page and I’ll get back to you asap.


If my quick link directs the user to a secured web site that requires a password, will SharePoint display the prompt where the password must be entered? Thanks.
Hi,
I have created team sites with multiple link and sublinks with long label names. Unfortunetely i can see the full label name only when hover to it. But my intension is to display the label name full without any hover.
Any idea how to do this?
I don’t think this information is current or accurate. Sharepoint is a not a rich web application, it is a content management system wrought with myriad permissions issues. Yes, I think Quick launch menu can be customized by citizen developer staff but they will need Global Admin rights to do so. And that is a recipe for disaster!
SharePoint is a platform and it can be extended or customized. And you don’t necessarily need Global Admin rights to do that type of customization. You are right though, that would be a potential disaster. Governance is key.
All of these sorts of instructions assume that your quick links in the navigation menu have ellipses(…) beside them. NONE of mine do. So I can’t use any of these instructions because the ellipses simply do not exist.
Where are the instructions for how to customize the navigation pane when you have no ellipses?