

Last Updated on February 20, 2025
Conscious of your permission management?
In this guide, we will go over different permission management strategies to maintain security and efficiency.
Let’s get started.
Table of Contents:
Best Practices for Permission Management
I call these “best practices” because these are things that when done, can help you keep SharePoint secure and easy to use.
Here’s the first one:
1. Assign Permissions at the Site Level
If you want to keep things easier to manage later on, then managing permissions at the site level couldn’t be simpler.
That’s because:
- Side-wide settings apply to all content
- Consistent access control across all libraries and lists
- Minimizes the risk of misconfigurations from unique permissions
- Limits accidental “over-permissioning” of sensitive files
- Easier to review and track permission changes
Besides preventing unnecessary complexity, assigning permissions at the site level makes onboarding new users faster.
If you think about it, assigning a user to a site-level permission group is easier than manually giving them custom permissions.
Now, while custom and unique permissions can be useful at times, keeping them to a minimum avoids confusion.
I mentioned this earlier, but I always recommend using the default groups or even creating a group, if you prefer.
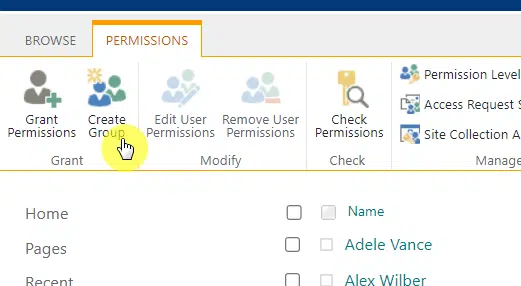
With groups, you have a structured and simpler way to control access without doing it manually for each user.
Some points here:
- There are already predefined roles available
- Adding or removing groups is easier
- There’s less risk of errors for individual user permissions
- Users automatically get the access they need to work efficiently
Since users will be grouped by their access, this keeps permission structures clean and predictable.
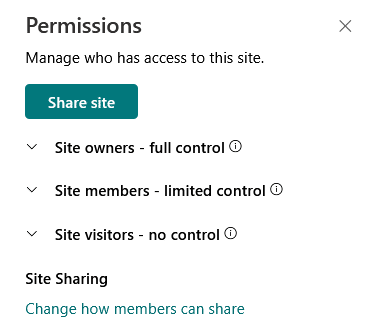
Owners have full control, members can edit content but can’t change site settings, and visitors can only view.
It’s also hard to imagine assigning multiple users their site permissions if there are more than 20 of them, such a waste of time.
3. Adhere to the Principle of Least Privilege
When it comes to permission management, the principle of least privilege will always come out.
Basically, this principle is about giving users only the access they need, nothing more and nothing less.
The advantages:
- It limits access to sensitive information
- Reduces the chances of unintended edits or deletions
- Keeps access levels clear and controlled
- Helps meet security and data protection requirements
- Lowers the risk of intentional or accidental misuse
The opposite of this is granting broad permissions, which means assigning users to random groups without much thinking.
This approach protects your data while allowing users to perform their tasks efficiently at the same time.
4. Regularly Review and Audit Permissions
Another one that should always be present in best practices is audit and review.
As you might have observed, users change roles over time, some get promoted while others go their own way.
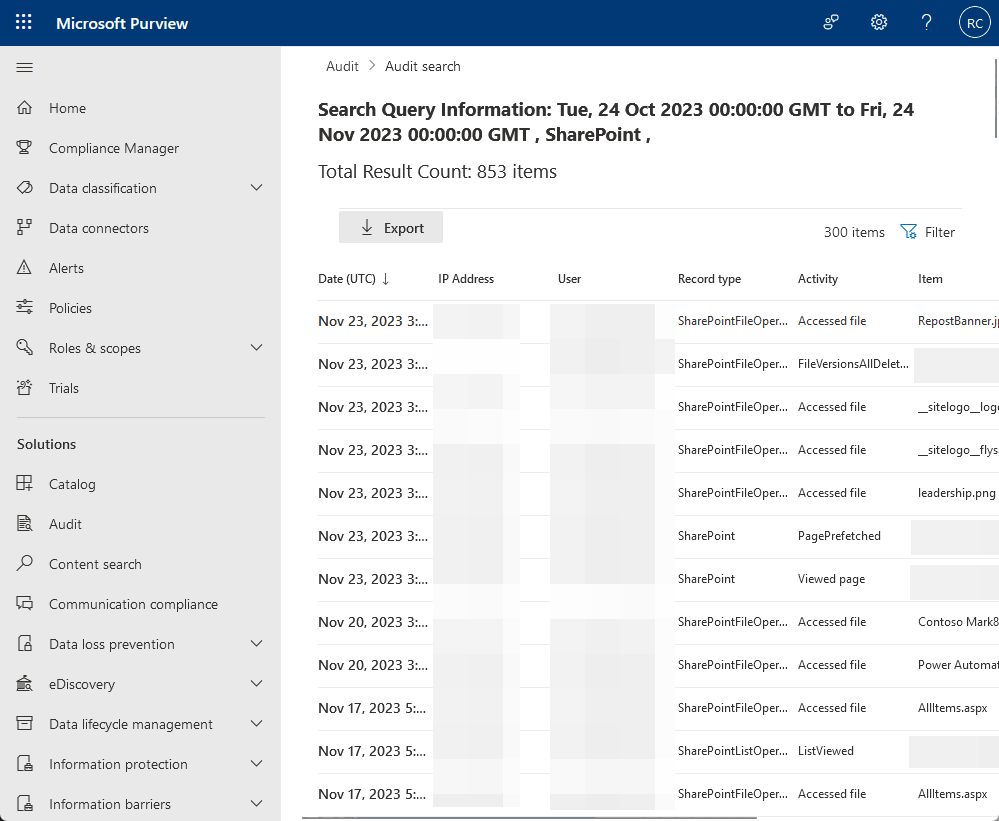
Unfortunately, outdated permissions can create risks.
Here are more reasons for this practice:
- Remove SharePoint Online permissions no longer needed
- Prevent security gaps
- Help meet data protection and regulatory requirements
- Avoid users getting excessive access over time (it can happen)
- Provide a clear view of who can access what
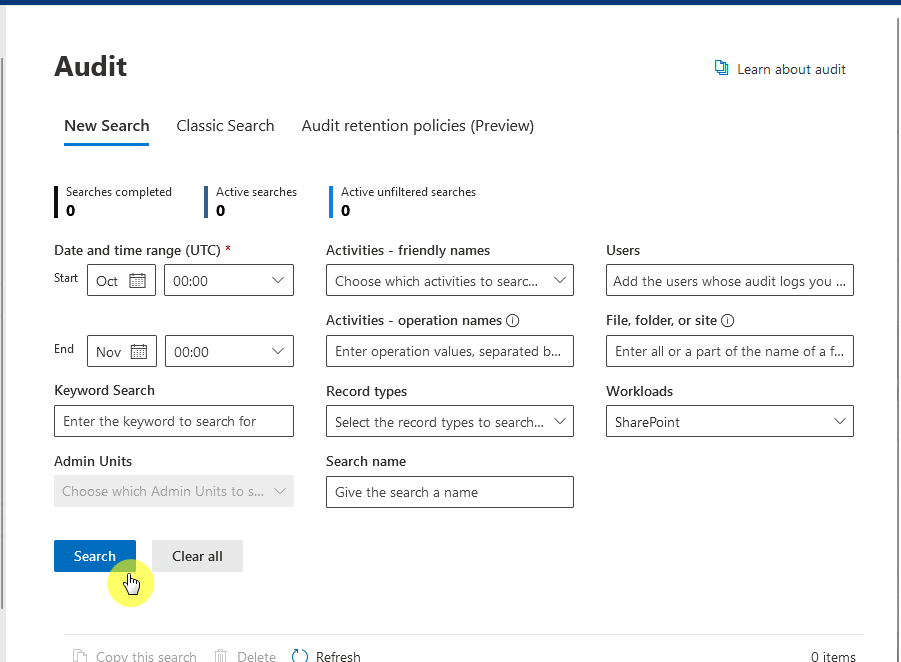
To make this happen, I suggest you set a schedule for when to review the permissions, be that quarterly or biannually.
You can use SharePoint’s built-in reports to identify inactive users or unnecessary access.
If a user has left the company or changed roles, you should update their permissions immediately.
Unfortunately though, if you want more automation, you’re only choice here is to use third-party tools.
5. Manage External Sharing Settings
One of the best things about SharePoint is the fact that you can share documents and files with external users.
Unfortunately, when unmanaged or uncontrolled, it can be a gateway for exposing sensitive data to others.

For this, you need the proper settings:
- Restrict anonymous links as much as possible (require authentication)
- Set expiration dates to access
- Limit external sharing at the site collection level
- Monitor shared content
You can configure the sharing settings and control who can share files and with whom.
If external sharing isn’t needed, disable it for the site, and when enabled, turn on notifications for document tracking.
Sign up for exclusive updates, tips, and strategies
Managing Permissions in Team Sites
As you may already know, the primary use for team sites is collaboration.
Because of this, there needs to be careful planning especially here that Teams and SharePoint work together.
Role of Teams in Permission Management
If we’re talking about collaboration in a Microsoft ecosystem, then we can’t count off Microsoft Teams.
Every team has a connected SharePoint site (it happens automatically with the creation of a Microsoft 365 group).

Take note of the following:
- Teams use groups to manage SharePoint permissions
- There are automatic role assignments (site owners, members, and guests)
- Each private channel gets its own site
- Adding/removing users in Teams updates SharePoint access
When you add someone to a Team, what happens is that they automatically get the right access to its SharePoint files.
You must also be aware of private channels as they create separate sites, each one having restricted access.
I feel the need to talk further about private and shared channels in Teams since they have unique permission structures.
Here’s what you need to know:
- Shared channels allow external collaboration while private channels have separate sites
- Private channel owners must manually add members (they don’t inherit team membership)
- Private channels work best for confidential discussions within a team
Shared channels are nice for cross-team collaboration without creating a new Team.
But because private channels generate their own site, overuse can lead to cluttered permission structures.
I suggest that you review who has access to both channel types to help prevent unauthorized sharing.
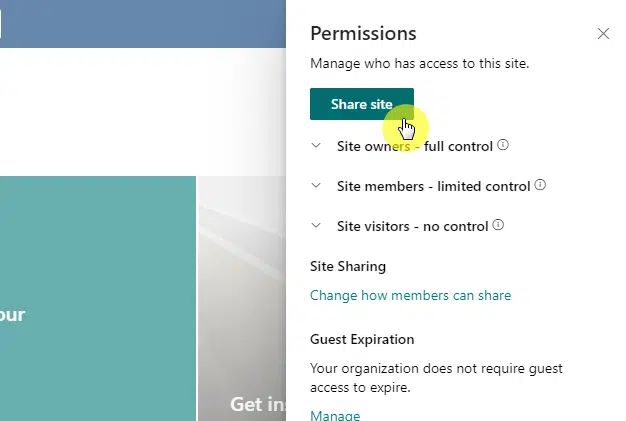
Handling Permissions in Communication Sites
In contrast to team sites, communication sites are designed for sharing information with a broad audience.
The deal here is to manage permissions correctly so the content reaches the right people without unnecessary risks.
This is where using SharePoint-specific groups helps in managing permissions efficiently.
When you go to the permissions settings in a communication site, you will see the default groups with their users.
When dealing with these groups:
- Adding users to a group automatically gives them the permissions given to that group
- This keeps access structured and reduces manual errors
- Groups can be reused for multiple SharePoint sites
I already mentioned this earlier, but it’s better to use groups rather than assign permissions to individuals.
This keeps permissions organized and easy to manage while maintaining consistency across the site.
Advanced Permission Strategies
I’ve also got some advanced permission strategies for those who need more control over access in SharePoint.
Let’s start with this:
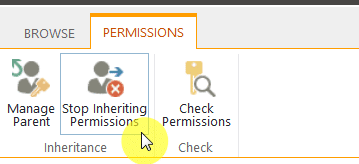
1. Breaking Inheritance When Necessary
Permissions are passed down from a parent object (like a site) down to a child object (like a list).
This happens automatically, so if you need custom access control, you need to break permission inheritance first.
Here’s how this can help:
- This restricts access to confidential files or folders
- Grant specific user access without affecting the whole site
- Limit who can edit or delete important content
The best strategy is to keep most permissions inherited while creating custom permissions for important content.
This also means breaking permission inheritance sparingly.
For example, instead of applying unique permissions everywhere, limit it to essential cases like HR files or financial records.
As I explained earlier, sharing makes collaboration easier, but you must use them, especially shareable links, carefully.
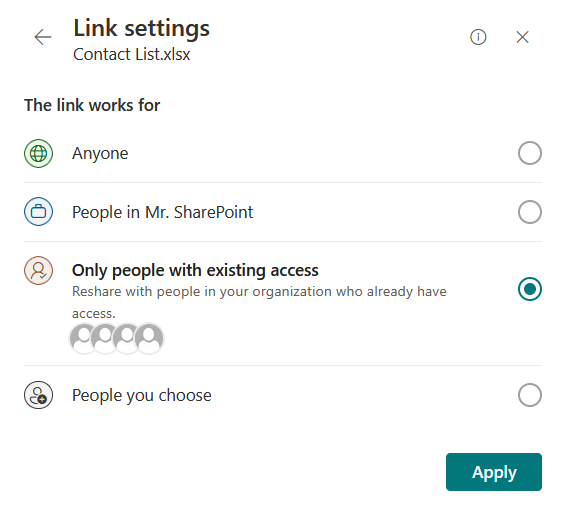
Here’s what I recommend you do:
- Use “Only people with existing access” for internal users
- Set expiration dates
- Restrict editing rights (use view-only links unless edits are needed)
I already mentioned limiting anonymous sharing and monitoring shared links earlier.
My point here is that instead of sharing files broadly, you must use specific permissions to control access.
If external sharing is required, you should set restrictions, like requiring authentication, to prevent unauthorized access.
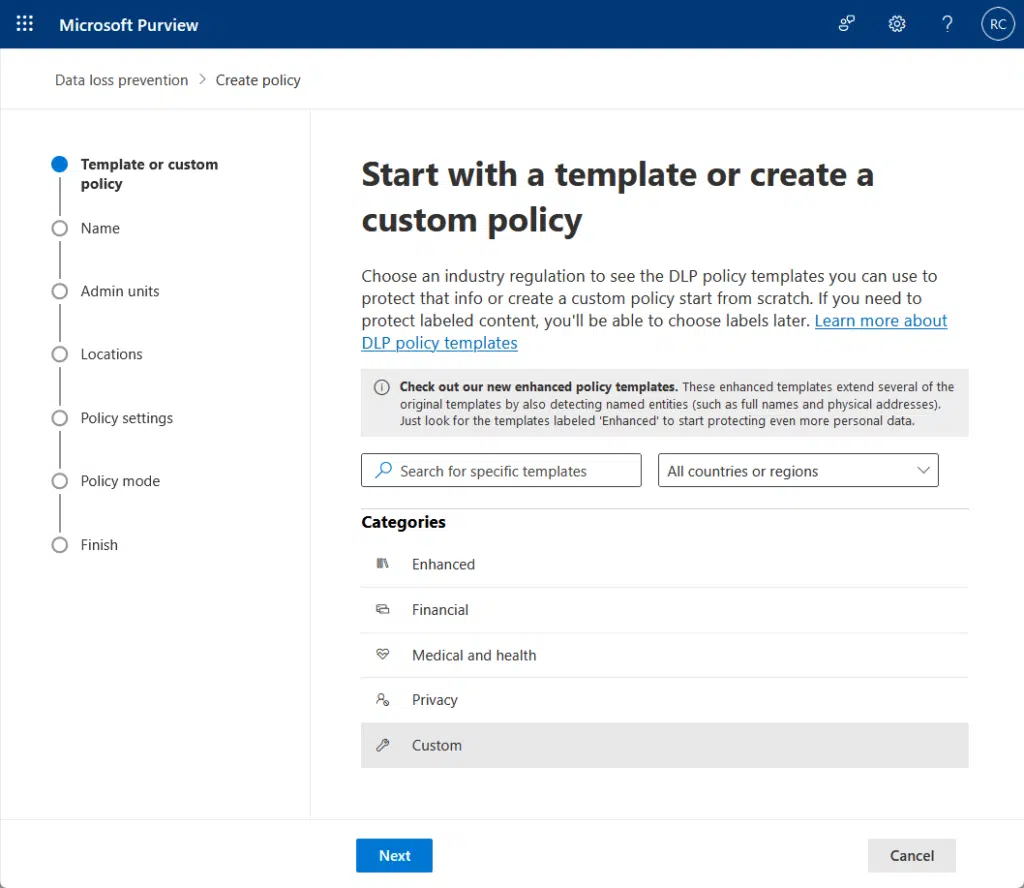
3. Implementing Sensitivity Labels and DLP Policies
Both sensitivity labels and data loss prevention (DLP) policies help protect sensitive data in SharePoint.
From the name, they help prevent unauthorized access and accidental sharing.
Here are some notes here:
- Tag documents based on confidentiality levels
- Always apply encryption automatically
- Block or warn on policy violations using alerts
- Track how and where sensitive files are accessed
To differentiate the two:
Sensitivity labels help enforce security without manual intervention, while DLP policies detect and prevent risky data sharing.
When used together, they will be able to protect financial records, customer information, and other sensitive data.
Common Pitfalls and How to Avoid Them
Well, despite having the best plans, permission management can still go wrong.
Here are three of the common pitfalls:
1. Overcomplicating Permission Structures
This can easily happen when best practices aren’t followed early on.
Complex permission structures would happen, leading to confusion and security risks.
This can lead to:
- Increased admin overhead
- Access issues (users may struggle to find or edit the right content)
- Security gaps with risk of unauthorized access
- Long-term maintenance challenges
To avoid this, use groups instead of assigning permissions individually, and if the problem is already here, implement this asap.
Keep inheritance intact unless necessary; you may need to reset the inheritance on some sites.
2. Neglecting Regular Permission Audits
Since users change roles and others leave the company, not doing any audits can create security-related problems.
Some examples:
- Old permissions may give access to the wrong people
- Users get more access than they need
- Sensitive data might be exposed
- IT teams lose track of who has access to what
Again, you can use SharePoint’s built-in tool for this or just find a better third-party tool with automation features.
3. Misconfiguring External Sharing Settings
I have also mentioned this earlier as external sharing can expose sensitive data if not managed properly.
Some of the consequences include:
- Confidential data being leaked
- Users may unknowingly share restricted content
- Hard to recover as IT teams lose track of shared content
This is why I always recommend to restrict anonymous sharing unless extremely necessary.
Each site can also be configured to enable/disable external sharing, which helps manage sites with confidential content.
Do you have any questions about the strategies I pointed out above? Let me know in the comments.
For any business-related queries or concerns, contact me through the contact form. I always reply. 🙂


This is an incredibly helpful guide! Managing SharePoint permissions can get complicated, but your breakdown of best practices makes it much easier to understand. I especially appreciate the emphasis on the Principle of Least Privilege and the importance of regular audits—these are often overlooked but so crucial for security. Would love to see a follow-up on automating permission management with third-party tools. Thanks for sharing!