

Last Updated on November 17, 2023
Thinking of using SharePoint as a legal document management system?
In this guide, I will walk you through the steps you need to create a legal document management system using SharePoint Online.
Let’s get started
Table of Contents:
- What is SharePoint Online?
- Why use SharePoint for legal document management?
- How to set up SharePoint as a legal document management system
- Use SharePoint for effective legal document management
In simple terms, SharePoint is a product that you can use to create websites for the organization’s intranet.
It allows organizations, including the legal industry, to create secure websites, or sites, for the following reasons:
- Store and organize documents
- Share and management documents and other information
For the legal industry, SharePoint Online is a great secure, and centralized location for managing sensitive case files, contracts, and legal documents.
You can also customize SharePoint to meet the specific needs of law firms and legal departments through templates, add-ons, and integrations.
Related: How to Use Sharepoint: The Definitive Guide for Newbies
Sign up for exclusive updates, tips, and strategies
I have already mentioned some of the reasons why SharePoint is great for document management in general.
But here are the benefits of using SharePoint Online as a legal document management system:
- SharePoint provides a single, secure location for storing and organizing legal documents where members can easily access and collaborate on files.
- Multiple users can work on the same document/list/document library simultaneously, streamlining teamwork and improving efficiency.
- The built-in security features are robust, with features like access control and permission settings to protect sensitive legal information.
- The version control feature tracks the changes made to documents and maintains a version history so users can easily revert to previous versions when needed.
- You easily automate various legal processes like document approvals or contract reviews to reduce manual tasks and increase productivity.
- Comes with customizable templates, add-ons, and integrations with apps like Microsoft Teams — enhancing the functionality for legal document management.
Not counting the fact that if your legal team or law firm is already using Microsoft 365, then you’re already home.
Related: Modern SharePoint Document Management System Guide Tutorial
With the basics out of the way, let’s get into the meat of this article — how to create the system itself.
Many of the steps below contain links to articles I previously wrote that expound more on the step I will be explaining.
Step #1: Determine the requirements
Much like everything else, the first work revolves around the blueprint and planning.
In this case, you need a thorough assessment of your organization’s specific needs and the factors that will influence the design and functionality of the site/sites.
Some of the key aspects to consider are the following:
1. Type of documents
You need to identify the various legal documents your organization handles and understand their scope and variety.
Examples of documents may include:
- Contracts
- Case files
- Court filings
- Internal memos
- Policies
This part is important since it will help you design an appropriate folder structure, document libraries, and metadata schema.
2. Users and their roles
Next are the users — determine who will access the legal documents and what their roles will be.
Some of the staff you may have are:
- Attorneys
- Paralegals
- Admin staff
- External collaborators
By understanding their roles, you will be able to configure the right permissions and access levels so each user has the necessary access to relevant documents.
Related: SharePoint Permissions Explained: How Permission Levels Work
3. Security and compliance
After the documents, you need to assess the security and compliance requirements for your legal document management system.
This may involve the following:
- Data protection regulations
- Client confidentiality agreements
- Internal policies
Based on these requirements, you can design your SharePoint site to meet the necessary security standards and implement security features.
Related: SharePoint Security: The Best Practices Guide
4. Collaboration and workflow needs
It’s also important to identify the collaboration and workflow processes that are or might be essential for your legal team.
This may include:
- Document co-authoring
- Document review and approval
- Case management
By understanding them, you will be able to leverage the right features and tools in SharePoint to automate and streamline these processes.
5. Integration with other tools
While SharePoint also integrates well with Microsoft apps like Microsoft Word, Microsoft Teams, etc., you need to consider other tools/software you might use.
For example, you might be using the following in your team:
- E-discovery tools
- Case management software
- Digital signature solutions
Many of the tools might already have integration with SharePoint. If not, knowing early on will help you find a way to integrate or even a workaround solution.
In SharePoint, there are various site templates you can use.
However, I strongly recommend to only use modern sites:
- Team sites
- Communication sites
Related: SharePoint Team Site vs Document Center (Obsolete?)
This is also where the planning and assessment in the previous step gear its head as you start to consider what type of site collection to create and how many.
In choosing between a team site and a communication site for SharePoint document management, refer to the following table:
| Feature | Team Site | Communication Site |
|---|---|---|
| Primary Purpose | Collaboration among team members | Sharing information and updates across the organization |
| Document Management | Built-in document library for organizing documents | Requires manual setup of document libraries |
| Collaboration Features | Calendars, task lists, Microsoft Teams integration | Limited collaboration features |
| Permissions | Fine-grained control at site, library, or document level | Typically more open permissions |
| Information Sharing | Focused on team-level communication and document sharing | Focused on one-way, organization-wide communication |
| Use Case for Legal Documents | Managing legal projects, cases, and secure document storage | Sharing legal updates, news, or policies with a broader audience |
You can see that generally, a team site is more suitable due to its focus on collaboration, built-in document libraries, and fine-grained permission controls.
Related: Using Site Templates in SharePoint Online: Beginner’s Guide
A communication site though is still useful for sharing legal updates or information with a wider audience — so there’s definitely a use case for each site type.
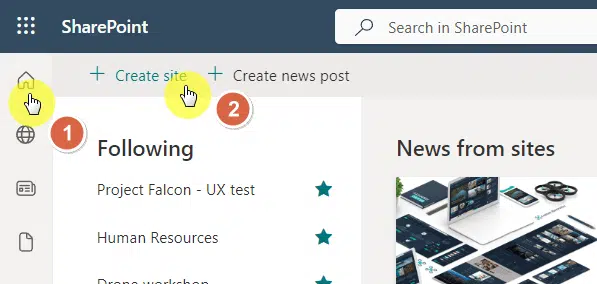
So how do you create a site? Well, it’s simple — click the home button > create site in your SharePoint environment.
Related: How to Create a SharePoint Site From Template: Full Tutorial
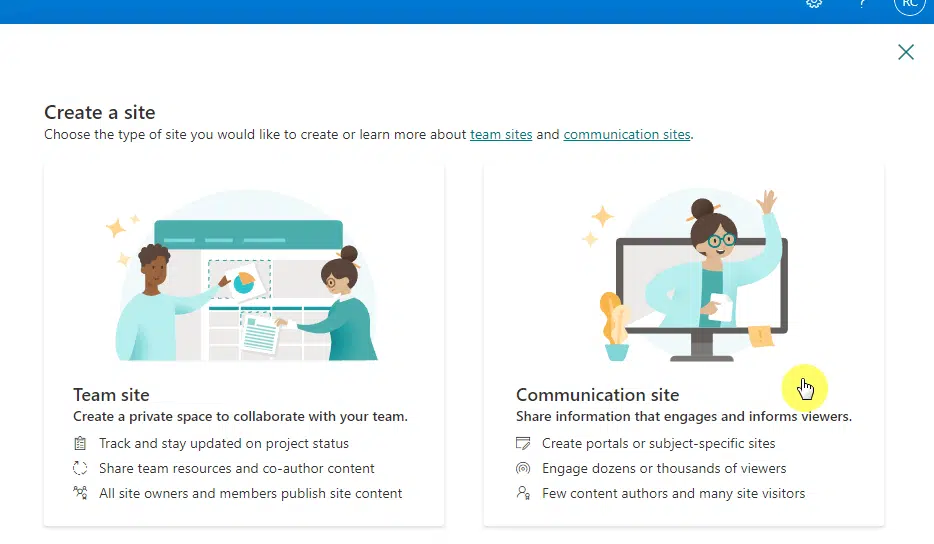
The next step is to choose between the two sites. More or less, the next steps are similar.
For example, if you create a communication site, simply click its box (and do the same if it’s a team site you’re creating).
You will then need to supply the required information for your site like the site name, site address, etc.
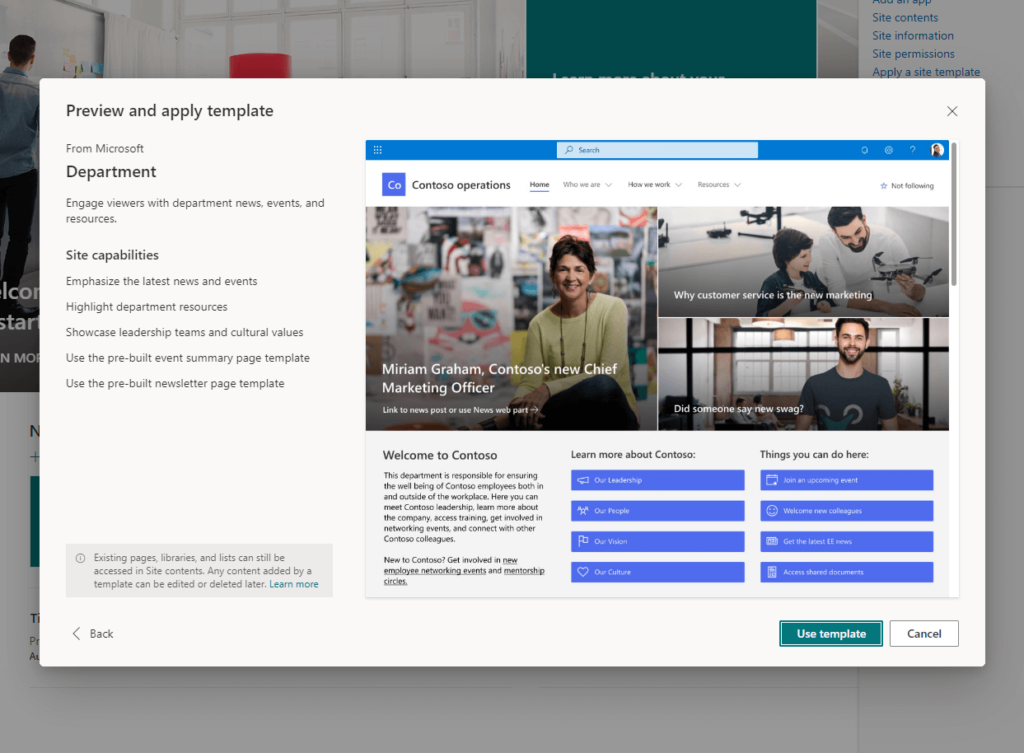
SharePoint will also offer to view and apply templates after creating the site — which you can do from there if you have a site template in mind.
From there, you can do more customization as you wish, such as adding web parts to pages, creating a landing page, and more.
Step #3: Set up document libraries
Since we’re dealing with documents here, the next step is to create document libraries.
Document libraries serve as the primary storage and organization containers for your legal documents which makes them easily accessible and manageable.
Related: SharePoint Document Library Types: Differences Between Them
Fortunately, creating a new document library is easy.
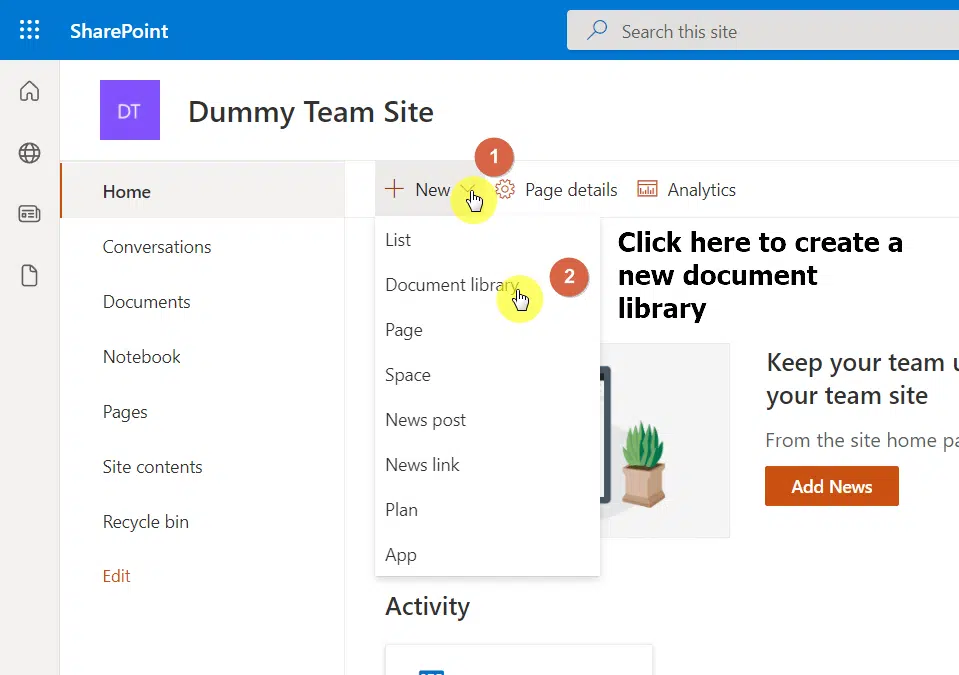
Simply click the new button on the site > document library option:
You will then have to give the library a meaningful name — like contracts or litigation files — and do this for each separate library.
The next part is to configure the library settings.
Open the library and click the gear icon on the upper-right corner > library settings:
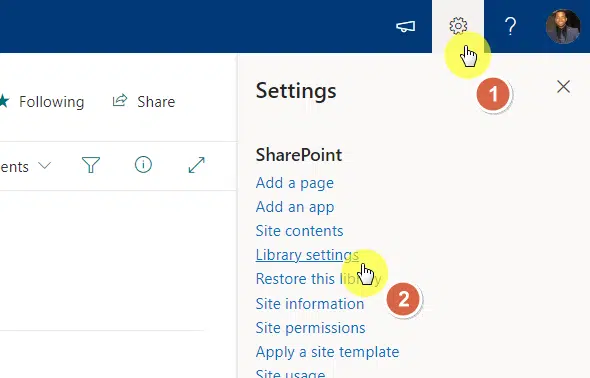
That will open the right panel and provide you with an option to see more library settings.
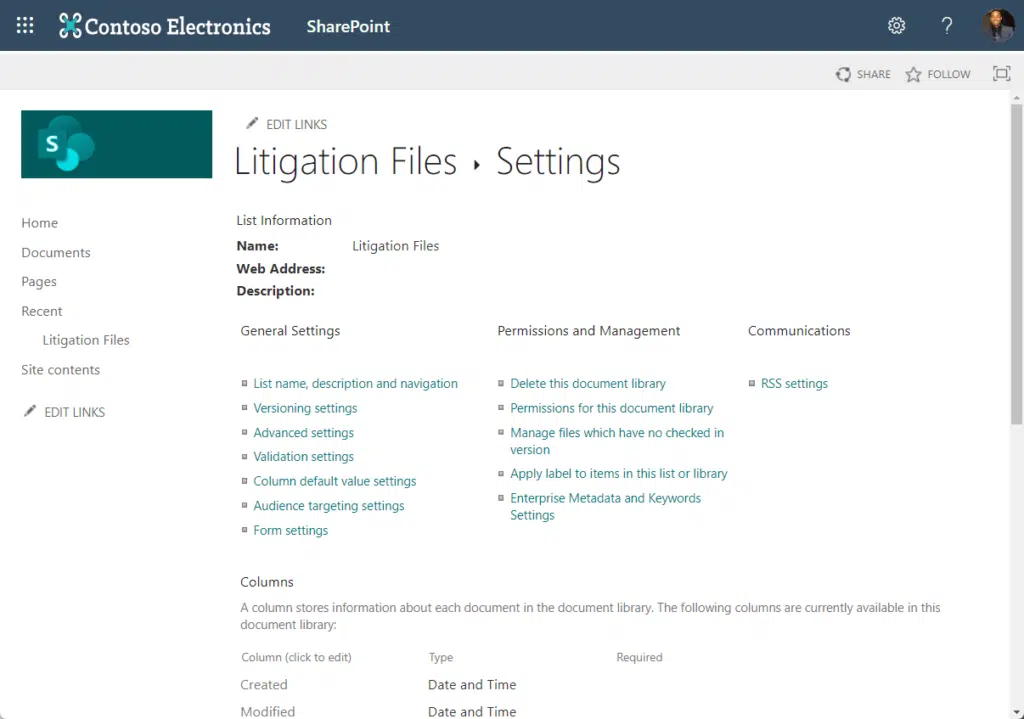
The next page is where you will be able to do the following:
- Customize the library’s default view
- Set up metadata columns
- Enable other features
Step #4: Create a clear folder structure
Many of the users in the law firms might be familiar with the folder hierarchy since it’s what we use in our computer systems.
While I personally prefer well-organized libraries to folders, there may be some users who are more comfortable with folders.
Related: SharePoint Library vs Folder: Stay Away From Folders
On the other hand, a well-planned folder structure can also help to prevent duplication, reduce clutter, and streamline navigation.
If you want to use a folder, simply head over to a document library > new button > folder option:
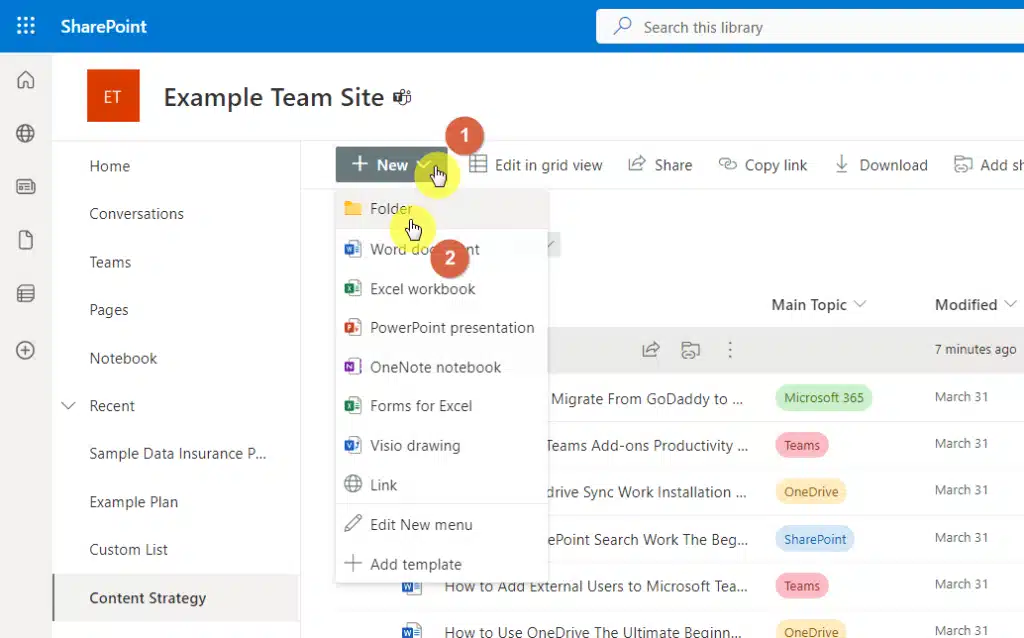
According to your assessment in step #1, you will need to develop a folder hierarchy to categorize documents in a logical and consistent manner.
For example:
- Document type (contracts, litigation, intellectual property)
- Department (human resources, finance, operations)
Step #5: Set up metadata
If you have read the linked articles in step #3, you can skip this one out. If not, just read on.
For starters, metadata provides additional information about a document like its title, author, and date created.
You can add metadata columns to document libraries and lists by clicking the add column button and choosing the column type:
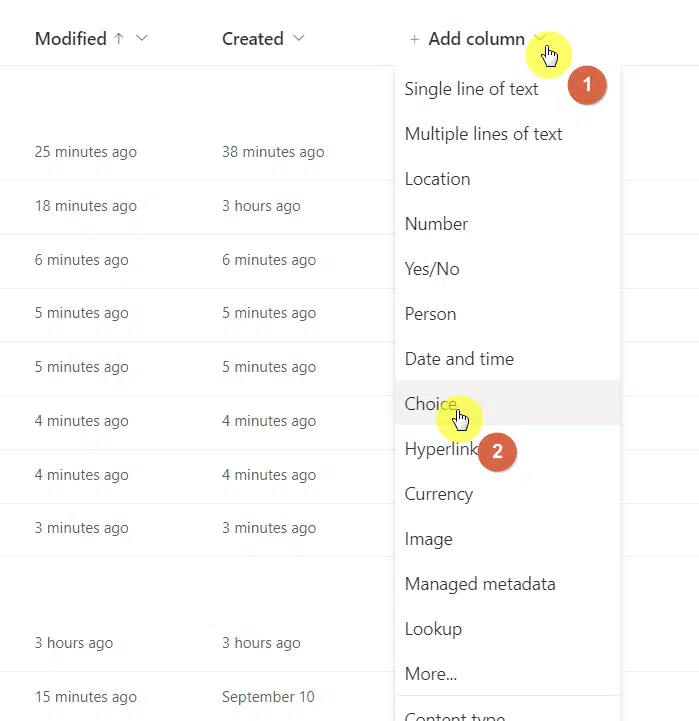
You need to analyze the types of legal and client documents you have and determine what metadata is most relevant to your needs.
Some examples include:
- Document type
- Case number
- Client name
- Author
- Creation date
- Status
It’s easier if you keep in mind that metadata is useful for searching, sorting, and filtering documents.
You will need to monitor and update metadata as needed to ensure they remain relevant and useful for your organization.
Related: How to Use Metadata in SharePoint: The Beginner’s Guide
Step #6: Configure permissions
This step is important since it’s for maintaining the security and confidentiality of your legal documents.
Setting permissions properly means that only authorized users can access, edit, or manage specific documents or areas of the site.
You need to understand the different permission levels first:
- Full control
- Design
- Edit
- Contribute
- Read
- Limited access
Study them first and their associated permissions so you will know which ones are appropriate for different user groups.
Related: SharePoint Permissions Explained: How Permission Levels Work
Creating user groups based on roles or responsibilities will simplify the process and make it easier to manage access.
For example, you can groups users into:
- Attorneys
- Paralegals
- Admin staff
There are a lot of ways to create a group, the most popular one is through the Microsoft 365 admin center (active teams and groups):

Related: How to Create a Microsoft 365 Group: The Ultimate List
You can then assign permissions at three levels:
- Site level (go to the site settings > site permissions)
- Library level (go to the library settings > permissions for this document library)
- Individual document (click the ellipsis on the file and select manage access)
Step #7: Configure versioning and approval workflow processes
This step is necessary to ensure that you maintain control over document changes for accuracy and compliance with regulations.
By default, versioning is already enabled in libraries (though minor versioning, for small changes made to the document, is disabled).
Related: Major Version vs Minor Version: SharePoint Online Versions
If you want to enable even minor versioning on a document library, head over to its library settings page.
Then go to the versioning settings:
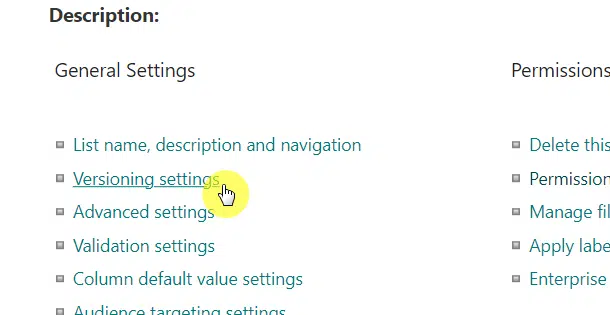
You will then find various options for versioning, including the option to create both major and minor versions.
On the same page, you will find an option for enabling content approval:
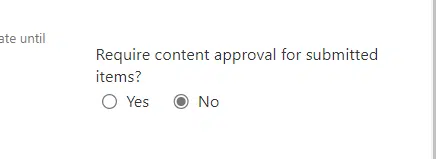
When it’s enabled, changes to existing items will remain in a draft state until an approver approves the changes made.
Related: Microsoft Flow Approval: Multiple Approvers
You can also set up a content approval workflow though using Power Automate right within the document library:
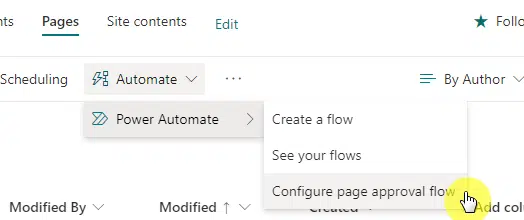
That’s also where you can set up workflow conditions. There are a lot of templates there you can use.
Related: How to Make an Approval Workflow for SharePoint
Step #8: Train users
After you finish setting up everything in the previous steps, you need to think about training users to utilize the platform effectively.
There are a few items I want to go over:
- Create tailored training materials and cover topics that they will need to know in everyday use of SharePoint.
- Select the most effective training formats for your users (in-person workshops, webinars, videos, written guides, etc.)
- Schedule and conduct training sessions and provide ample opportunities for them to ask you questions.
- Provide ongoing support after the initial training — which may include follow-up sessions, creating a helpdesk, etc.
- Keep track of how well users are adopting the legal document management system in place and use the information to improve the system.
Related: How to Learn SharePoint Online Today (Updated Guide)
Make use of SharePoint’s robust features to establish an effective and efficient legal document management system.
With the full potential of SharePoint, you can manage your legal documents, and ensure compliance, security, and ease of access for stakeholders.
Do you have any questions regarding the steps I explained in this article? Share your thoughts in the comments below.
For inquiries and other concerns, kindly reach out through the site’s contact form and I’ll get back to you asap.


