

Last Updated on January 16, 2024
Want to create a glossary page?
In this guide, I will show you the step-by-step process of how to easily create your own glossary page in SharePoint.
Let’s get started.
Table of Contents:
Why create a glossary page?
A glossary page serves as a centralized repository of terms and definitions relevant to a specific domain of knowledge.
It’s a valuable tool for users to quickly understand and familiarize industry jargon, acronyms, and terms quickly.
In the context of SharePoint, creating a glossary page brings different benefits like:
- Enhance user experience and productivity
- Reduce confusion
- Improve communication
- Increase efficiency within the organization
- Contribute to the organization’s knowledge management efforts
Moreover, a glossary page can be customized to suit the specific needs of an organization.
It can be color-coded, enriched with additional web parts for more details, and designed for easy navigation.
Sign up for exclusive updates, tips, and strategies
How to Create a Glossary Page
Creating a SharePoint glossary page involves several steps.
Here’s a step-by-step guide on how to create a SharePoint glossary page:
Optional: Decide the structure
We’re talking about creating a glossary page — but if you like, you can actually break it into different pages.
This works especially well in such cases:
- You have a lot of terms to cover
- You want each page to be shorter
The process is more or less the same.
The only difference is that when we talk about different sections, this translates to different pages.
I will explain in each section if you prefer to create make it a one-letter or multiple-letter per page glossary.
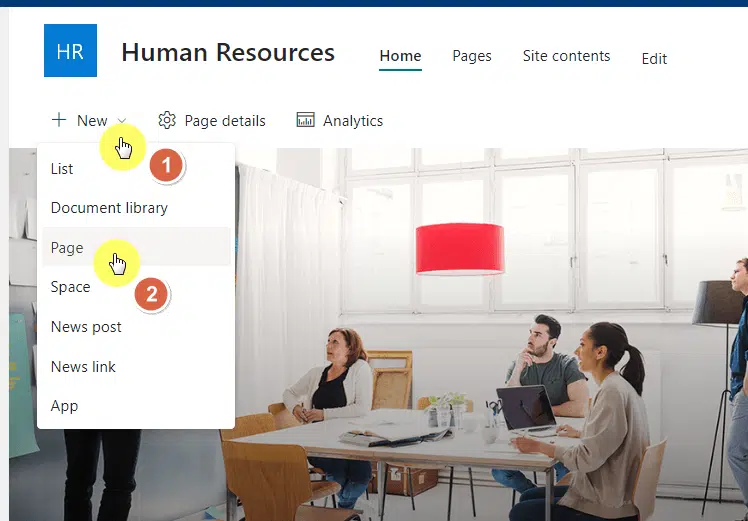
Step 1: Create the glossary page
The first step is to create the glossary page on the SharePoint site collection where you want to house the glossary.
Click the new button > page option on the home page or the site contents page:
Related: How to Make a Landing Page in SharePoint Online
For the page templates, it’s preferable if we just go with the blank page layout.
For a multi-page glossary, the first page that you will create will be the home page of your glossary.
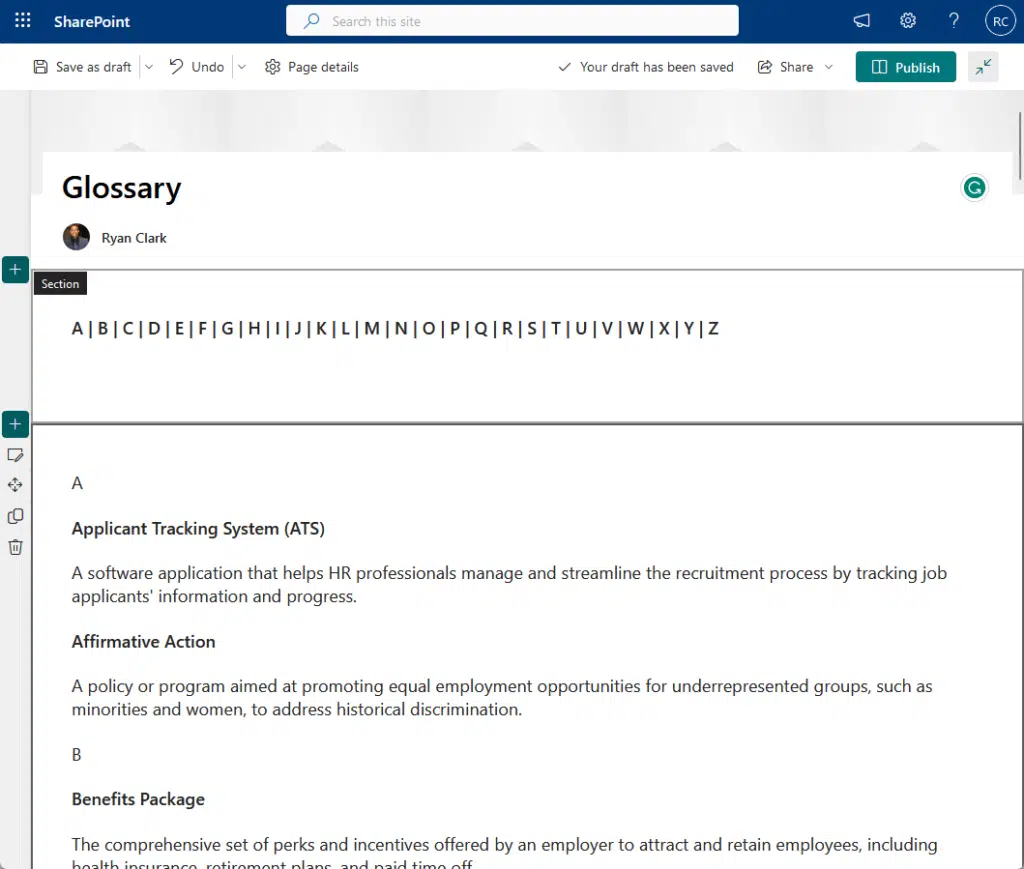
Step 2: Set up the glossary letters
Now that we have the page ready, there are three tasks here to do:
- Name the page
- Create the glossary letters (menu)
- Add the letters in the body
How you want to create the letter menu is up to you.
But for simplicity, you can just do it like this:
A | B | C | D | E | F | G | H | I | J | K | L | M | N | O | P | Q | R | S | T | U | V | W | X | Y | Z
After that, you need to put the letters in another section (a different text web part) like what you see in a dictionary.
Naturally, they should be in alphabetical order — something like this:

For a multi-page glossary, you have two options here:
- Make this page your home page containing only the letters
- Make this the first part of your glossary and contain the first few letters
If you prefer the second option, you can then create the letter menu like this:
A B C | D E F | G H I | J K L | M N O | P Q R | S T U | V W X | Y Z
You can also get creative if you want and use images to indicate the letters. 😀
Step 3: Add the glossary topics and terms
The next part now is to add the glossary topics and terms.
Like this:
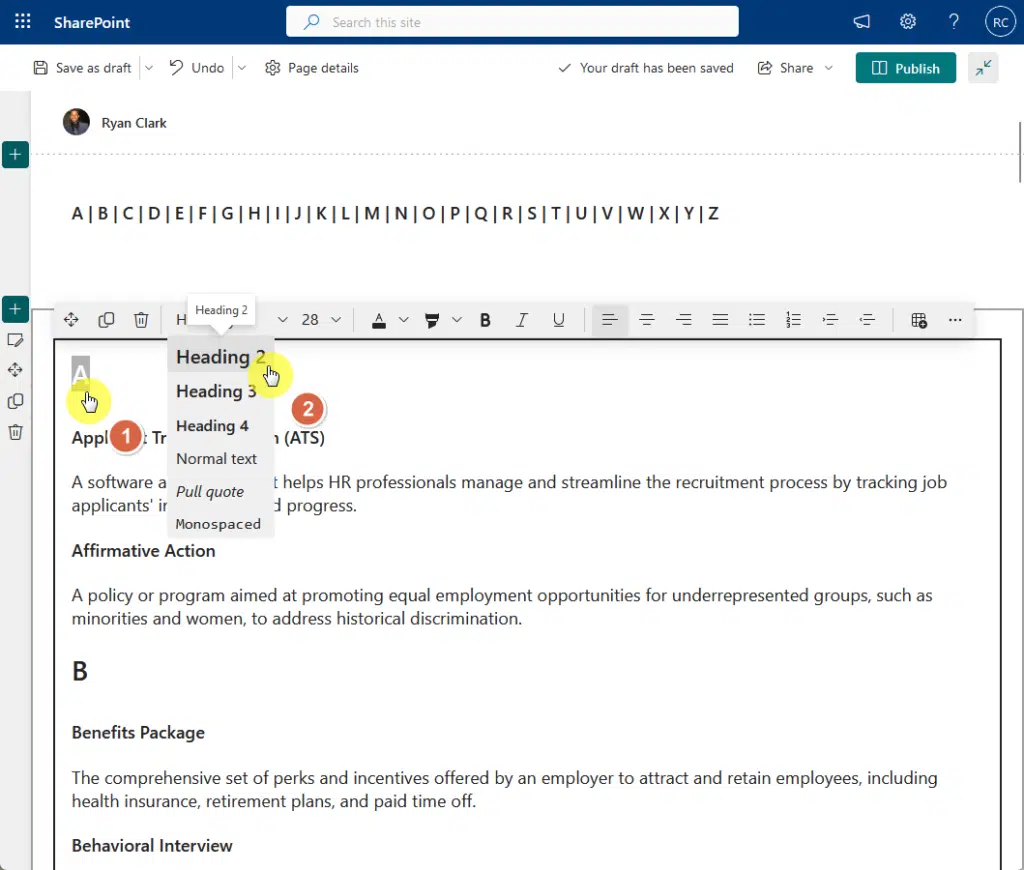
The next step is to make each letter a heading 2.
Just select those letters and select heading 2 in the options above:
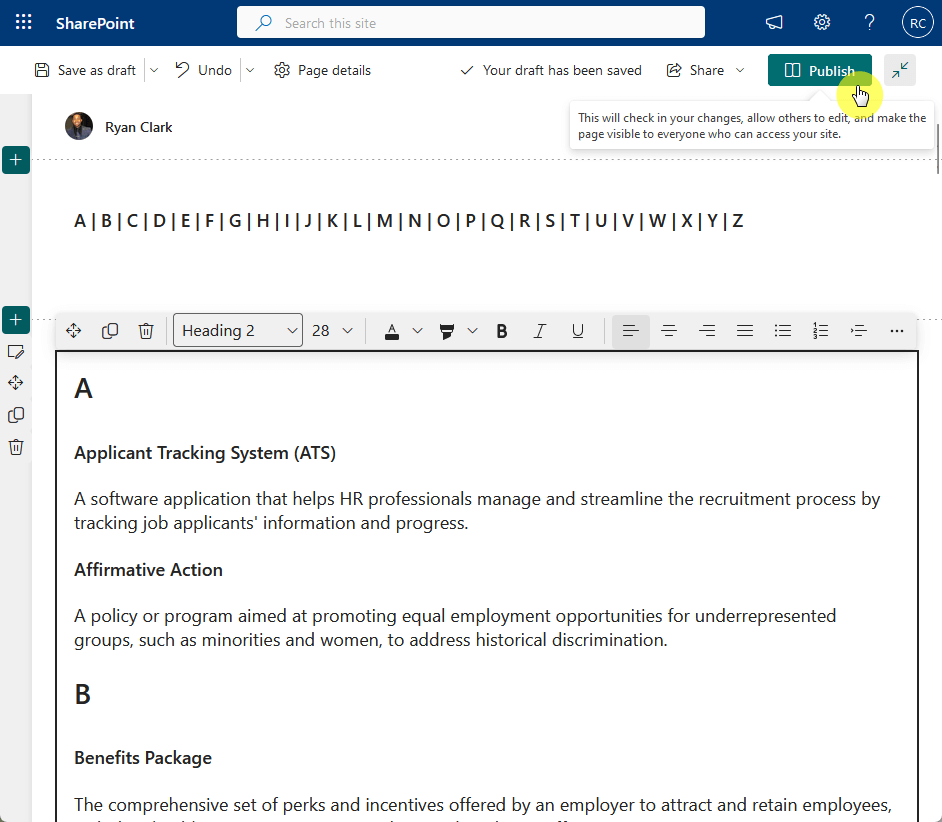
After making each letter a heading, all you have to do is publish the page.
I’ll explain later why you need to publish it first.
For a multi-page glossary, create different pages for different letter groups.
So if you want to create one page for terms starting in A, B, and C, do that.
Step 4: Link each glossary letter
The reason why you need to publish the page first is that the header link can only be seen when the page is published.
You will need two browser tabs for this:
- Open the published page on one tab
- Open the page in edit mode on another (same page)
Note: If you’re not sure how to do this, just open another tab, go to the site pages document library, and open the page there.
On the published page, hover your mouse over a letter heading and copy the link like this:
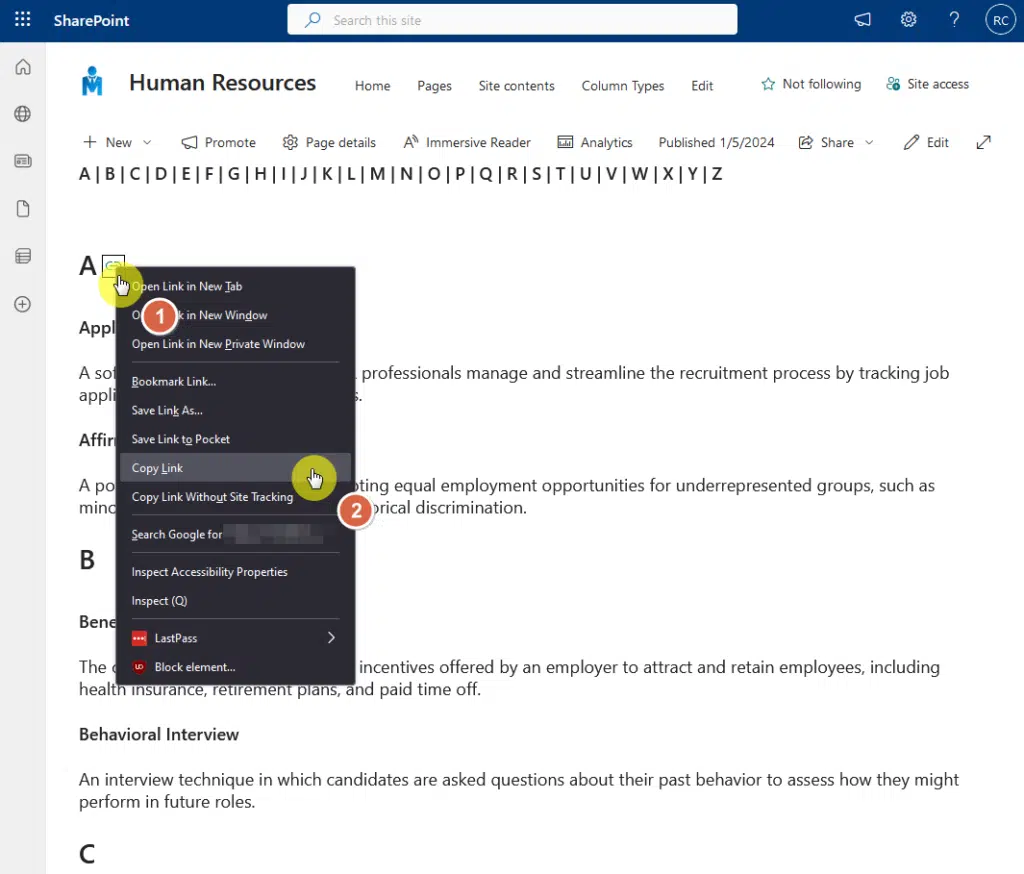
Switch to the tab with the edit mode.
Select the letter from the menu > hyperlink (shortcut is “ctrl” + “k”) from the options bar:

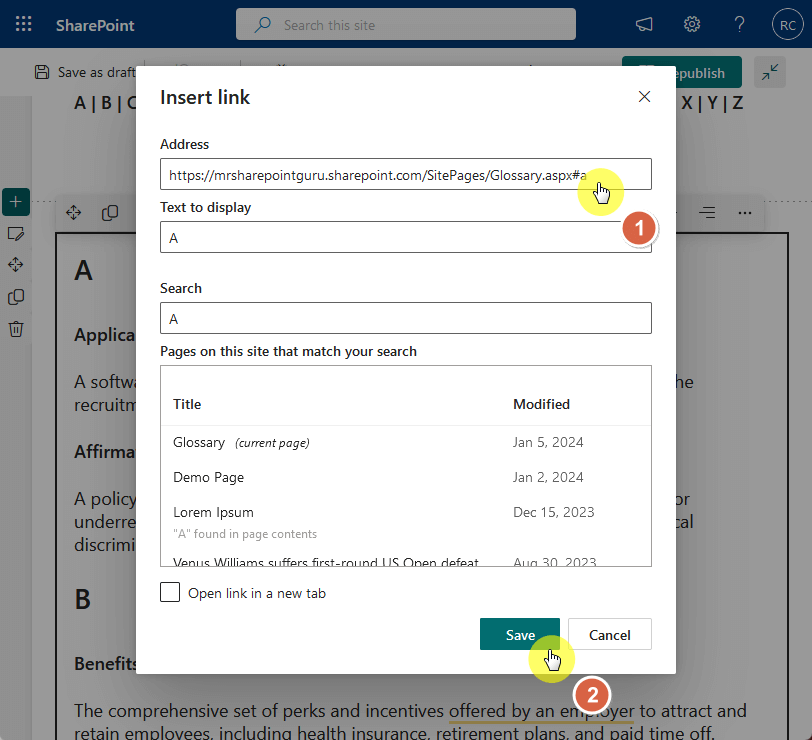
This will bring up the insert link modal.
Paste the link on the address field and hit the save button:
Now do this for all the letters.
Note: You can actually make this quicker by changing the last letter on the link into the current heading.
For example, for the letter “B”, just change the hyperlink to this:
https://mrsharepointguru.sharepoint.com/SitePages/Glossary.aspx#b
Republish the page once you’re done and you now have a glossary page.
For a multi-page glossary, here’s how to approach this:
- Instead of pasting links to the individual sections/headings, you need to paste links to the pages.
- Copy the section with the letter headings to every page so you can go through different letter pages from any page.
Here are some ideas that can help make your glossary page better:
- Add a back-to-the-top link in every section
- Add a divider on each letter section
If you have more questions about creating a SharePoint glossary page, feel free to leave a comment.
For inquiries or any business-related concerns, kindly use the site’s contact form. I’ll respond promptly.


hi, how do i add the back to top link in every section?