

Last Updated on January 18, 2025
Curious about the flow option in a library?
In this guide, let’s talk about flow in SharePoint Online, its components, how to create one, and more.
Let’s get started.
Table of Contents:
It’s an automated workflow that connects tasks, processes, or data within SharePoint and other applications.
You can build them using Power Automate to simplify repetitive business processes and help teams work more efficiently.
Key features include:
- Automation
- Integration
- Triggers and actions
These flows are used in many scenarios, such as setting one to send an email alert when a file is uploaded to a library.
Other common scenarios where you can make use of Flows include:
- Document approval
- Notifications
- Task assignment
- Data synchronization
They also make complex workflows, like multi-step approvals, easy to build and manage, all with minimal coding.
👉 Related: What Replaced Microsoft Flow in SharePoint: Power Automate
Sign up for exclusive updates, tips, and strategies
SharePoint Flow relies on a few essential elements to function effectively.
These components are:
- Triggers: Events that start a flow, like a file upload or list update
- Actions: Specific tasks performed after a trigger, such as sending an email
- Connectors: Tools that link SharePoint with other apps, like Teams or Outlook
- Conditions: Rules that determine what actions to perform based on data
Thankfully, each component is easy to configure with its easy-to-use canvas, with no coding required.
For instance, a trigger could detect when someone updates a document in SharePoint.
Based on this, actions like notifying a team or updating another system can then be added easily to the flow.
👉 Related: Power Automate Multiple Conditions: The Beginner’s Guide
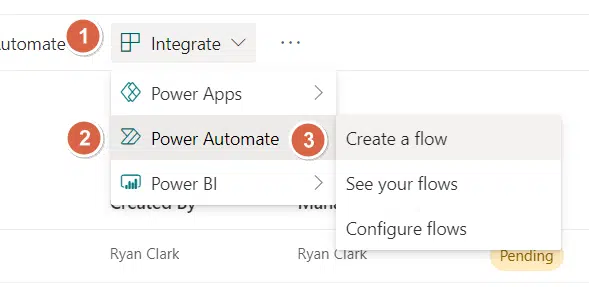
What’s nice is that you can start creating a flow from a SharePoint list or library quite easily.
Simply look for the “Integrate” option in the toolbar, then Power Automate, and click the “Create a flow” button:
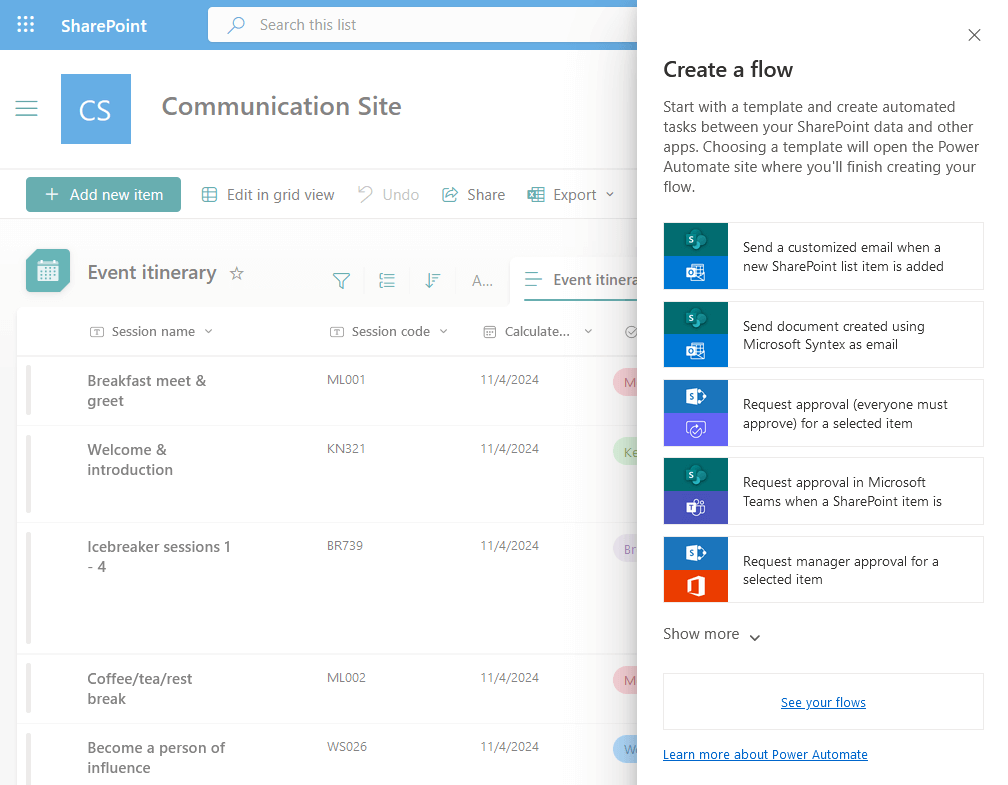
After that, the right-side panel will open with different flow templates available.
Browse through the templates shown here, and when you find what you’re looking for, click on that option.
The page looks like this:
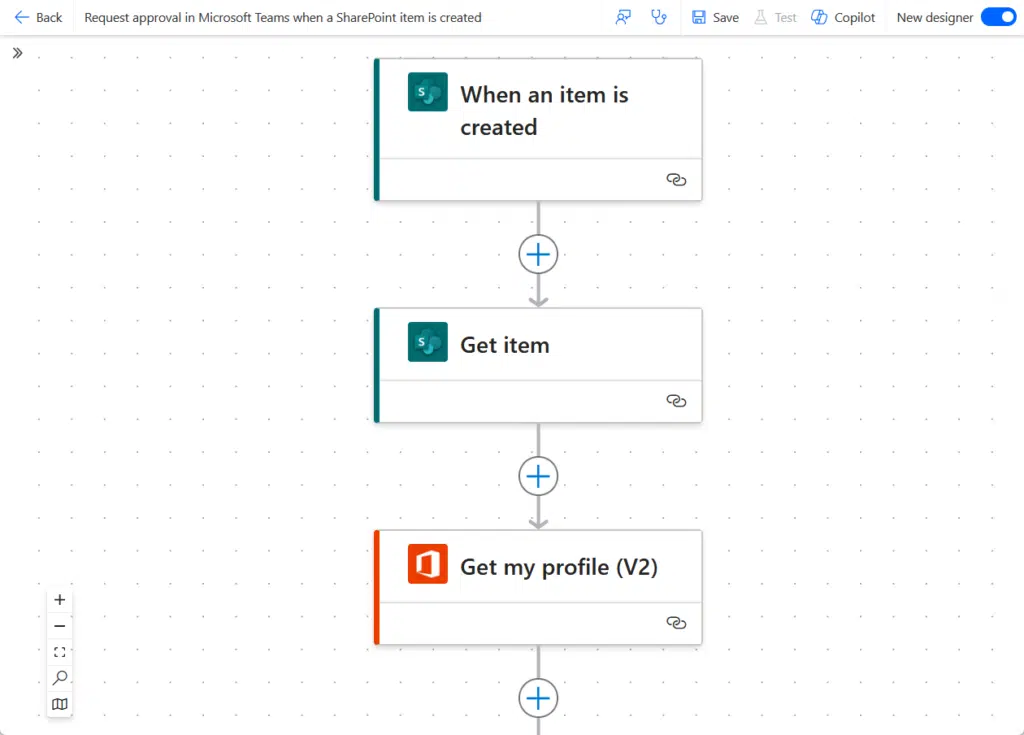
Clicking on a template will bring you to the Power Automate site where you can finish or customize the flow.
It will show you where it will connect to, what things to look for (parameters), and well, basically edit the flow.
The canvas looks like this:
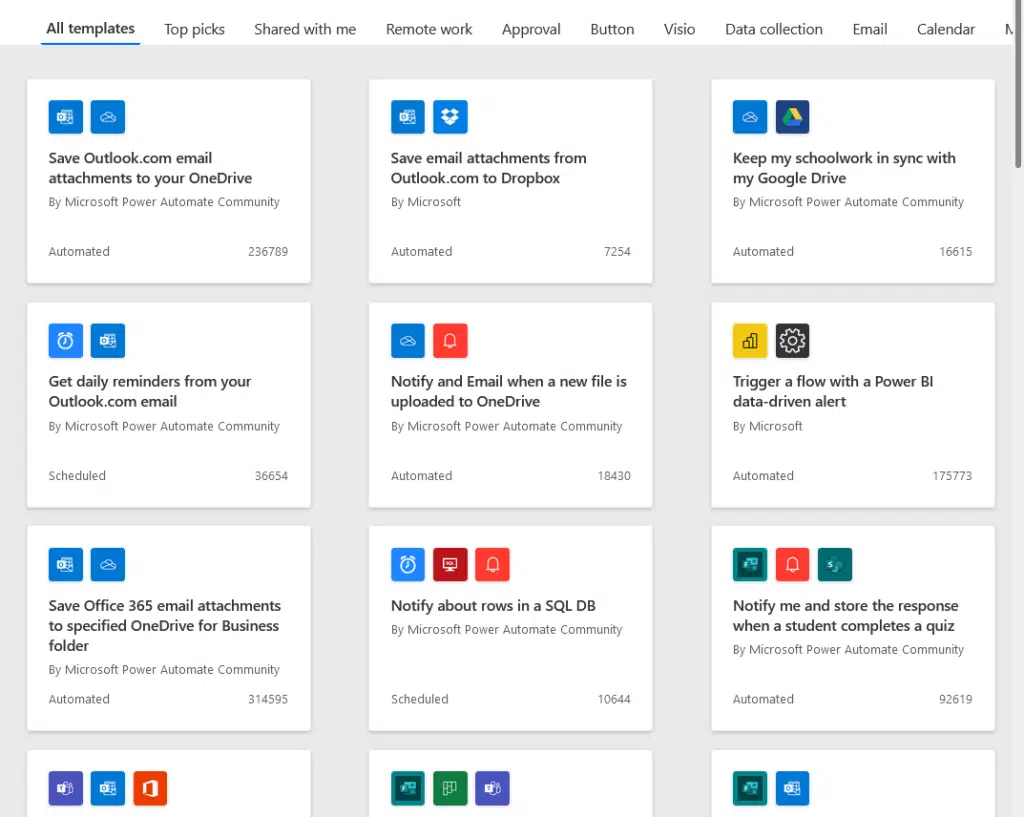
You can also start from the Power Automate site itself (you can go out of the current flow and browse the site).
There are more flow templates here available that you can check:
If this is what you’re looking for, I suggest you check my other tutorial on how to create a workflow in SharePoint.
You can also design a flow from scratch, set up your own trigger, and add an action (what happens next).
👉 Related: How to Create a Workflow in SharePoint Online
Managing and Monitoring Flows
After creating a flow, it’s important to manage and monitor its performance.
If you’re in a document library or list, you can see that there’s a “See your flows” option right below “Create a flow”.

On the other hand, if you’re already on the Power Automate website, click “My flows” on the left-hand sidebar.
That will bring you to a page that contains all your flows:

If you click on a flow, you will be able to:
- Check its run history
- Track errors
- Update actions or triggers
- Disable or delete them
For example, the “Run History” section shows whether a Power Automate flow succeeded or failed.
If there’s a failure, you can pinpoint the step that caused the issue and fix it.
Transition from Classic Workflows to Power Automate
With the retirement of SharePoint 2010 and 2013 workflows, transitioning to Power Automate is now the default.
But all for a good reason as Power Automate offers a modern and flexible solution for workflow automation.
Power Automate provides more advanced features than classic workflows, and it integrates with hundreds of apps.
Do you have any questions about SharePoint flows? Let me know in the comments below.
For any business-related queries or concerns, contact me through the contact form. I always reply. 🙂


