Last Updated on June 8, 2024
Are you looking for a way to create an employee directory in your SharePoint intranet?
If so, I have good news for you. SharePoint offers different ways to show an employee directory on any of the pages.
In this article, let’s talk about the different SharePoint employee directory options you have and how to set them up.
Let’s get started.
Table of Contents:
If you want to create an employee directory in SharePoint, here are the steps you need to take:
1. Create a custom list first
Before anything else, you need to create the directory first. The easiest way to do this is by creating a custom list.
On your site, click on the “New” button and select “List” from the option:
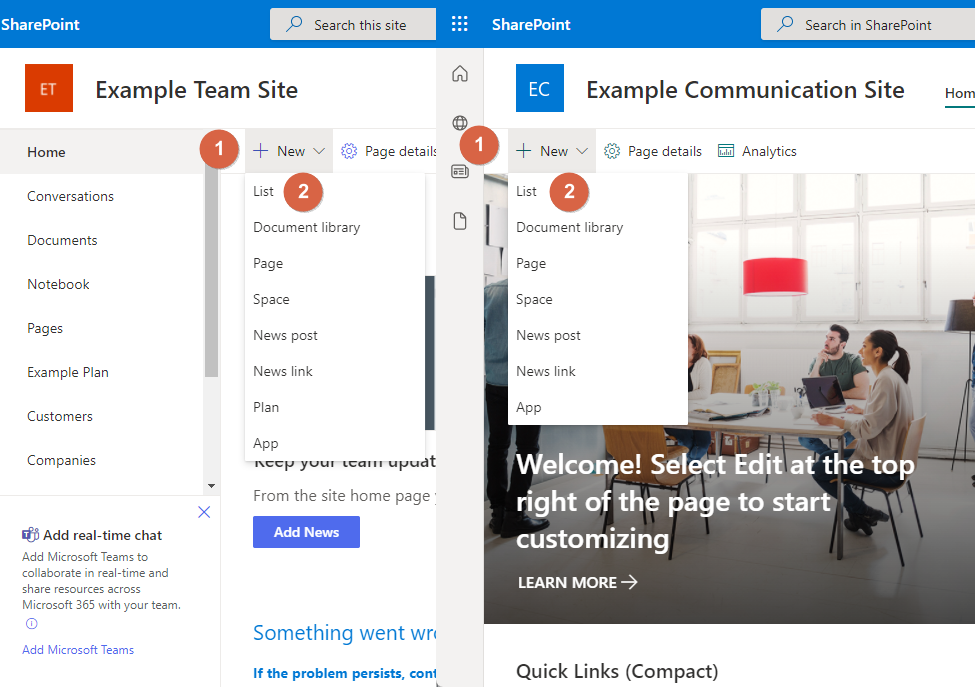
Now, you have two options on how to proceed:
- Start with a blank list and organize everything
- Upload a spreadsheet that contains the information about your employees
If you want to create from blank instead, then click on its button when creating a list:
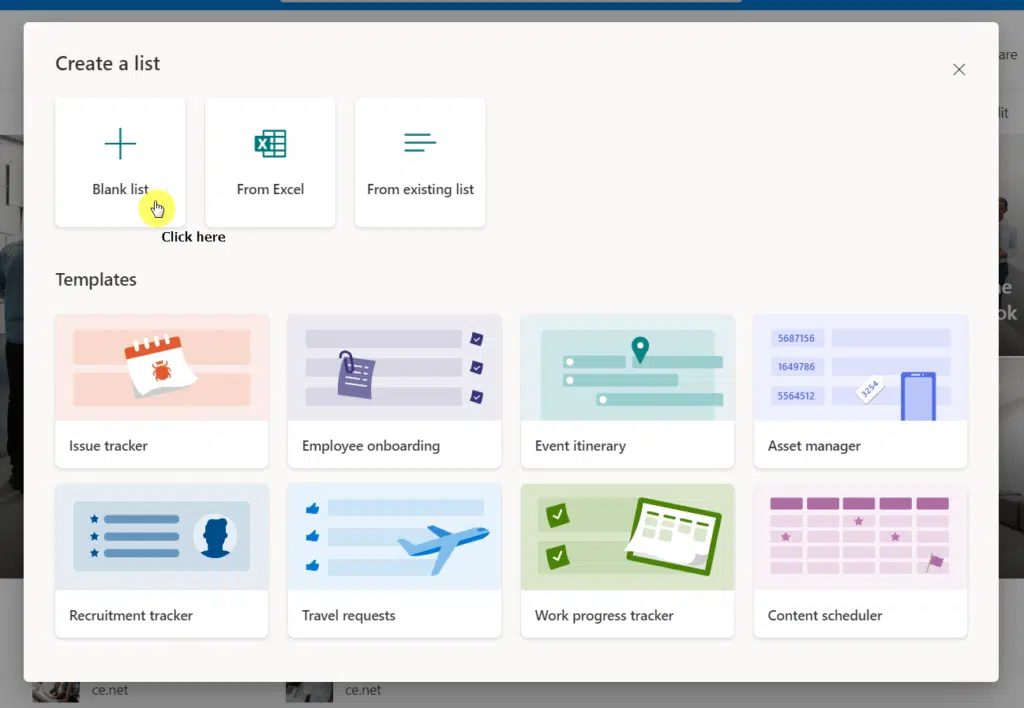
Afterwards, you need to add columns relevant to your directory like:
- Name
- Contact number
- Job title
Note: If this is the route you want to take, I suggest you review what I have written in my guide on how to create a custom list in SharePoint Online.
On the other hand, if you want to make things simpler, you can also create a list from an Excel spreadsheet and start from there.
Click on the “From Excel” option:
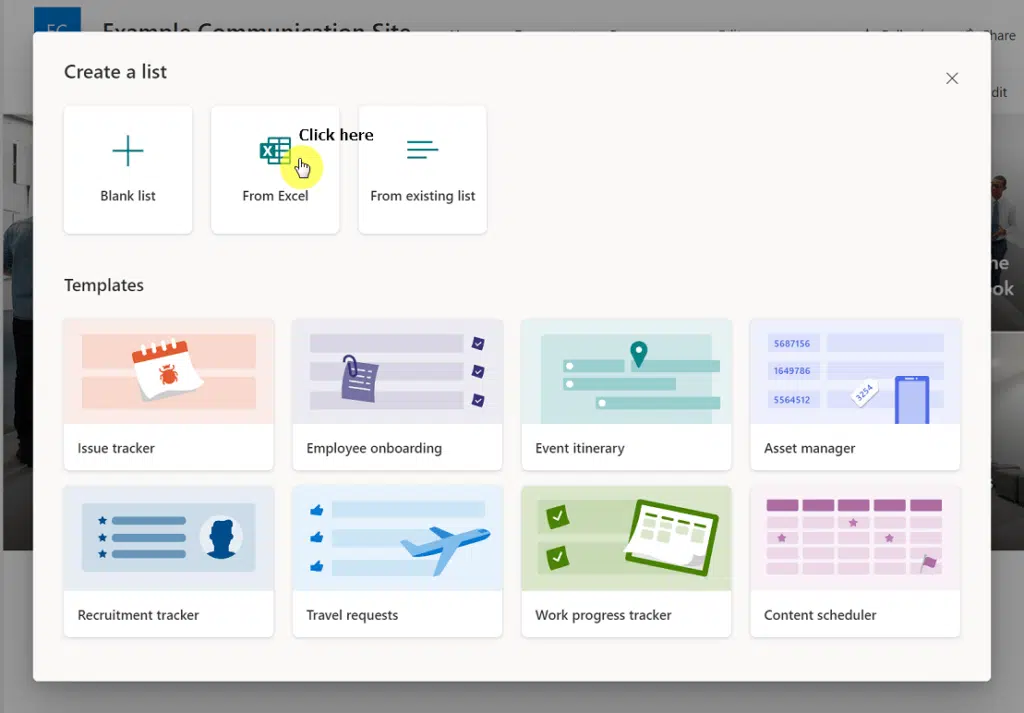
Note: Before you upload the Excel file, make sure to format the directory as a “table”. Otherwise, the system will not be able to create a list out of the Excel file.
After you upload the Excel file, you will be able to customize and check on the columns included:
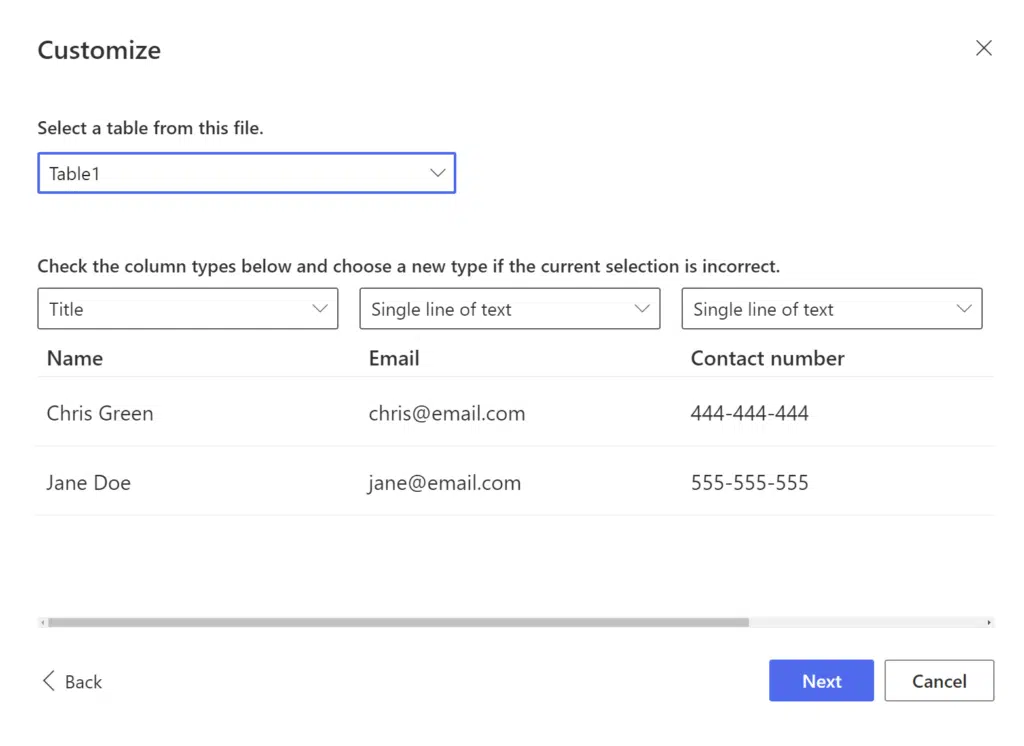
Note: If you need more help on this, check out my article on how to create a new list where I expounded more on what you can read here.
2. Add in a “Person” column in the list
Although this part isn’t necessary, you may want to do this if your employees are on the intranet and have their own user accounts.
There are so many benefits to doing this like:
- Connects your employee directory list to the Azure Directory
- Being able to see more information on the employee from their information on the Azure Directory
- The profile picture of the user also gets displayed through this method
Now, to proceed, add a column as usual and this time, select “Person” from the options. You can name it however you like.
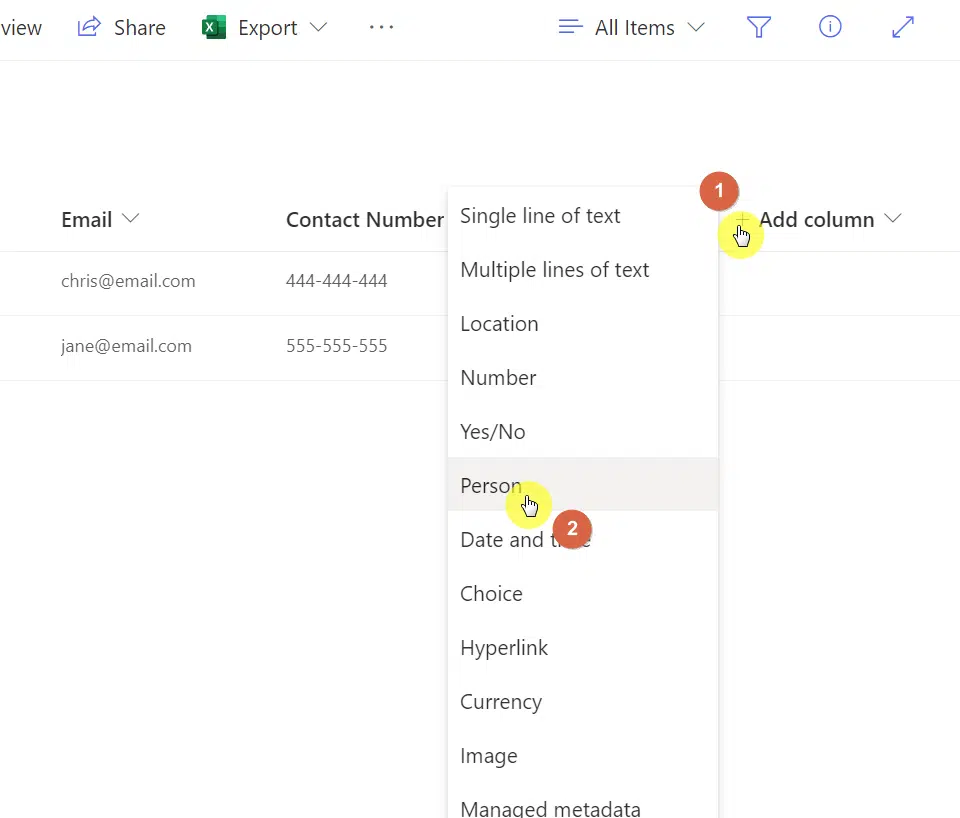
Once you set that up, all that’s left is to edit the list items and tie them up with users in the Azure Directory.
To edit a list item, simply right-click on an item or hover your mouse over it and click on the three vertically-aligned dots.
Then, click on the “Edit” button.
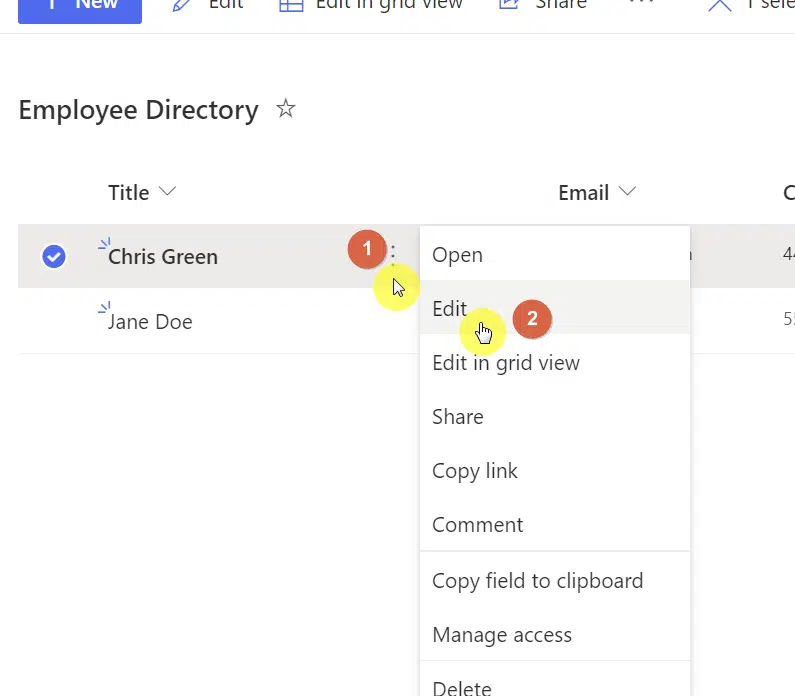
Then, on the field for the “Person” column, simply enter the name of the employee and click on the correct choice.
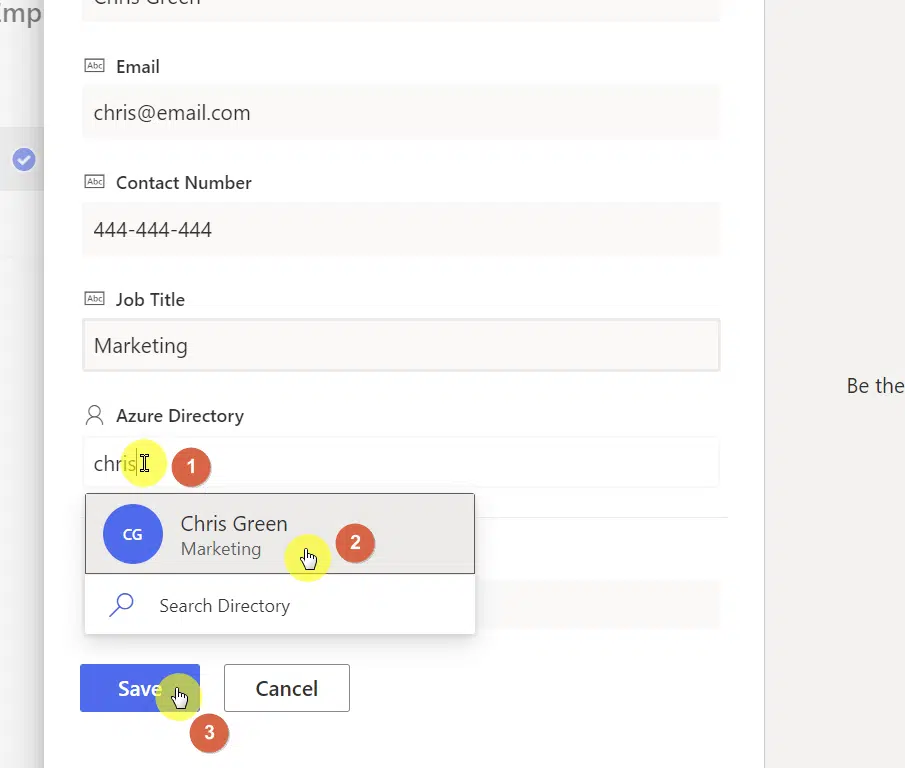
Note: If the user has a profile picture in his or her Microsoft account, then it will also show here and in any other places where the user’s account is tagged.
3. Add an “Image” column
This step is optional. But if you really want to display an image on each item, then all you need to do is add a new column.
This time, choose the “Image” option:
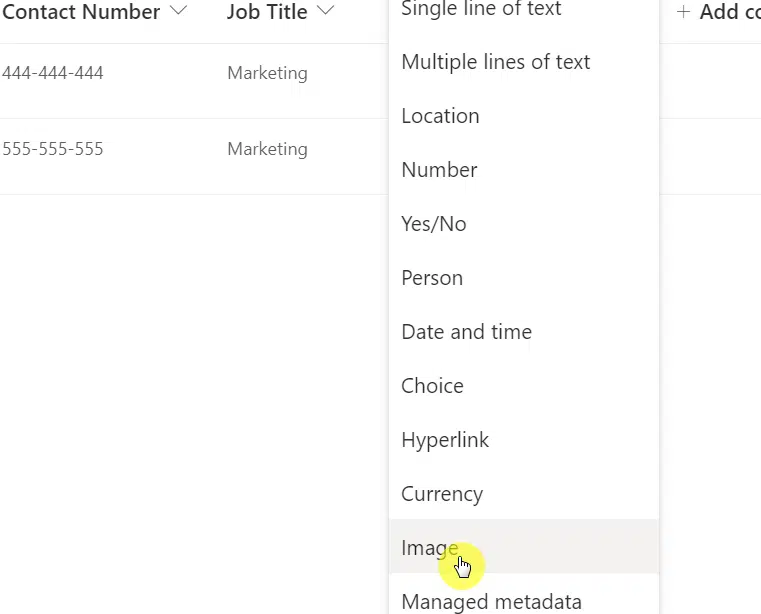
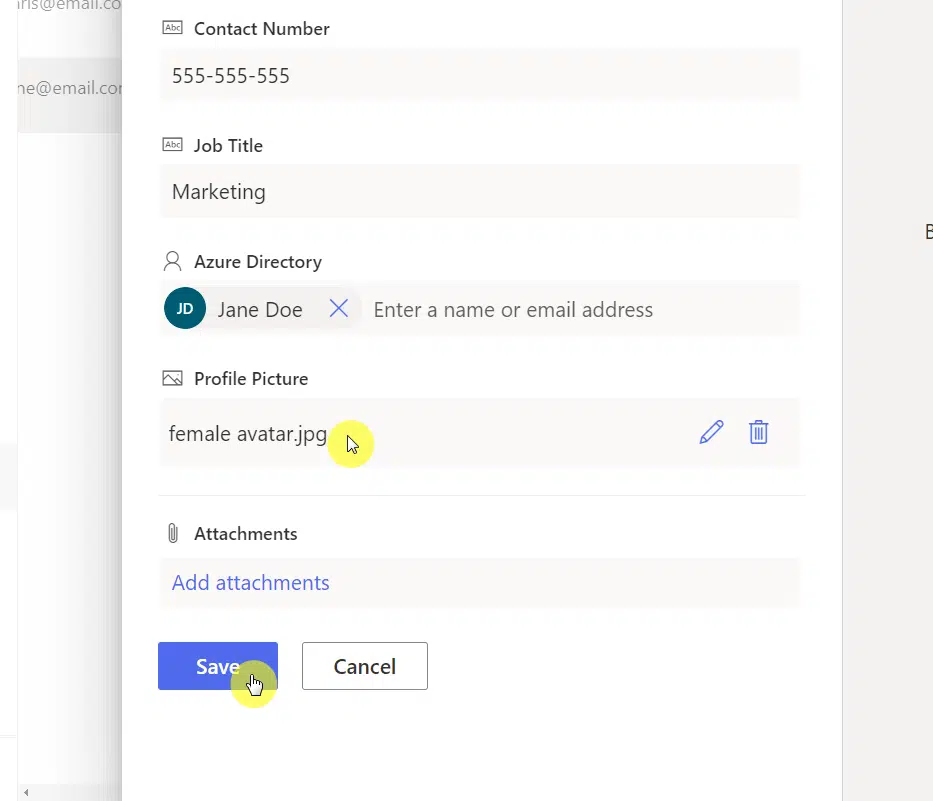
Like with the earlier step, all you need to do here is edit the list items and upload the image on the correct field.
Hit the “Save” button once you’re done.
4. Display the list on a page
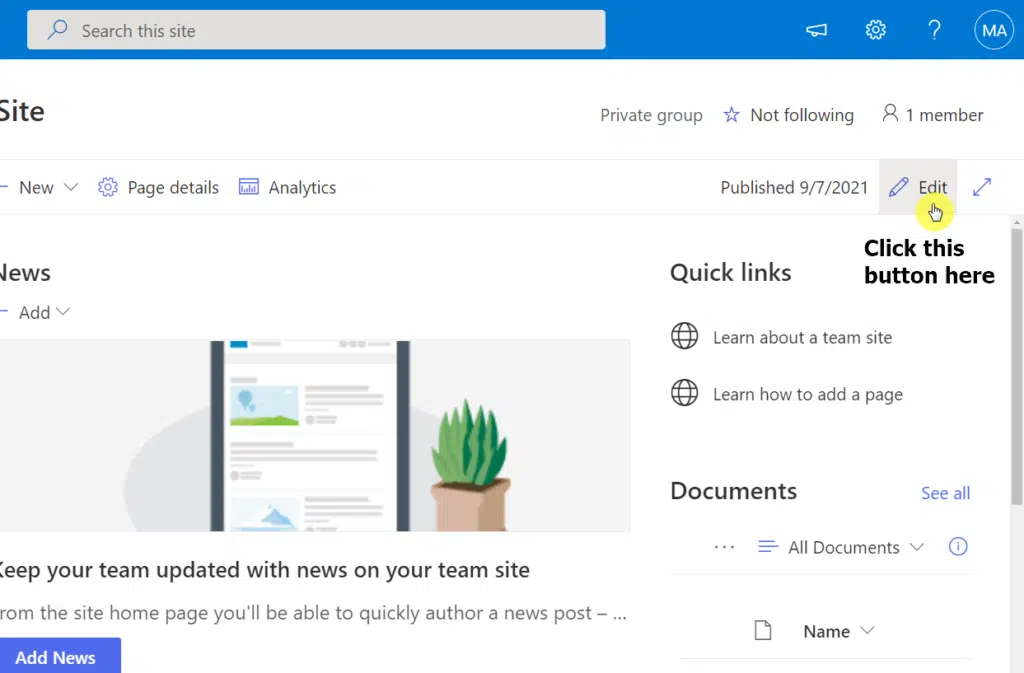
To show the list on a page, you need to edit that page first.
For example:
On the home page, you will see an “Edit” button in the upper-right section of the page:
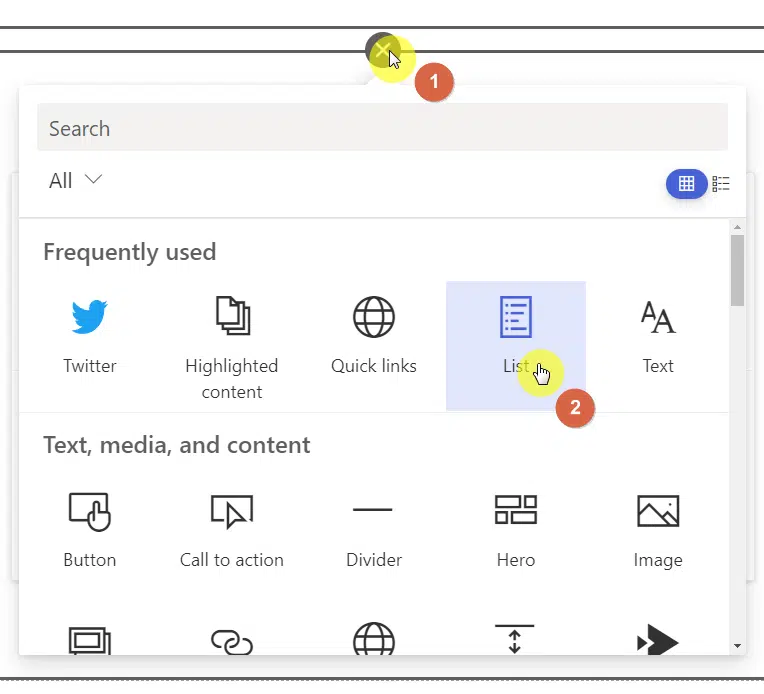
After that, select a space where you want to add the list. Hover your mouse until you see a plus icon that you can click.
Then, choose the “List” web part (you can also search for it if you can’t find it right away):
You will then see a list of all the lists that you have on the site. Select the employee directory list.
Simply publish the page and you will now see the directory list on that page.
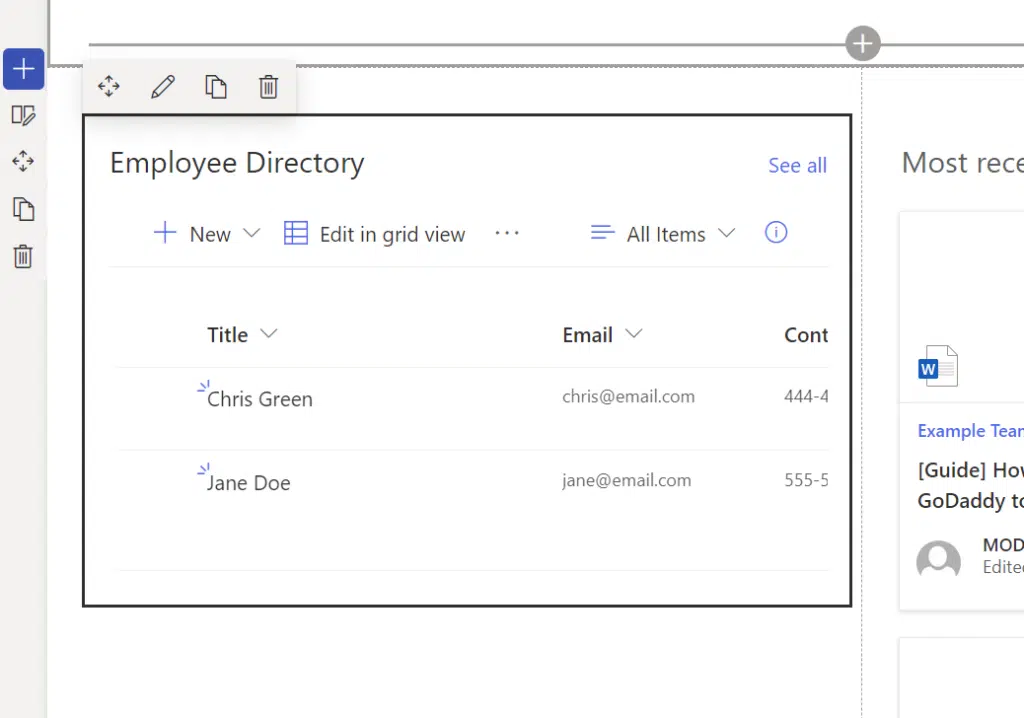
Note: If you want to display the profile picture, you may also want to put the “Image” column first so viewers will see it first.
Sign up for exclusive updates, tips, and strategies
Here are other options for showing an employee directory in SharePoint:
1. Directly show the employee directory document
If you feel like the steps and the outcome above are a little over what you expected, then you can go through it the simplest way.
Note: This still requires you to create an employee directory document though (better if you use Word than Excel) and upload it to the site.
Now, all you have to do is edit the page and use the “File Viewer” web part:
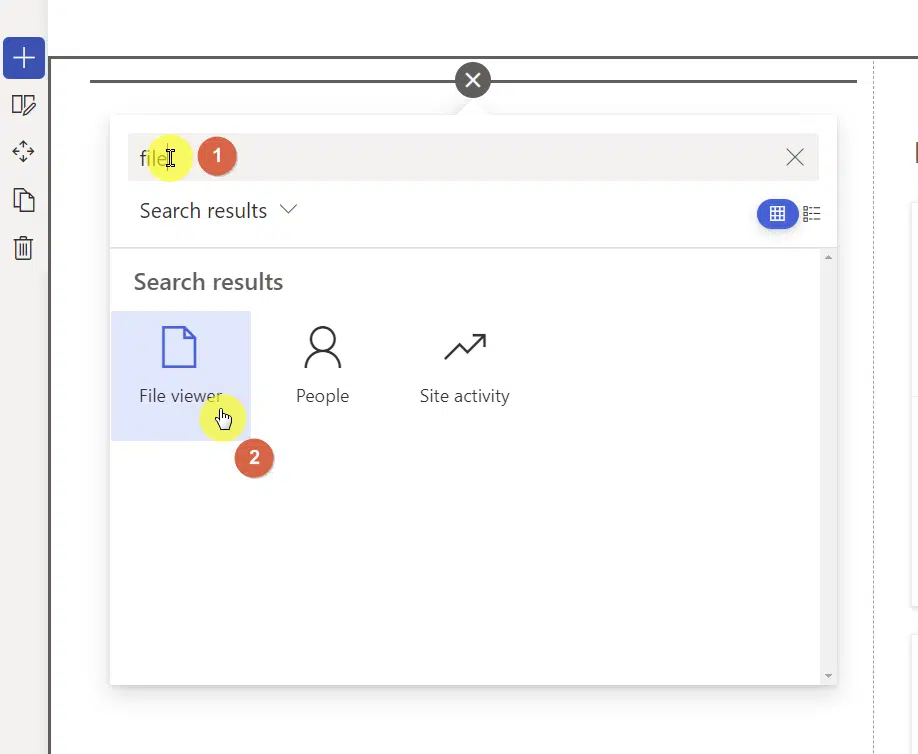
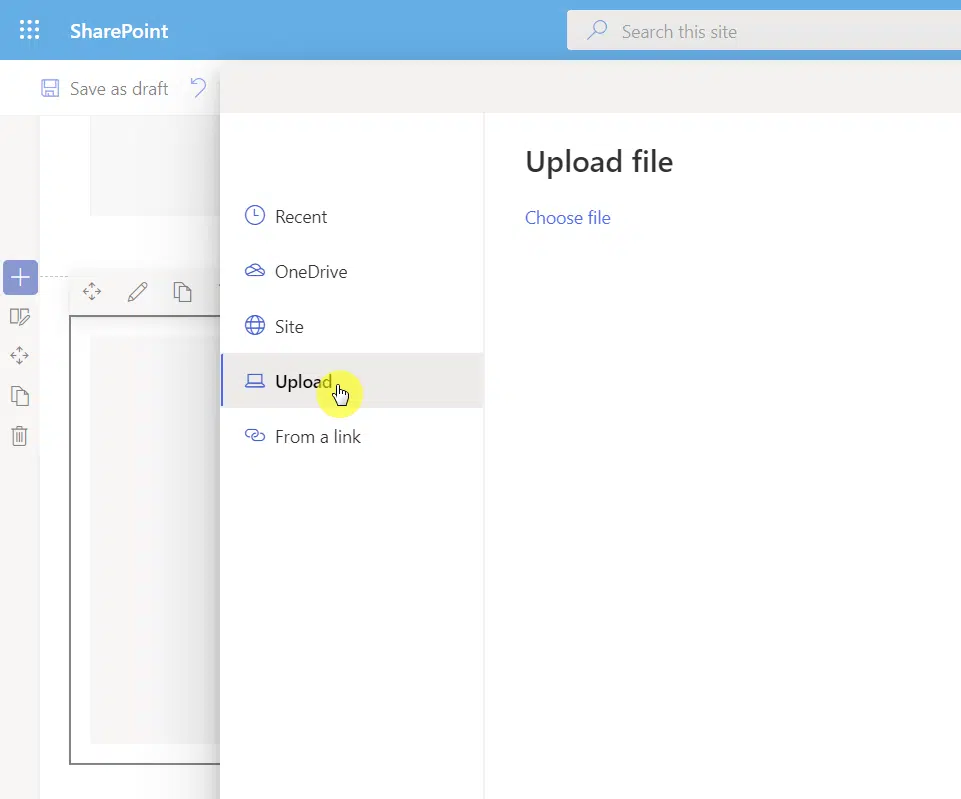
You will then be able to either upload a file or choose from a file in your OneDrive, site, or from a link. If you still need to upload the file, then choose that option.
After uploading the file, you will be able to add it to the file viewer, which will then look like this:
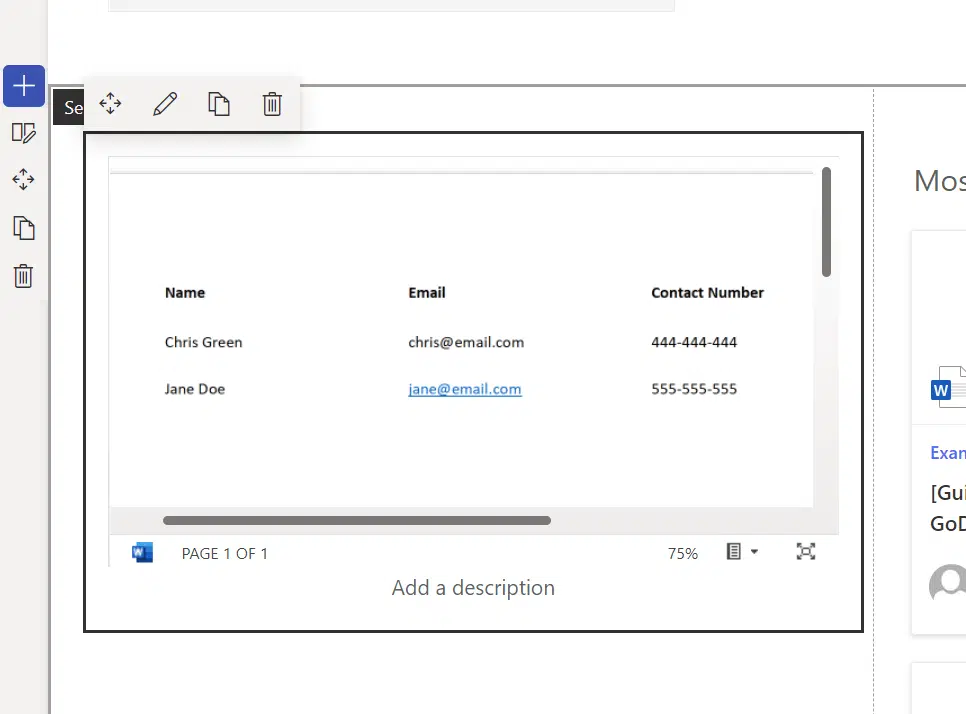
If you want to add some changes to it, you can simply open the document right inside SharePoint itself. You can also spice it up with images.
It’s simple and rudimentary, though it gets the job done if you don’t have a lot of requirements for the employee directory.
2. Use the “Organization chart” web part
The last option I suggest is the “Organization” web part that allows you to create a dynamic organization chart on the page.
Here’s how it looks:
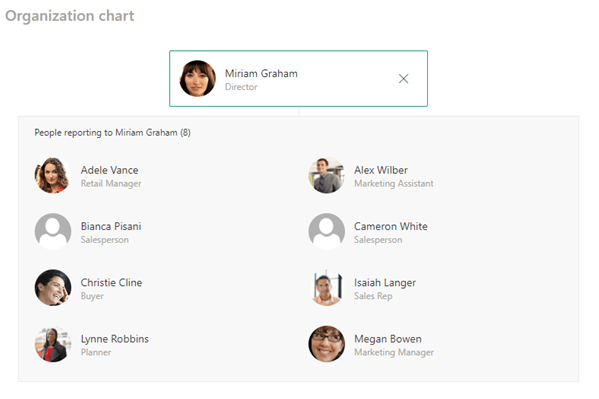
The advantage here is that you can control the levels of hierarchy you want to show while still taking advantage of how users can see more information about each employee.
The downside to this is that you can’t add external users to the organization chart. In addition, people usually use this to display leadership only.
If you want to create a list-type, dynamic employee directory that can have pictures of your employees, then the first option I gave is better.
On the downside, it involves a lot of things you need to do starting from creating a list and adding other columns to the list.
If “simplicity is the key” for you, then using the file viewer web part is more than sufficient for your needs.
Otherwise, if you wanted to display the leadership, then the organization part may prove to be more helpful and easier to set up.
Do you have some questions regarding how to create a SharePoint employee directory? If so, ask away in the comment section below.
For inquiries and concerns, please use the site’s contact form to reach out and I’ll get back to you as soon as possible.


All of these options will require lots of maintenance as you will have to update it everytime a user changes positions leaves the company or when you hire a new person. Is there not a way to sync it with AD? The only option that wouldn’t require ‘ a lot’ of maintenance is the ‘organizational chart’ but still with this option you have to create it by entering a persons name and not their position so if you have the CEO move positions you would have to update this. Also for a staff directory users will need to filter by… Read more »
I’m also very interested in a solution to minimise maintenance, possibly sync with Active Directory, and the search functionality. If anyone else finds any solutions, I’d be very keen to hear it! There has to be a way?
Hi Rachel, check my response to Josh.
I’ve just achieved this with sponline using the pnp search webparts, it filters by department and job title, and is dynamic, shows the people card with photo and tel/chat options 🙂
This is a great idea. Thanks for sharing!
Can you point me to where the instructions are to do this?
She’s referring to these web parts: https://microsoft-search.github.io/pnp-modern-search. When I get a chance, I will write a blog post on how to configure this.
Hi Josh – You could set up a Power Automate workflow which would update the list data via Azure Active Directory on a cadence of your choosing. With the custom list approach, you can pin the column filters, which would address your second question.
What are you using as the trigger for this flow?
Hi Michelle – You would create a scheduled workflow and set it to run nightly, for example. In this case the fact that it’s on a schedule would be the trigger.
How can I add photo of the employee and brief description of his/her role?
Hi Jelena – If you are using the custom list approach then you can add a person field and also a text box for you to put the description text