

Last Updated on July 27, 2023
Are you looking for a way to set up an alert whenever a document, an item, or even a folder has been changed in a SharePoint site?
Fortunately, it’s easy to create an automated alert to notify a user of any changes in a list or library.
In this article, I’ll share with you how you can easily set up an email notification alert in SharePoint.
I’ll also show you other methods to notify a user of any changes.
Let’s get started.
Table of Contents:
- How to create an email notification alert in SharePoint?
- How to edit or delete an email notification alert in SharePoint?
- Is it possible to create a SharePoint alert for groups?
- What are the other methods of notifying a user of changes in SharePoint?
- Get updated by creating SharePoint email notification alerts
It’s quite easy to set up an email notification alert on any list or library in SharePoint.
Simply navigate to the list or library where you want to set up an alert.
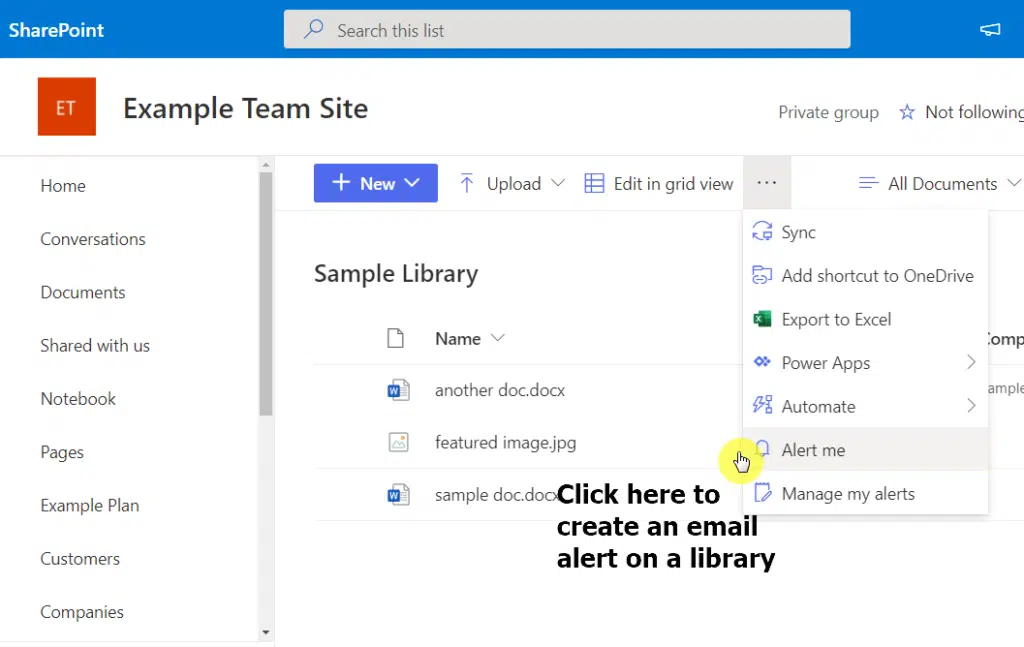
Once there, you will see an “Alert me” option right on the command bar.
For example, here is where you can find the option on a library:
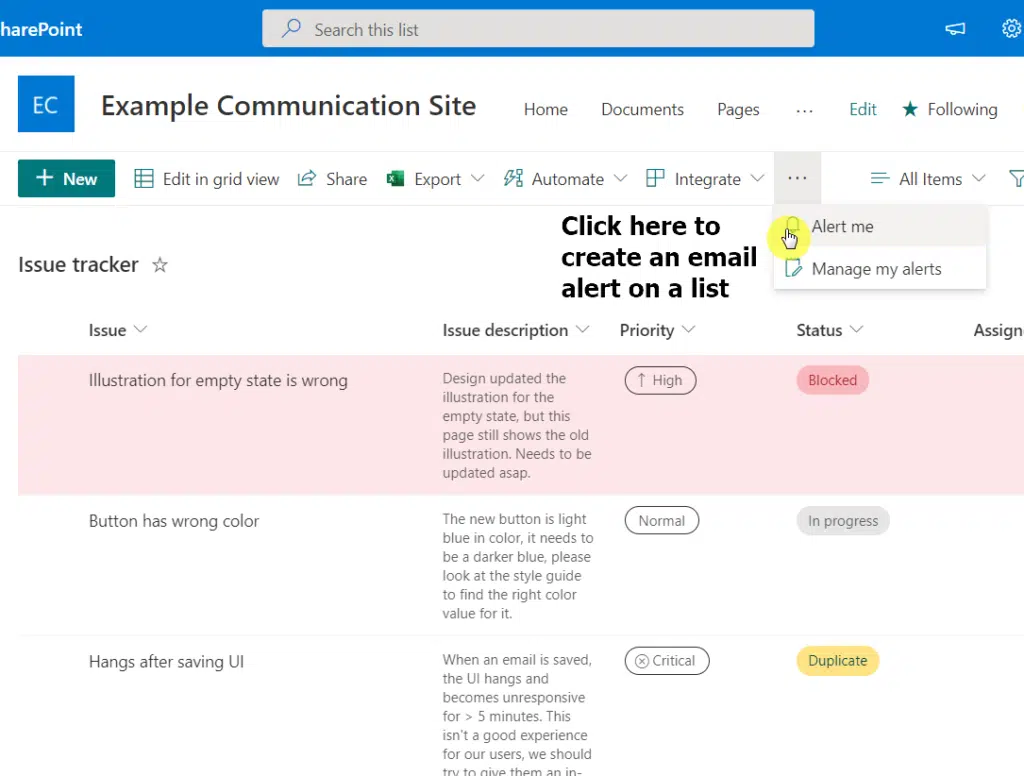
On the other hand, here it is on a list:
One thing you should know is that whether you use SharePoint Online or the On-Premise version, the process is basically the same.
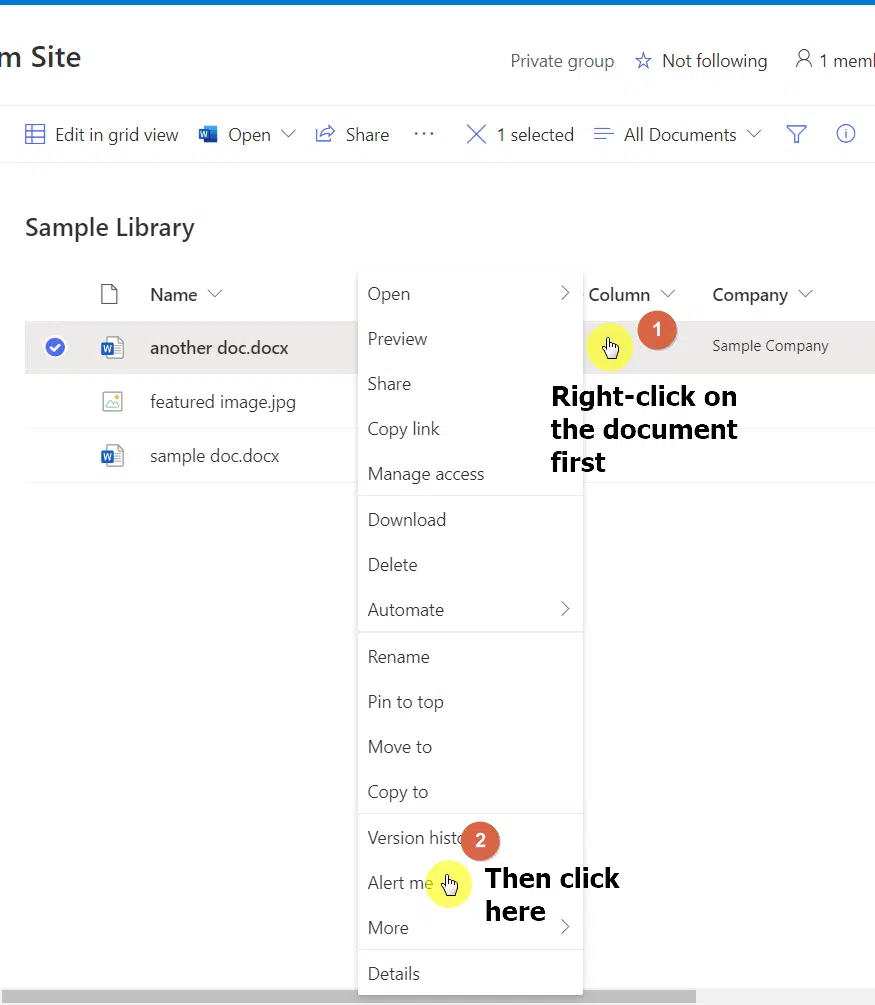
The slight difference is that with SharePoint Online, you can also set up an alert for a specific item on a list or library.
To do so, all you need to do is right-click on a specific document or list item and select “Alert me” from the options.
For example, you can do it with a specific Word document on a library:
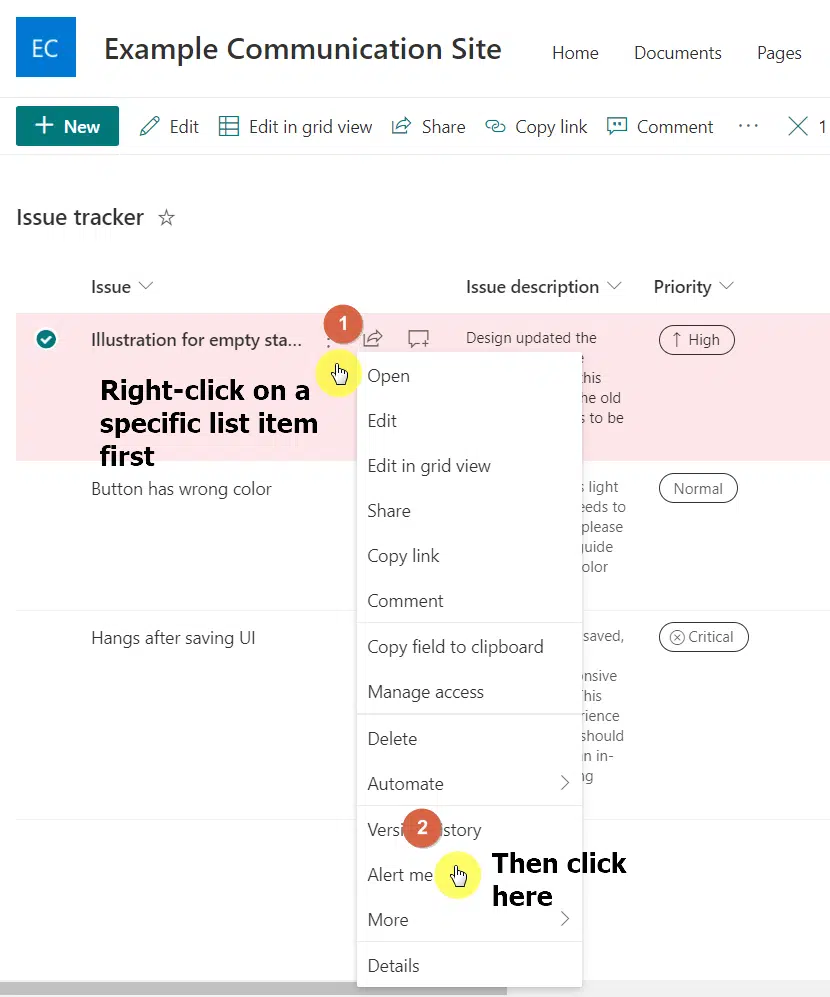
If you’re working with a list, then right-click on a specific record first:
By the way, if you’re not seeing the option, then that’s because you don’t have permission to manage the alerts for the site or list.
To be able to create email alert notifications, you must be the site owner or at least given permission to manage the site (or the specific list or library).
To continue, once you select the “Alert me” option, a window will appear where you can tweak the alert settings.
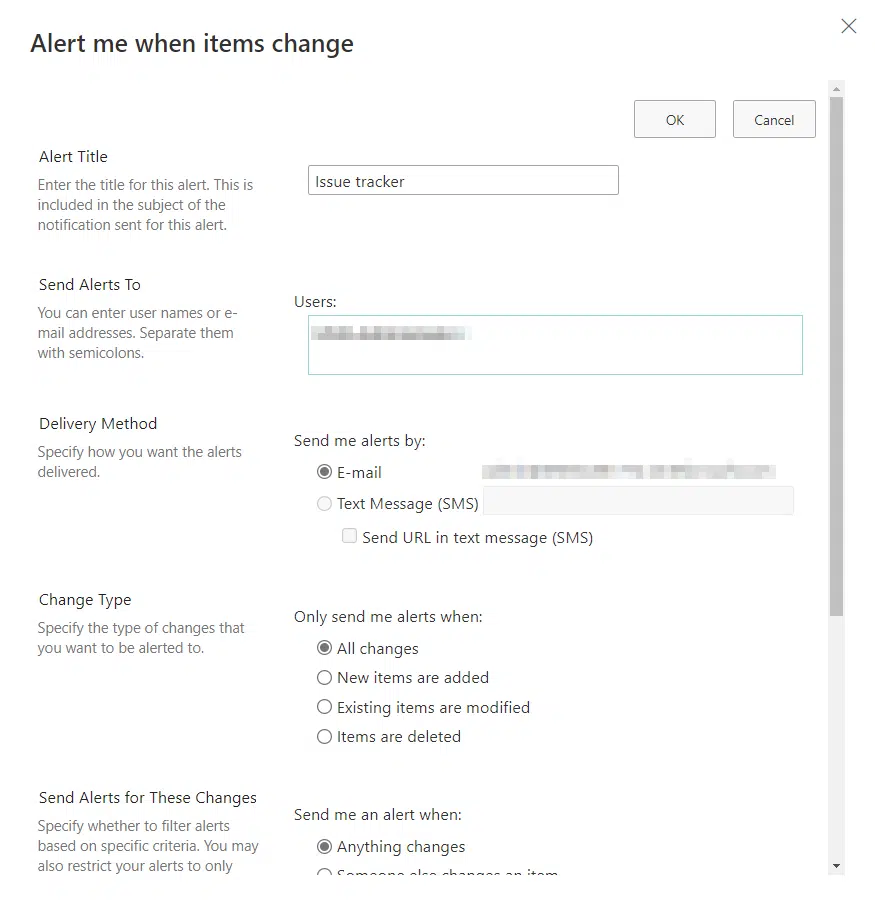
In the first part, you will be able to change the alert name or leave its default name, which is the name of the list or library.
You can also see that you can add or remove users who will receive the alert and what delivery method to use (email, by default).
You can also change when you will receive alerts. By default, the system will notify the users entered of all changes.
The next part is related to the one mentioned above and basically asks you if you want to be alerted of all changes made by anyone who has access.
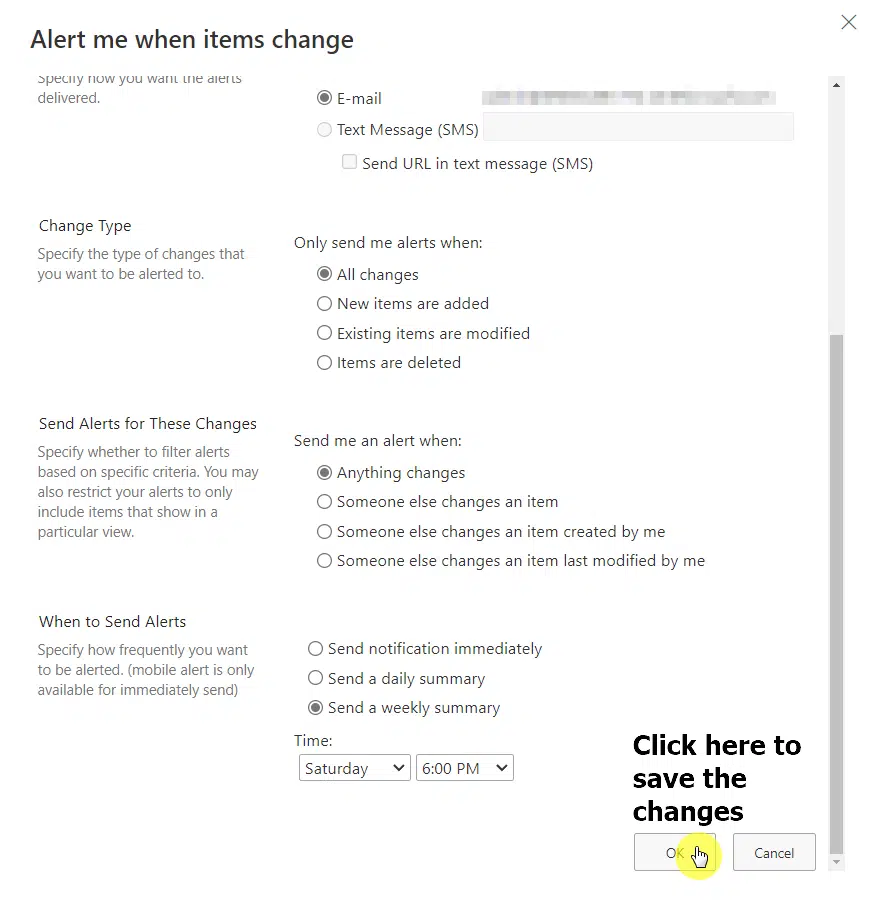
Lastly, you will be able to configure the frequency of the alerts.
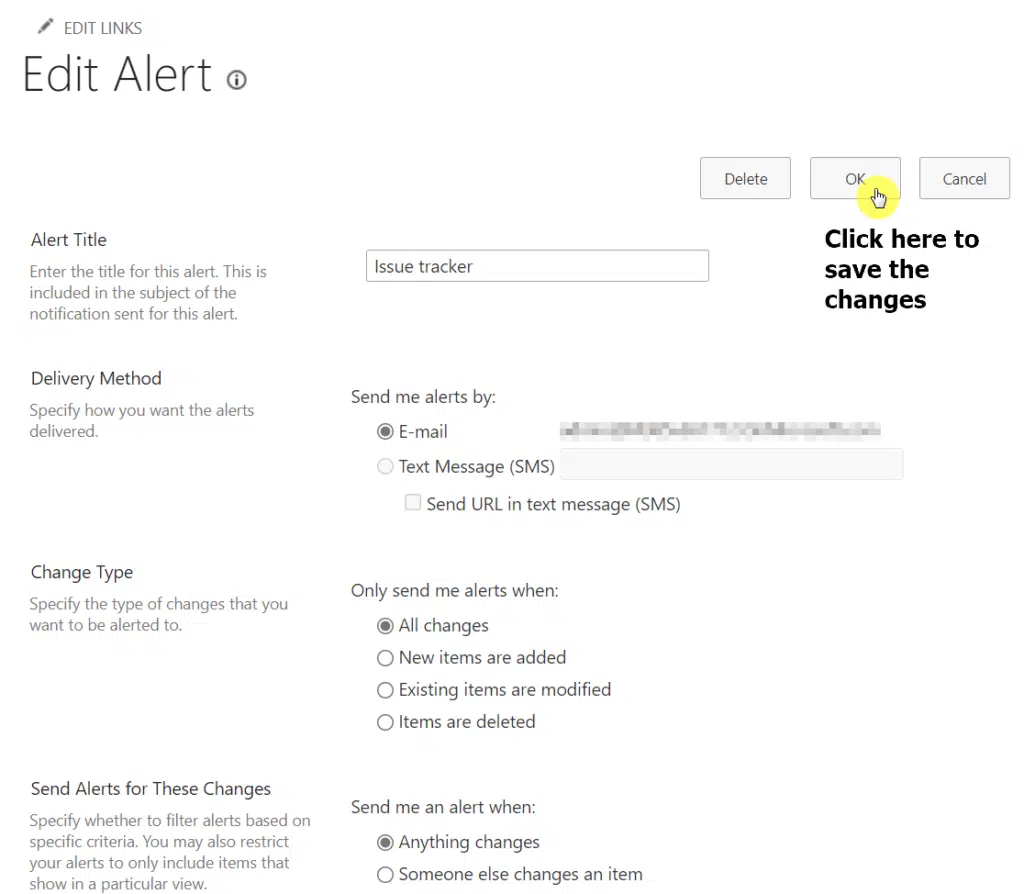
Once you’re satisfied with everything, click the “OK” button at the bottom to save the changes.
Sign up for exclusive updates, tips, and strategies
But what if you want to change something about the alert? Like maybe you want to change the frequency of the alerts to daily.
The answer is simple:
Go to the command bar again and this time, click the “Manage my alerts” option.
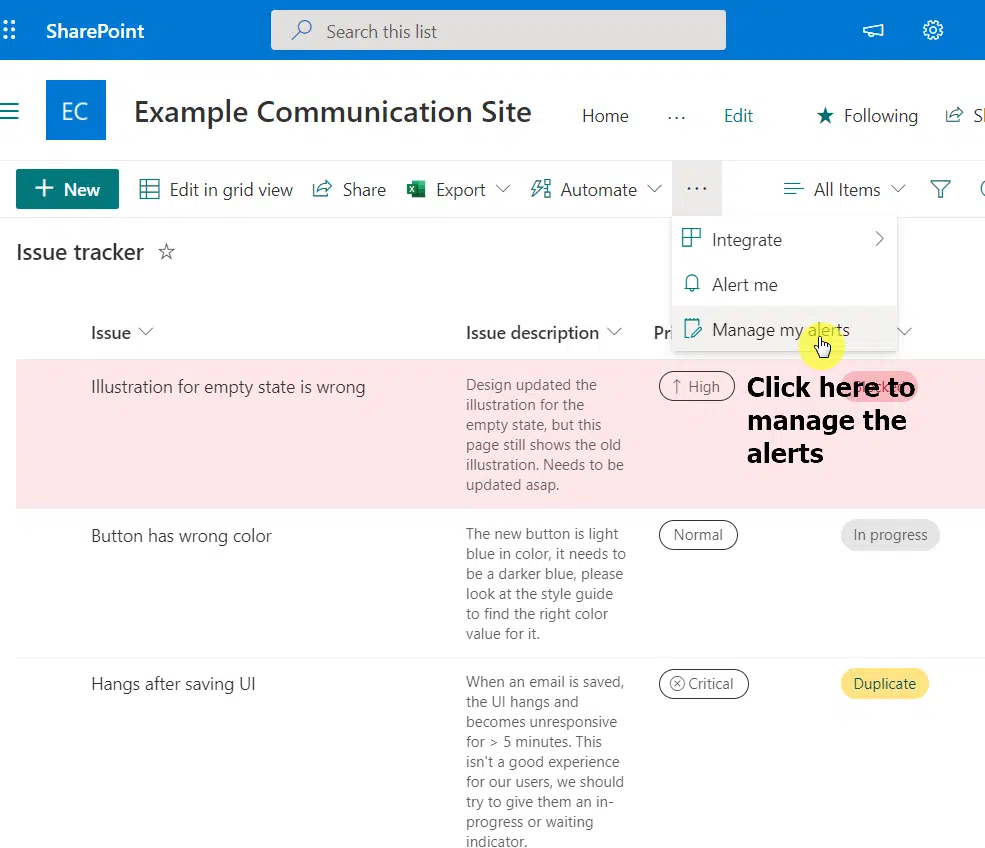
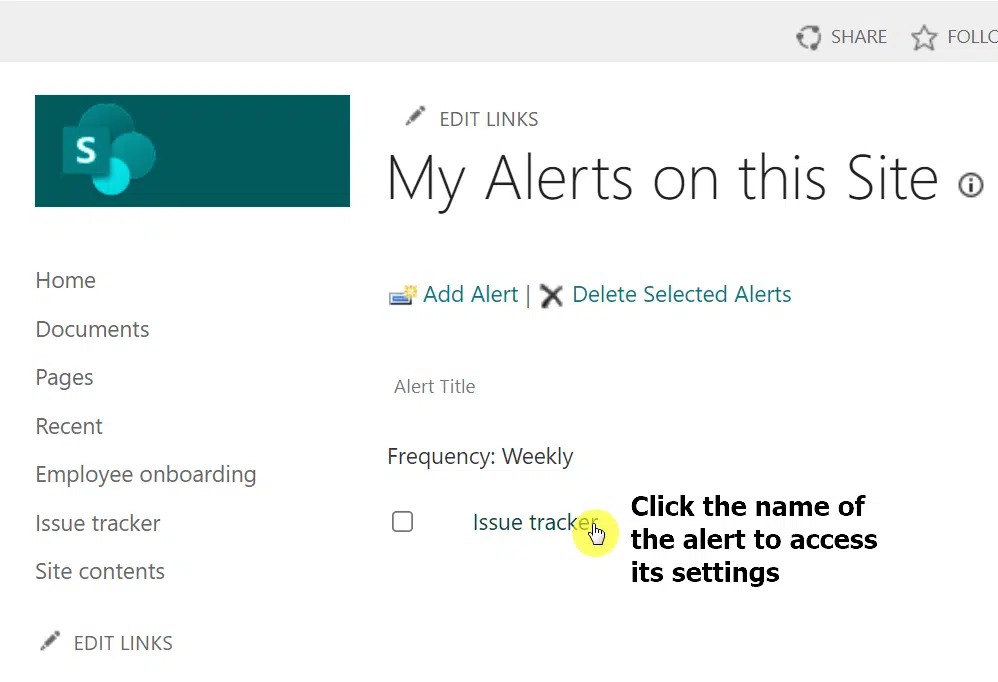
A new window will open on the browser where you can see all the alerts created on the site.
To delete an alert, simply tick its checkbox and click the “Delete Selected Alerts” on the top.
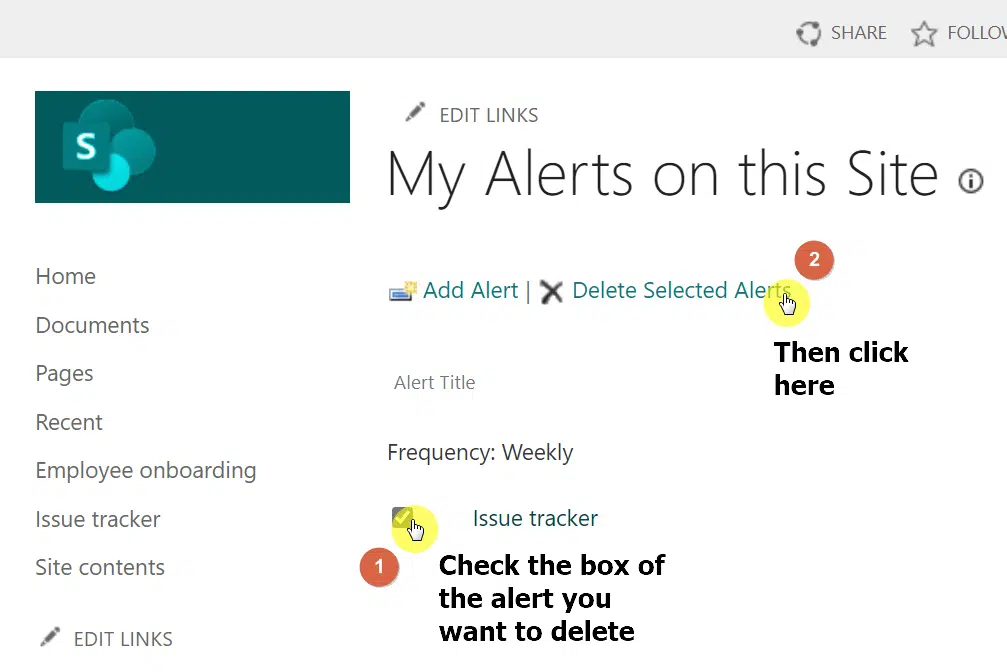
To access the settings of the alert and change it, click on its name on the page.
On the next page, you will see the same settings as when you created the alert.
Simply make the changes you want and click the “OK” button.
Yes, you can create an email alert for groups the same way you create an alert for yourself and any individuals.

But there’s a twist:
You can’t add a specific group per se while setting up the alert.
That means you will have to add all the members of the group individually.
Fortunately, there are two workarounds that you can try:
- Get all the emails of the group members from Outlook (check messages sent to everyone in the group). Then, copy and paste everything on the list to the “Send Alerts to” field on SharePoint.
- Create a forwarding rule in your own email to send alerts to everyone in the group. This will reroute all SharePoint email notification alerts to all the email addresses you indicated in the forwarding rule.
Related: How to Forward a Folder of Emails in Outlook (Using Rules)
Aside from the alert route, there are other ways you can notify a user of any changes made in a list or library.
One of them is by creating a rule.
To do so, simply navigate to the list or library.
Then, click the “Automate” button on the command bar and select the “Create a rule” option.
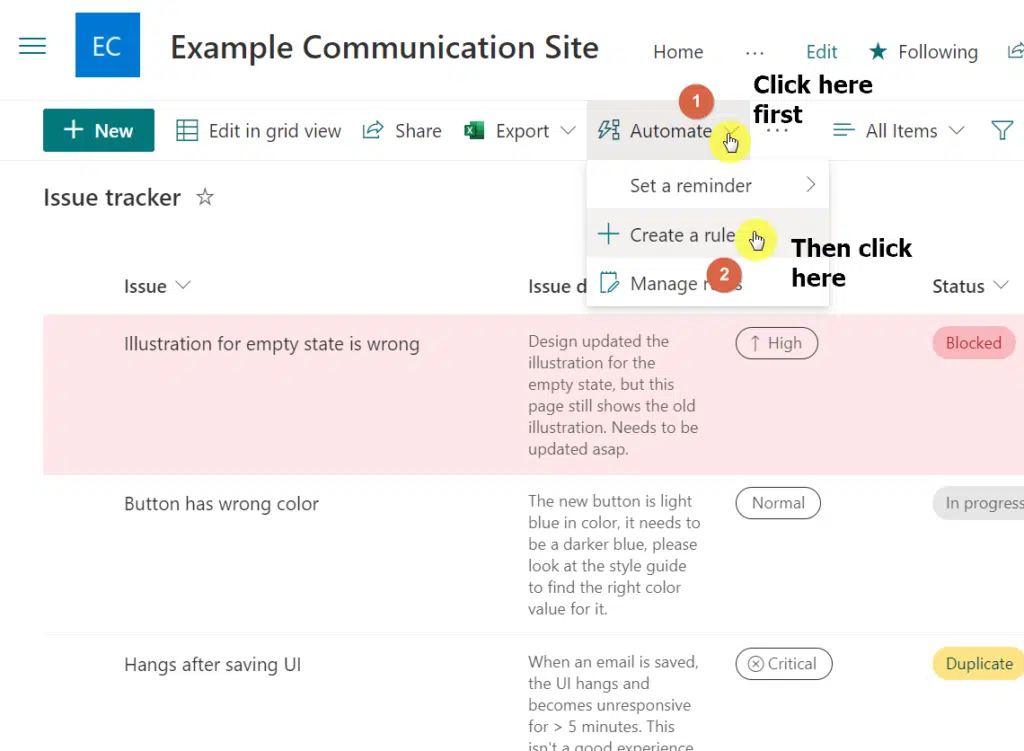
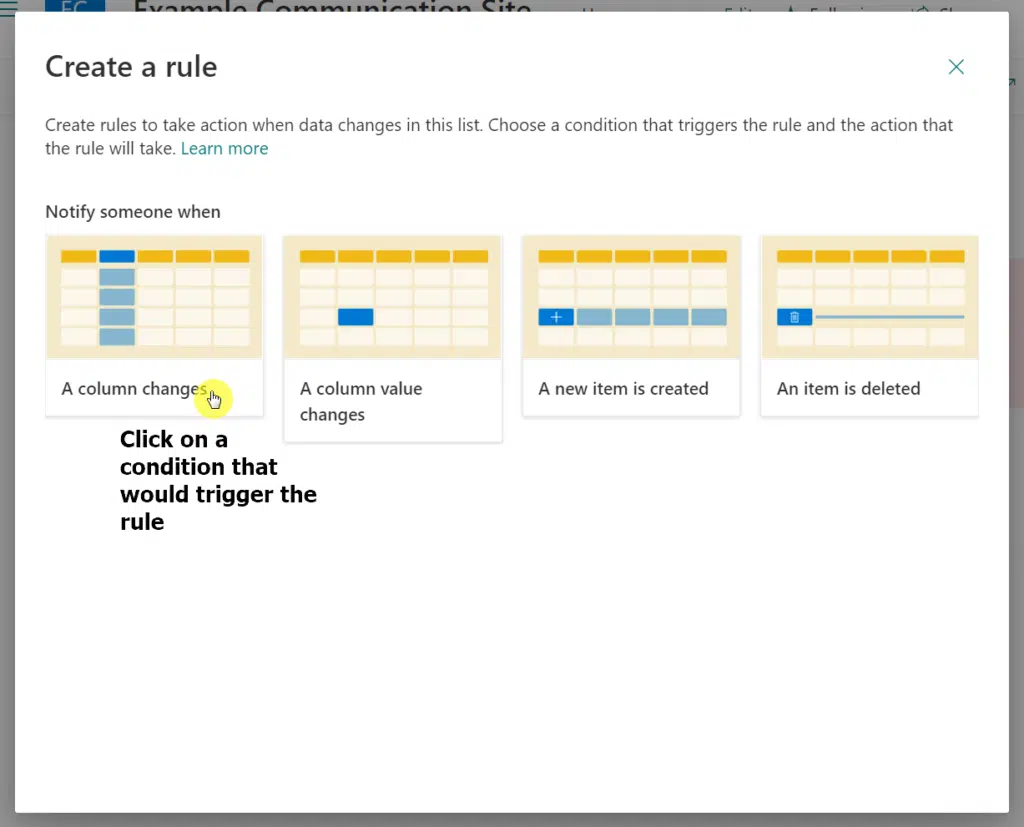
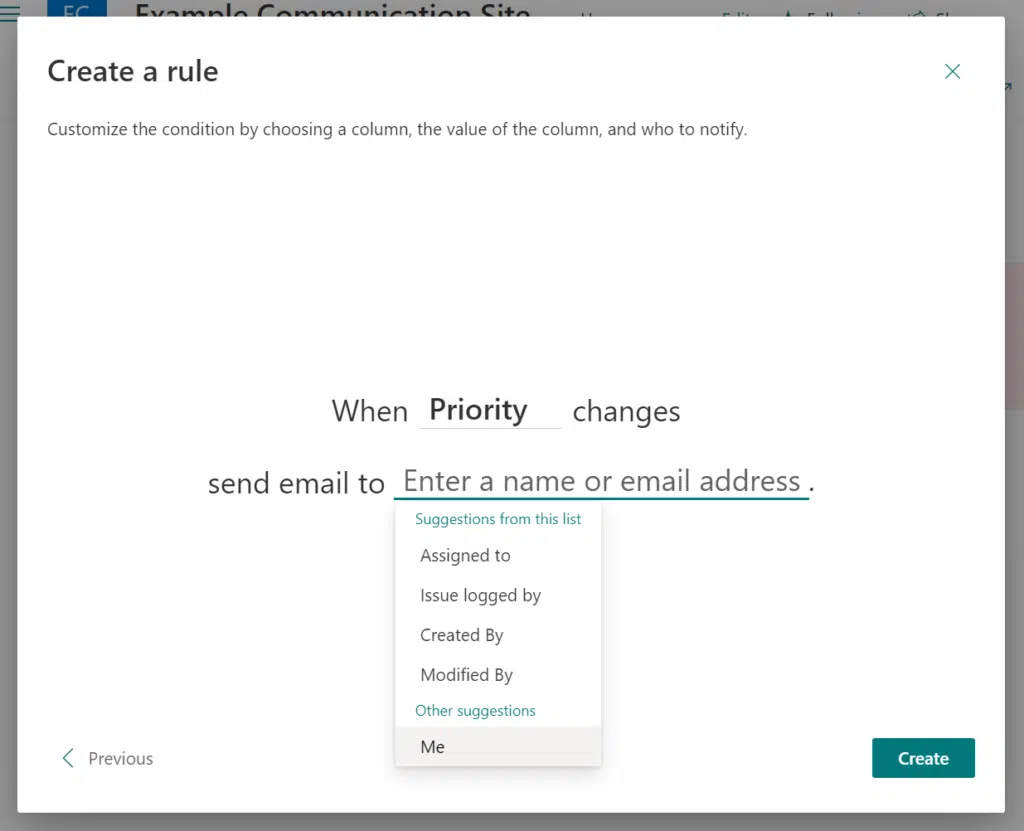
On the pop-up window, select the specific trigger for the rule.
For example, you can select to be notified when a column changes.
After that, you must complete the whole rule by choosing the right values. The last part is always the same where you indicate where to send the email.
Once you’re done, simply click on the “Create” button at the bottom of the window.
Now, the other method to notify someone of any changes is by using SharePoint Flow.
It’s basically a pre-configured application that would automate some processes on SharePoint based on a set of conditions.
Microsoft has prepared triggers you can use to start a flow.
Designing your own flow might be a bit complicated. It’s better if you start with a template first.
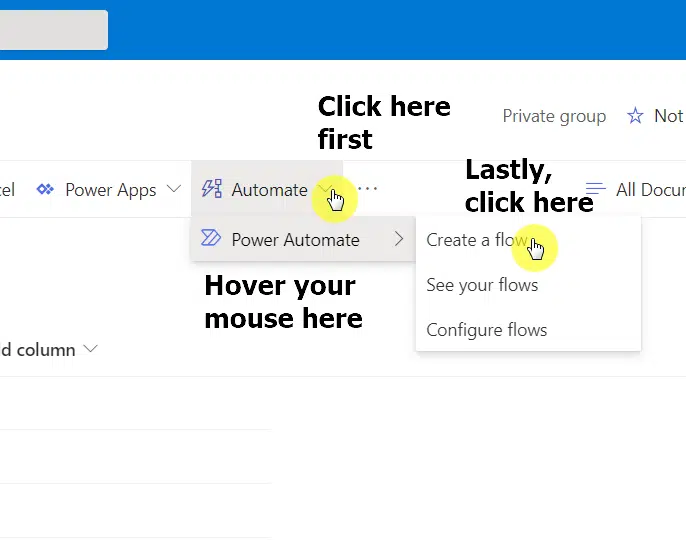
To create a flow from a template, all you need to do is follow these steps:
- Click “Automate” on the command bar
- Hover your mouse over “Power Automate”
- Click the “Create a flow” option
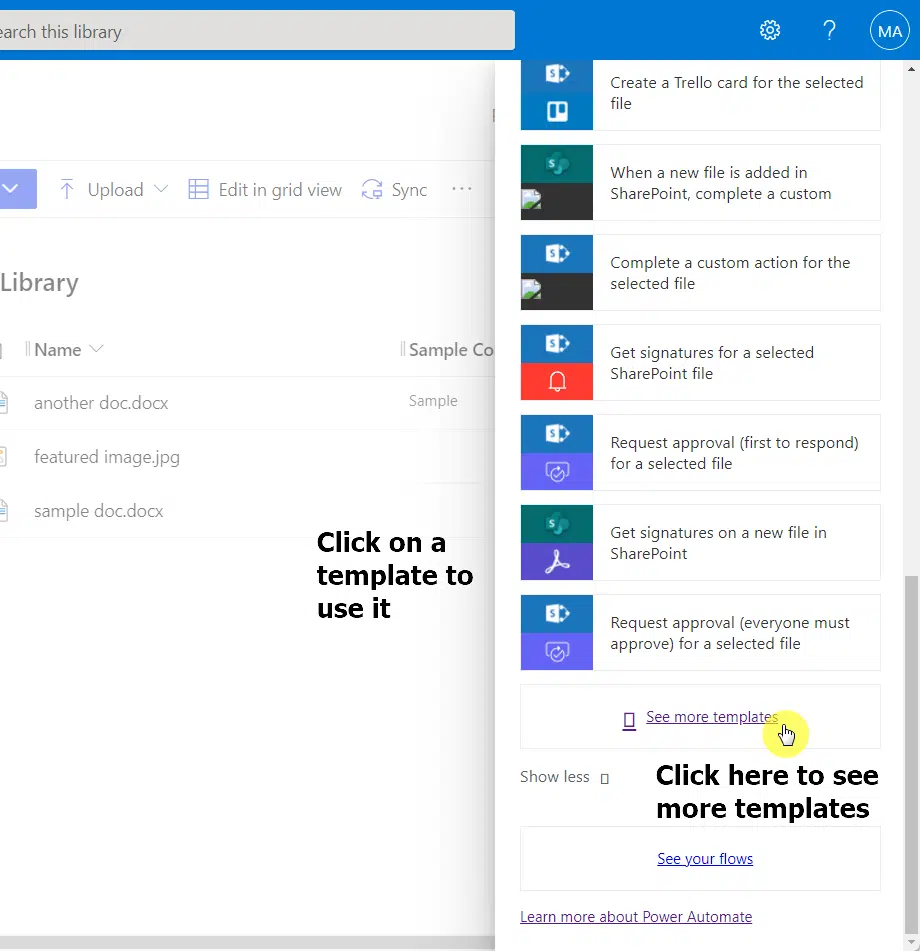
Then, a right-hand pane will appear.
You can then click on any template you like, or click the button at the bottom to see more templates from the flow library.
Note: I actually wrote a basic guide on how to use SharePoint Flow. Feel free to read the guide to get started.
SharePoint email notification alerts are a great way to get updated on any changes made in SharePoint.
The easiest way to do it is by setting up an alert straight from the list or library.
But if that doesn’t work out, you can always create a rule instead or use SharePoint Flow.
Do you have any questions regarding email notification alerts in SharePoint?
If so, kindly leave a comment below and share your questions or concerns. You can also reach me directly through my contact page.


Great article! Just came across this whilst looking for a solution to something. Is there a way of changing the alert from Email address so it doesn’t say from ‘’?
Many Thanks in advance.
Great article, Can i change the from address in alert email