

Last Updated on March 30, 2025
Want to reindex your list or library?
In this guide, you will learn how to easily reindex a list in SharePoint Online using both the interface and PowerShell.
Let’s get started.
Table of Contents:
Not a lot of users know that you can actually submit a list or library for reindexing manually.
There are three reasons why you might consider doing this:
- Update search results
- Improves search relevance and efficiency
- Resolves issues with search crawling
When you reindex a list or library, it forces the search engine to update its search index for that list or library.
This is significant when you make important changes to the list or library’s schema , like adding or removing columns.
There are issues when certain items or documents don’t appear in the search results, reindexing might resolve this.
Sign up for exclusive updates, tips, and strategies
There is actually a reindexing button hidden in the advanced settings of a list or library.
Follow these steps:
Step 1: Open the list settings
Navigate to the SharePoint document library or list that you want to reindex.
Open the list/library settings panel (gear icon) and select list settings from the options:
Step 2: Go to the advanced settings
On the next page, find the button for the advanced settings.
It’s under the general settings section:

Step 3: Reindex the list
Now that you’re in the advanced settings, simply scroll down until you see the reindex list.
Then click the reindex list button.
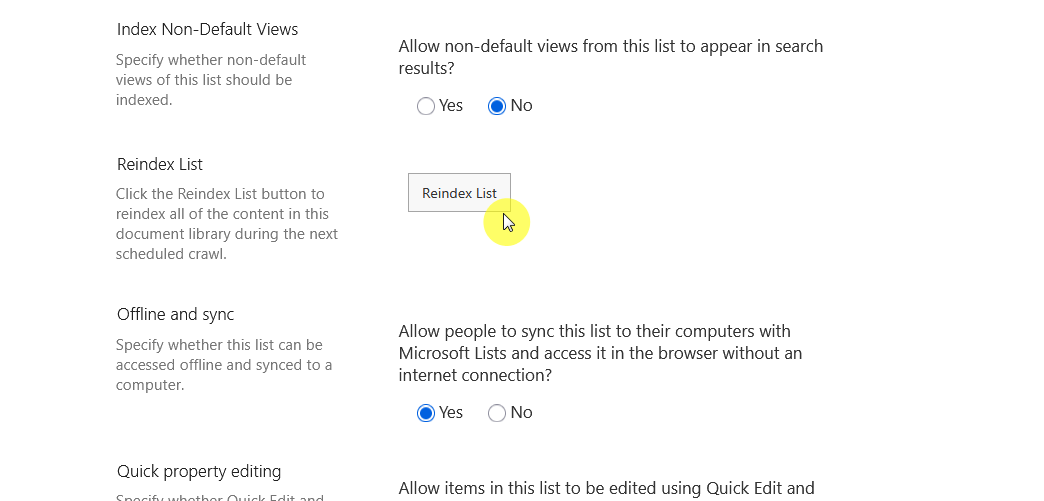
You will then see a box where you need to acknowledge that the reindexing might get delayed.
Tick the checkbox and click the reindex list button once again.
You can also reindex the whole site similarly by going to the site settings > search and offline availability > click reindex site.
If you want a more efficient method, you can also use PowerShell.
You can use this script:
# Config Variables
$SiteURL = "https://tenant.sharepoint.com/"
$ListName = "List Name"

# Connect to PnP Online
Connect-PnPOnline -Url $SiteURL -UseWebLogin

# Request Reindex of the specified list
Request-PnPReIndexList -Identity $ListName

# Output confirmation
Write-Output "Requested reindex for the list: '$ListName'.”
After that, SharePoint’s search engine will queue the list or document library for the next scheduled crawl.
With PowerShell, you can simply change the name of the list (and the SharePoint site) — faster than visiting each list.
Got any questions about reindexing a list or library in SharePoint? Feel free to leave a comment below.
For any business-related questions or concerns, send me a message using the contact form. I’ll reply promptly.


