
Last Updated on January 18, 2025
How do you publish anything?
In this guide, let’s talk about publishing in SharePoint Online including documents, files, and pages.
Let’s get started.
Table of Contents:
Classic vs Modern Publishing Features
SharePoint Online offers two approaches for publishing: classic and modern.
Each has its unique characteristics and use cases:
- Classic publishing: Uses structured page layouts and master pages.
- Modern publishing: Focuses on responsive design and user-friendly editing.
- Customization: Classic allows extensive customization; modern prioritizes simplicity.
- Workflows: Classic supports complex approval workflows; modern uses Microsoft Flow.
Nowadays, most users are used to the modern experience and prefer its faster and more responsive content creation.
But when deciding between the two, consider your audience’s needs and the type of content you’re publishing.
Modern sites are continuously updated by Microsoft, making them more future-proof for evolving business requirements.
👉 Related: SharePoint Classic vs Modern Experience (Comparison)
Sign up for exclusive updates, tips, and strategies
How to Publish Documents and Files
Publishing documents in SharePoint Online is straightforward.
Here’s a quick breakdown of the steps:
- Check-in documents: Ensure your document is checked in to make it available to others.
- Versioning: Publish a major version to mark it as complete.
- Content approval: Enable approval if necessary for controlled publishing.
To publish, simply upload your document into a document library:
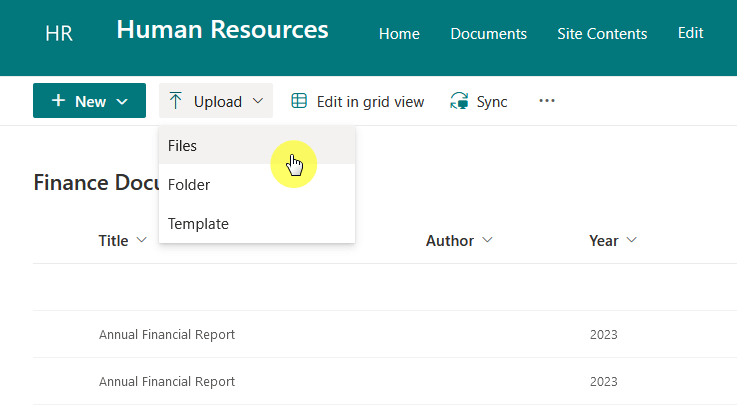
You can also directly create documents here through the “New” button and it will save the document on this library.
With versioning, users will only see published versions while content approval ensures that only authorized documents go live.
Remember to assign proper permissions to avoid accidental edits or unauthorized access.
👉 Related: How to Upload Files and Documents to a SharePoint Library
How to Publish Site Pages
Publishing site pages in SharePoint Online helps share content with your team or audience.
The first is to edit a page, or create a new one through the “New” button:
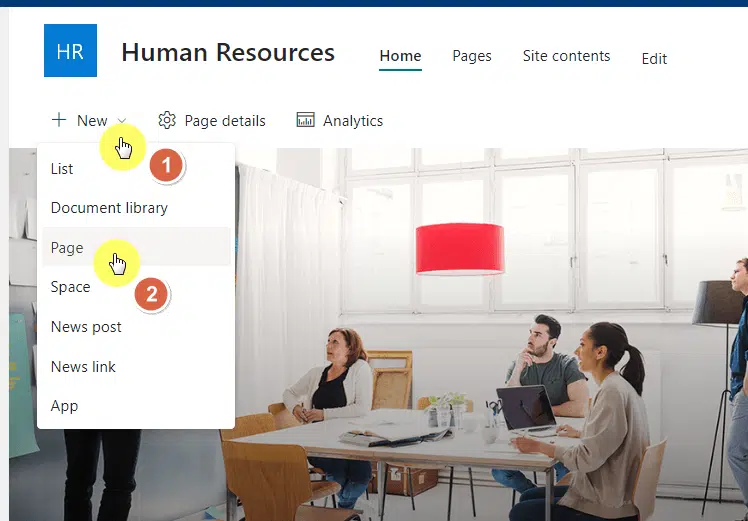
There are some steps here in between, like choosing a page template, writing the actual content, etc.
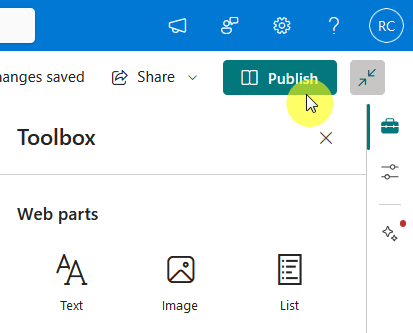
Changes are automatically saved, though you can also click the “Save as draft” button in the command bar.
Once you’re ready to publish, there’s a button for it in the top-right corner:
You can also schedule a page to publish at a specific time.
If approval workflows are enabled, pages must be reviewed before publishing.
Always review your content thoroughly before hitting publish.
👉 Related: How to Create a Page in SharePoint Online: Tutorial
Managing Content Types
Content types in SharePoint help organize and standardize content.
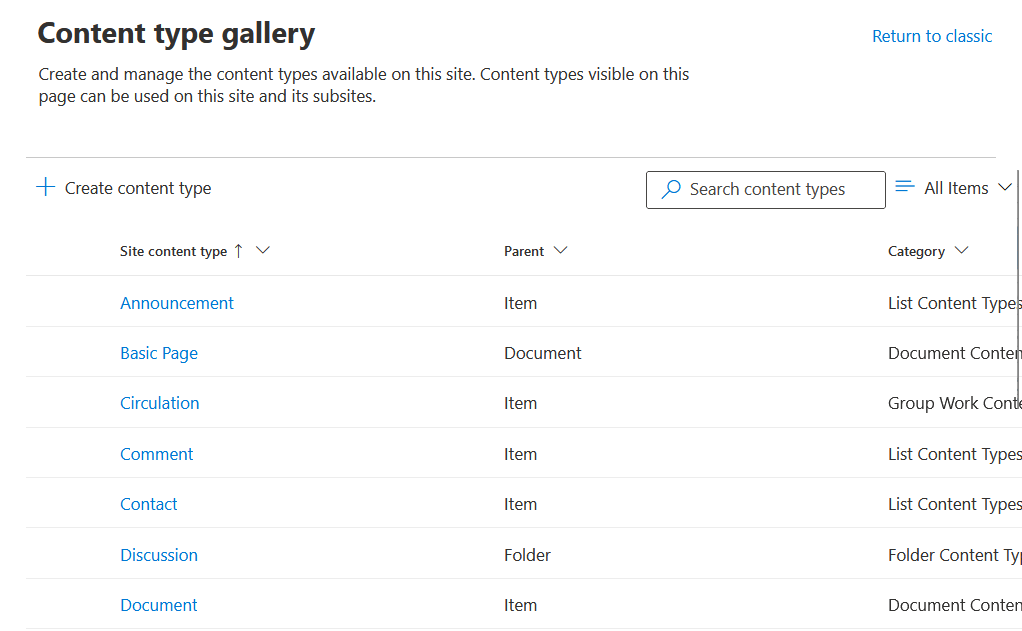
Managing them ensures consistency across your sites:
- Create new content types: Define custom types for your specific needs.
- Publish content types: Use the content type hub for central management.
- Update or unpublish: Modify or remove content types as needed.
Content types can include metadata, templates, and workflows for efficiency.
Publishing through the content type hub allows updates to propagate across all connected sites.
This saves time and maintains uniformity.
👉 Related: How to Create Modern Content Types: The Ultimate Guide
Do you have any questions about publishing anything in SharePoint Online? Let me know below.
For any business-related queries or concerns, contact me through the contact form. I always reply. 🙂


