Last Updated on December 31, 2022
There are three migration tools you can use with SharePoint, each has its own purpose.
The first one, the so-called “migration manager”, enables you to copy on-premises files to Microsoft 365. The other one is to copy from the SharePoint server.
One of the most recent additions to this is the Mover migration tool, which will enable you to copy content from other cloud services to Microsoft 365.
If you need to migrate your files from Google Drive and Dropbox to SharePoint Online or Office 365, this is what you need to use.
Let’s explore the Mover tool much further…
Table of Contents:
What is the Mover migration tool?
Mover is a cloud-to-cloud migration tool that Microsoft bought last 2019.
Through it, you can move content and files from a cloud service including Box, Dropbox, Google Drive, and Egnyte, to Microsoft’s OneDrive and SharePoint Online services.

It’s a self-service solution designed to help companies move their cloud workspaces into Microsoft’s ecosystem.
Mover works by downloading your content and files to a temporary server and then uploading them to your Office 365.
There’s no need to worry about the temporary server since all the files are deleted once the upload is successful.
In addition, once the whole migration is complete, the temporary server, which resides in Office 365, will be destroyed.
The log data also expires in 90 days and will never be retained by Microsoft.
Note: If you want to read more about it, check out Microsoft’s documentation on Mover cloud migration.
Sign up for exclusive updates, tips, and strategies
How to set up the destination directory?
If you’re looking to migrate from the cloud service you’re using, it’s tempting to go straight into it and start the migration.
But before you do that, make sure that the destination directory is ready for it.
If not, you will have a lot of work to do right after migrating your content and files. Well, it might be okay if you only have a handful of files.
But what if you have thousands of files and hundreds of folders? It will take hours before you finish organizing everything that you have migrated.
That’s why before you start, publish multiple sites first (if needed) and set up various document libraries for your files.
If the organization is quite complicated, then you must also think about creating a sort of user guide.
After that, you can now proceed with the next step…
How to access the Mover migration tool?
There are two ways to access the tool:
- Start from the SharePoint admin center
- Go directly to Mover’s website
Unless you already have the admin center opened, you can skip it and go directly to the tool’s website.
From the SharePoint admin center, click “Migration” from the left pane and find the “Go to Mover” box.
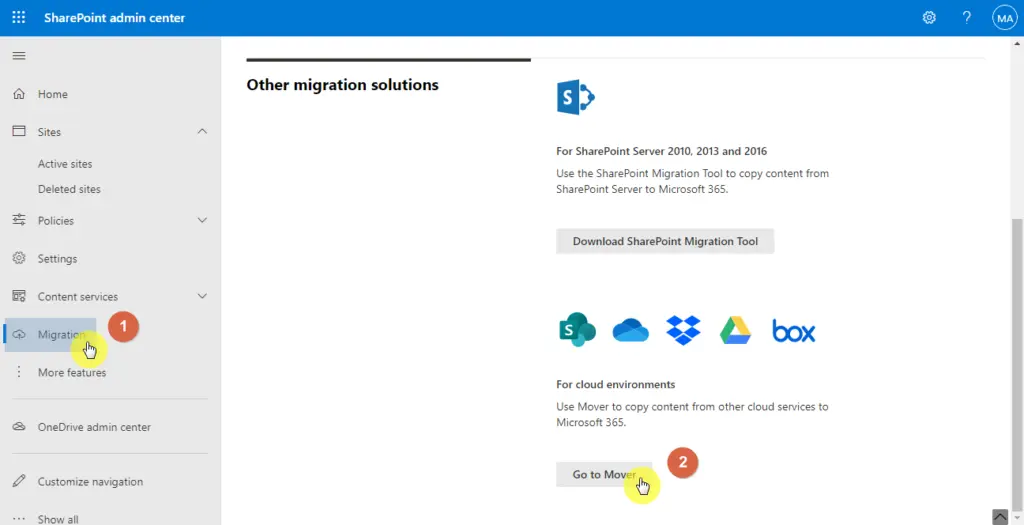
If you don’t know how to access the SharePoint admin center, all you have to do is open the app launcher from any SharePoint site and click on the “Admin” app.
After you click on the box, you will be brought to Mover’s website.
From here, all you have to do is scroll down a little bit and click on the “Migrate Now” button.
There’s also another button below the website that you can click. Both will get you to the next step.
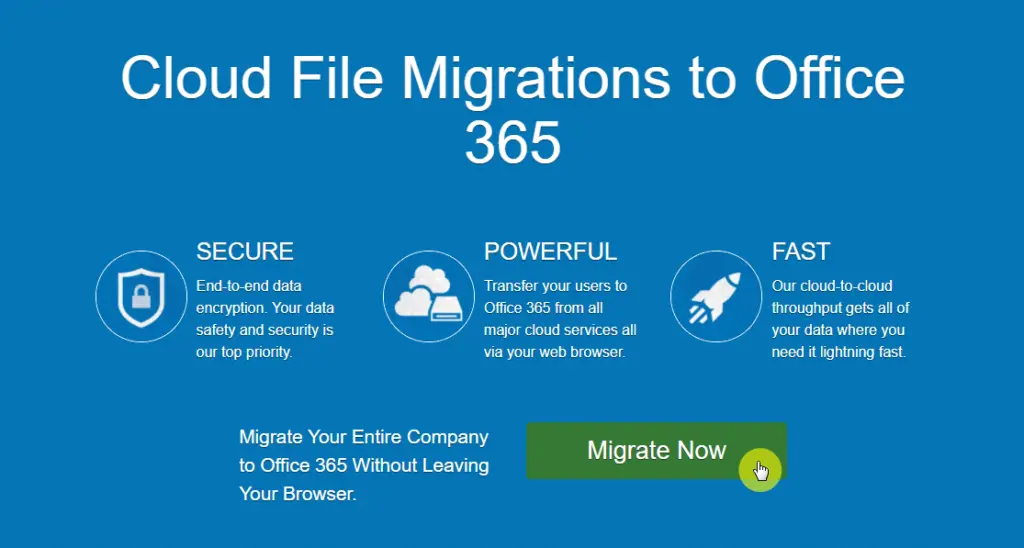
Right after that, you need to sign in with your Microsoft SharePoint account which you want to migrate to.
You can also sign in with your old Mover account if you have one.
After you log in with your Microsoft credentials, you will have to accept the permission request in order for SharePoint and Mover to establish a connection.
Don’t forget to tick the box to give your consent on behalf of your organization.

After this part, you’re now ready to use the migration tool.
How to use the Mover migration tool?
Once you have permitted the Mover tool to gain access to your SharePoint account, you will be brought to the internal homepage of the tool.
Here you will see three columns where you can select the source and the destination.
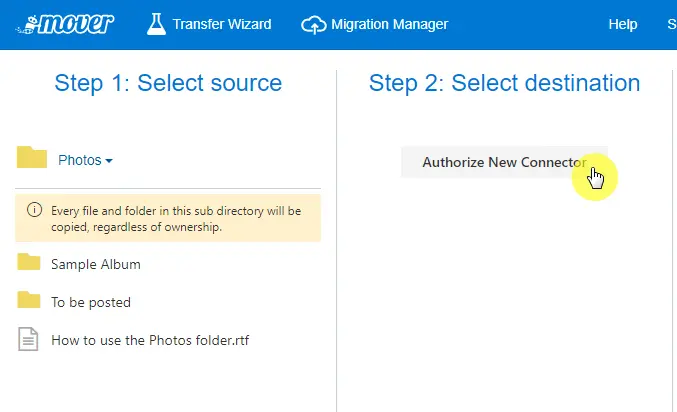
Select source
Click on the “Authorize New Connector” box to proceed.

The next step is to select the cloud service which you will be migrating from.
For instance, you will be migrating from Dropbox. Find it from the list and click the “Authorize” button on the appropriate service.
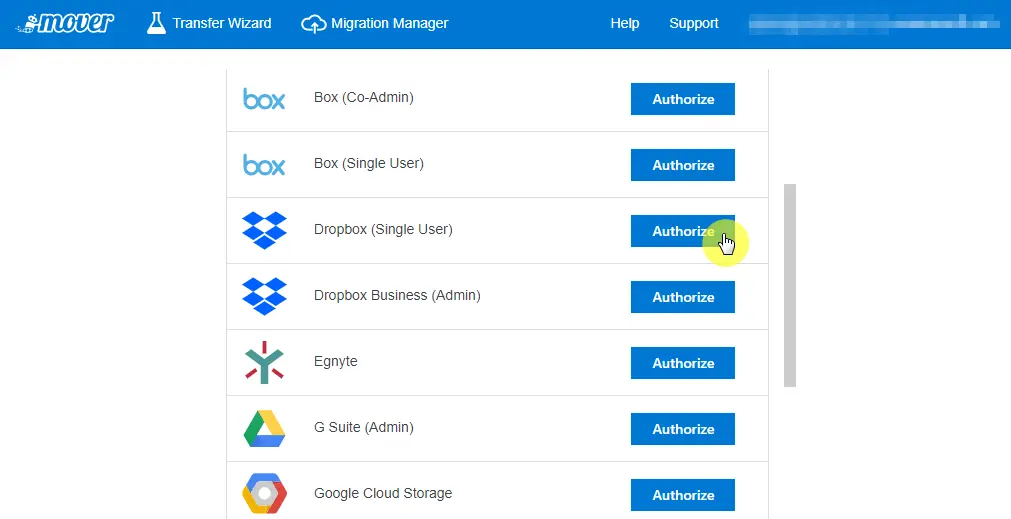
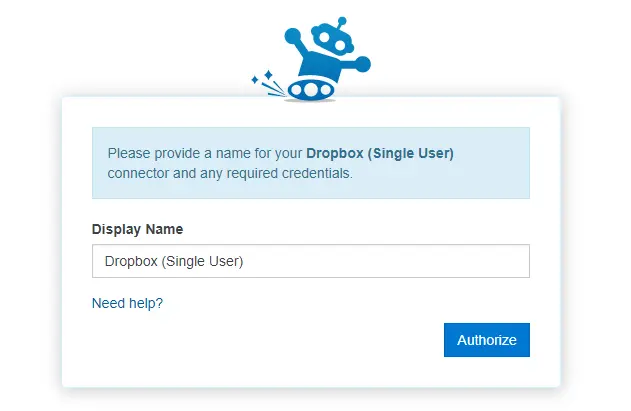
On the next page, you will be asked to provide a name for your connector.
You can use its default name. Don’t forget to click on the “Authorize” button to proceed.
The next step is to simply provide the credentials of your cloud service.
There’s no need to worry about providing your credentials since the activity is protected by Google’s privacy policy and terms of service.
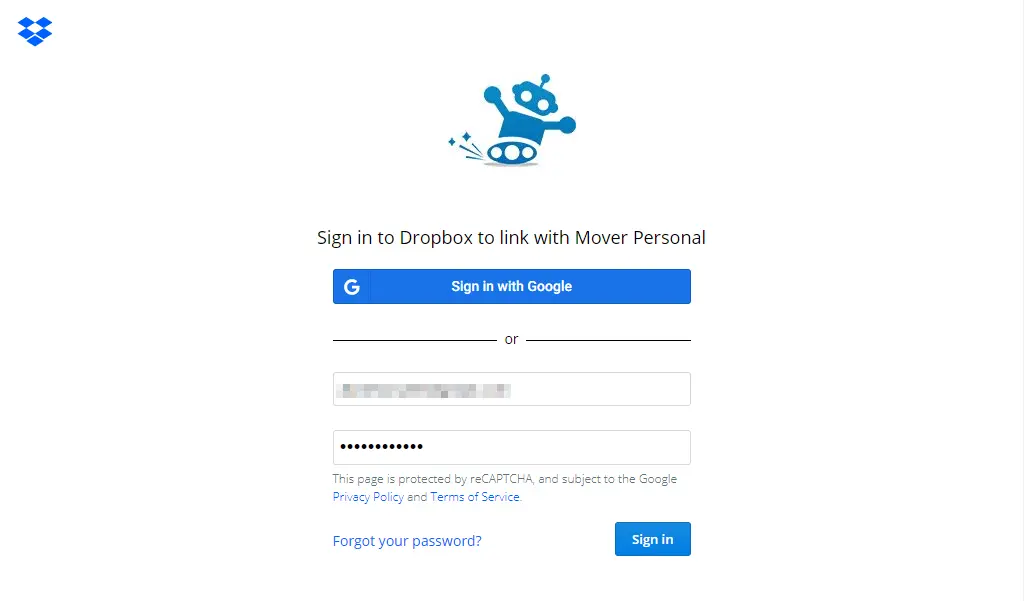
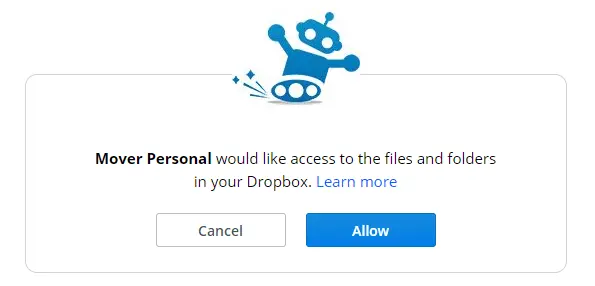
The next page is about authorizing Mover to access your source cloud service.
This will enable Mover to scan all your files and folders and upload them to your SharePoint account.
Click on the “Allow” button to proceed.
If the connection was successful, you will be brought back to the internal homepage.
Here you will be able to browse your source and configure it to show the directory or subdirectory that you want to migrate to SharePoint.
Select destination
The next step is to select the destination. Click on the “Authorize New Connector” to proceed.
To migrate to SharePoint, click on the “Authorize” button for Office 365.

The steps here will be similar to the ones you went through earlier with the source cloud service.
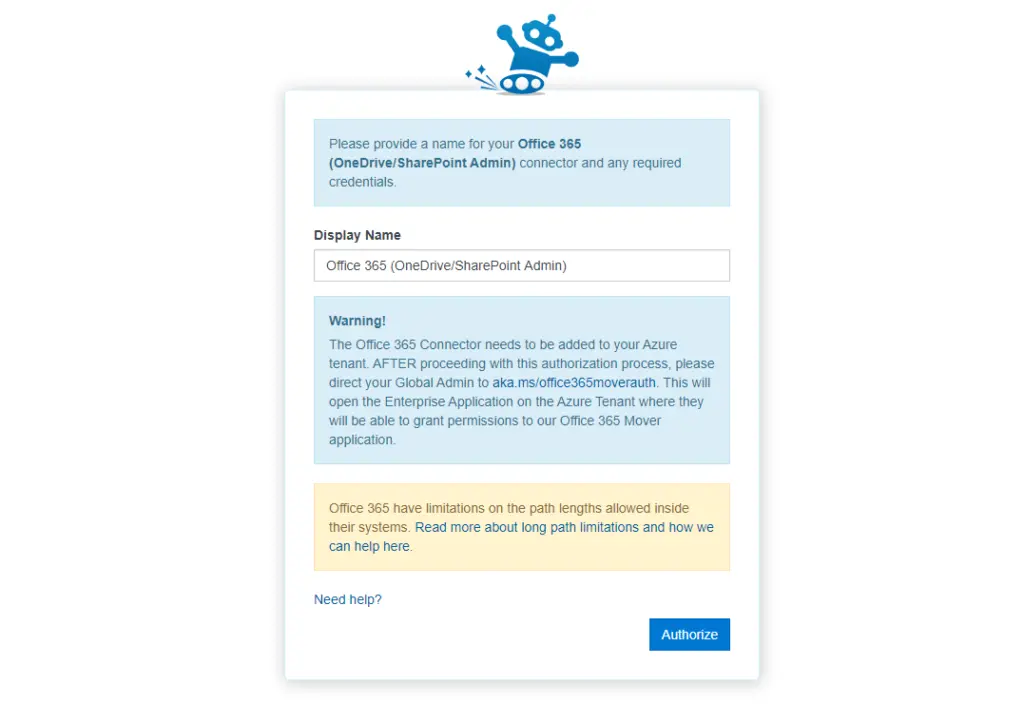
First off, you will have to provide a name for the connector (the default one will do).
Then, click on the “Authorize” button to proceed.
There’s a warning that you can read here on how you need to add the connector to your Azure tenant.
You will read about this later on after configuring the Mover tool.
The next part is about picking the right account that you will use with the destination connector.
Note that you will need an administrator account to be able to migrate files and folders from the source cloud service.
Grant admin consent
After connecting your SharePoint account, you will be brought again to the Mover internal homepage.
Don’t be surprised if you see a lot of error warnings on the screen.
Remember that there’s still one step to do to fully authorize Mover to access your Microsoft account.
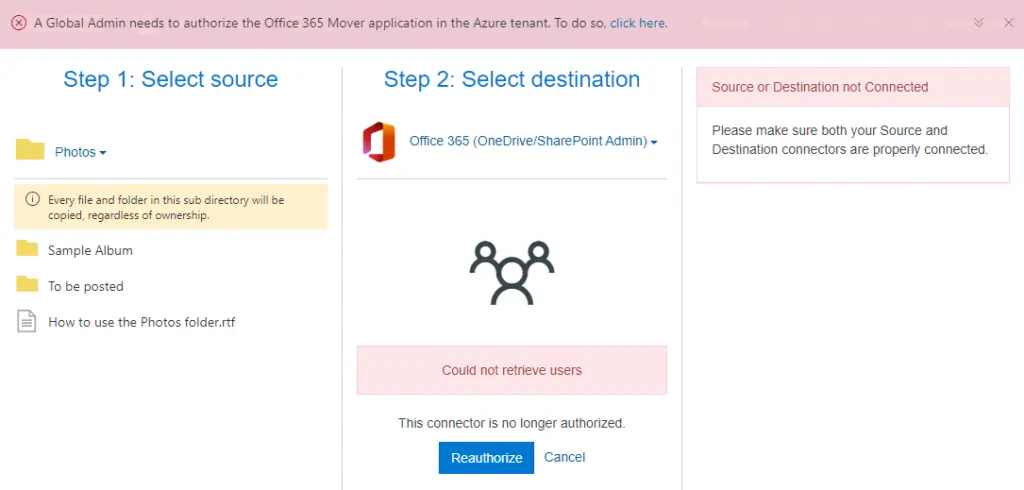
To proceed, visit your Azure Active Directory’s all applications page.
This is where you can grant permission to the Mover tool and reconcile all the errors you see on the tool’s internal homepage.
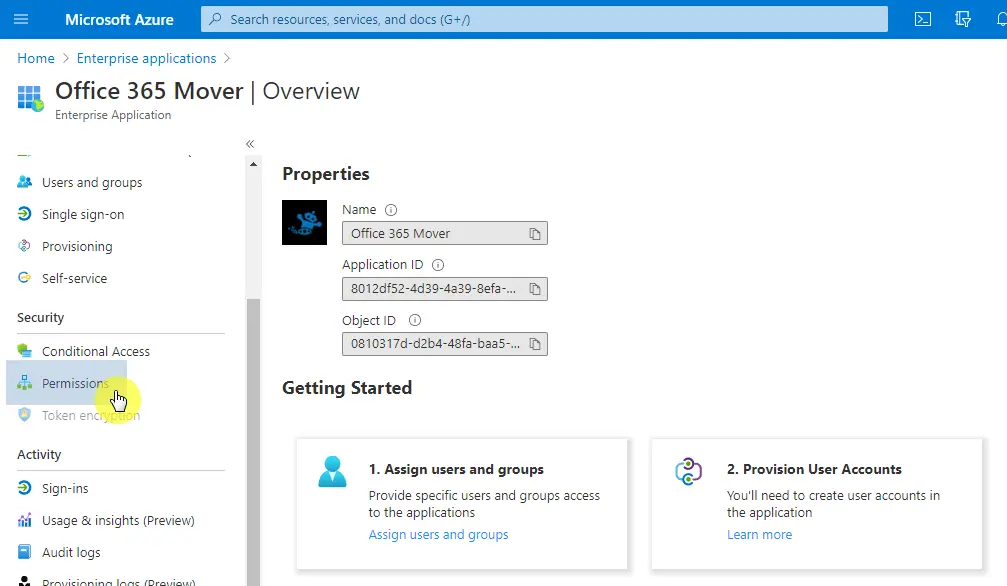
All you need to do here is find the Mover app named “Office 365 Mover”. Click on its name to proceed.

On the next page, click on “Permissions” under the left side pane.
Ignore all the properties you see and the other instructions you see on the page.
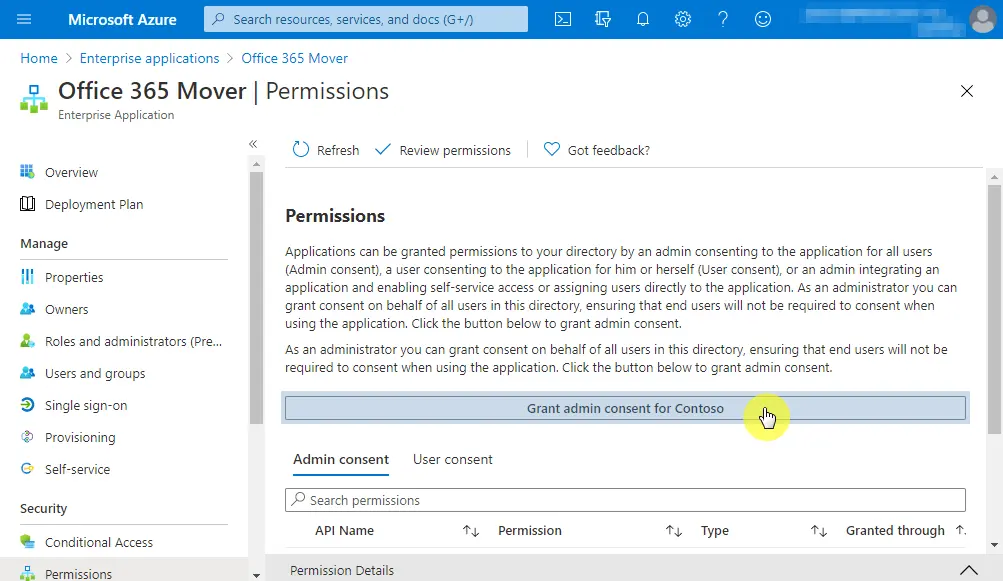
Then, click on the “Grant admin consent for Contoso” box.
It’s easy to find since it’s in the middle of the screen as highlighted below.
The next part here is about reviewing the permission request.
Breeze through all of them by confirming your account and accepting the permission request.
After that, you will a notification on your Microsoft Azure about the granted admin consent for the Mover tool.
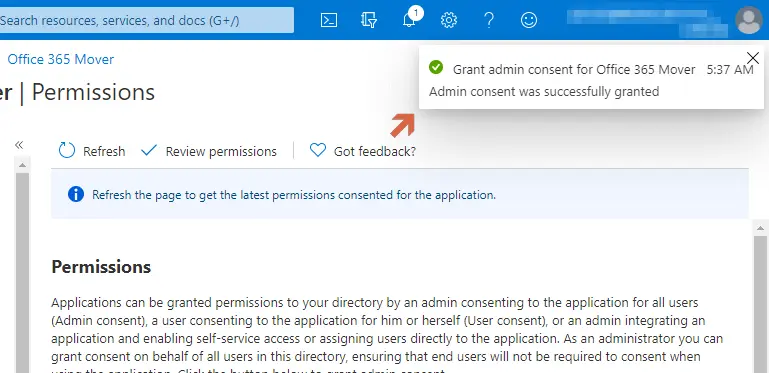
Now, go back to Mover’s internal homepage and hit the “Reauthorize” button for the destination connector.
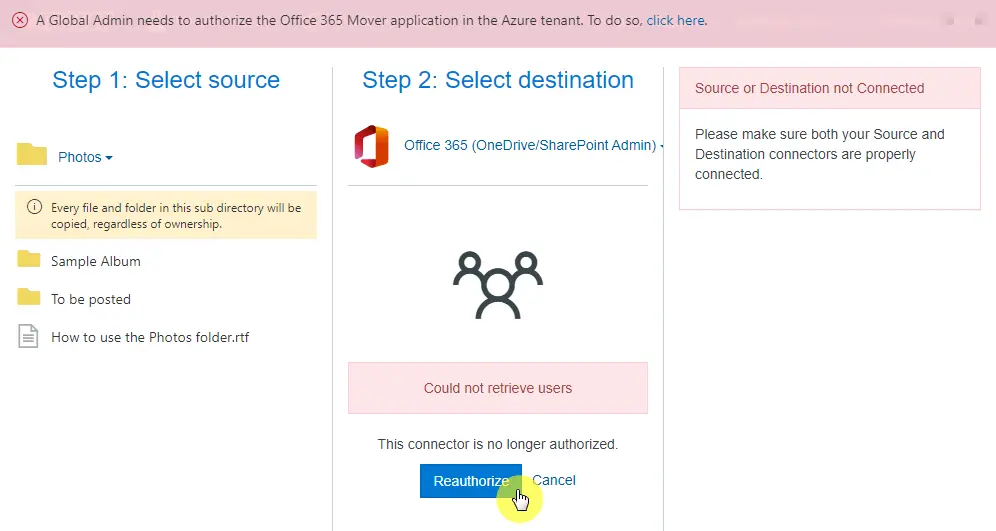
After clicking the button, you will go through the same steps as earlier when selecting a destination connector.
When you’re done, you will be brought back to the internal page but this time, you will not see any errors.
To proceed with the next step, click on the “Continue Migration Setup” box.

Add users and destination paths
This next part will make sure that all the metadata that comes with the files will be included in the migration too.
To start, you will need to add users
For this, you can either import a list of users or use the automatic discovery feature for both the source and the destination.
If you decide to use a list of users, you can still easily set their source and destination ID for both source and destination paths.
Many users opt for this method. For more info, check out Mover’s guide and go to the Setting up the migration > Reviewing your users > Adding section.
In most cases, auto-discovery will suffice.
Click on the “Add Users” box and then on the “Automatically Discover and Add Users” box.
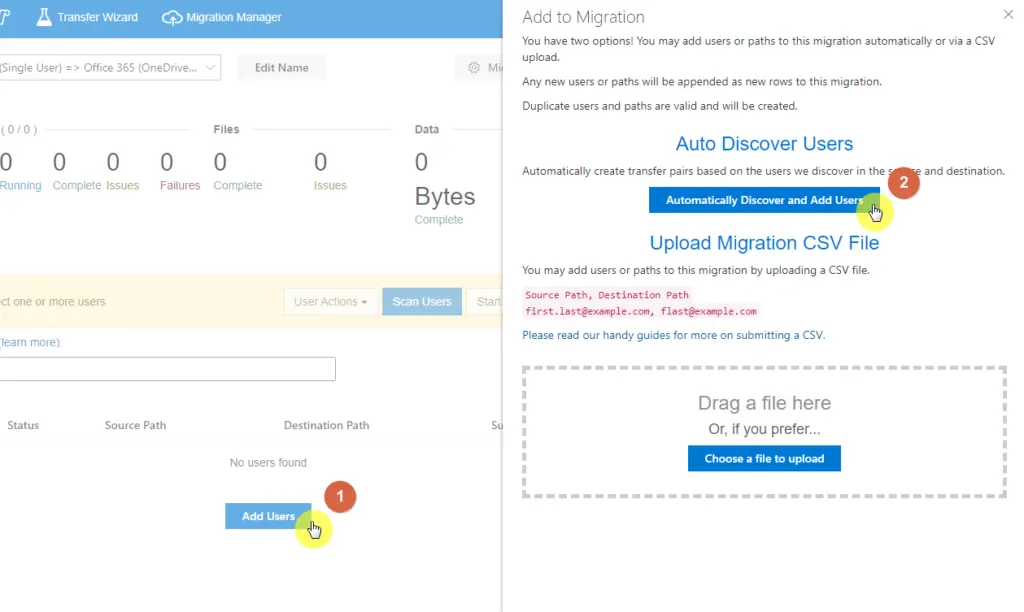
You will then see all the destination paths for all the discovered users.
To edit the destination path for a user, all you need is to select the discovered user, go to the user actions dropdown, and select “Edit Destination”.

Then, double-click the site that you want to set as the destination path.

Then, browse the site’s document library by double-clicking on the folders (like how you will on Windows Explorer).
Once you found the folder, all you need to do is to select it and click on the “Save Destination Path” box.
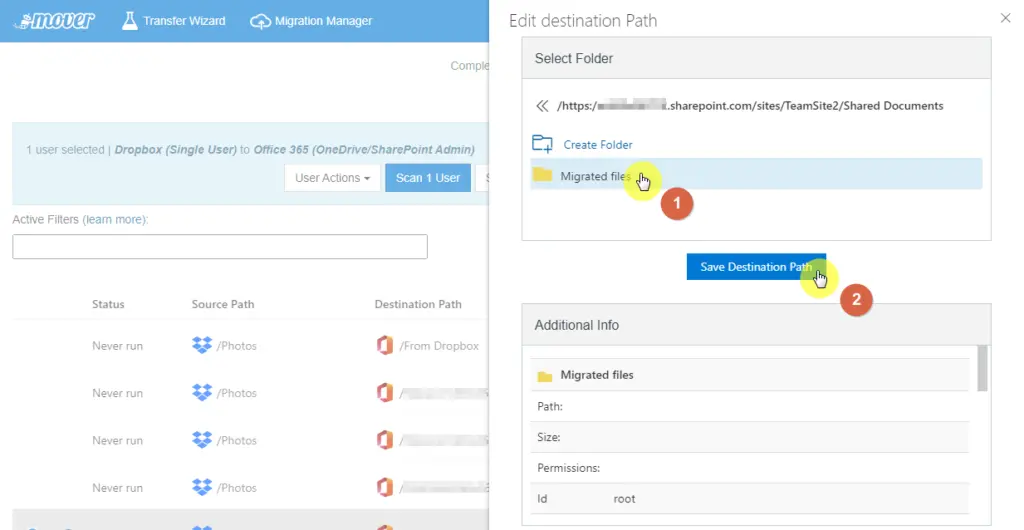
If you need to set up different paths for different users, simply repeat the steps above.
Start the migration process
After setting up the destination paths for each user (and the source path if there’s any need), you can now start the migration process.
To do so, select the user or users and click on the “Start Migrating” button.

The next screen will allow you to review the source and destination, agree to the terms, and set the schedule.
If all is well, what’s left is for you to click on the “Continue” button.

That’s it! Once the migration is complete, you will receive an email from Mover notifying you that the transfer is already complete.
In addition, you will also see a summary of it on the Mover tool.
You can also download different sorts of migration reports by clicking on “Migration Actions” and selecting the specific reports you want to download.

As you can see, migrating from a cloud service using Mover isn’t really that complicated.
If you have any questions about SharePoint, feel free to contact me or leave them down below in the comments section.


Thank you so much for sharing this amazing article. I want to migrate an SP Site from one tenant to another, does the mover tool include the design content of the site that resides on the source and apply the same on the destination other than migrating the files?
Awaiting your response.
No