
Last Updated on February 17, 2024
When starting a project, it might be tempting to work on it right away.
But, it is always a great idea to sit down and create a plan, map out your strategy, and figure out your budget.
With that in mind, this tutorial will guide you through the most basic steps to get you started with Microsoft Project.
Table of Contents:
- What is Microsoft Project?
- What can you do in Microsoft Project?
- What are the main features of Microsoft Project?
- How to Create a Timeline in Microsoft Project
- How to Create a Gantt Chart in Microsoft Project
- How to Add Milestones to Your Project
- How to Set Up Resources in Microsoft Project
- How to Assign Tasks in Microsoft Project
- How to Show the Critical Path in Microsoft Project
- How to Set a Baseline in Microsoft Project
What is Microsoft Project?
Microsoft Project is one of the early pioneers when it comes to project management software.
It provides intuitive solutions to planning your projects, scheduling, tracking progress, managing your budget, and analyzing workload.
Whether you’re a beginner in project management or someone who has been at it for a long time, this software is sure to be a great addition to your arsenal of business management tools.
Sign up for exclusive updates, tips, and strategies
What can you do in Microsoft Project?
While Microsoft Project is rich with features and project management tools, you need to be familiar with project management techniques to fully utilize the tools it offers.
A lot of confusion that comes from using Microsoft Project is in thinking that the software will plan for you.
Microsoft Project is most helpful to you when you want to create a schedule for the project.
Your main objective when using MS Project should be to help you
- Visualize your project plan in standard defined formats
- Schedule tasks and resources
- Track information about the project’s progress
- Generate reports to share with team leaders and managers for meetings
What are the main features of Microsoft Project?
- Project timelines: The most important feature of Microsoft Project is timelines — which are a great way to visualize tasks, schedules, and progress.
- Resource planning: Microsoft Project allows you to manage your resources, whether personnel, equipment, or documents, easily and effectively.
- Resource leveling: This feature is used to solve resource overallocation challenges and help balance resource workload.
- Create milestones: Milestones are important events in your project which can help you keep track of how well you’ve progressed with the project.
- Show critical paths: Microsoft Project has a feature to show critical paths. A critical path is a chain of tasks that directly affects the whole project, moving one task from the chain would also change the date of the whole project.
- Set baselines: Microsoft Project can help team leaders and managers set baselines, which is a condition against which plans will be compared to.
- Taskboards: You are provided a task board that can help you work on tasks.
How to Create a Timeline in Microsoft Project
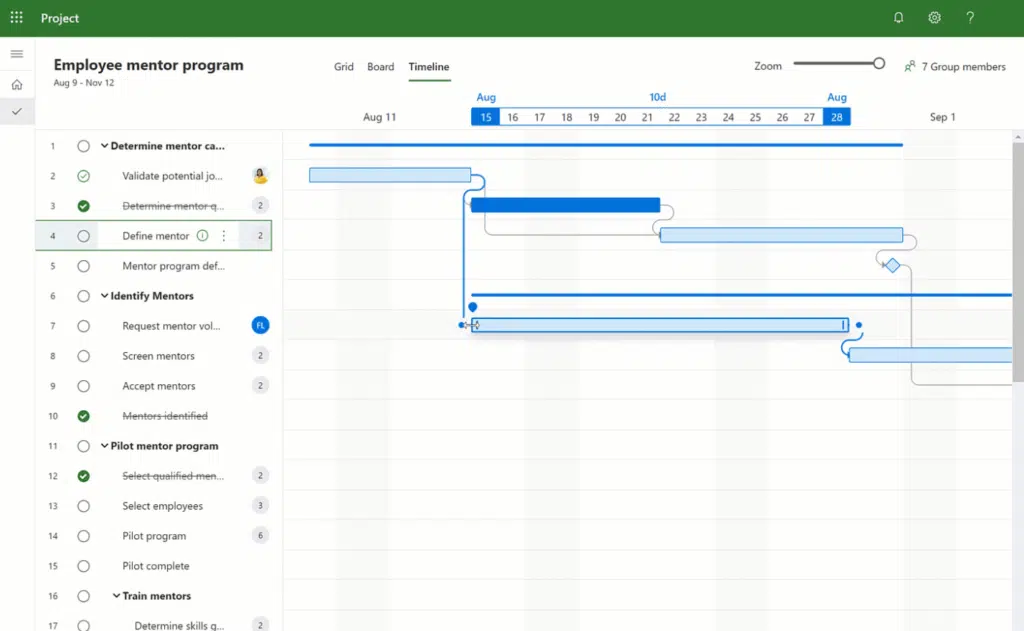
A timeline is a graphical representation of all your tasks. It provides an easy way to view, check, and report on the overall progress of your project for managers.
This is especially true for large-scale projects.
Step 1: Select Timeline in the Timeline Box
You can do this by opening View on the Menu bar and checking the Split View.

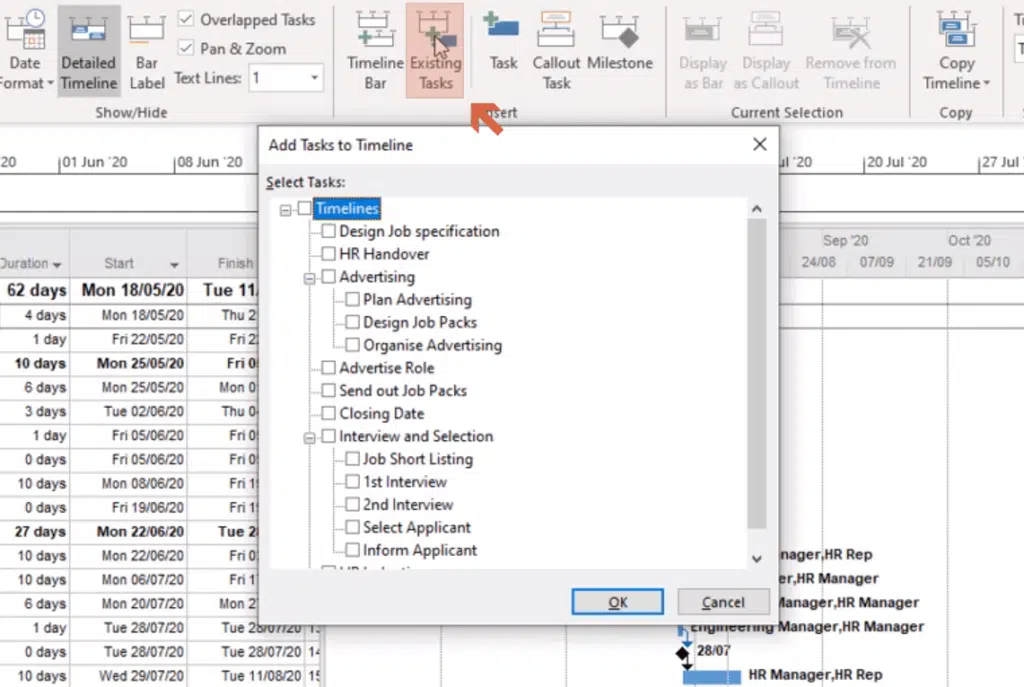
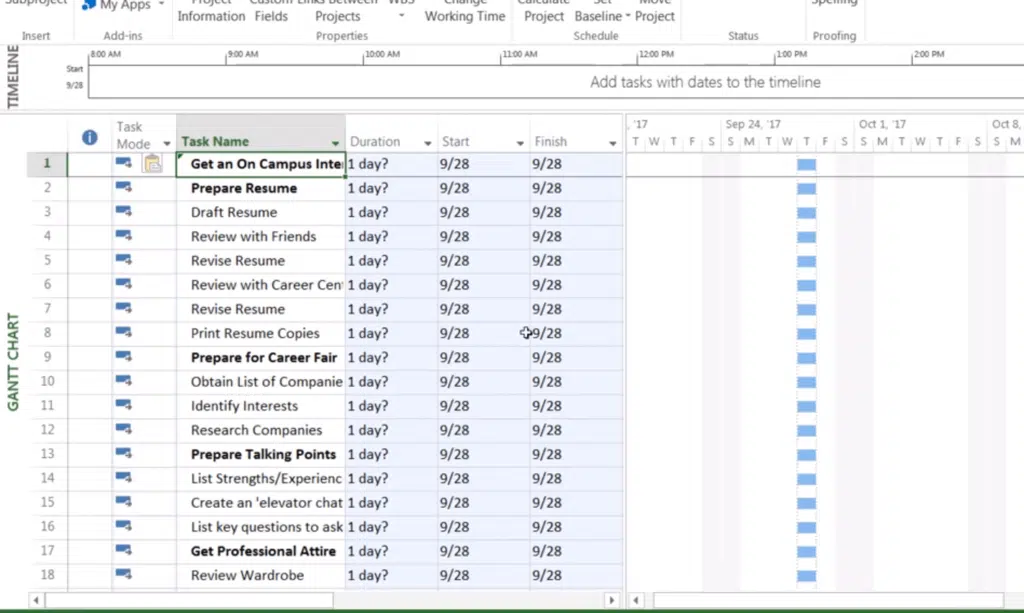
Step 2: Add Tasks to the Timeline
By right-clicking on a task and selecting Add to Timeline, you can add a task to a timeline. Repeat this step for each task that you want to add to the timeline.
You can also click on the Existing Tasks box to add tasks already in the project.
How to Create a Gantt Chart in Microsoft Project
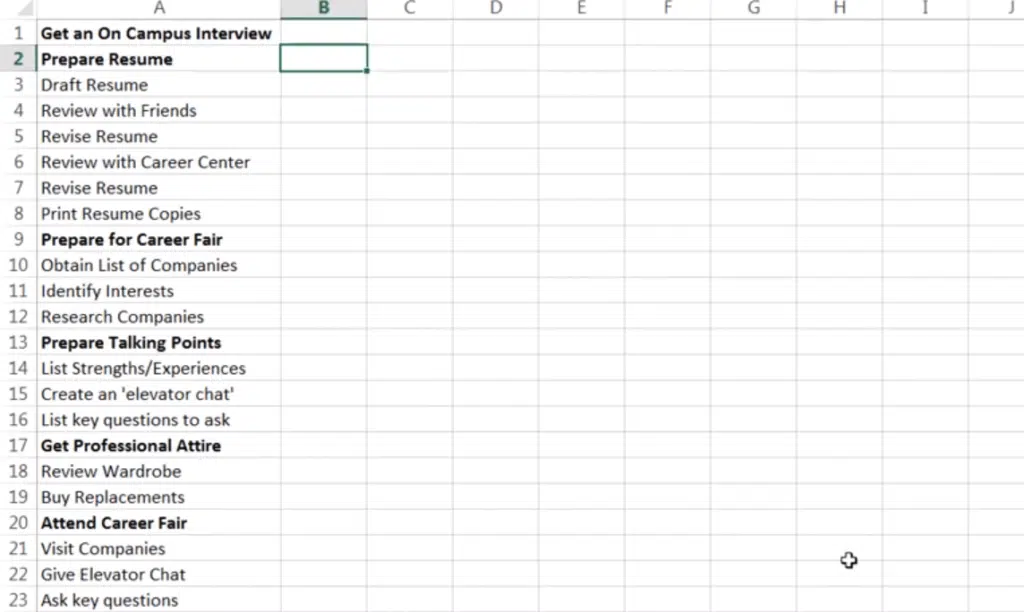
Step 1: Prepare Your List of Tasks
In creating a Microsoft Project Gantt chart, you will need to prepare a list of tasks.
The list should be arranged in chronological order, or in the order that they need to be carried out to keep the project organized.
Step 2: Add Tasks to Your Project
Once you have the list of your tasks ready, add them to your project. You can copy and paste them or click the task name fields and write down the name of each task.
You can group related tasks by highlighting the tasks and clicking the right indent button on the ribbon.
Step 3: Add Start Dates and End Date for Each Task
By adding start and end dates, you can start building the actual project schedule. You can either manually type the date or use the date picker when selecting a date for your start date.
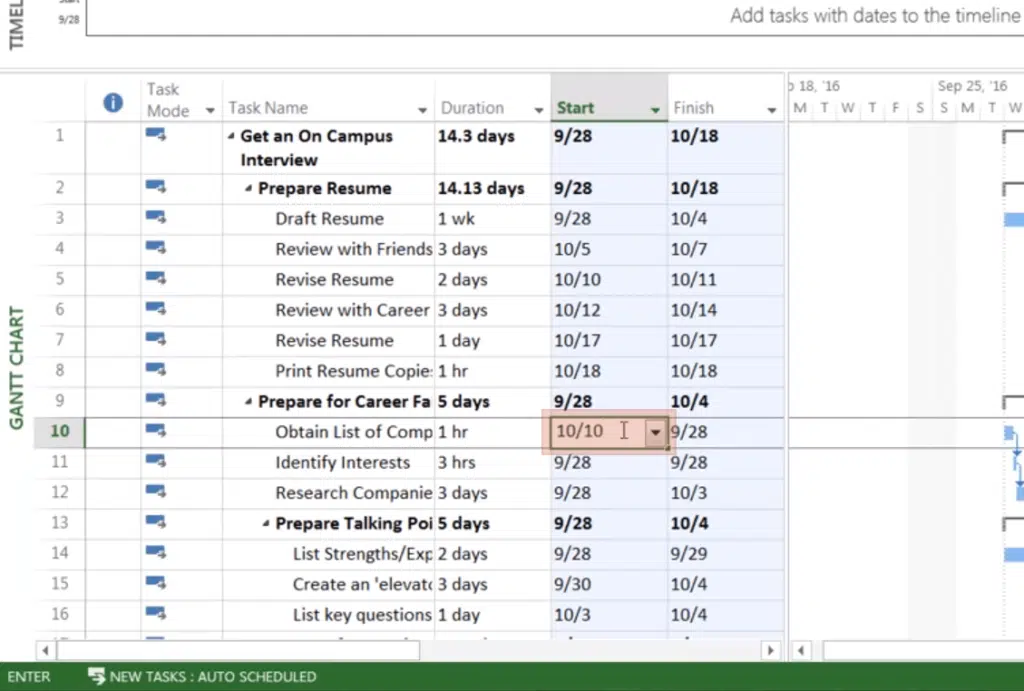
For the end date, you can also do the same as you did for the start date or use the Duration field and enter the task’s duration.
Microsoft Project will automatically calculate the end date for you and fill out the Finish field.
How to Add Milestones to Your Project
Milestones are helpful ways to make sure that your project is still up to date and indicate the end of a phase of the project.
Here are two easy ways to add milestones for your project:
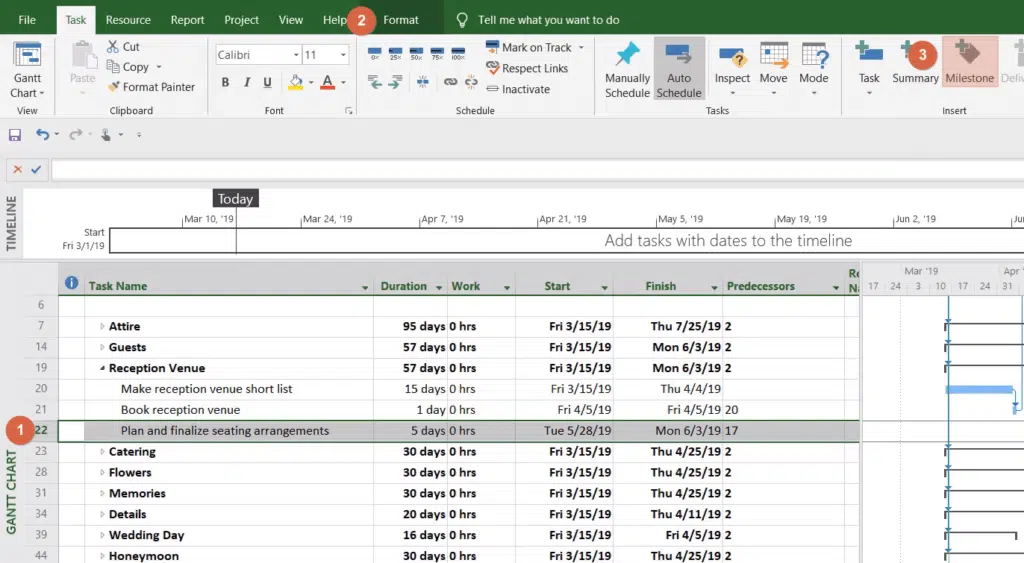
Select the row where you want to add a milestone and click on the Insert Milestone button found on the ribbon.
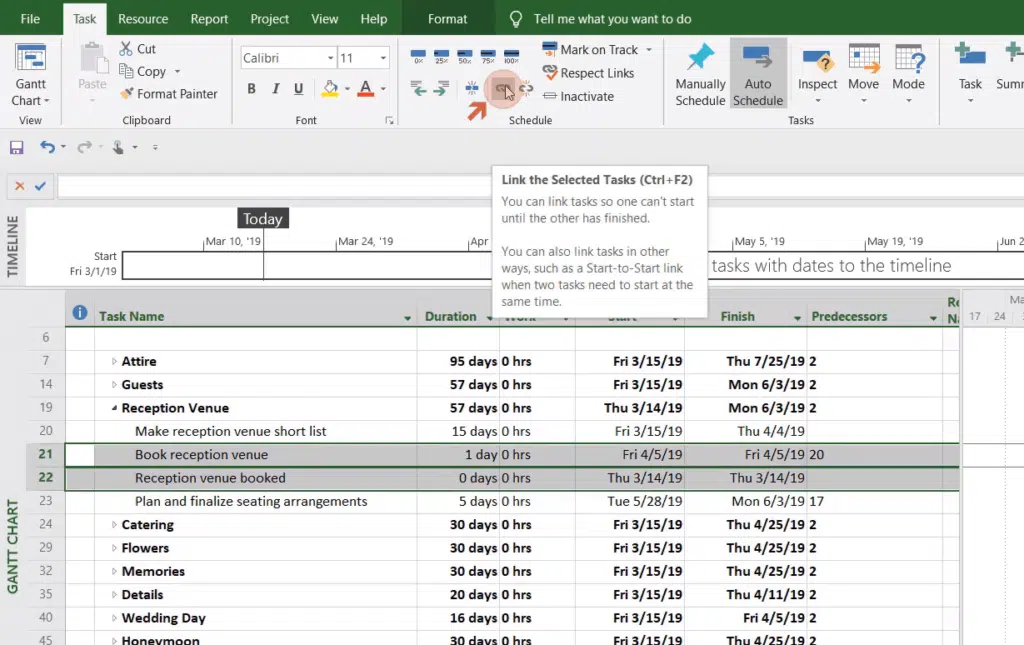
Creating milestones is also helpful in linking appropriate tasks.
To do this, highlight the task that should be linked to the milestone and click the Link the Selected Tasks button found on the ribbon under the Schedule section.
How to Set Up Resources in Microsoft Project
Resources usually mean the people who will work on the tasks. It can also be the documentation or type of work that is needed to complete the task.
That is why adding them to your project is important to get the job done.
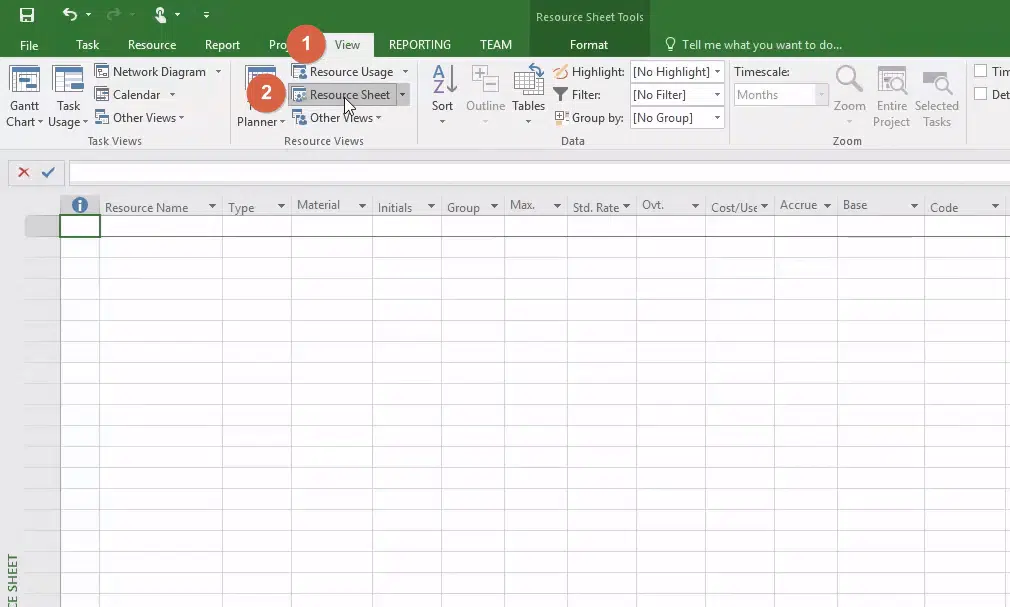
Step 1: Open the Resource Sheet
You can find the Resource Sheet under the View tab. The Resource sheet will then appear on the screen.
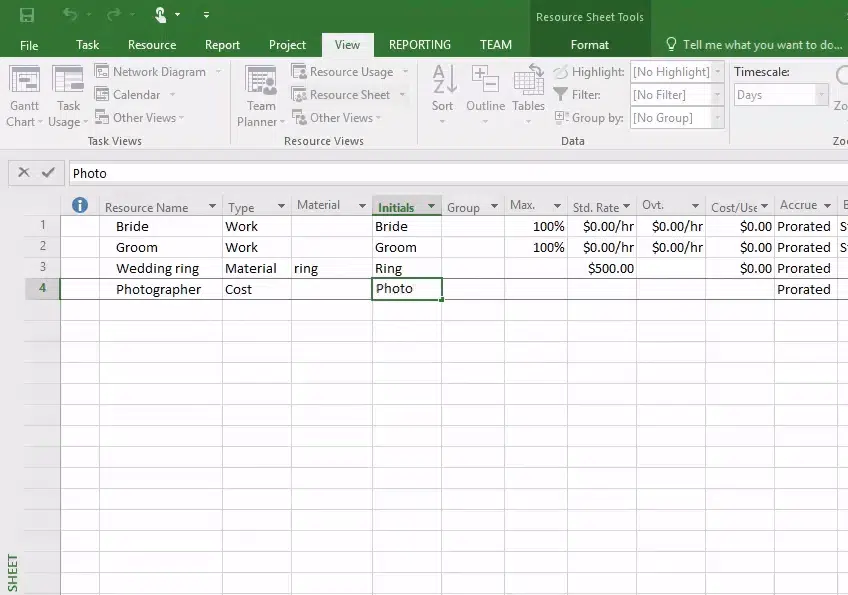
Step 2: Adding Your Resources
Type the name of the resource needed in the Resource Name field and complete the remainder of the information.
Once you have added the resources for your project, it becomes easier to check who is available to take on the task based on their workload.
You can also manage how much time each team member assigned to the task will spend by checking the Resource Management view.
How to Assign Tasks in Microsoft Project
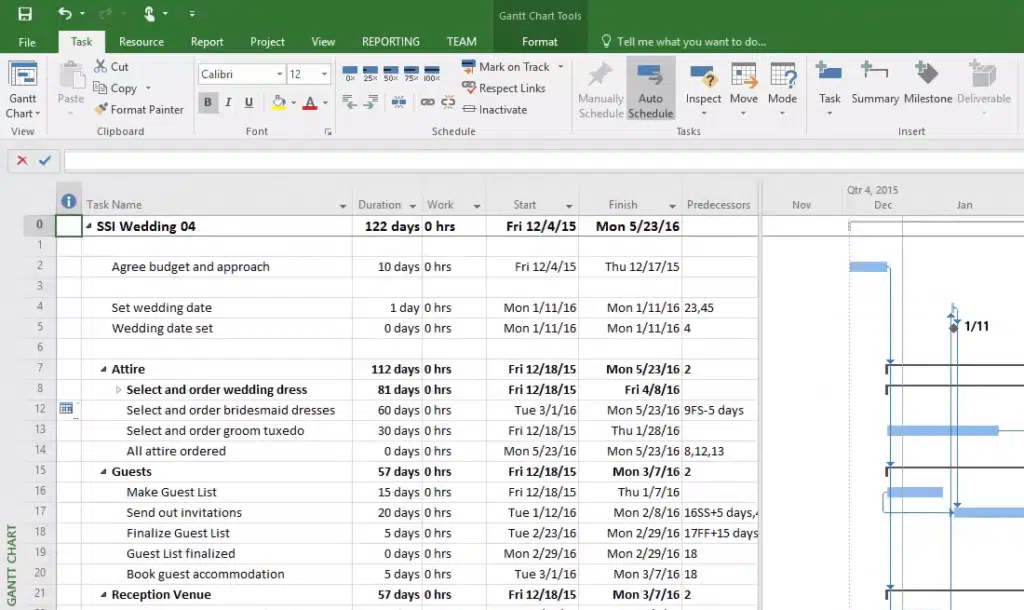
Step 1: Switch to the Gantt Chart
In order for you to assign tasks, switch to the Gantt chart. To do this, click on the Gannt chart icon at the top left corner of the window.

Step 2: Open the Task Form
In the View tab, click the Details box in the ribbon. The Task Form should appear on the other side of the screen.
If it does not show up, you can click on the down arrow button in the Details box and select Task Form.
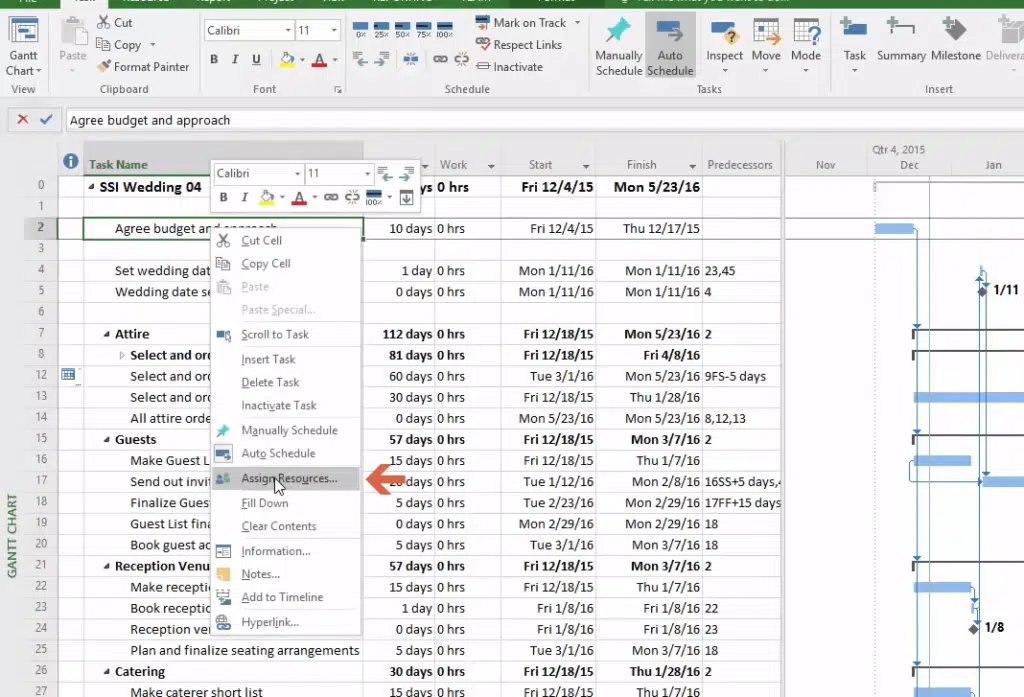
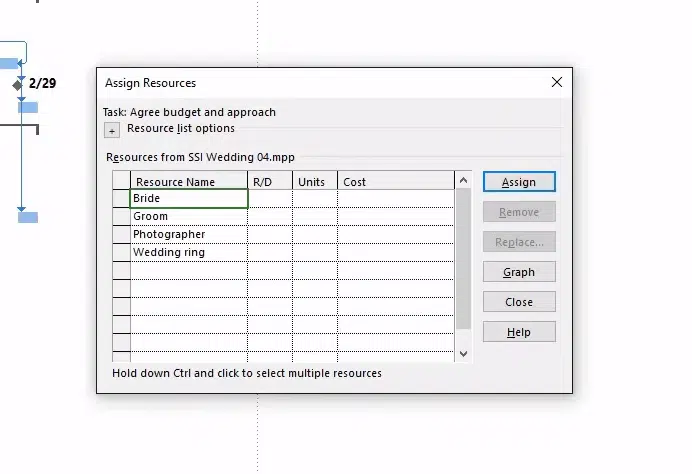
Step 3: Assign Resources
Right-click on a task and select Assign Resources from the options.
A mini window will open up where you can specify the resource name to assign to the task. Do the same for all the tasks you want to assign a resource name.
How to Show the Critical Path in Microsoft Project
While a project consists of a series of tasks, not every task will directly impact the project’s completion or affect its duration.
Critical paths are the important tasks that influence the whole project.
Here is how you can show the critical paths:
To start, you must be on the Gantt Chart. Open the View tab and change the table view to Schedule.
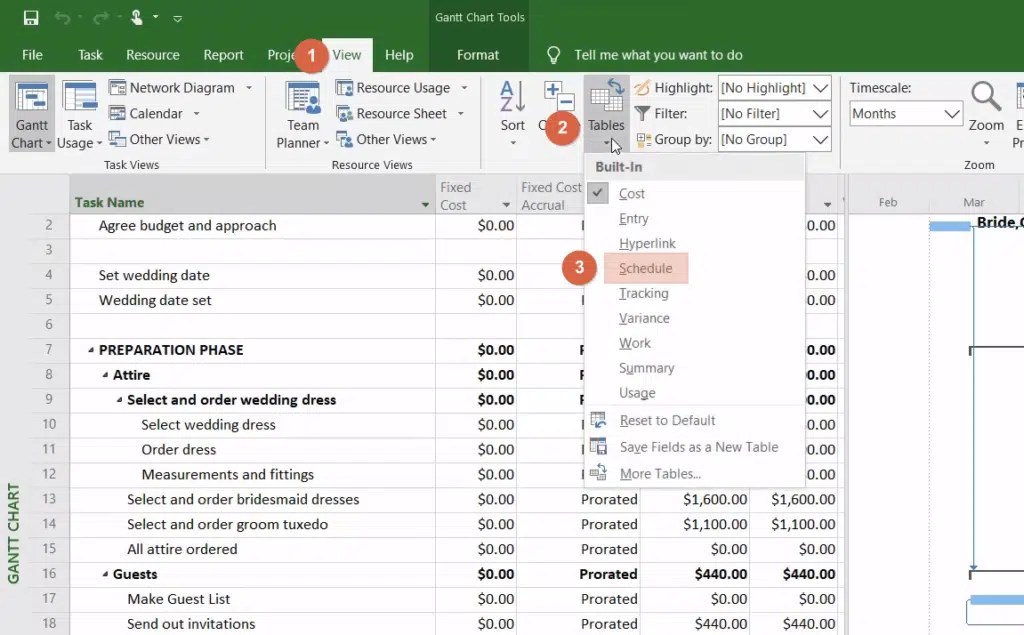
You will then see a Critical Path column on the table as shown below:

How to Set a Baseline in Microsoft Project
Baselines allow team leaders and managers to compare any state of the project with the initial schedule and check where it has changed.
You can even think of it as a fixed schedule, cost, or scope of your project.
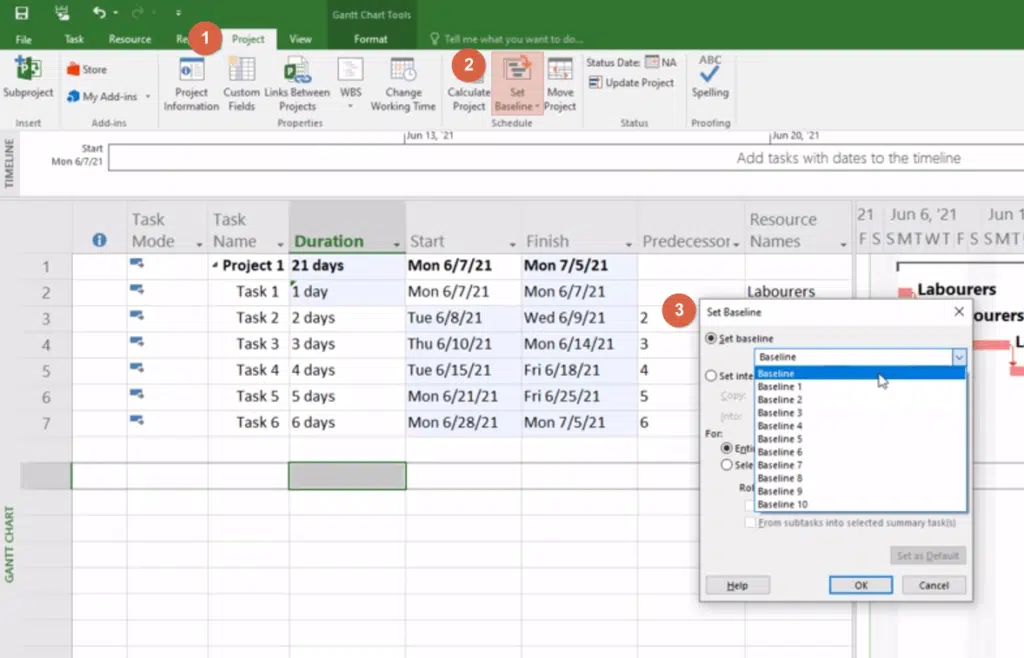
On the Project tab, click on the Set Baseline box. That will open a mini window where you can set a baseline for selected tasks or the entire project itself.
Don’t forget to click OK once you’re done.
These are just some of the main features that Microsoft Project can offer to make the management of your projects easier and more productive.
Exploring more of the features it offers and coordinating its use with other productivity tools can help you even more.
That’s it! If you have other questions related to Microsoft Project and other Microsoft products, comment them down below or reach me directly through my contact page.


