

Last Updated on July 27, 2023
Have you heard about Microsoft Lists?
It was announced back in 2020 in a Microsoft Build event and was hyped to bring new user experiences to the platform.
In this article, I’ll take a closer look at Microsoft Lists like what features it brings to the table and some basics on using it.
Let’s get started.
Table of Contents:
What is Microsoft Lists?
Remember SharePoint lists?
Imagine being able to use it externally outside the context of SharePoint — like an independent app.
That’s basically what Microsoft Lists is. It’s a smart app for organizing work, tracking data and info, and managing workflows.
You will see the same web-based tables or databases as what you see in SharePoint lists.
In essence, Microsoft Lists will include:
- Microsoft Lists app (for mobile and Teams)
- Microsoft Lists home page
- SharePoint Lists functionality
Sign up for exclusive updates, tips, and strategies
What are the features of Microsoft Lists?
Here are some of the current features you will find in Microsoft Lists:
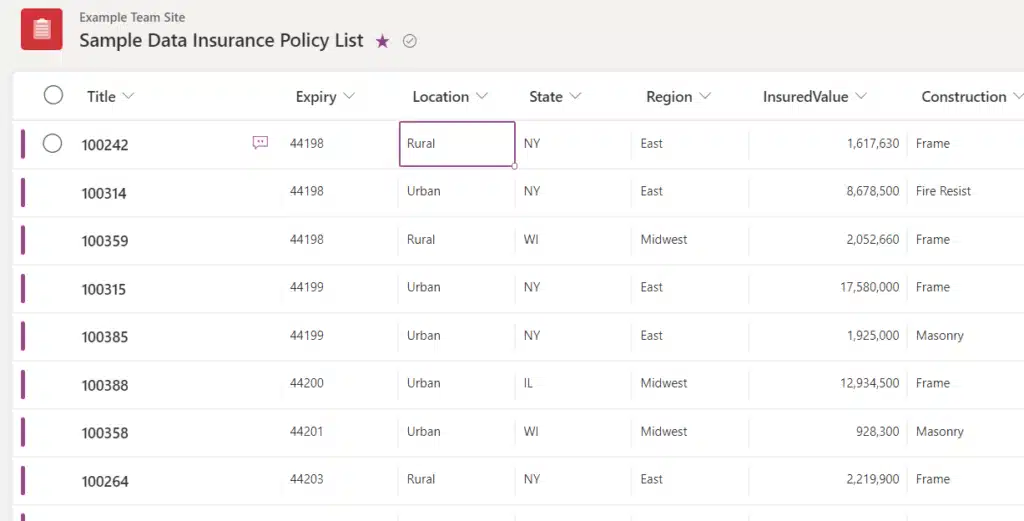
1. Column formatting
Like in SharePoint, you can also format columns in Microsoft Lists.
You can enter custom rules for conditional formatting and easily manage those rules or you can use data bars for spotting numbers.
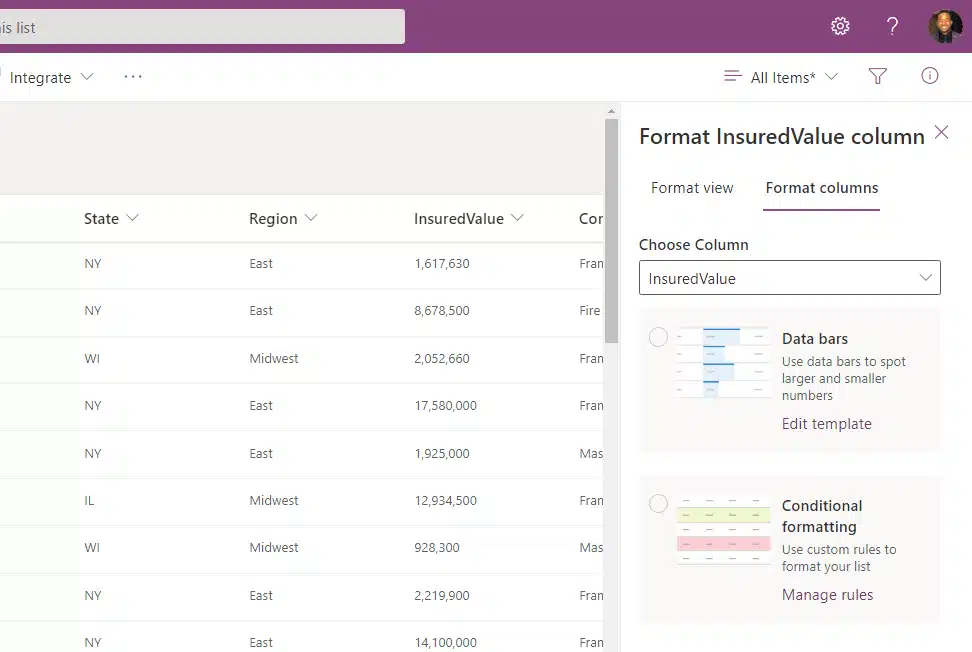
For conditional formatting, you can select from a few pre-selected styles or create your own complete with icons, borders, fill color, etc.
For data bars, you can provide the minimum and maximum values and change the data bar color for both positive and negative values.
You can also change the list layout to either list (default) or gallery.
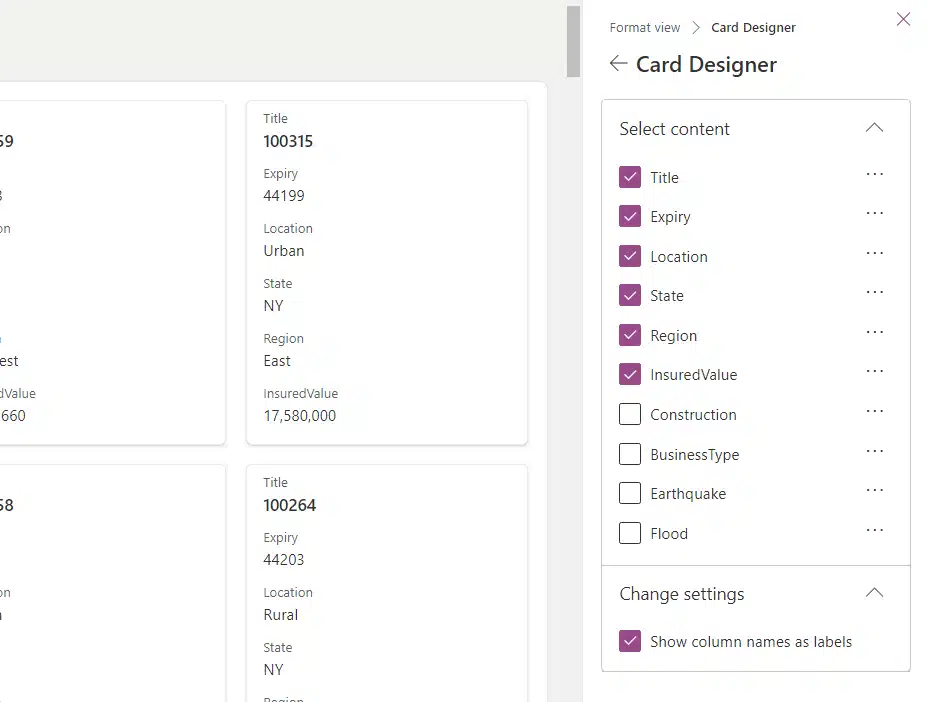
Changing to gallery view will create cards that look similar to the cards you see in Power BI.
The gallery layout comes with an advanced design mode where you can add JSON to format the cards.
Meanwhile, you can format odd or even rows in your own style — including the text color, text style, and borders.
Both views allow for advanced formatting using JSON formatting.
Note: For more information on using JSON for customization, check out this guide: How to Use JSON to Customize a SharePoint List Form.
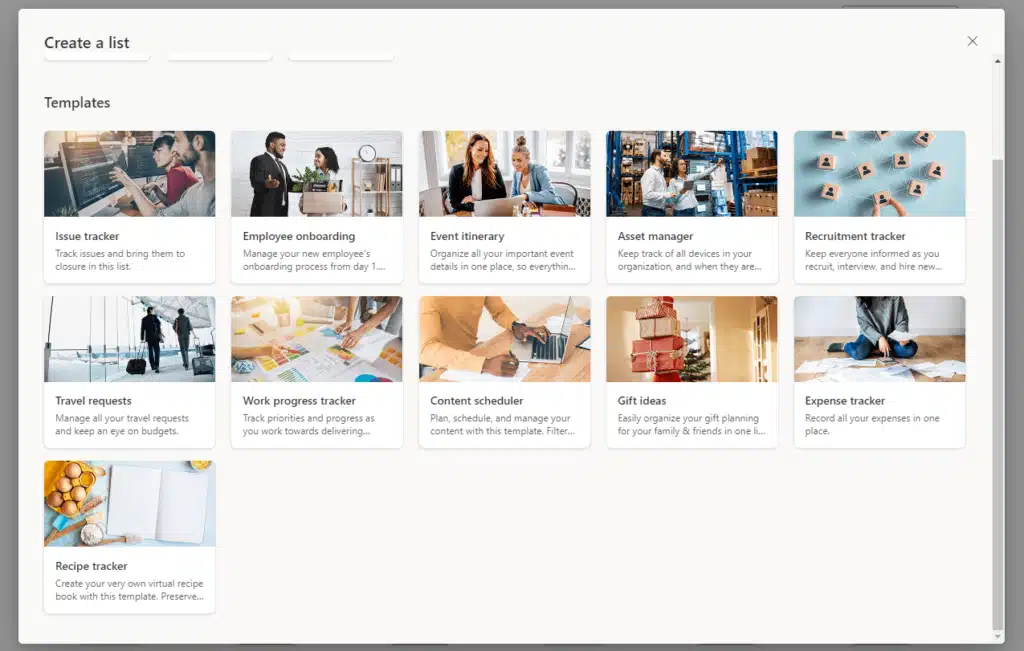
2. Starting templates
Microsoft Lists also comes with starting templates so you don’t have to create a list from scratch.
Now, these templates are the same ones that you will see when you create a new list from SharePoint.
If you don’t want to start from a template, you can also choose the usual options:
- From blank (create a new list from scratch)
- From Excel (convert an Excel table to a list)
- From an existing list (copy the columns in an existing list)
The steps are basically the same when you create a new list in SharePoint.
If your account is the same one you have in SharePoint, then you can also view your existing list from Microsoft Lists.
Note: For more information on creating lists, head over to the creating a list section below in the how-to-use chapter.
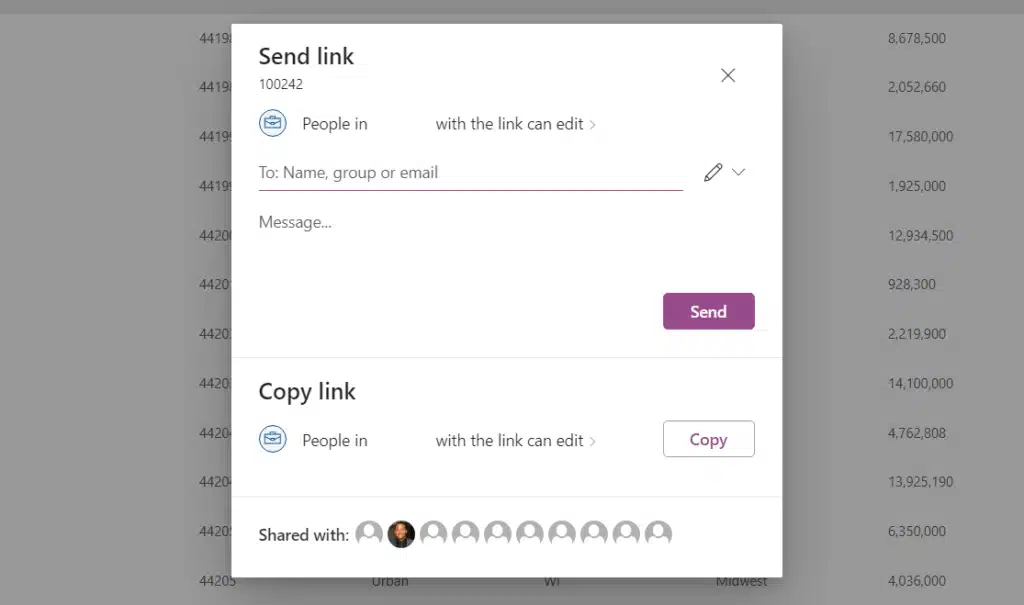
3. Sharing and commenting
Sharing is vital in today’s online work and collaboration.
What’s awesome here is that you can share a list or its item as easily as if you’re sharing a document with your friends.
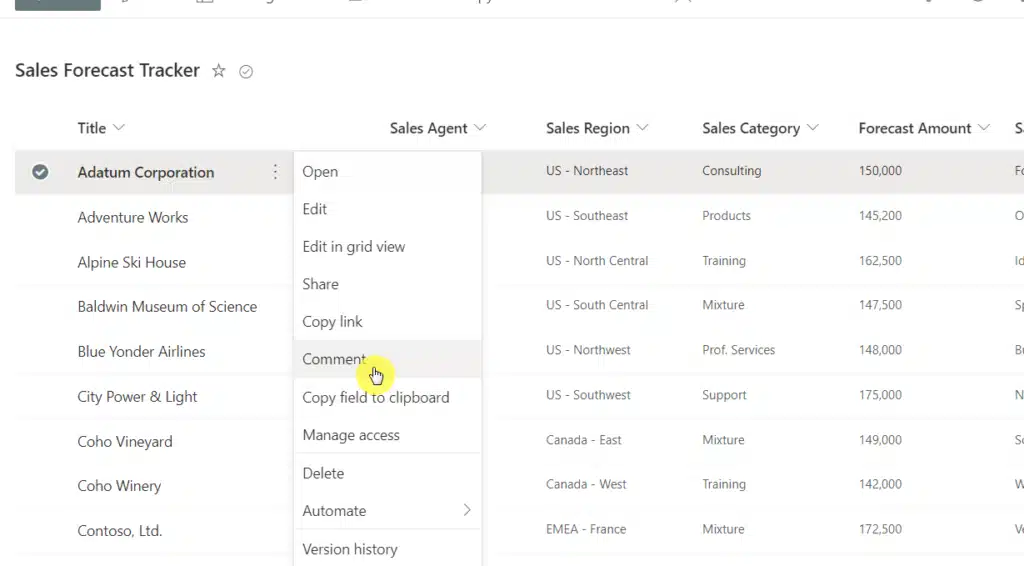
Commenting works similarly to the feature in SharePoint.
You can either click the comment button, use the context menu, or go to the information panel.

Because of this feature, people can leave comments on specific list items and discuss them with other team members.
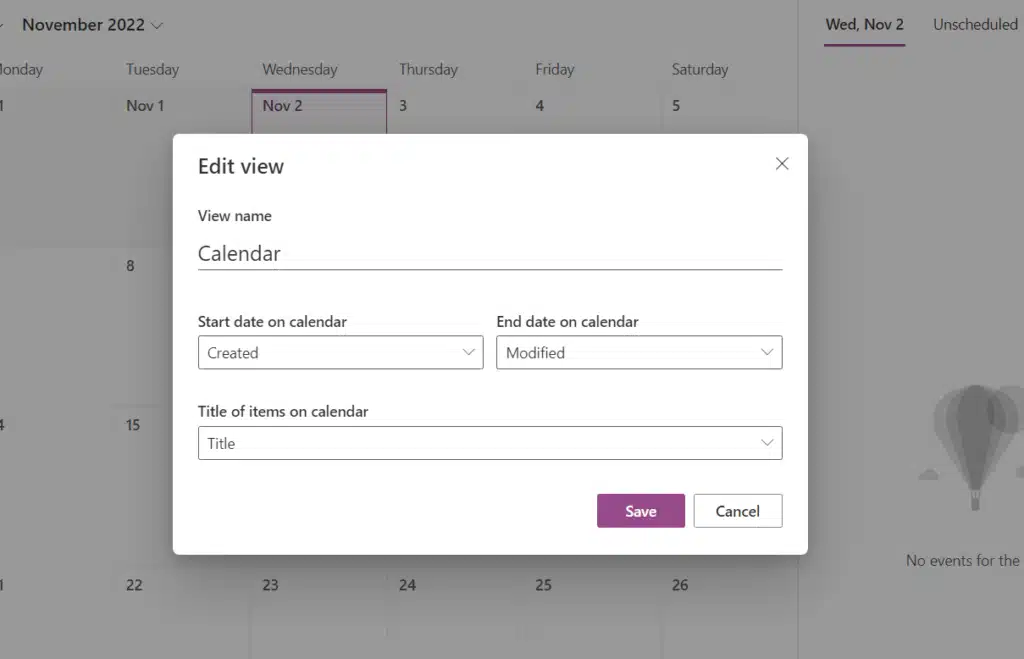
4. Show the list as a calendar or a board
How important are the dates in your list? How about a kanban board?
What’s cool with Lists is that you can create a calendar view of your list complete with a start date and an end date (if there are any).
On the other hand, if you want to create a kanban board with your list, you don’t need to go to Planner right away.
That’s because you can always create a board view and create your own buckets:

But if you want to use a kanban board with productivity features built-in, you can use Microsoft Planner with that.
Note: For more information on Microsoft Planner, check out this article: What is Microsoft Planner? How to use it?
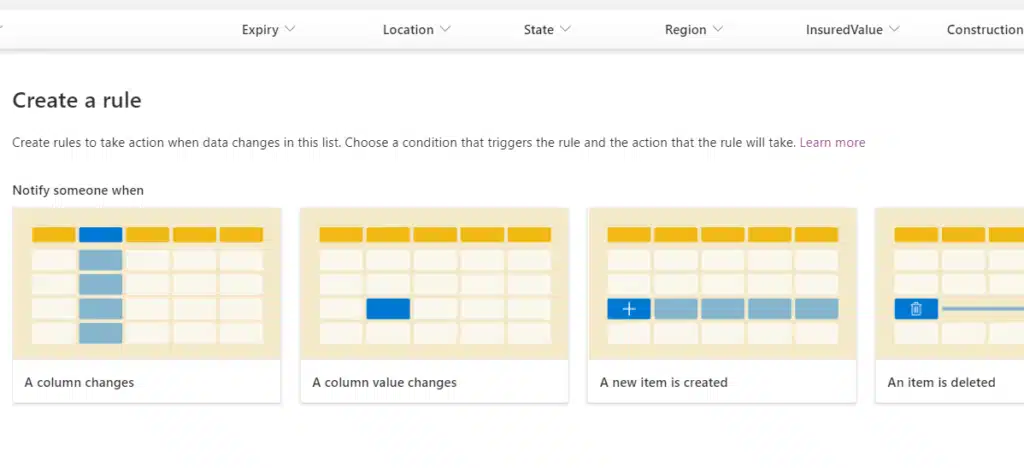
5. Set up alerts and rules
If you like the alerts and rules features in SharePoint, you will be happy to know that the same features are also present here.
You can set up a rule to notify someone when a column or its value changes, a new item is created, or when an item is deleted.
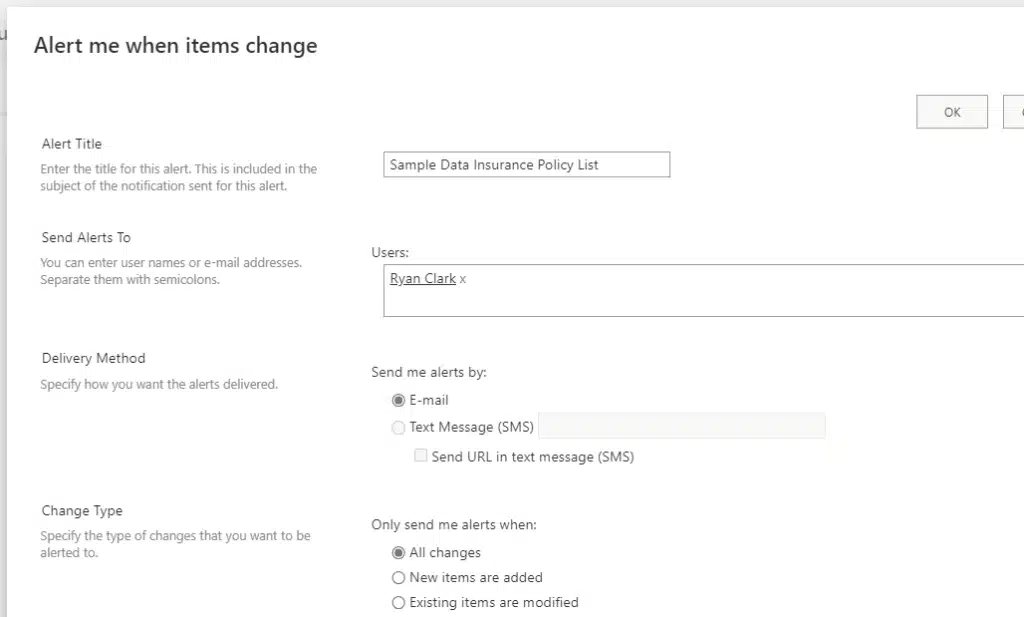
The automated alerts will send a message to the user or email that you have specified.
You can also set up a more advanced email alert where you can change the delivery method, recipients, frequency, etc.
Note: For instructions on setting email alerts, read the guide here: How to Set Up Sharepoint Email Notification Alerts.
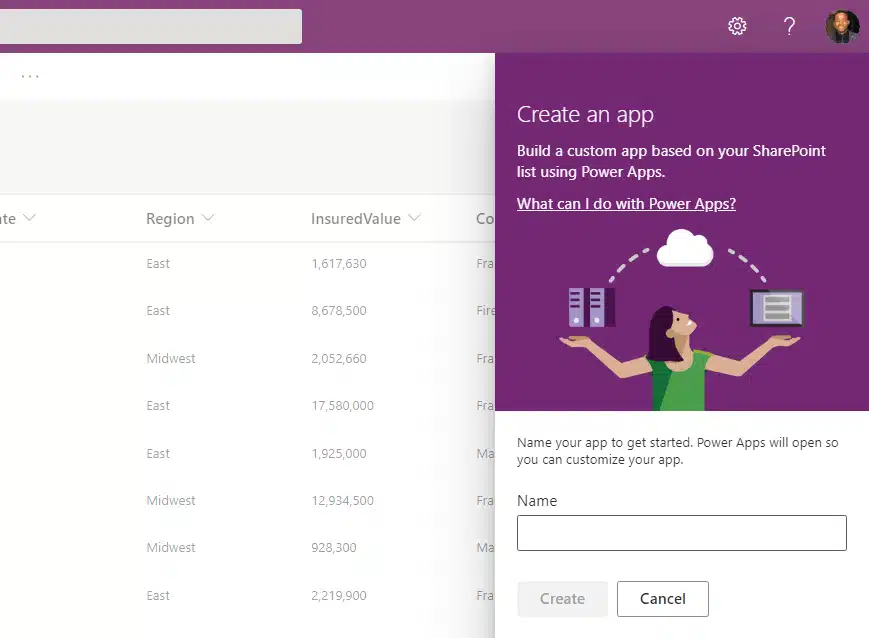
6. Power Apps and Power Automate Integration
Did you know that you can create an app from your list?
The amazing part is that you don’t need to enter a single code. You can do it using Power Apps, a tool for creating custom apps.
Besides apps, you can also create custom forms.
Note: Got a tutorial here for using Power Apps. Check out this article: Power Apps in SharePoint Online: Get Started.
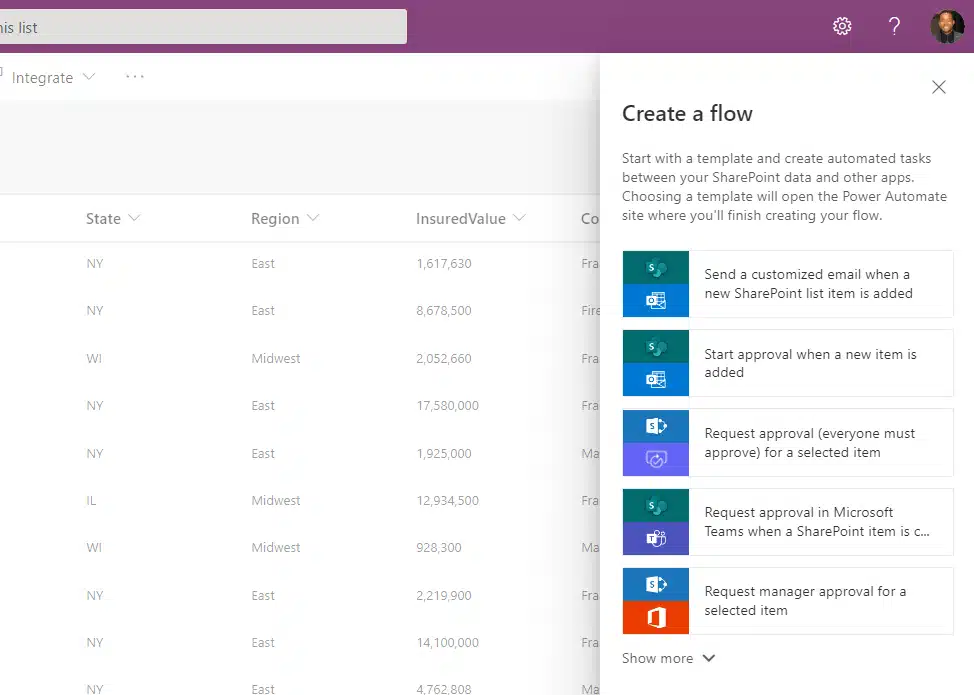
Power Automate is another automation tool that enables you to create online workflows that work across various apps and services.
For example, you can create an approval workflow for your list using Power Automate.
Note: For a detailed tutorial on creating an approval workflow, read this guide: How to Make an Approval Workflow for SharePoint.
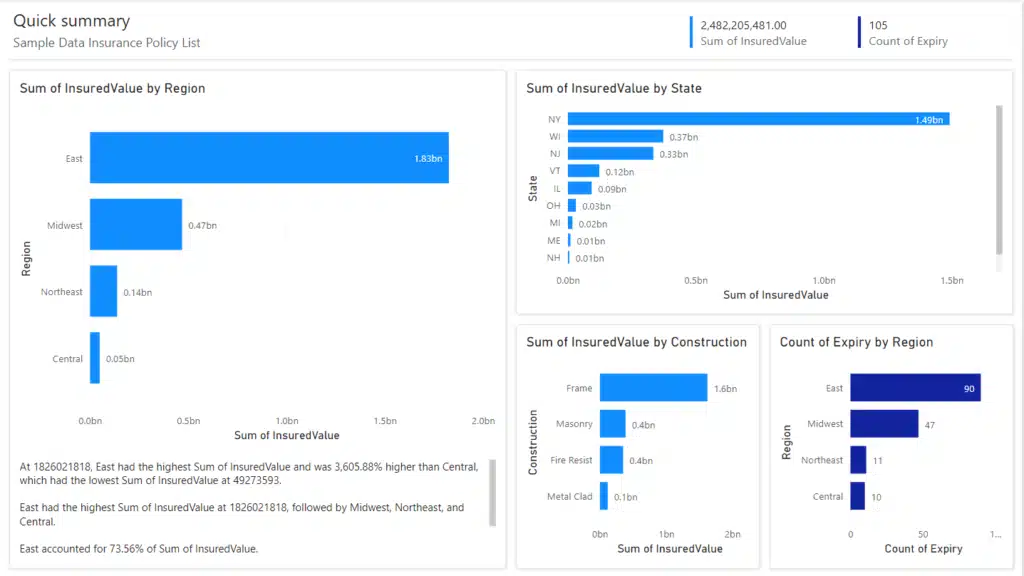
7. One-Click Power BI Visuals
A more recent addition here is the ability to automatically create good-looking visualizations of your list using Power BI.
All of that in a single click inside your list:
By the way, this feature is also present when you want to easily create a Power BI report from a SharePoint list.
Note: New to Power BI? Read this article to get the basics: What is a Power BI Dashboard [Power BI Dashboard Tutorial].
How to use Microsoft Lists
Before you jump right away to Microsoft Lists, here are the basics of using it (skip this part if you know how to use a SharePoint list):
There are a few ways you can access Microsoft Lists on your computer.
The first is to go directly to its website. Go to this website and sign in:
https://www.microsoft.com/en-us/microsoft-365/microsoft-lists
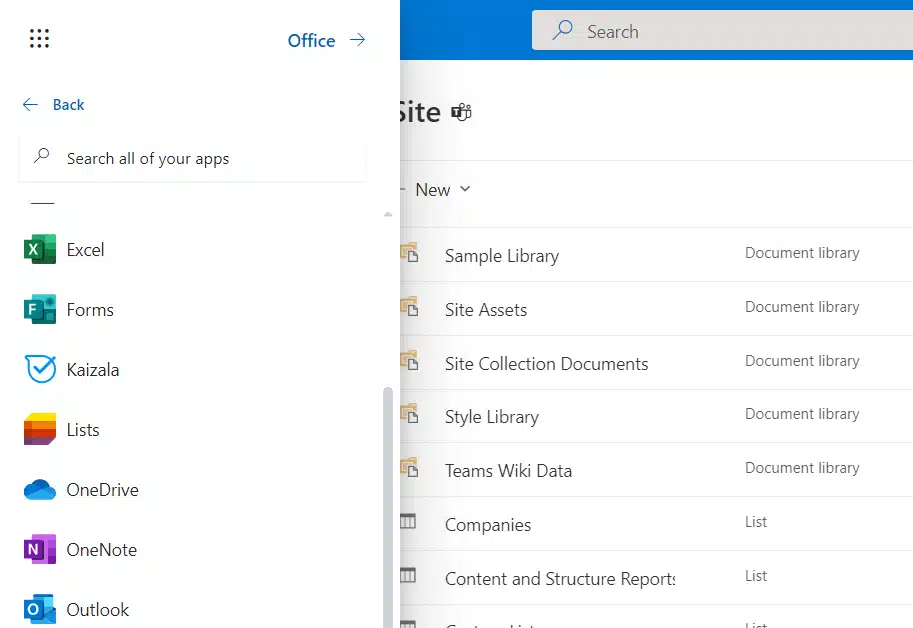
If you’re already inside Microsoft 365, then you can simply navigate to Microsoft Lists from the App launcher > All apps:
For mobile devices:
- Go here if you’re using an Android device
- Check here if you’re using an Apple device
The home screen of Lists looks like this:
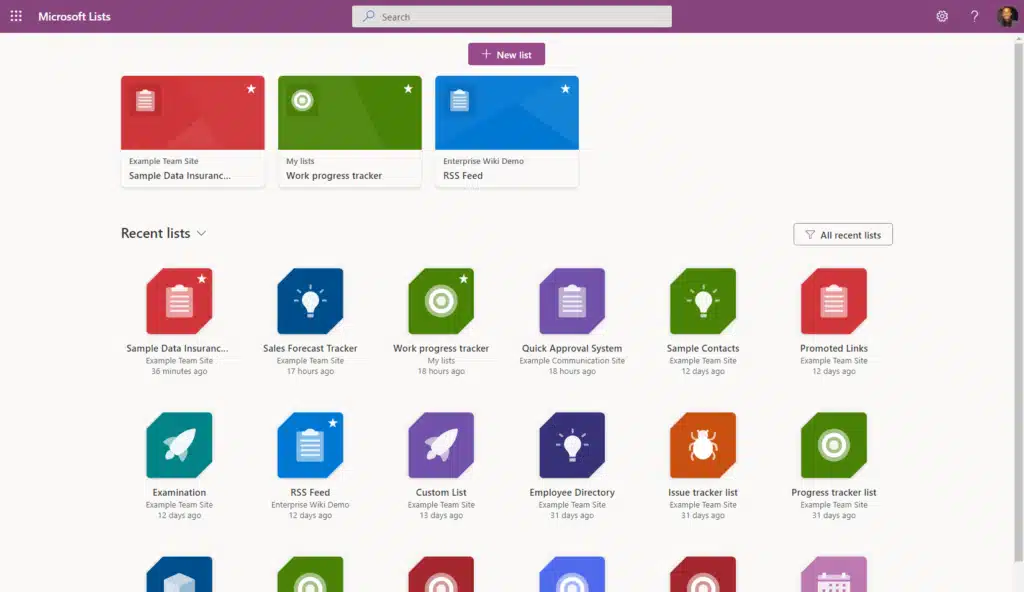
The most prominent space on the screen is your recently created lists, which you can toggle to show only lists created in the app.
The app sees it as an important distinction since all your SharePoint lists appear here. Microsoft Lists could be used for personal purposes.
Creating a list in the Microsoft Lists app
To continue, you can see the glaring new list button near the top and centered on the page.
As its name suggests, pressing this button will allow you to create a list in different ways, including templates:
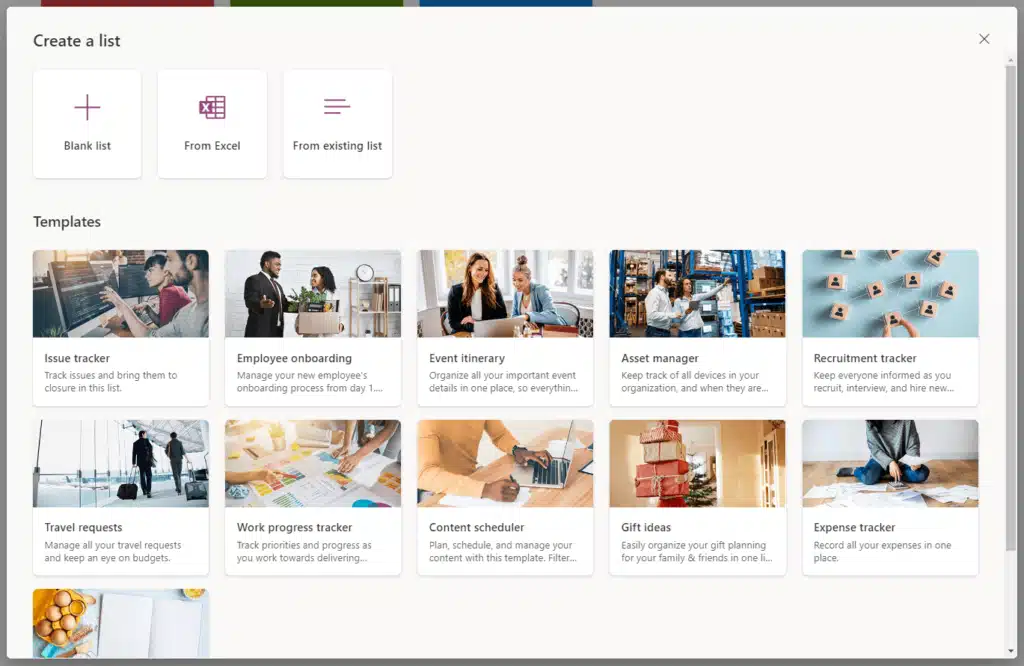
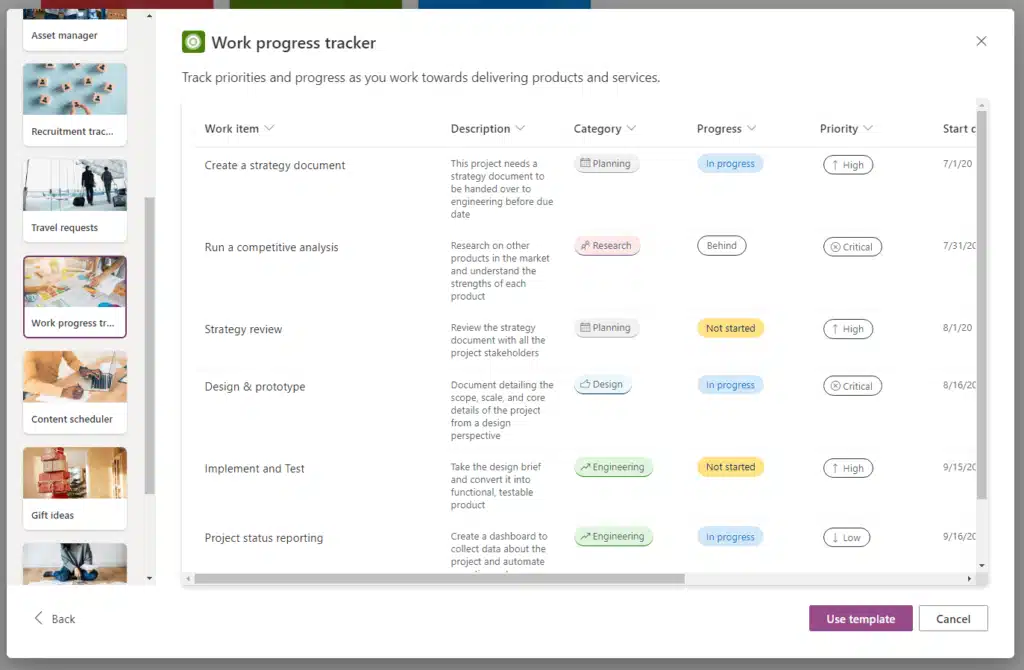
If you choose to create a new list from a template, the app will show you first the columns that it includes.
However, the template will not import the list items shown in the preview, so expect an empty list.
For information on the other methods, check out these guides:
- How to Create a Custom List in SharePoint Online
- How to Import Excel Table to SharePoint Online List
- Duplicate Sharepoint Lists: How to Create a Custom List
Editing entries in Microsoft Lists
If you want to edit your list, all you have to do is open it first from the home screen.
Once you see the list:
- Select a list item
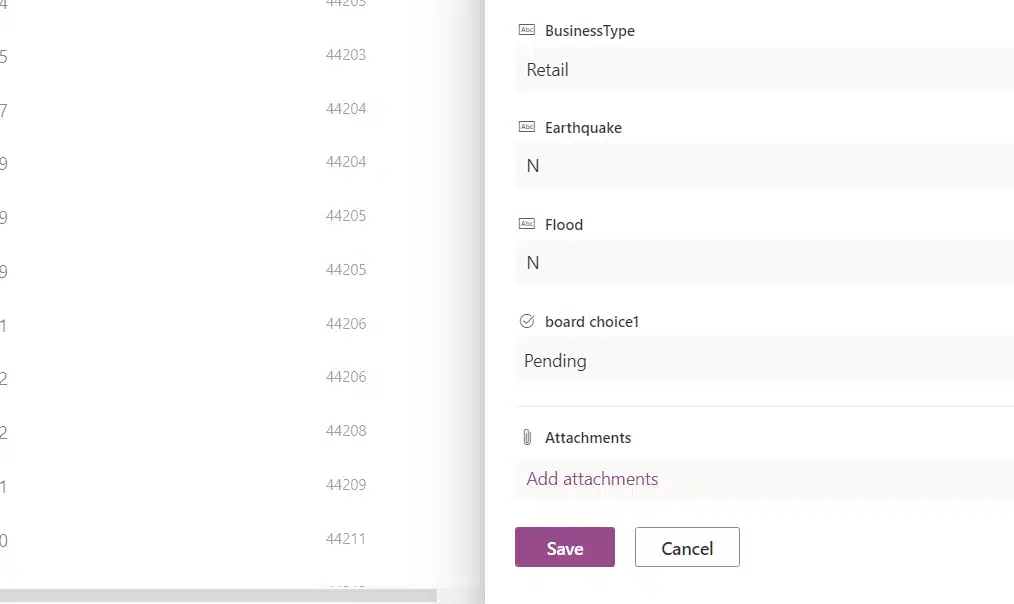
- Open the information panel

On the properties part, you can simply overwrite the information on the fields and press the enter button on your keyboard to save the changes.
The edit all button will open an extension panel where you can change all the fields and click the save button below the panel:
You can also edit multiple list items at once. All you have to do is activate the edit in grid view mode.
Click it from the menu bar at the top:
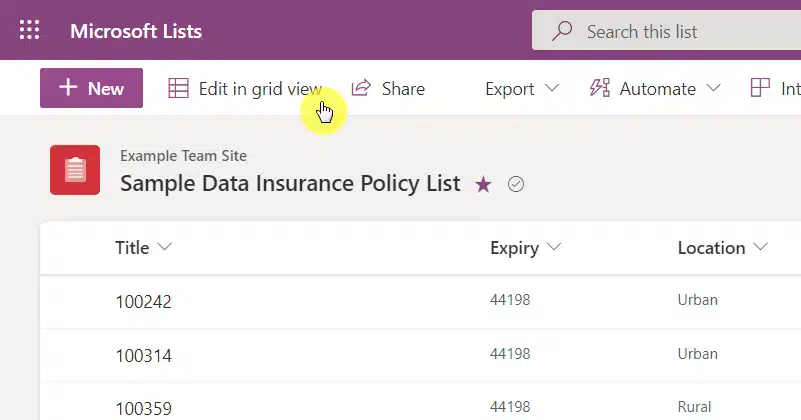
This will turn the list into something like a spreadsheet where you can edit any cell or metadata inside the list.
Simply enter the new value and press enter on your keyboard to save the changes:
You can exit from the grid view using the same button to enter it (the button will change to exit grid view).
What is the difference between Microsoft Lists and SharePoint Lists?
The short answer — there’s almost no difference between a SharePoint list and a Microsoft list in terms of functionality.
In the past, Microsoft Lists has an edge when it comes to social interaction with its Teams integration and commenting.
However, as you can see below, these same features are present in SharePoint lists:
So where do SharePoint lists end and Microsoft Lists begin?
Well, the Lists app is built on top of SharePoint lists. But there are some minor differences:
- In Lists, you can see all the modern lists from all the sites at once where you have the proper credentials.
- In SharePoint, you can only see the lists from a single site at a time. You need to go to another site to see its lists.
- When creating a list, it’s stored on your personal site (the web interface you see when accessing OneDrive files).
You will catch the location of the list when you see its list settings. Check the link in the link field in your browser.
Related: Introductory Guide: SharePoint Online Modern Experience
How to add Microsoft Lists to Microsoft Teams
Many organizations today use Microsoft Teams, especially since the pandemic kicked in and forced us to work from home.
If you want to switch from Lists and Microsoft Teams, all you have to do is add Microsoft Lists to your channel.
Go to Microsoft Teams and follow these steps:
- Navigate to a specific channel and team
- Click the plus button on the upper toolbar
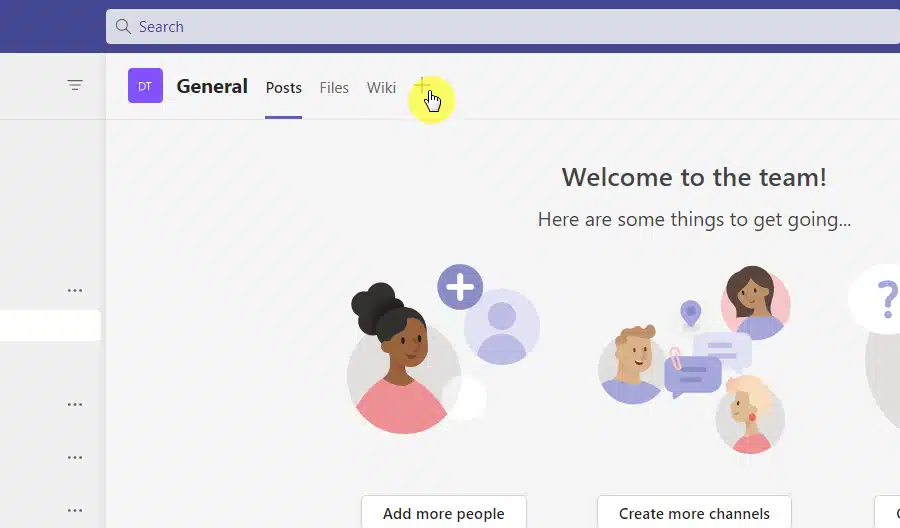
You will then see a box with pre-installed apps in Teams.
All you have to do now is to search for Lists and click on it:
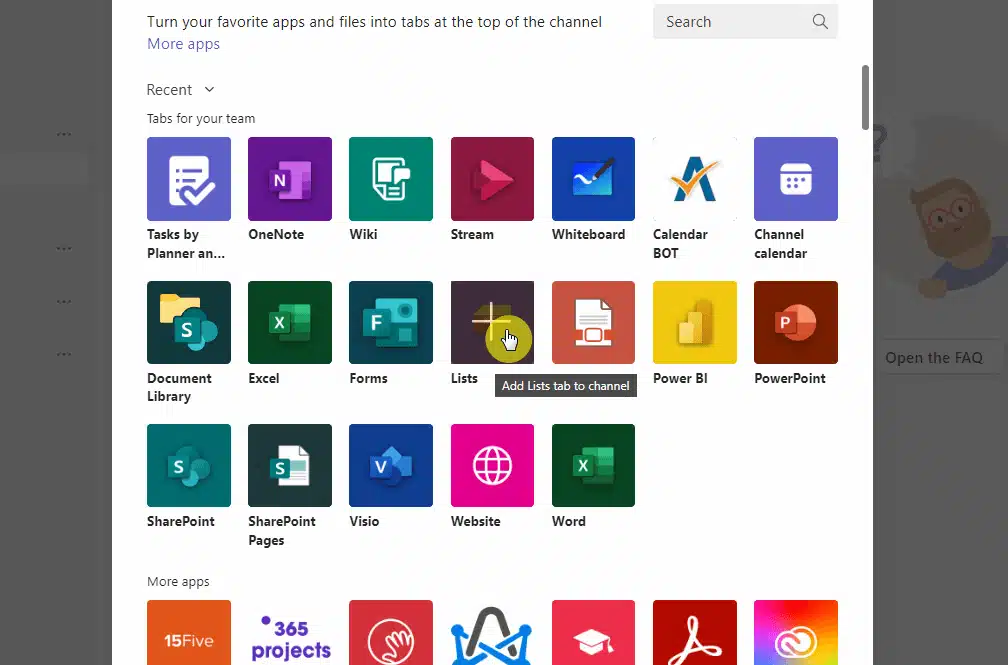
On the next screen, click on the save button to finish adding Lists to the channel.
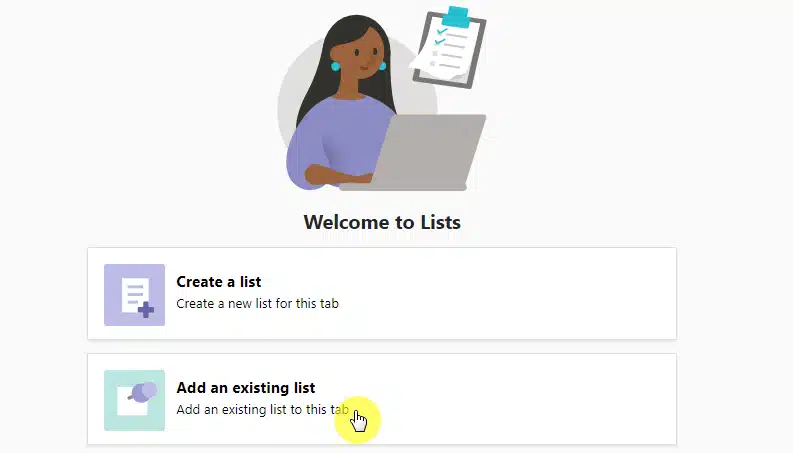
Right after that, the new Lists tab will open where you can either create a new list for this tab (saved to the site where the channel belongs) or add an existing list.
Note: For a more detailed guide on Teams, check out this guide: Microsoft Teams Tutorial: Become a Teams Expert Quickly.
Creating a list is similar to when creating a new list in Microsoft Lists or in SharePoint sites so I won’t discuss this much here.
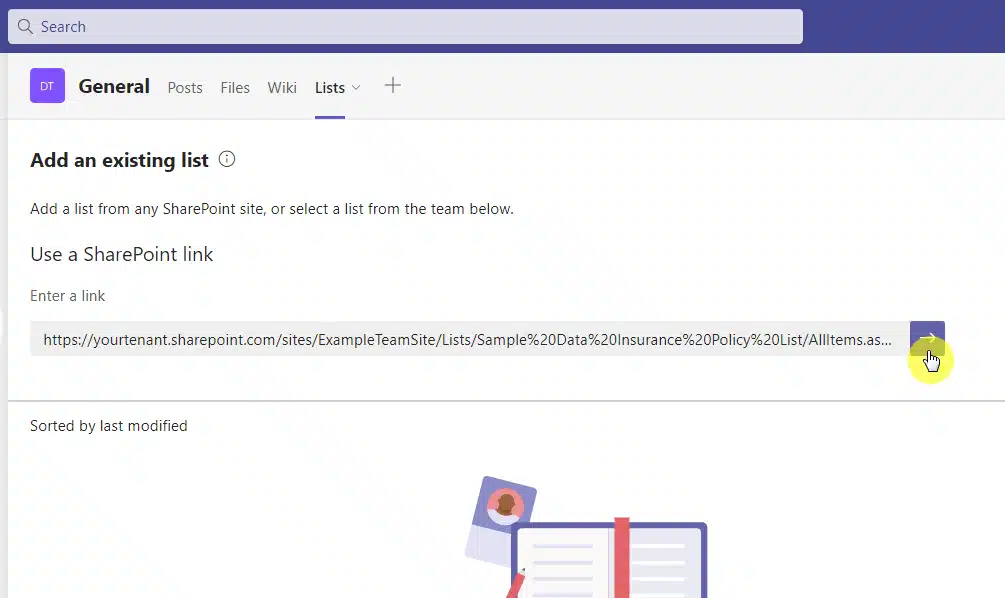
Adding an existing list though is different. Click on it first to understand better what I mean:
On the next page, you will have to enter the link on the field provided and click the button on the right.
This means you will have to go back and open the list on another tab in your browser and copy the list’s link.
Depending on the size of the list, it may take a little bit for it to load in the tab.
But once the load finishes, you will immediately see the list in Microsoft Teams in the channel you specified.
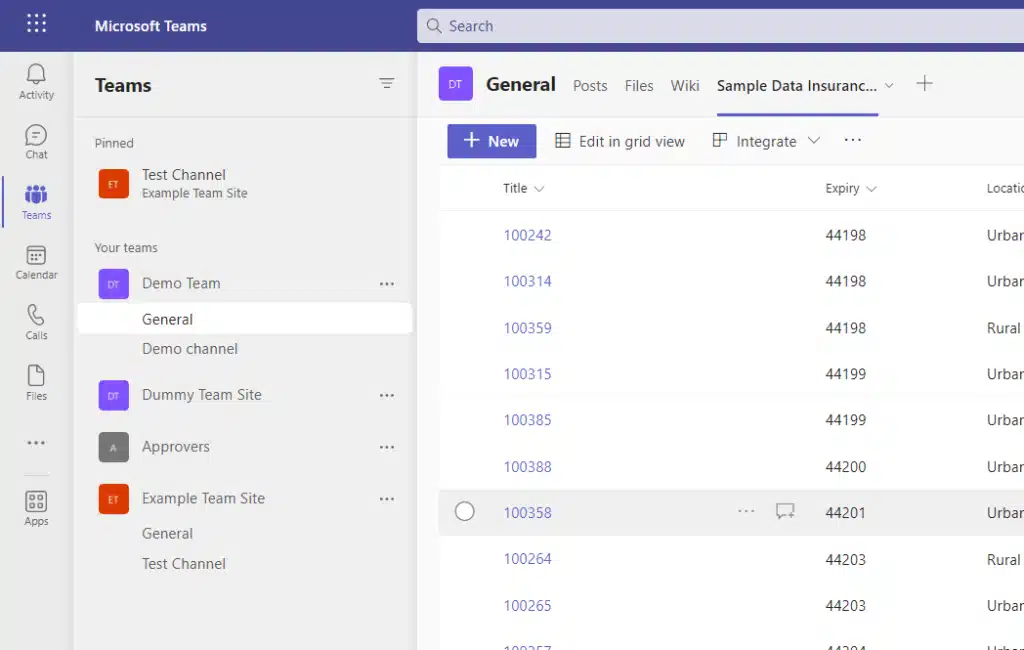
With this, you don’t have to switch between both apps since you can manage your lists right inside Teams.
Some notes here with Teams and Lists integration:
- Some of the advanced features like automation, alerts, and rules are not available in the tab.
- Lists retain the permissions they inherited from their source site. This specifically applies to external Team members.
- Guests can also add items to an existing list integrated into Teams. They can’t, however, create, edit, or delete a list.
So what do you think about Microsoft Lists? Share your thoughts and questions in the comments below.
For business inquiries, please send a message using the contact form found here and I’ll get back shortly.


