
Last Updated on December 14, 2023
Want to check out the audit logs?
In this guide, you will learn how to view the audit logs in SharePoint, how to run search queries yourself, and how to export them.
Let’s get started.
Table of Contents:
SharePoint audit logs record various activities and events that occur within a SharePoint online environment.
They are integral in SharePoint’s framework and serve as a critical tool for administrators and compliance officers.
What types of events are logged?
These logs are essential for several reasons, including security monitoring, compliance assurance, and troubleshooting.
Here are the types of events that are typically logged:
| Event | Definition | Examples |
| User activities | Actions performed by users, such as viewing, editing, downloading, and deleting documents. It also tracks login attempts and changes made to site collections, libraries, and lists. | User downloads a document, User edits a list item, Failed login attempt, Change made to site settings |
| Administrative actions | Activities performed by SharePoint administrators, including changes to site settings, permission modifications, and policy updates. | Administrator updates site permissions, Changes made to site settings, Policy updates |
| System events | Automated processes or actions initiated by the SharePoint system itself, such as workflows, automated scripts, and other system-level operations. | Workflow execution, Automated script runs, System-level operations |
| External user activities | Activities performed by external users when external sharing is enabled. This is crucial for monitoring access and activities by non-organizational users. | External user accesses a shared document, External user edits a shared list item |
| Search queries | Logging of search queries made by users, valuable for understanding what information users are most frequently seeking. | User searches for “project report”, User searches for “customer information” |
Each logged event in the audit trail includes details such as:
- The date and time of the event
The user who performed the action - The IP address from which the action was initiated
- The specific item that was affected
Sign up for exclusive updates, tips, and strategies
How to Enable Audit Log Tracking
Enabling audit log tracking in SharePoint Online is a straightforward process, but it requires administrative privileges.
But first off, audit log tracking is now on by default for Microsoft 365 organizations — and you can verify this easily.
You can use the following command to verify the feature’s activation:
Get-AdminAuditLogConfig | Format-List UnifiedAuditLogIngestionEnabledIn case it was disabled, here’s what to do:
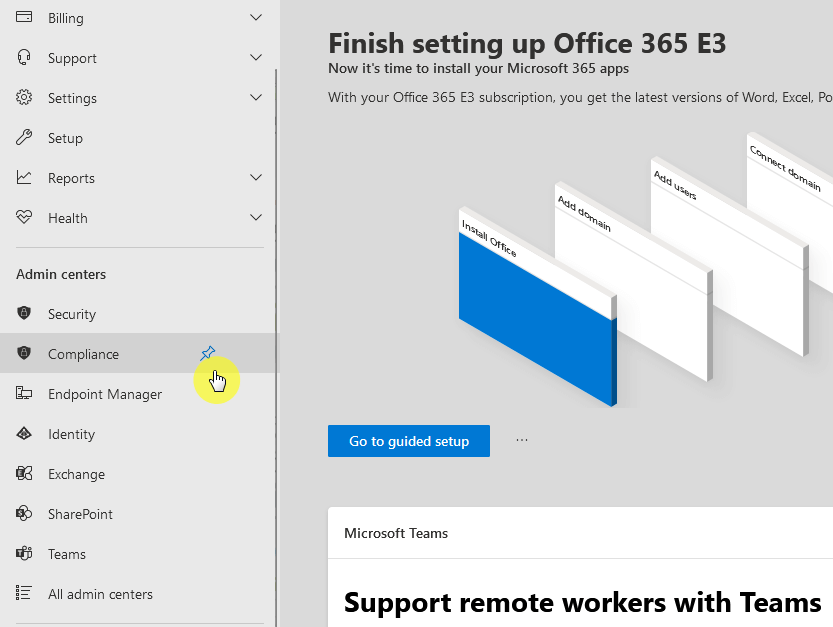
Get to the Microsoft 365 admin center with an account with admin privileges.
From there:
- Expand the list of admin centers
- Click on the compliance option
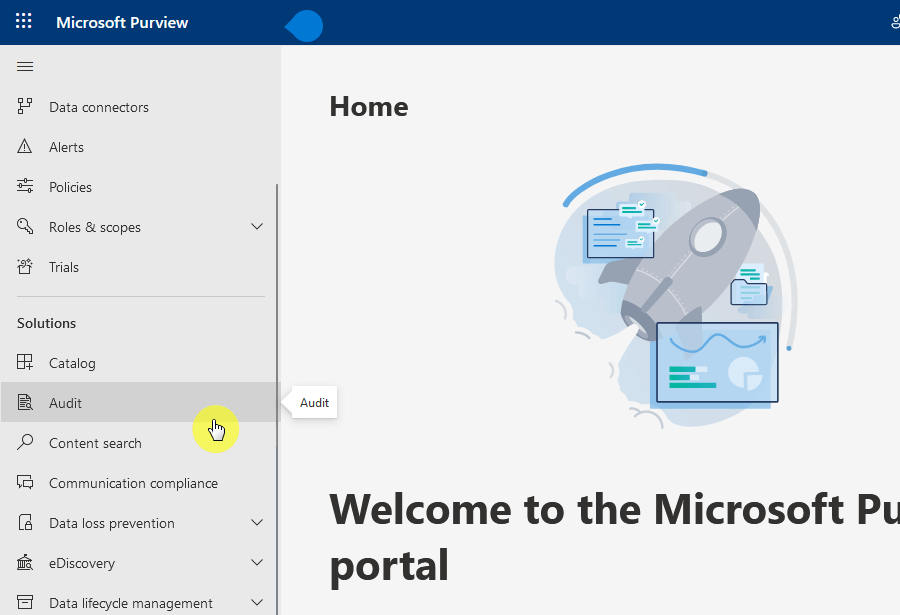
Step 2: Get to the audit section
Now that you’re in the Purview app, click the audit solution from the sidebar panel:
Step 3: Start recording activity
If audit log tracking isn’t enabled yet, you will see the following screen:
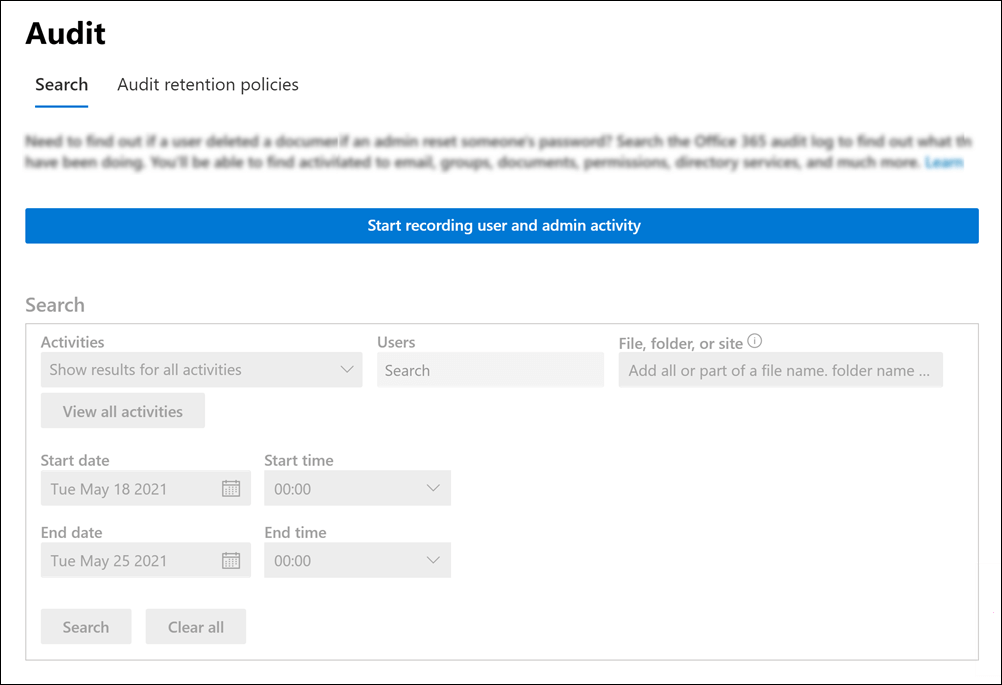
If that’s the case, you must click the start recording user and admin activity button to enable the audit log tracking feature.
After that, this is how the page will look like once the audit log tracking feature is activated:
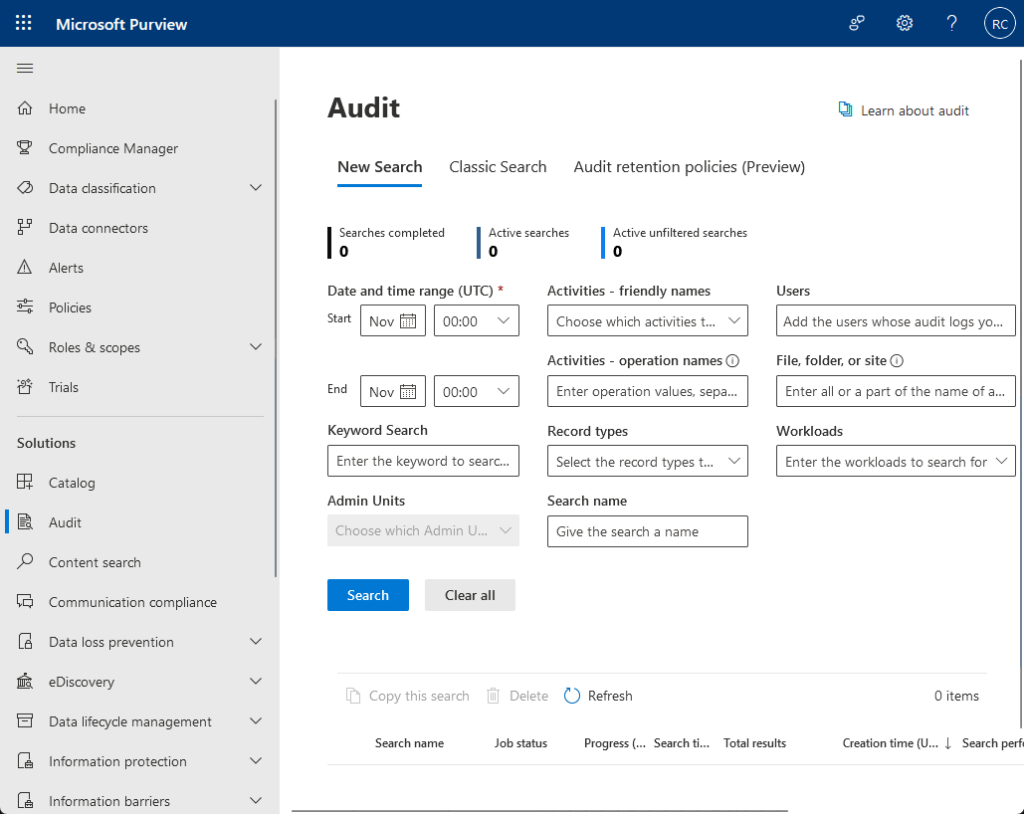
It’s also what you will see if the feature is enabled the first time you visit this page.
By the way, you can also use PowerShell to enable the auditing feature:
Set-AdminAuditLogConfig -UnifiedAuditLogIngestionEnabled $trueIf you use that, you will then receive a notification that it may take up to 60 minutes for the system to enable the feature.
How to Run Audit Log Search Queries
If you want to use the audit logs effectively, you need to know more than simply how to view them…
You must learn how to run targeted search queries in order to extract meaningful information.
Here’s how to configure and execute audit log searches:
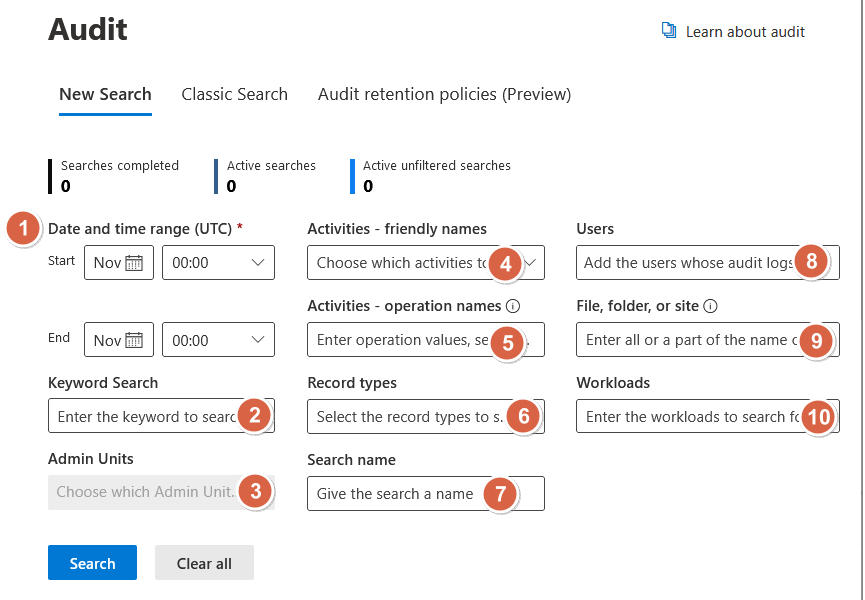
Configure the search parameters
In SharePoint Online audit log searches, the precise search parameter configuration is important for efficient data filtering and retrieval.
Here’s what each search parameter is for and how to use them:
| Parameter | Definition | Usage |
| Start Date and End Date | Default selection is the last seven days. Can customize up to a 180-day range. | Useful for focusing on specific time periods for auditing, especially important after recent enablement of auditing. |
| Keyword Search | Enter keywords or phrases for filtering within the audit common schema. | Ideal for targeting specific terms or phrases, using asterisks (*) for special characters. |
| Admin Units | Select from a drop-down list of administrative units within your organization. | Allows scoping of the search to specific organizational units. Can select multiple or all units. |
| Activities – Friendly Names | Choose audited activities based on their user-friendly names, organized into related groups. | Enables selection of specific activities or groups for more focused search results. |
| Activities – Operations Names | Enter exact operation names for a granular search. | Best for advanced users, requires precise naming for accurate results. Mirrors PowerShell search flexibility. |
| Record Types | Choose from a list of record types associated with Microsoft services. | Useful for narrowing searches to specific types of records, like those related to Microsoft Purview Information Protection. |
| Search Name | Assign a custom name to your search job. | Aids in identifying and managing search jobs, especially when multiple searches are conducted. |
| Users | Specify one or more users for the search. | Focuses search results on activities performed by selected users. Can include all users if left blank. |
| File, Folder, or Site | Input keywords or URLs for specific files, folders, or sites. | Helps in targeting search for activities related to specific files or sites, using wildcard character (*) as needed. |
| Workload | Identifies the Microsoft 365 service where the activity occurred. | Useful for narrowing down search to activities in specific services like Azure AD, Dynamics 365, etc. |
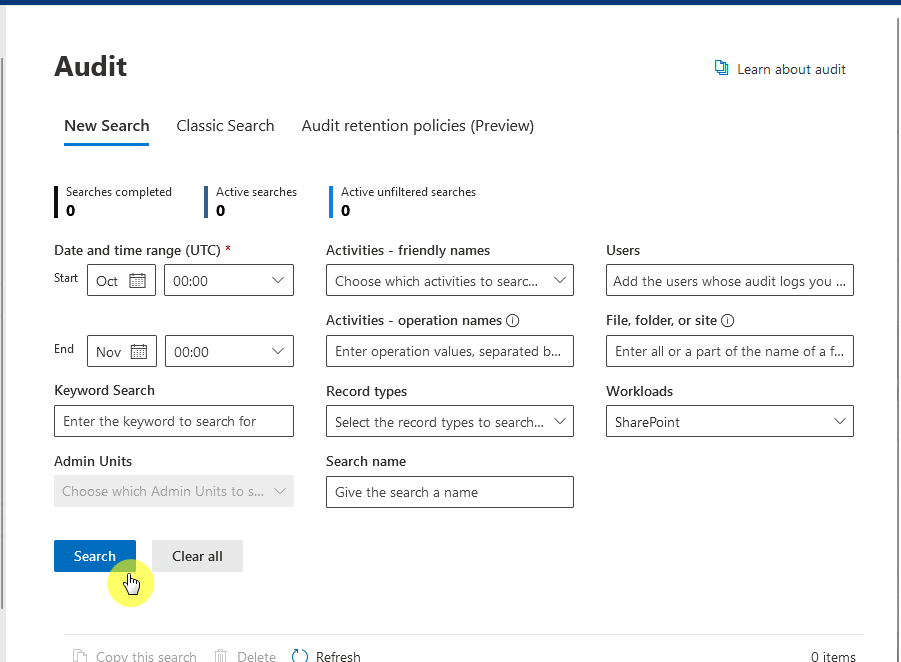
Run the search
After configuring your search parameters, initiate the search.
The system will process the request and display the results based on your criteria.
Click on the search button to get started:
If your initial search does not yield the expected results or is too broad, adjust the parameters and run the search again.
This iterative process helps in fine-tuning your search to get the most relevant information.
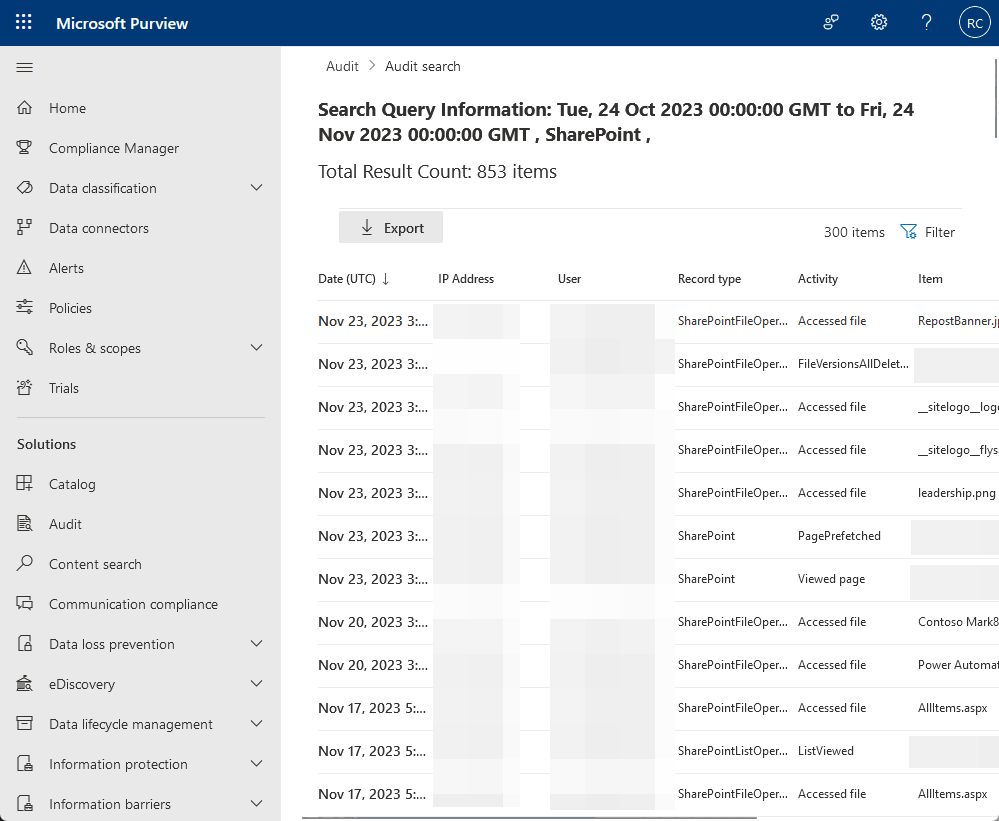
After running searches, you will then see the results in the dashboard below the parameters.
Here’s what you will see:
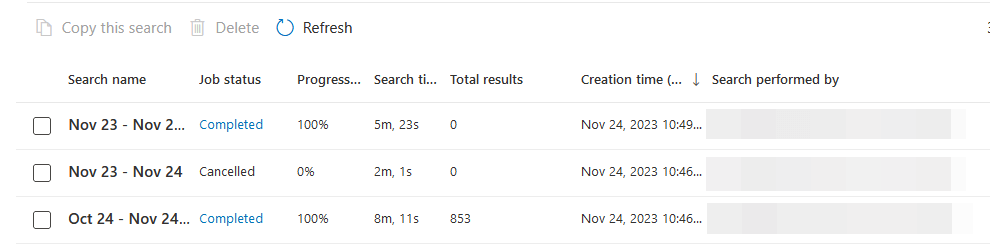
To view a search result, all you need to do is click on the row of that search result.
That will then bring you to another page that looks like this:
You can click on an item to see more details on that activity.
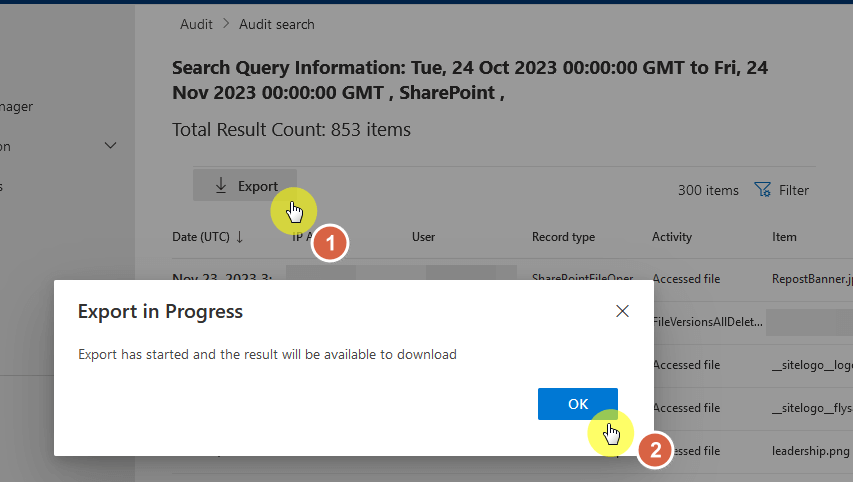
Exporting the audit logs
You can then export the audit log reports easily.
Click on the export button and a window will appear telling you that the export has started:
After the export is complete, you will see a green call-out where you can download the file.
Click on the link provided to download the file.
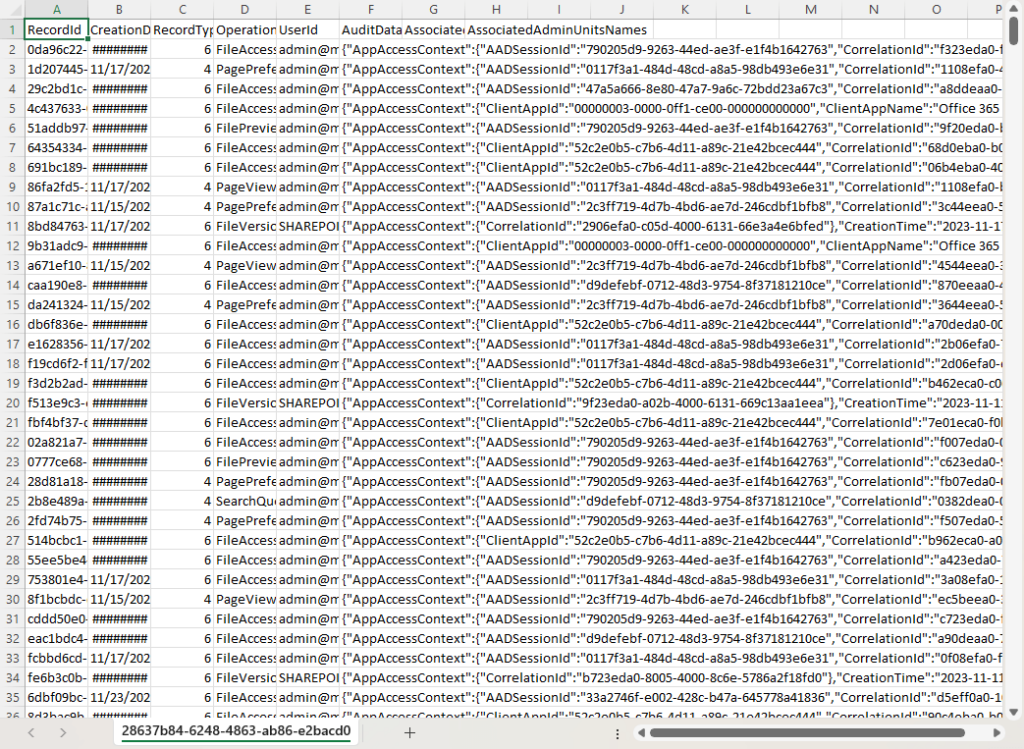
Here’s a sample of an exported audit log opened in Microsoft Excel:
The Importance of Monitoring User Activity
Effectively viewing, analyzing, and exporting SharePoint Online audit logs is essential for safeguarding your SharePoint environment.
These skills enable administrators to detect and understand user activities and potential security threats.
Have more questions about audit logs? Feel free to drop your queries in the comments section.
For business-related assistance, don’t hesitate to reach out through the contact page. I’ll reply as soon as possible.


How can we generate these logs for multiple files(1000 files)? Additionally, is it possible to obtain logs for the child files within a SharePoint drive?