Last Updated on April 30, 2024
Do you need to migrate a large volume of documents to SharePoint Online?
Using a third-party tool might do the trick. However, I suggest you look into the in-built options first (especially for one-time migration).
In this article, let’s talk about how to use the Microsoft SharePoint Migration Tool (SPMT). I’ll also share other options as well.
Let’s get started.
Table of Contents:
In a nutshell, the SharePoint Migration Tool enables you to easily migrate your content to Microsoft 365 in a secure manner.
According to Microsoft:
The SharePoint Migration Tool (SPMT) is a free and easy-to-use migration solution to help you migrate content from on-premises SharePoint sites to Microsoft 365.
You can use this tool to migrate from on-premises file shares and SharePoint Server 2010, 2013, and 2016.
This includes:
- File, folder, and list items
- Permissions
- Versions
- Managed metadata and taxonomy
- Navigation and icons
- Site features
- SharePoint web parts
- Site migration
- Site description
- Incremental
- Pages
- Microsoft Teams
- Taxonomy migration
Sign up for exclusive updates, tips, and strategies
Before everything else, make sure that you have properly prepared the documents you want to migrate to SharePoint Online.
For example, you need to make sure that you build the information architecture properly first before you migrate.
Note: If you need more help in this aspect, check out my beginner’s guide on how to plan a SharePoint migration.
Once you’re sure that everything is ready, proceed with the following steps:
In your tenant:
- Click the app launcher icon on the upper-left corner
- Click “Admin” from the options
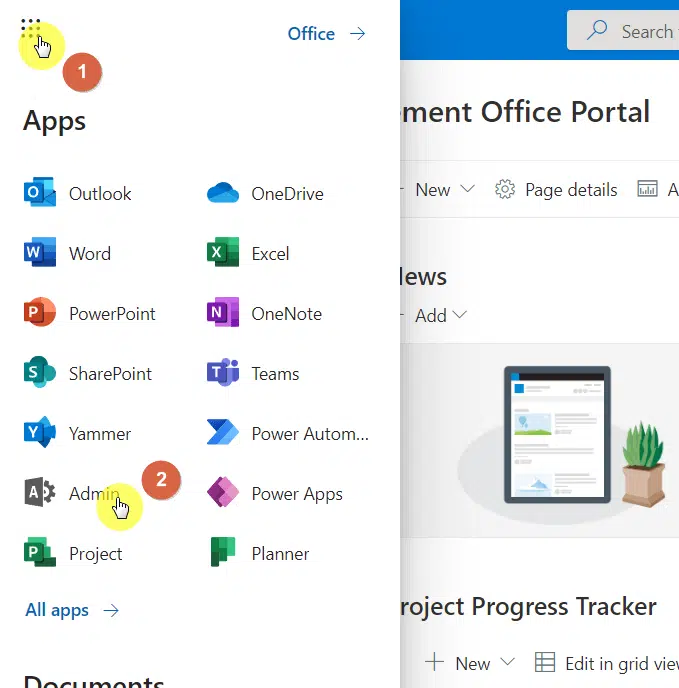
In the Microsoft 365 admin center:
- Expand the admin center options in the left panel
- Click “SharePoint” from the options
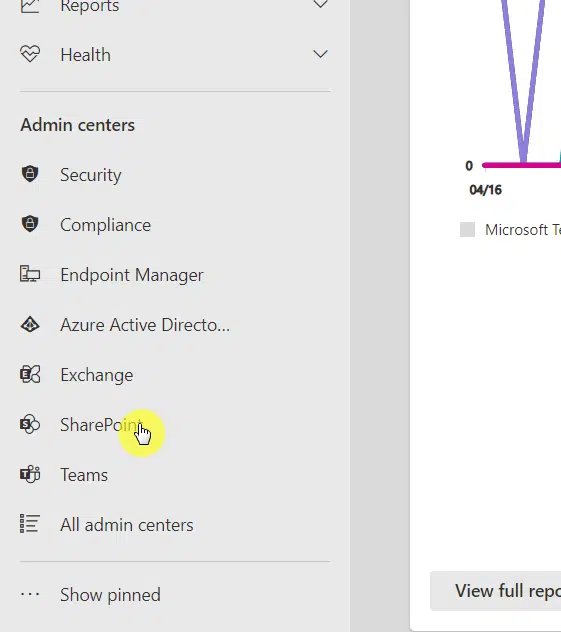
When you get to the SharePoint admin center, click the “Migration” item from the left panel:
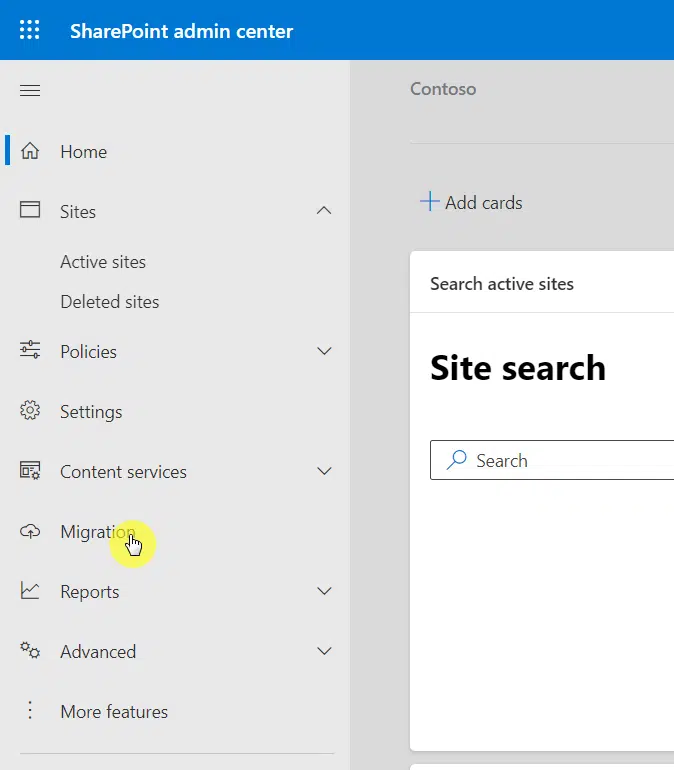
Scroll to the bottom of the page and click the “Download SharePoint Migration Tool” button.
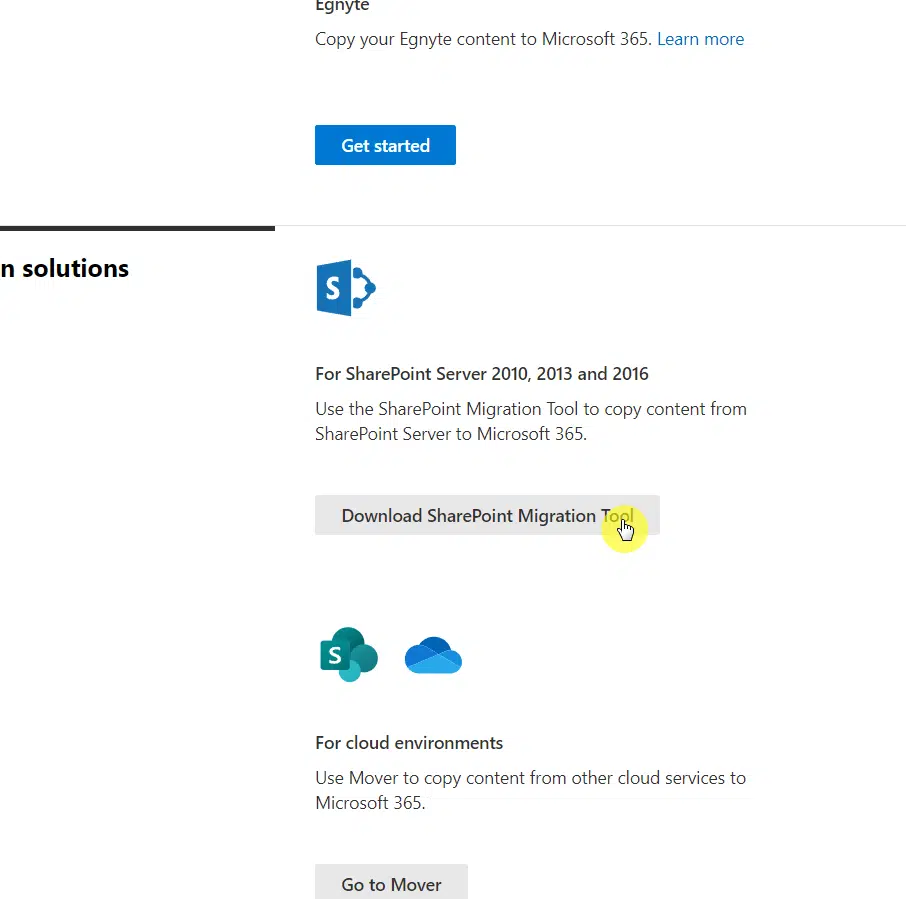
Save the file on your computer and run it.
Now, two things will happen when you run it:
- The file will download the rest of the tool
- After it finishes everything, you need to enter your username and password
Note: You need to enter a credential with admin access to be able to do the migration.
2. Start your migration
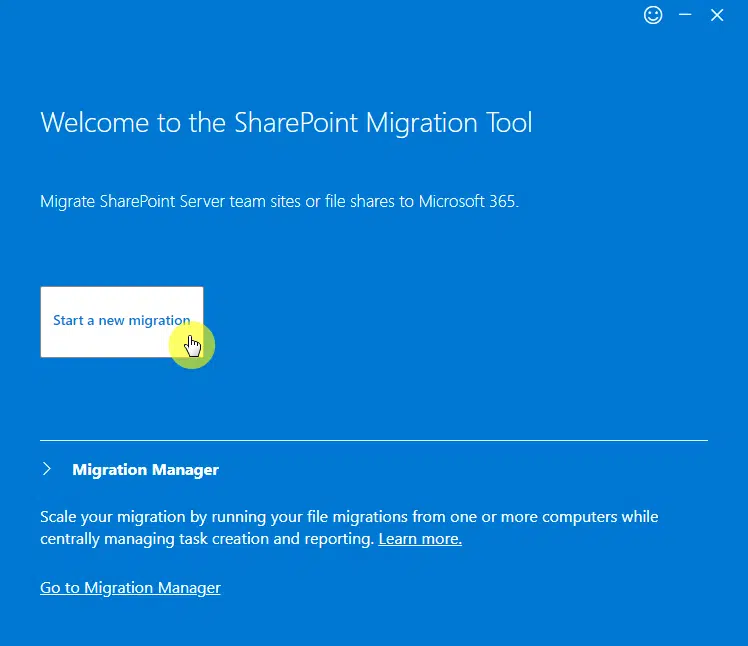
After successfully logging in, you will be greeted with the home interface of the tool.
Click the “Start a new migration” button to start:
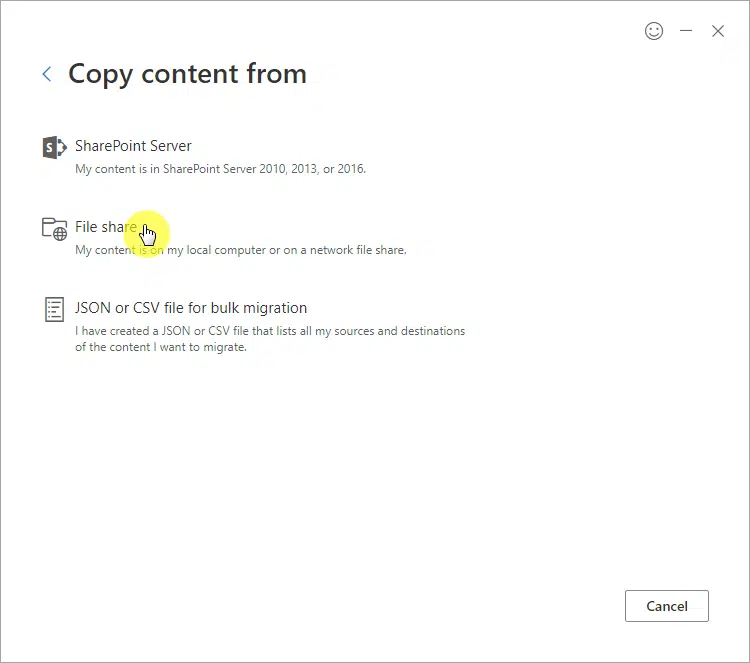
On the next page, you will be shown three options on where to migrate your files from:
- SharePoint Server (if your files are in SharePoint Server 2010, 2013, or 2016)
- File share (if your files are on your local computer or network file share)
- JSON or CSV file for bulk migration (basically a list of all the sources and destinations for migration)
Since my goal in this article is to demonstrate how to use the tool, I will use “File share” to migrate documents.
On the next page:
- Choose the folder that contains the content you want to migrate
- Select from the options whether or not you want to migrate only folder contents
- Click the “Next” button to proceed

Then, choose where you want to migrate the files to:
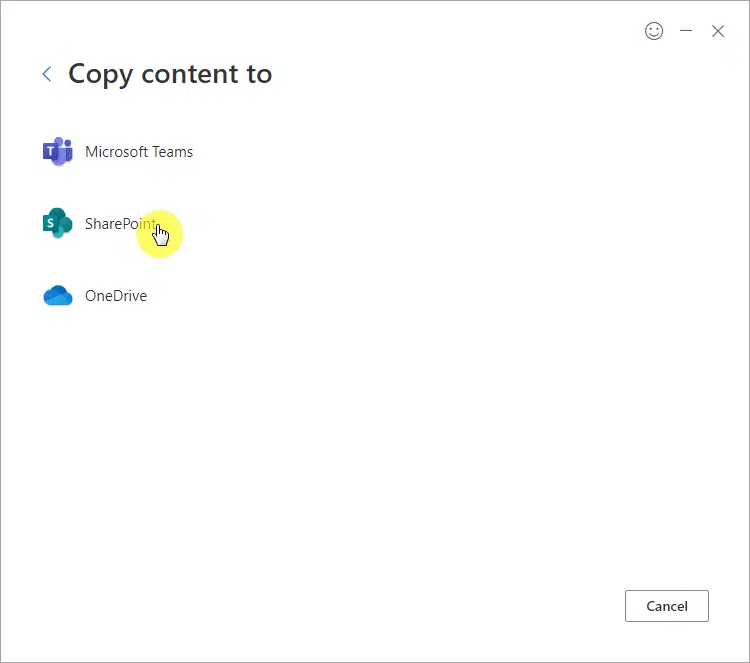
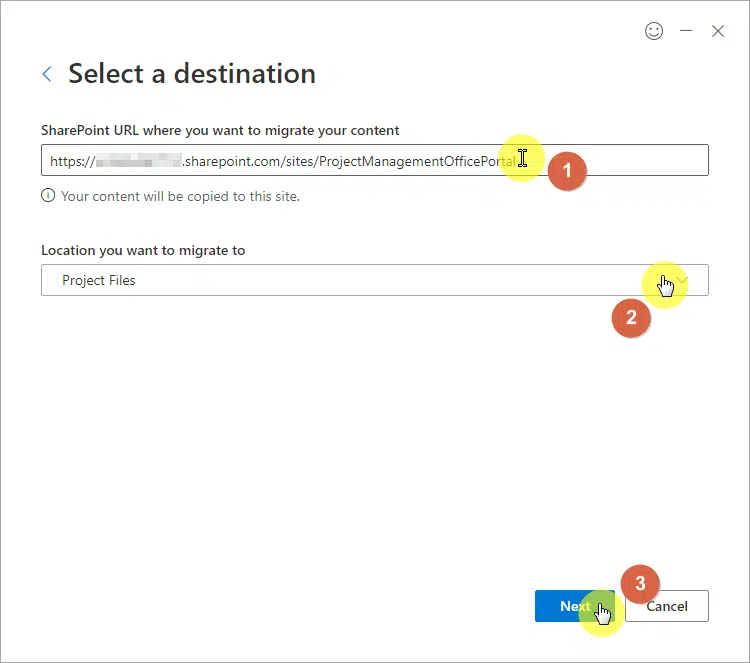
On the next page:
- Enter the site link on the first field
- Select the location or document library to migrate the files to
- Click the “Next” button
Note: When entering the site link, don’t include a page link e.g. home.aspx. Just copy the link without the page extension as shown in the example below.
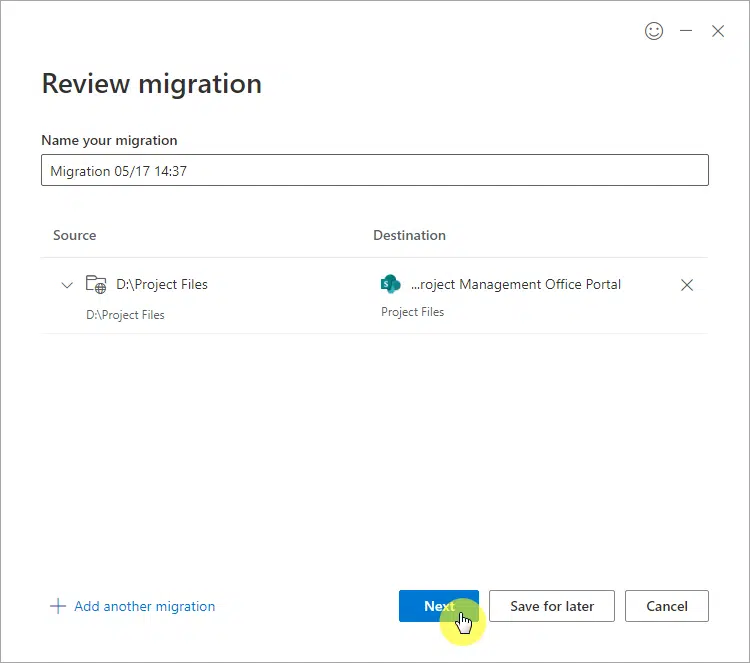
You will then be able to review the migration details (source and destination) and even customize the migration event name.
Once you’re sure of everything, click on the “Next” button to proceed.
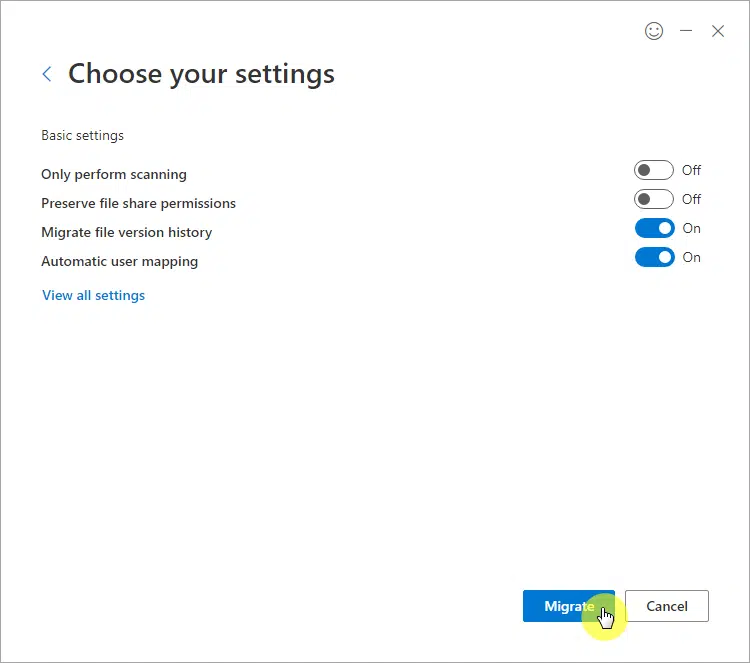
Lastly, you will be able to configure some settings as well. There’s also a “View all settings” button if you want to check everything out.
Once you’re ready, click the “Migrate” button to start the process.
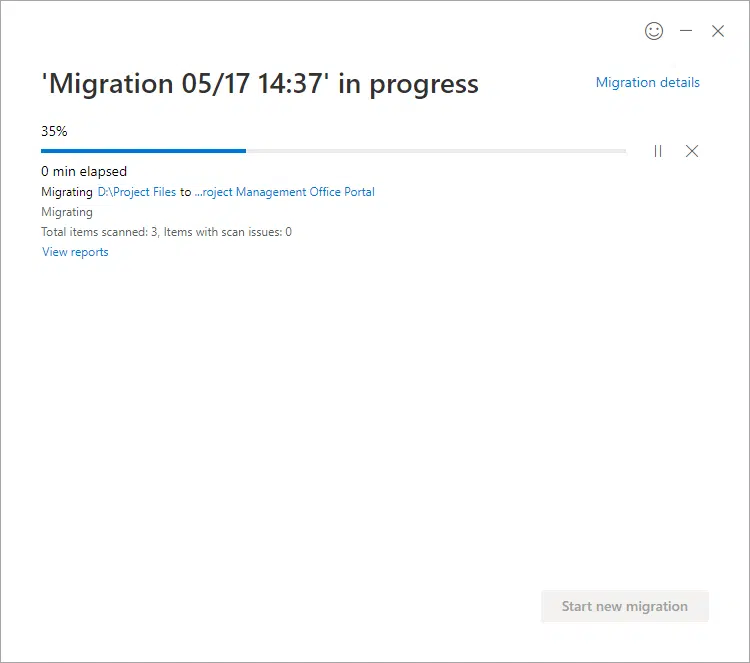
3. Check the migration results
The migration process may take anywhere from a few minutes to a few hours depending on the volume and your internet connection.
Once the migration is complete, you have the option of saving the migration report (which might come in handy for incremental migrations).
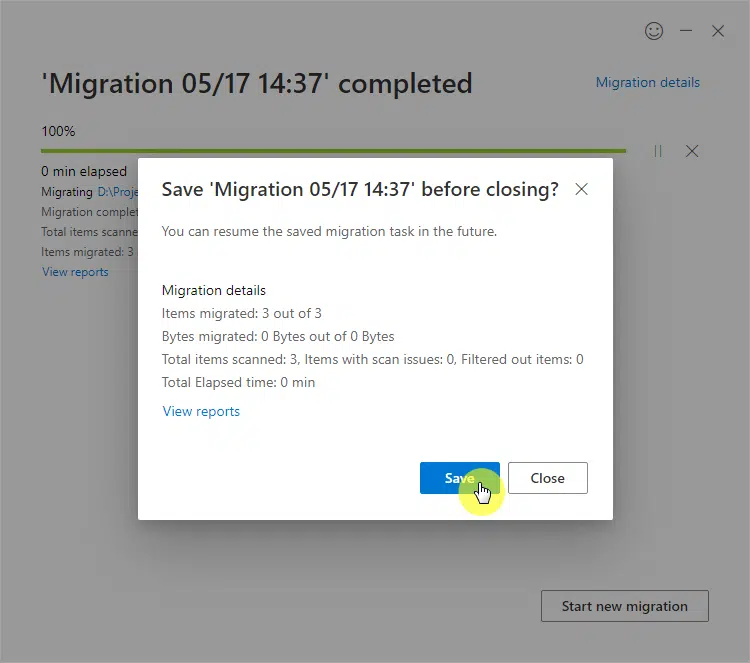
Otherwise, you can simply close the window and the tool itself.
Now, upon checking the SharePoint site document library that I indicated as the destination for the migration, I see these files:
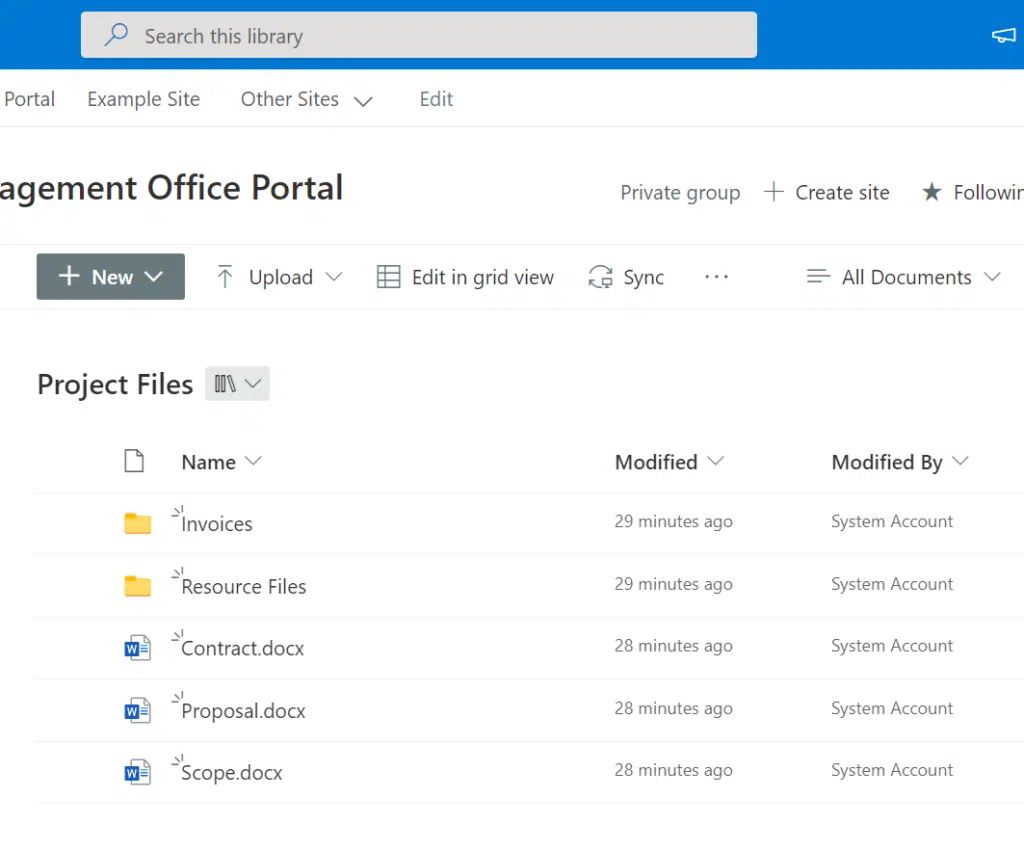
As you can see, using the Microsoft SharePoint Migration Tool (SPMT) is quite easy and straightforward.
But in the event that you’re looking for alternatives, I suggest you check out these articles:
- How to Use Sharegate for SharePoint Migrations
- Exchange Hybrid Configuration Migration Wizard Tutorial
- SharePoint Migration Tool: How to Use the Mover Tool
- How to Move and Copy Files in SharePoint Online and OneDrive
If you don’t have a lot of files you want to transfer, the OneDrive option is easy. Plus, you can sync your files with your computer as well.
Anyway, do you have some questions on how to use the SharePoint Migration Tool? If so, kindly drop those questions below.
For inquiries and other concerns, please use the site’s contact form to reach out and I’ll get in touch with you as soon as possible.

![How to Use the Microsoft SharePoint Migration Tool [2022]](https://www.mrsharepoint.com/wp-content/uploads/2022/05/black-tablet-computer-on-wooden-table-sigmund-taxUPTfDkpc-unsplash-1024x683.jpg.webp)
Thanks for sharing this article with us, and also you can use Gs Richcopy360 and Sharegate for migrating to Sharepoint, all are straightforward
Thanks for your suggestions, both Gs Richcopy360 and Sharegate sounds good
I appreciate you sharing this informative article on securely migrating content to Microsoft 365 using the SharePoint Migration Tool. It’s great to know that the tool allows for migration from on-premises file shares and SharePoint Server versions. Additionally, it’s useful to note that proper preparation of documents and information architecture is crucial before starting the migration process. While the SPMT is an excellent in-built option, third-party tools may also be considered depending on the migration requirements. Overall, a very helpful guide for anyone planning a migration to SharePoint Online.
Hi, I would just like to know if it will be possible to migrate documents from one site to another under the same tenant while keeping file data, such as created dates and original dates the same.
used the tool to test migration of a file share folder. all copied fine, but the site doesn’t appear in active sites page in the online admin console. how do we get the site to appear as an active site?
You should make sure that your default view is for all sites in the SharePoint Admin Center.