
Last Updated on September 22, 2024
New to SharePoint Online?
In this guide, I will walk you through the basics of SharePoint Online, from creating a site to web parts.
Let’s get started.
Table of Contents:
- What is SharePoint Online?
- Communication Site vs Teams Site
- Setting up a SharePoint Site
- Document Libraries and Lists
- Creating a SharePoint List
- Columns in SharePoint Lists
- Uploading Files to a SharePoint Site
- Creating a Page in SharePoint
- Adding Web Parts to Pages
- Editing Web Parts and Section Layouts
- Managing Access to SharePoint Site
- Integrating Teams and SharePoint
SharePoint Online is a cloud-based service that’s a part of the Microsoft 365 suite.
Its key features are the following:
- Cloud access
- Collaboration tools
- Document libraries and lists
- Integration with Microsoft apps
SharePoint is mostly known for its ability to create an intranet with resource and document management features.
What’s nice about it is its flexibility and scalability, which is why small and large organizations use it. 🙂
👉 Related: SharePoint Online Features: The Power of SharePoint Online
Sign up for exclusive updates, tips, and strategies
Communication Site vs Teams Site
To use Microsoft SharePoint, you need to create a site, and two basic types exist in the platform:
- Team sites
- Communication sites
A Microsoft team site is primarily built for internal collaboration and is usually used by smaller groups (teams/departments).
Communication sites are ideal for broadcasting information since they can reach a larger audience (think whole organization).
The two main differences are:
- Microsoft Teams integration
- Permissions
Team SharePoint sites have almost perfect integration with Teams where members can share files and even communicate directly from Teams.
As for the permissions, in Teams sites, members typically have edit rights, while it’s more on view access on communication sites.
👉 Related: SharePoint Team Site vs Communication Site (Differences)
There are two main places where you can set up a site:
- Start page
- SharePoint admin center
Let’s talk about each method:
1. From the start page
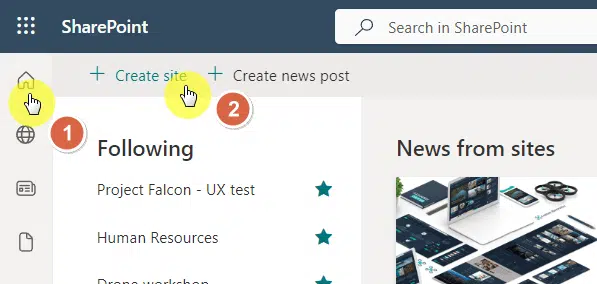
For the first one, simply log in to your tenant, and then click the home button that you can see from the left panel.
The start page acts like a personalized dashboard, a main hub that gives you a consolidated view of important information.
Anyway, once you’re here, you will be able to see a create site button on the top-left corner of the screen.
Like this:
Nice! 🙂
For the SharePoint admin center, find the admin app from the app drawer that you can access anywhere in Microsft 365.
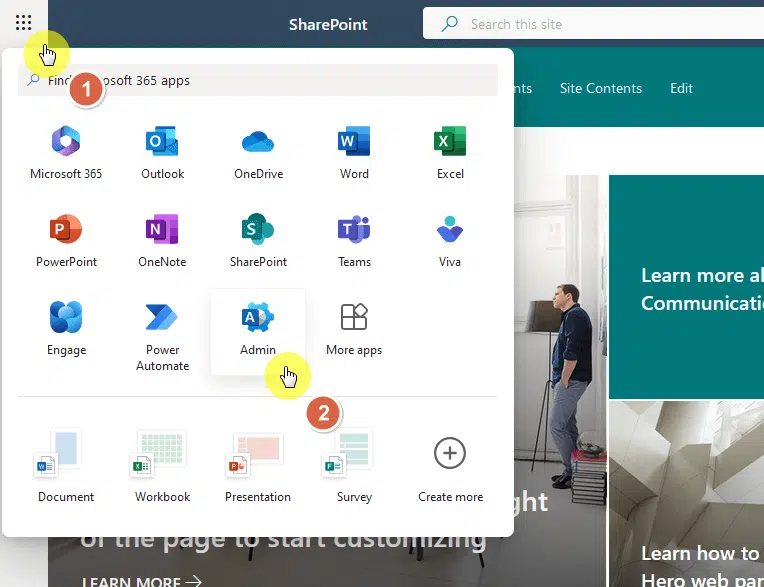
This will take you to the Microsoft 365 admin center, which is different from the SharePoint admin center.
You will find a list of admin centers on the left panel, expand it to see more, and then click the SharePoint option.
Like this:

Alright! 🙂
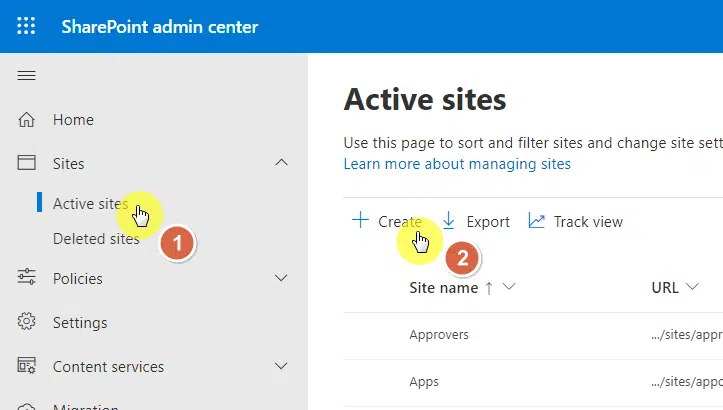
Now, when you go to the active sites page, you will once again see a button to create a new site.
Here’s what you will see:
Now what happens after that?
Selecting the site type
From there, a window will appear in the center where you can select the site type:
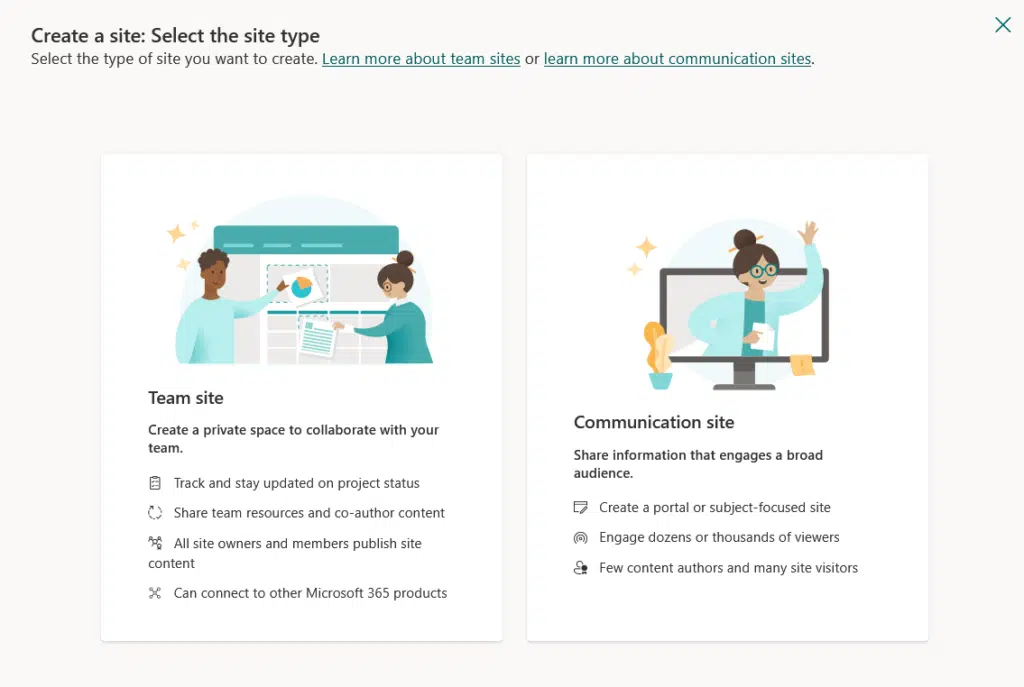
The main difference here is that in the admin center, you will have a few options to create “classic” or legacy intranet sites.
Anyway, once you select a site, you will then be presented with a list of templates and their preview.
Then the site creator wizard will kick in:
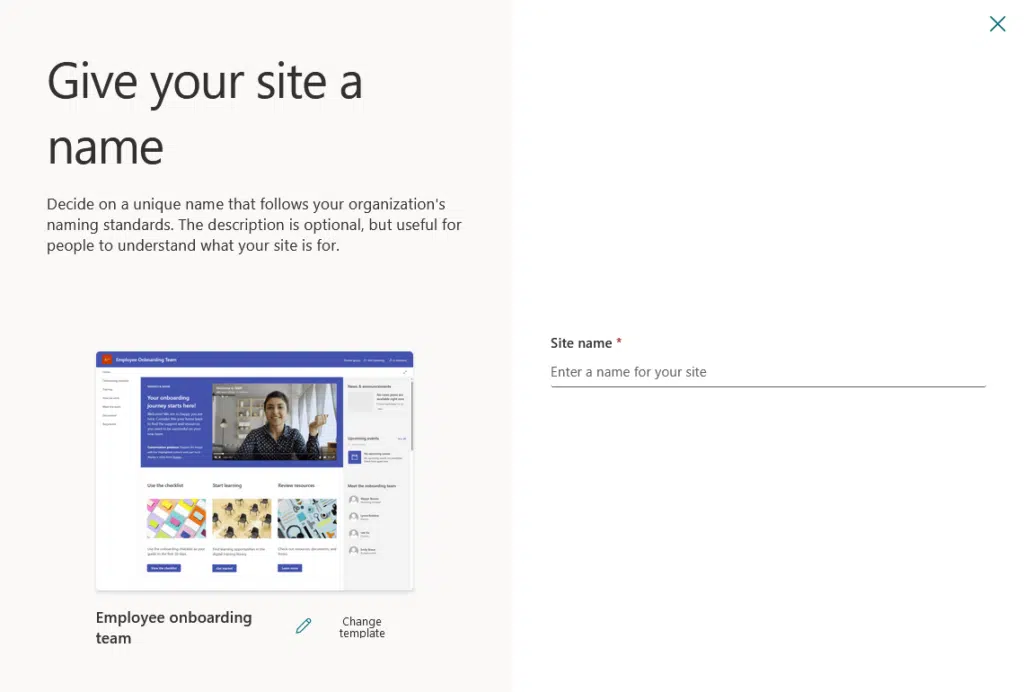
Basically, it will just ask you for some details like the site name, description, group owner, and site address. 🙂
👉 Related: SharePoint 101: Types of Sites in SharePoint Online
Document Libraries and Lists
Another main feature of SharePoint Online is document libraries and lists, which are core tools in the platform.
Document libraries deal with file storage, organization, and sharing.
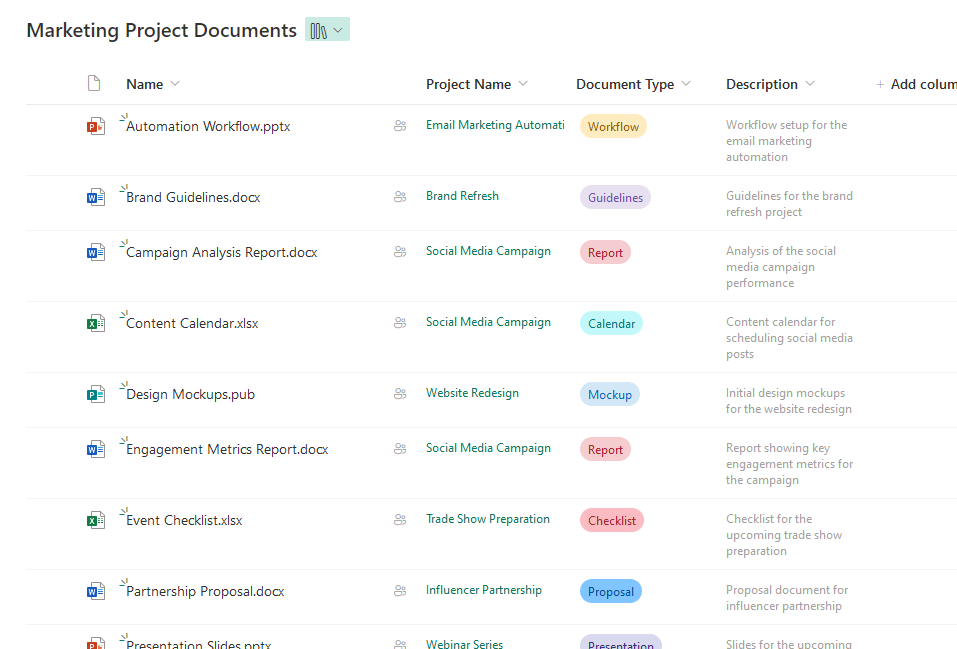
They have features like:
- Version control
- Metadata
- Permissions
They’re ideal for managing everything from internal reports to project files, and users can collaborate on them.
As for lists, they’re here to organize and track structured information like tasks or inventories.
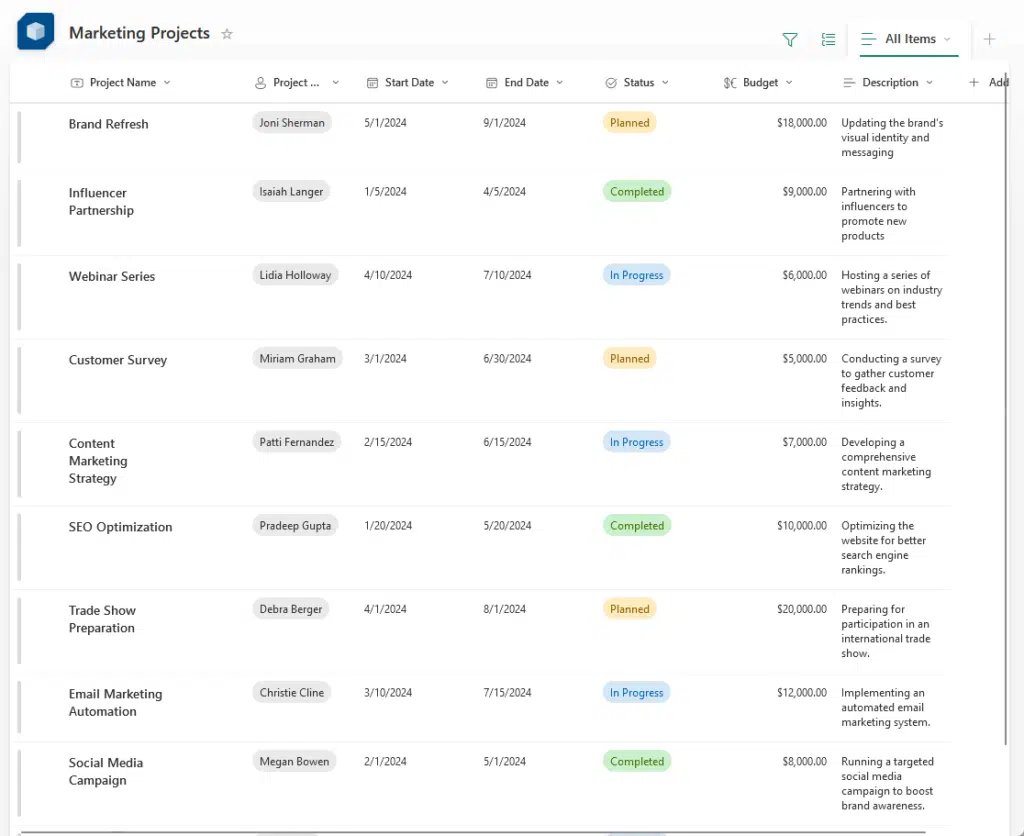
Their key features include:
- Custom fields
- Views
- Integrations
Lists basically help teams track important data like project timelines or customer requests in a clear, manageable format.
But it’s important to note that document libraries are technically lists, just designed to specifically deal with files. 🤯
👉 Related: SharePoint List vs Library: The Differences (Comparison)
If you want to create a list (and a SharePoint library), you can do so from the home page of the site and in the site’s contents.
On the home page, just click the new button and then list (or document library):
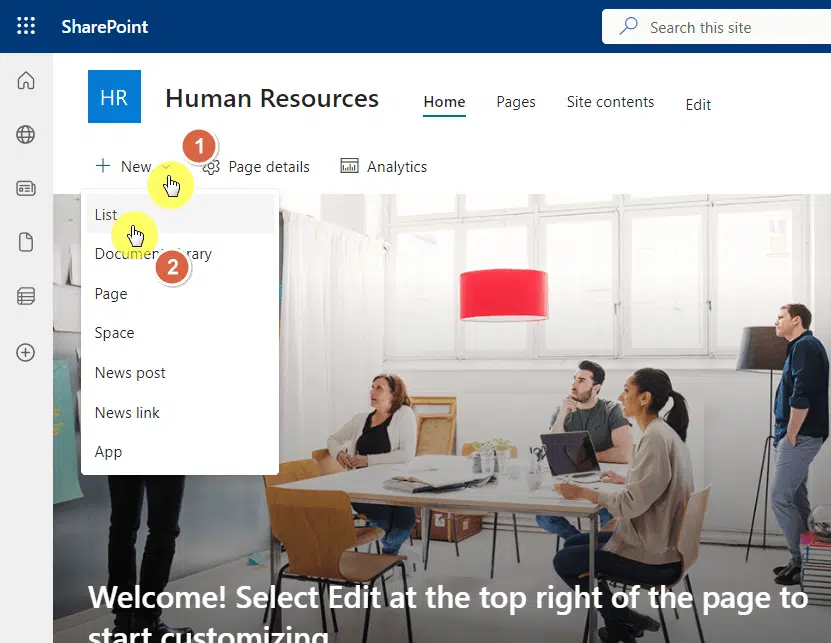
If you go to the site contents, you will also see the same “new” button, then just select what you create to create.
In both instances, you will see a list of templates for lists (and document libraries), and you can preview them.
When you’re ready to create, there’s a “use template” button you can use:

One thing you need to know here is that although there’s a preview, no data will be carried over to the new list.
You will only see the columns and views shown in the preview, the data there are only sample data. 🙂
👉 Related: How to Create a List in SharePoint Online (For Beginners)
Columns allow you to define the type of data you want to store in the list or library.
There are many types of columns available, the most common ones are:
- Single line of text
- Number
- Choice
- Data and time
- Person or group
You can add a new column by clicking the + add column button after the right-most column in the list.
Then choose the column type to add:
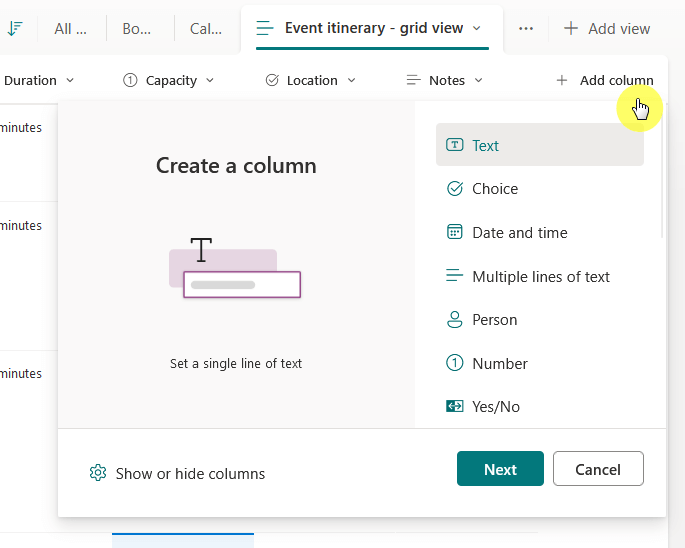
All column types have their own settings, which you will see after adding a new column as well as when editing one.
You can also customize them by adding validation rules or default values to standardize data input.
👉 Related: SharePoint Column Types Explained: Overview and Use Cases
In document libraries, you can either create documents from there or upload files and documents yourself.
There are several ways to upload documents:
- Drag and drop
- Use the upload button
- Sync with OneDrive
- Open in Explorer
- PowerShell
The most common one, and well, the easiest method is to simply click the upload button and find the files on your machine.
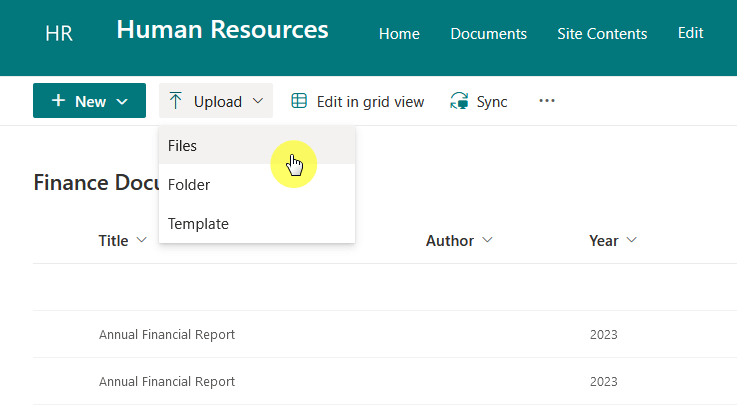
If you already have the folder opened in File Explorer, you can also drag and drop files to the browser.
For automation and batch processing, I recommend using PowerShell to upload the files (it’s easy to do).
👉 Related: How to Upload Files and Documents to a SharePoint Library
Well, sites wouldn’t be sites without pages, right? 😅
Like web pages online, pages exist in SharePoint, and they’re where lists and document libraries are store.
To create a page, go to either the home page or the site contents page of a site and click the new button.
Then select the page option:
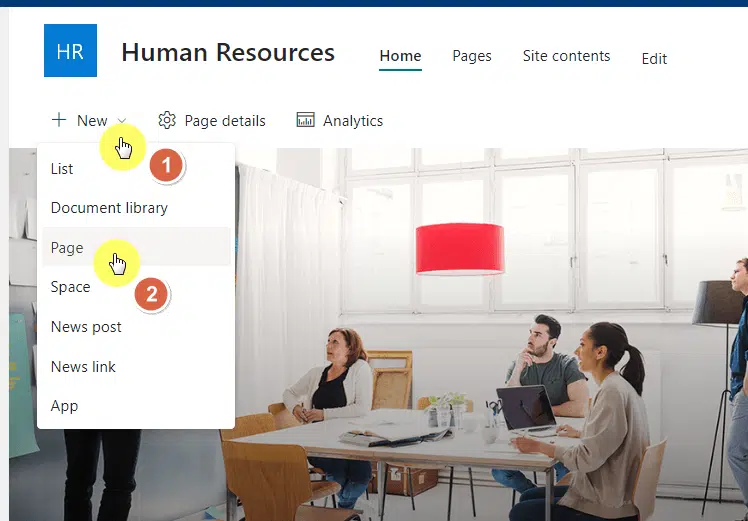
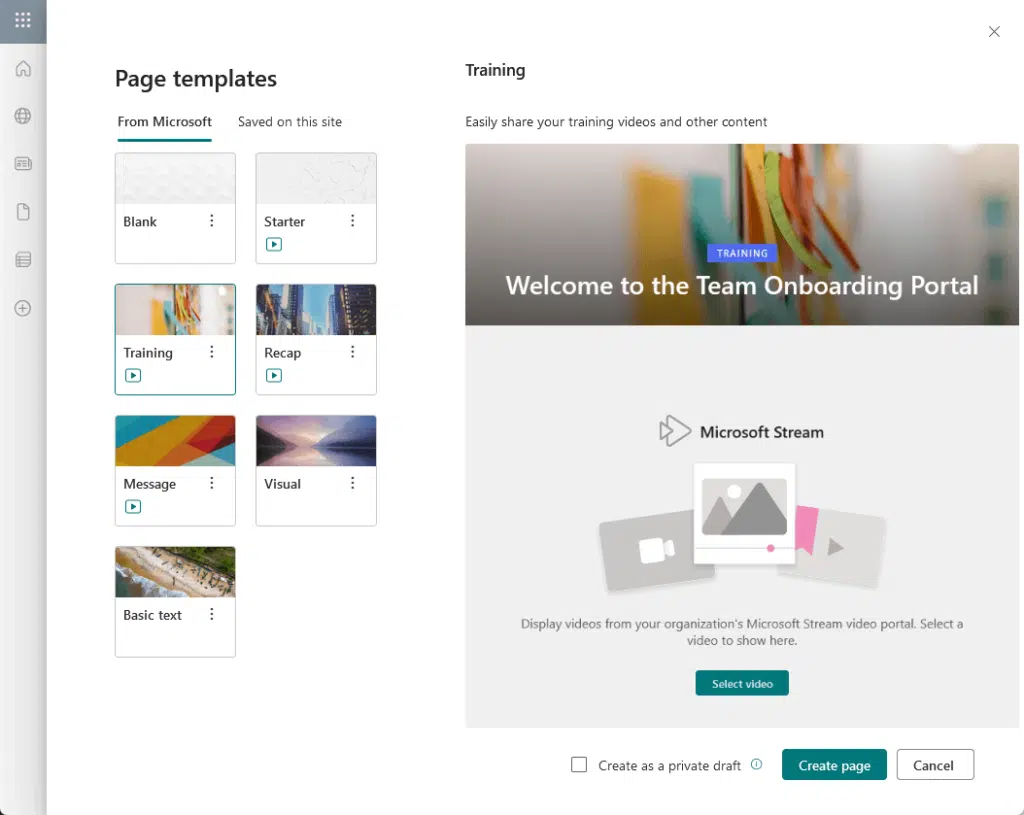
From there, you will be given various templates to choose from, or you can also choose to start from scratch.
But anyway, this is what you will see:
Pages are fully customizable and can include sections, columns, and various web parts to show information. 🙂
👉 Related: How to Create a Page in SharePoint Online: Tutorial
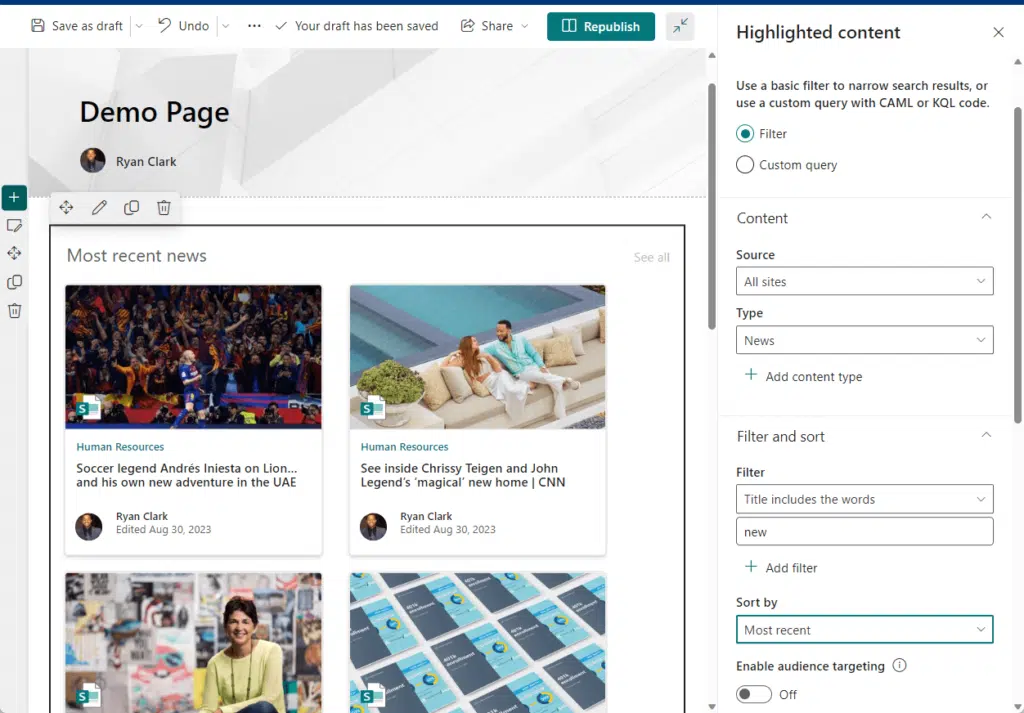
Adding Web Parts to Pages
Think of web parts as building blocks for SharePoint pages where you can add dynamic content like text, images, etc.
Some of the most popular ones include:
- Text web part
- Document library web part
- Image web part
- News web part
- Quick links web part
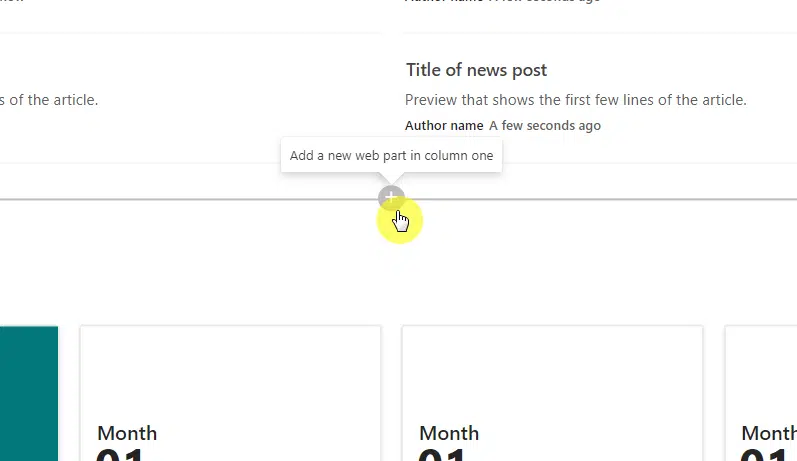
To add web pages, edit a page and then go to the area where you want to add a web part and click the + button:
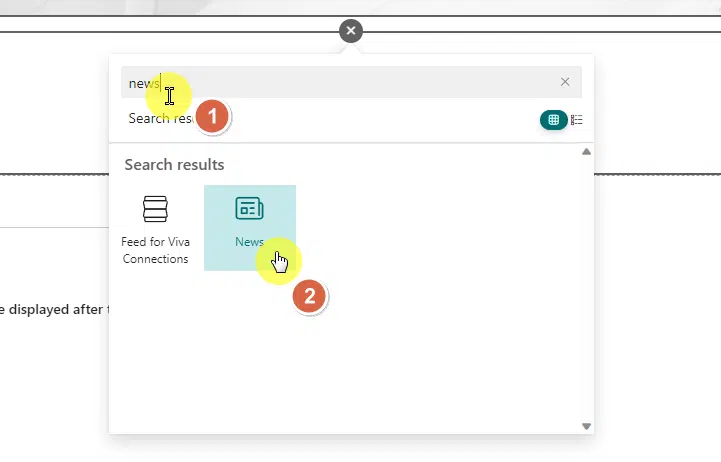
You can then choose the web part you want to add to the page, or you can also search for it in the search field.
When you find the web part you want to use, click on it and it will automatically be added to the page you’re editing.
Like this:
You can also customize the web part to your liking, though like columns, each web part is unique and will have different settings.
👉 Related: Modern SharePoint Web Parts: List of All Available Web Parts
Editing Web Parts and Section Layouts
As mentioned, you can customize your web parts and even the section layouts according to your liking.
The properties of a web part will appear after adding one, though you can customize one through its edit icon.
You will see a pencil icon when you select a web part:
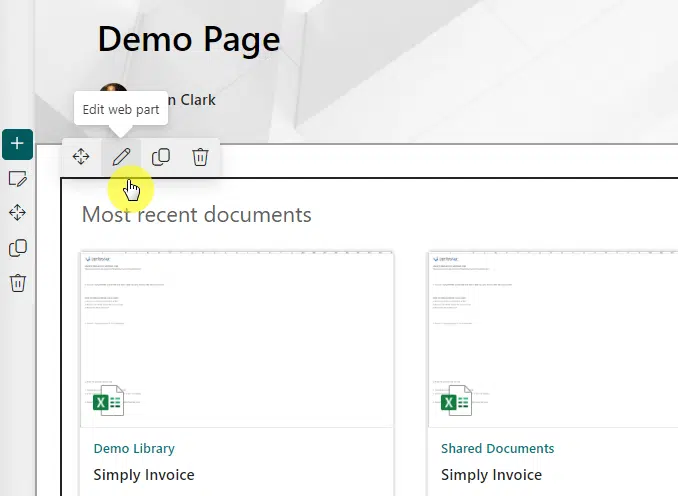
After you click the pencil icon, you will see the properties of that web part opened in the right panel.
It will look like this:
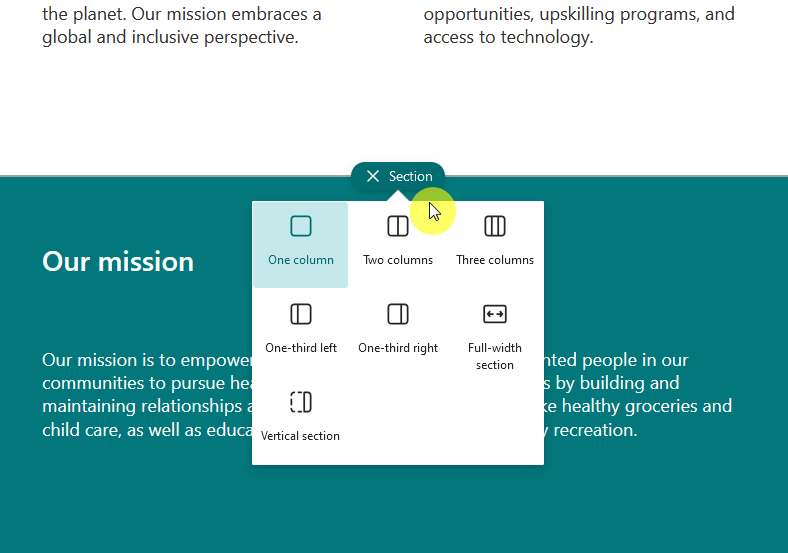
Pages are divided into different sections, and you can add new ones or edit existing sections on the page.
If you want to add a new one, just look for the add button in between the existing sections or at the bottom of the page.
Once you click on that button, you will be able to select the section layout:
If you want to edit an existing section, simply select that section, and click the settings icon on the top-left corner.
The section settings will then appear in the right panel:
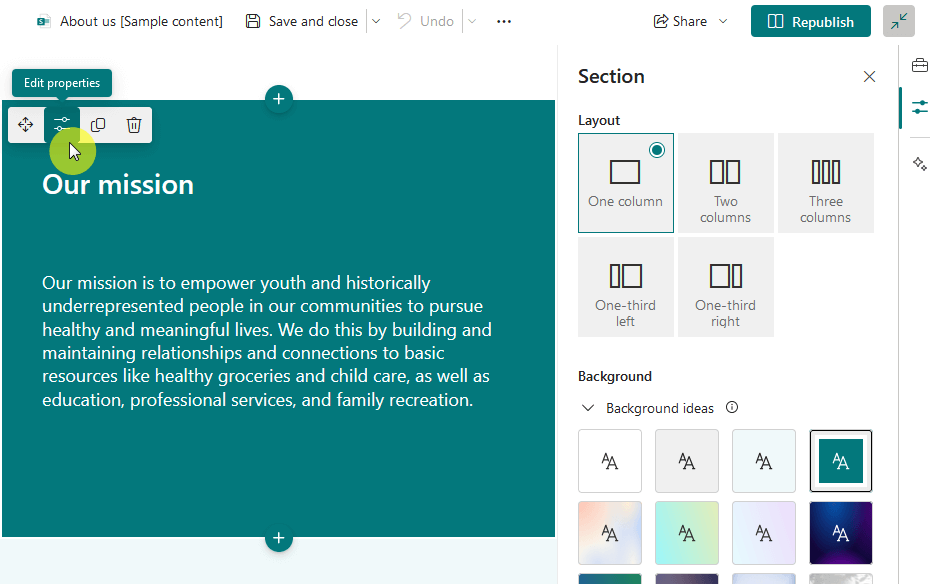
New updates in SharePoint Online will allow you to also include a background color or even a background image.
Nice! 🙂
I want to touch base a little about permissions, though I recommend that you read more about them.
That’s because controlling who can view or edit your SharePoint site is key to keeping data secure.
The easiest method to check this out is in the gear icon and then site permissions:
In the right panel, you will be able to see basic information about your site permissions including who has what access.
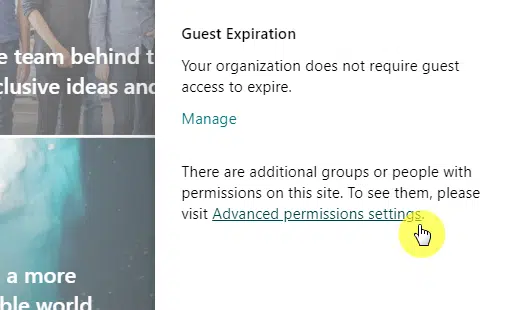
But if you want to go deeper, or if you want to manage site permissions, click on the advanced permissions settings link.
It’s at the bottom of the panel:
The next page will have more robust functions like creating a group, granting permissions, removing user permissions, etc.
It will first contain all the users who have access to the site, what user type they are, and their permission levels.
Like this:

These access controls can help you balance collaboration with security, the right people having the right access. 🙂
👉 Related: SharePoint Permissions: Best Practices to Implement
I want to put out here that if you’re planning on using SharePoint, you will see its full power when paired with Teams.
Integration with result to:
- File sharing from SharePoint to Teams
- SharePoint tabs in Teams
- Shared calendars and lists
- Security and permissions
Link these tools so your users can work together on documents and content without having to switch platforms.
Anyway, do you have questions about using SharePoint Online? Let me know in the comments.
For any business-related queries or concerns, contact me through the contact form. I always reply. 🙂


