

Last Updated on September 23, 2023
Need to share your site with everyone?
In this tutorial, you will understand user permissions in SharePoint, how to share a site with everyone, when to do it (use cases), and more.
Let’s get started.
Table of Contents:
When you work with SharePoint, one of the critical aspects you need to grasp is user permissions.
In simple terms, user permissions determine what users can see and do within your site.
There are various levels of permissions you can assign:
- Full control: Users can manage settings, create and delete sites, and add or remove users. They essentially have complete control over the site.
- Design: Users can view, add, update, delete, approve, and customize the layout of the site.
- Edit: Users have the ability to create, modify, and remove lists. They can view, insert, alter, and delete both list items and documents.
- Contribute: Users can view, add, update, and delete list items and documents.
- Read: Users can view pages and list items and download documents.
Understanding the differences between these permissions is crucial as it helps you assign the appropriate levels of access to various users.
The goal is not to restrict but rather to regulate access in a manner that protects the integrity of your data while promoting collaboration.
Related: SharePoint Permissions Explained: How Permission Levels Work
Sign up for exclusive updates, tips, and strategies
Fortunately, enabling external sharing is quite easy and straightforward.
This part will explain how to share a site with both internal and external users.
Step #1: Set external sharing to the most permissive
The first step is to turn the sharing settings for the tenant into the most permissive setting.
This needs to be done at both the organization level and the site level.
You need to get to the SharePoint admin center for this:
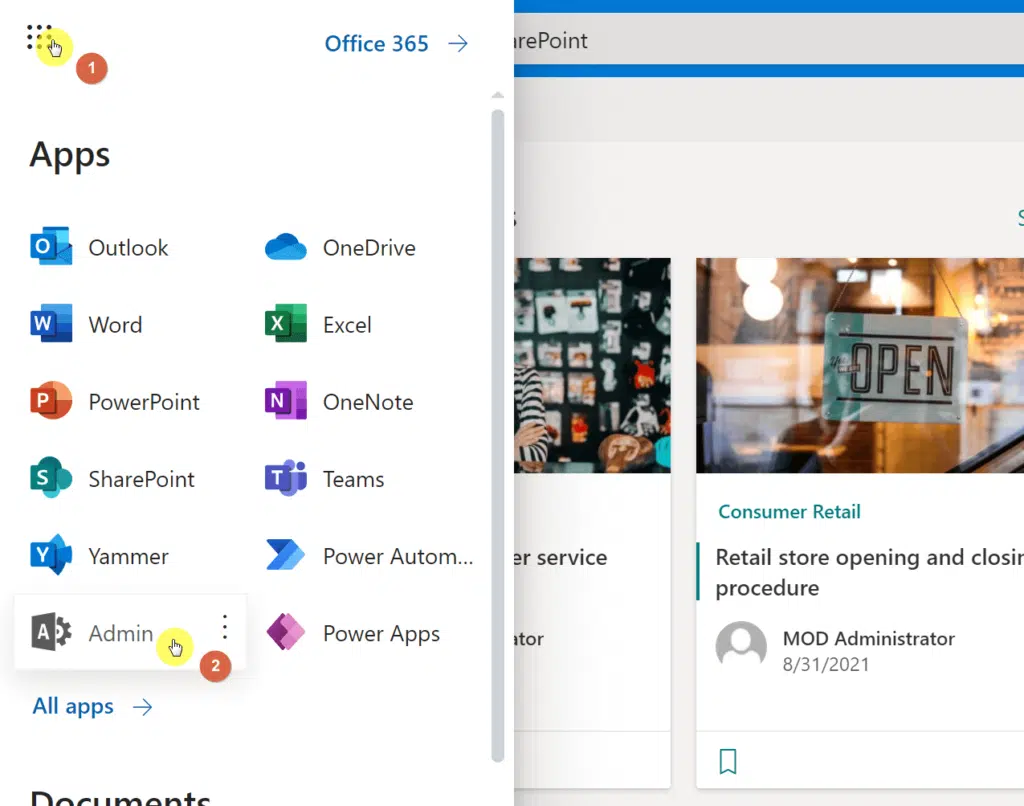
- Click the app drawer on any Microsoft 365 page
- Click the admin button
In the Microsoft 365 admin center, you will have to show all the admin centers on the left panel.
Select SharePoint from the list:

Now that you’re in the SharePoint admin center:
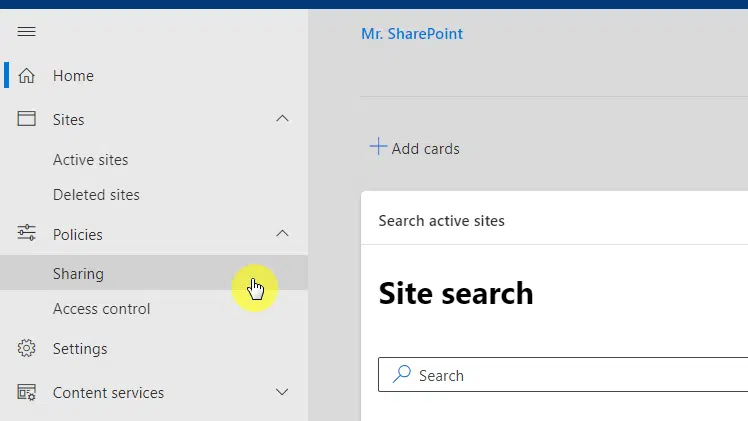
- Expand the policies menu item on the left panel
- Click the sharing option
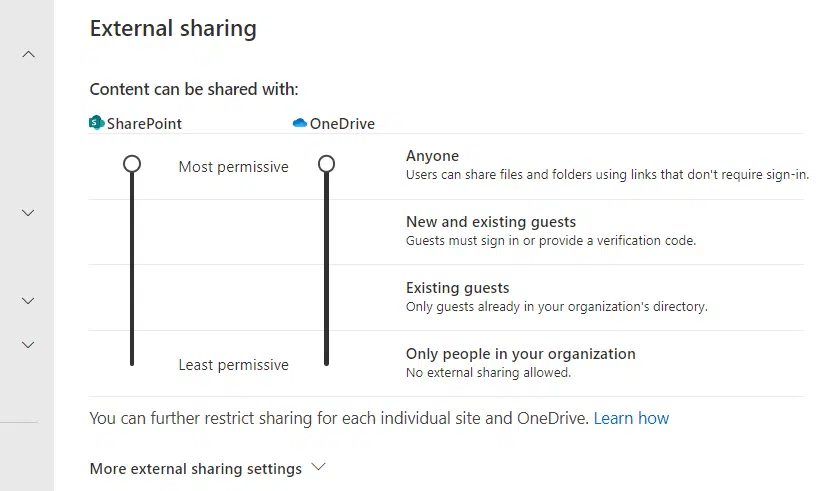
In the external sharing settings, you will see a slider for both SharePoint and OneDrive.
You have to adjust your external sharing setting here.
What you have to do here is drag the slider all the way up to the most permissive.
Like this:
Related: External Sharing in SharePoint Online: How Does It Work
Step #2: Enable external sharing
The next step is to set the external sharing setting at the site level, on the site you want to share.
Make sure that your Microsoft account has the necessary permissions to perform these actions.
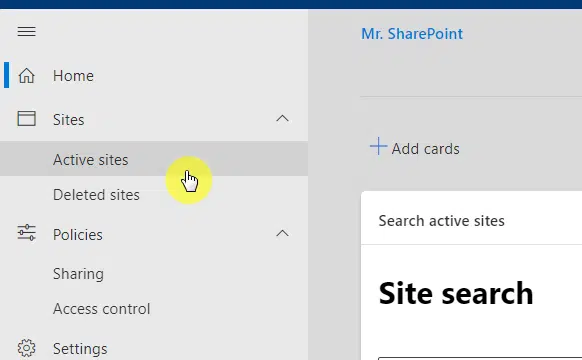
While still in the admin center, expand sites and go to the active sites page.
Now do the following steps:
- Click the site name of the site you want to share
- Go to the settings tab on the right panel

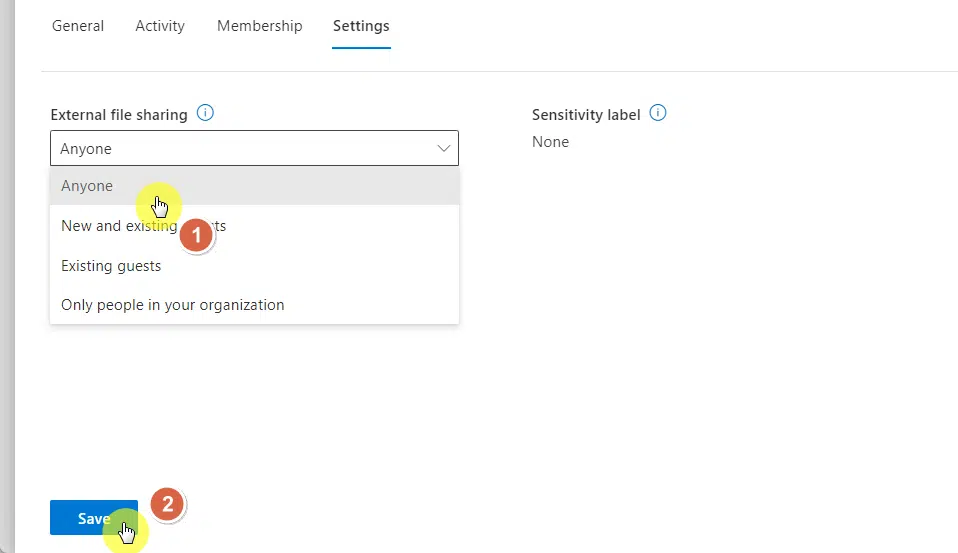
Click the dropdown field for external file sharing and set it to anyone.
Hit save at the bottom of the panel.
After doing the steps earlier, all that’s left is to share the site with external users.
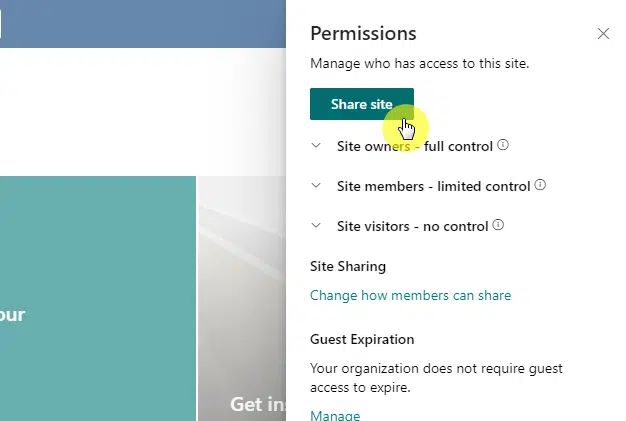
For communication sites, you can do it directly:
- Click the gear icon
- Go to site permissions
- Click the share site button
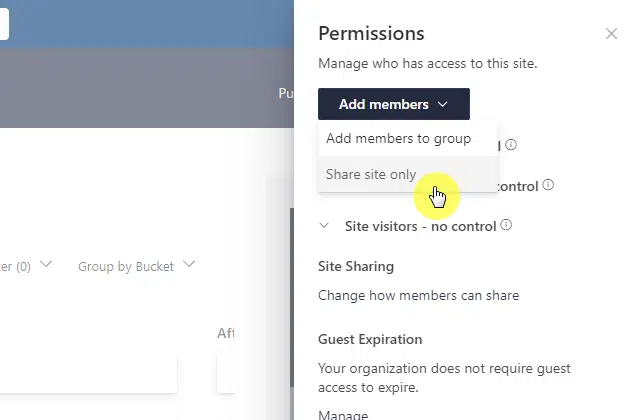
On a SharePoint team site, you need to be specific — if you want to share the site with a specific Microsoft 365 group, follow these steps:
- Click the gear icon
- Go to site permissions
- Click the add members button
- Select share site only
Use Cases for Sharing a Site with Everyone
Sharing a SharePoint Online site with everyone is an important feature that comes in handy in various scenarios.
This feature is not just useful for external users but also for internal users who need access to certain documents or sites.
Here are a few use cases:
- Company-wide announcements: If you need to disseminate information across your entire organization, such as policy updates or company news, sharing a site with everyone ensures all people in your organization have access.
- Collaborative projects: For projects involving multiple departments or teams, you might need a central location for sharing documents and updates. A site shared with everyone allows for this level of collaboration.
- Training and education: If your company has training materials, guides, or educational content that all employees need access to, sharing a site with everyone is an effective solution.
- Resource library: A site can serve as a central library for company resources, such as templates, brand guidelines, or frequently used forms. Sharing this with everyone ensures easy access.
Related: SharePoint File Sharing With External Users: Quick Guide
Proper site sharing is a balancing act between accessibility and security.
By ensuring you have the correct user permissions in place:
You protect sensitive data, be it from a school account or a business account, while still allowing your team to collaborate efficiently.
Remember the following:
- Not having proper permissions can lead to numerous issues, including unauthorized access to sensitive data, unintentional modifications, or even data loss.
- On the other hand, overly restrictive permissions can stifle collaboration and productivity.
- Set appropriate permissions for what these users can do once they have access.
Related: How to Create Sensitivity Labels in Microsoft 365
Got everything you need for sharing your site with everyone? If not and you have some questions, drop them below.
If you need to reach me personally for business concerns, send me a message through the contact form here. I’ll reply asap.


Super Useful. Thank you very much