
Last Updated on July 25, 2024
Need to set the site storage limit?
In this guide, I will walk you through the steps of setting the site storage limit in SharePoint Online.
Let’s get started.
Table of Contents:
Why set the site storage limit?
Well, doing it is actually a practical approach to managing resources and ensuring smooth operations.
Here’s what you get if you control the site storage limit:
- Helps manage and limit data accumulation.
- Avoids any one site collection having an excessive site storage quota, which can impact other sites.
- Keeps storage costs predictable and within budget.
The ultimate goal is to prevent individual sites from consuming too much space and affecting the overall system performance.
This ensures that you stay informed about usage patterns and can allocate resources where they’re most needed.
I also recommend you educate site administrators on data management best practices to maximize efficiency.
👉 Related: The SharePoint Admin Role (Complete Guide for Beginners)
Sign up for exclusive updates, tips, and strategies
Automatic vs Manual Storage Management
If you skipped this part and went straight to the steps, you would know that there are two storage management settings:
- Automatic
- Manual
Automatic management, from its name, allows the system to allocate storage as needed (hands-off approach).
Manual management gives administrators more control over how much storage each site can use.
Here’s a table to make this easier to understand:
| Storage Management Type | Description |
| Automatic Storage Management | The system allocates storage as needed without manual intervention. |
| All sites draw from a central pool to ensure fair distribution. | |
| Manual Storage Management | Administrators can set specific limits for each site based on needs. |
| Helps prevent individual sites from using excessive storage. |
When choosing between them, you must consider the size of your organization and your admin resources.
Automatic management is better for larger organizations or those with limited IT staff (no need for constant monitoring).
Manual management is better for those who require strict control over data usage or have specific compliance needs.
How to Set Individual Site Storage Limits
Thankfully, setting individual site storage limits in SharePoint is straightforward.
Basically, it involves assigning a specific amount of storage to each site to prevent any single site from using too much space.
Here are the steps:
Go to the SharePoint admin center through the “admin” button from the app launcher:
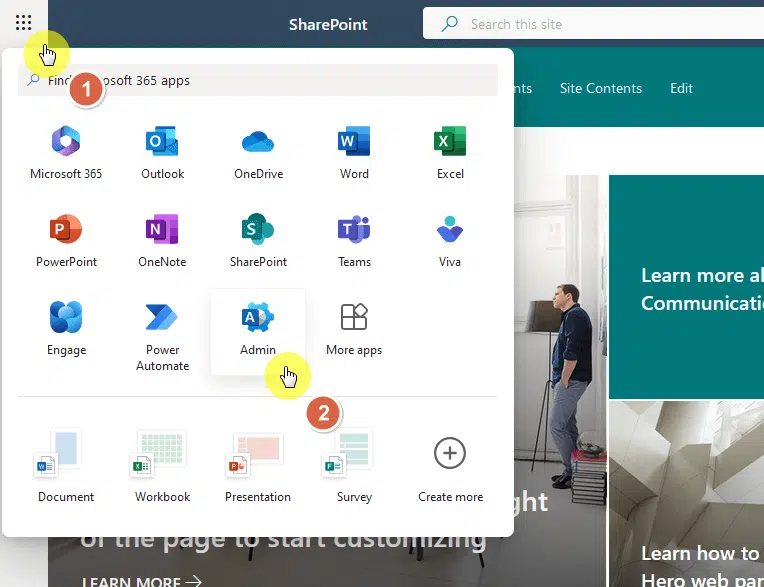
This will bring you to the Microsoft 365 admin center.
From here, expand the admin center options from the left pane and then click on the SharePoint option:

Now you’re in the SharePoint admin center. 🙂
Step 2: Change to manual management
The first thing you need to do is change the site storage management to manual.
Click on the settings button from the left pane:
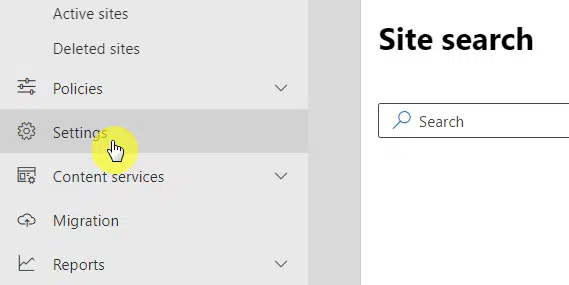
The next page will list out different SharePoint settings that you can configure from the admin center.
Click the site storage limits button from that list:
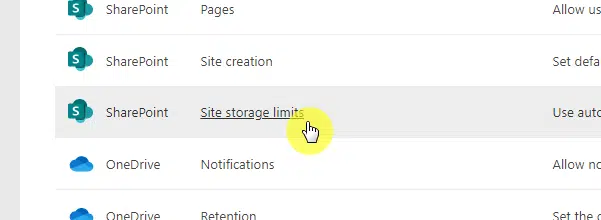
By default, the site storage management is set to automatic.
To change it, select the manual option and save the changes.
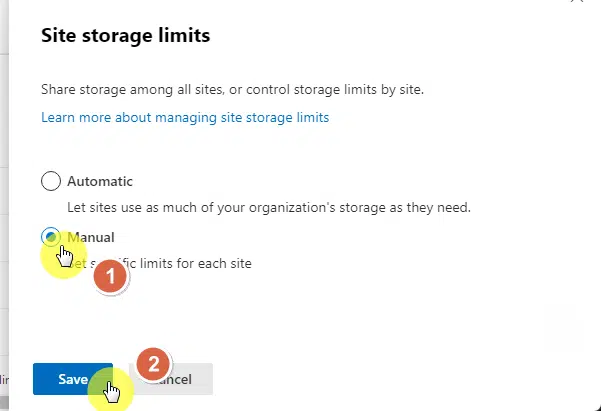
⚠️ Note: Without changing this, the option to set the site storage limit will not appear on the active sites page.
Step 3: Find the site to manage
Nice work so far! 🙂
The next step now is to go to the active sites page from the left pane:
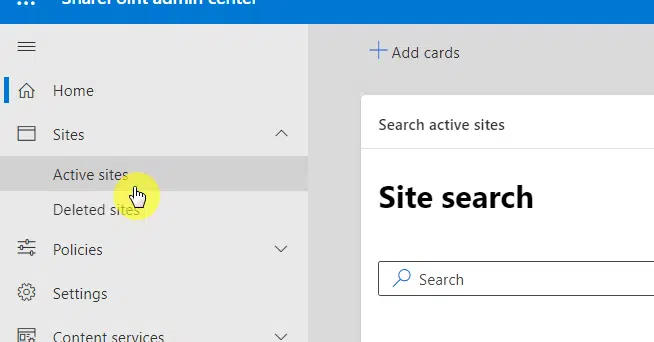
This list will contain all the active sites in the tenant.
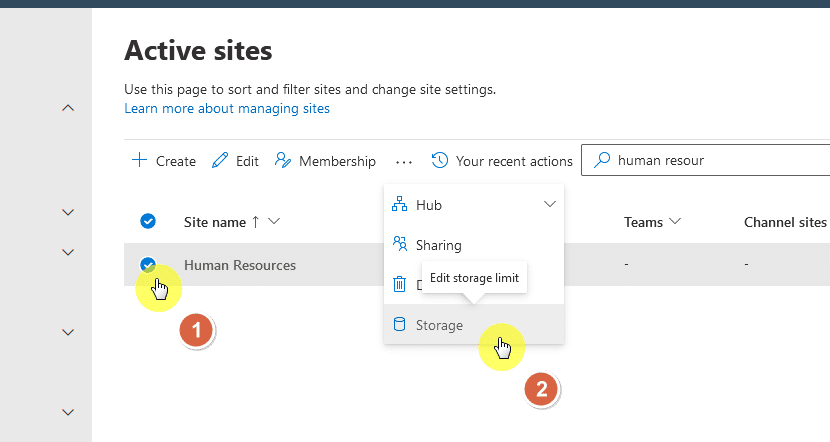
What you need to do here is find the specific site that you want to manage.
If you have too many sites, you can use the search function to easily find that site.
Once you find the site, select it and then click the storage button from the command bar:
Nice! 👏
Step 4: Set the limit
The next step is to edit the storage limit.
All you need to do is enter the maximum storage you want to set for that site, allow notifications, and save the changes.
Like this:
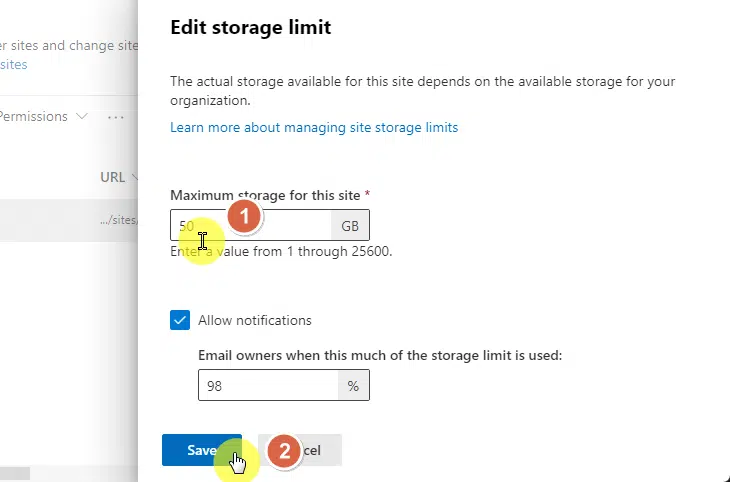
Although you can disable the notifications, I highly recommend that you enable it.
That’s especially true if the site is highly active and a lot of files are being dumped to it to ensure performance is top-notch.
👉 Related: How to Manage SharePoint Storage Limits (Microsoft 365)
When a site approaches or exceeds its total storage allocated, it can lead to disruptions such as:
- An inability to upload new content
- Save changes
To avoid these issues, it’s important to monitor storage usage and respond promptly.
If a site reaches its storage limit, administrators can take several actions:
- If the organization’s overall storage capacity allows, request more extra file storage space for the site.
- Review and delete old or unnecessary files to free up space.
- Encourage users to manage their data effectively, using features like file compression and removing duplicate files.
It also helps to educate users about best practices for data management to minimize unnecessary storage consumption.
Anyway, got any questions about setting the storage limit in SharePoint Online? Let me know.
For any business-related queries or concerns, contact me through the contact form. I always reply. 🙂


