

Last Updated on May 20, 2024
Want to send your email data to SharePoint?
In this guide, you will learn how to extract email data, and then send that data to a SharePoint list using Power Automate.
Let’s get started.
Table of Contents:
How the Extraction + Sending Works
The key to the whole process is Power Automate.
Fortunately, it’s not that complicated, although I admit that the extraction process may require analytical thinking.
Basically, all you need to do is:
- Convert the HTML body of the email to text
- Select what parts of the text contain the data
- Send those data to a SharePoint list
The process is simple if you consider the whole email body as the data and that’s what you need to send.
Unfortunately, if you need certain parts in the email, you need to do some splitting and trimming of the content.
In fact, this bugs out a lot of people in the Power Platform community (usually newbies of Microsoft Flow).
I will explain it later on — but you also won’t be able to isolate data that “changes position” in every email or if there’s no identifier.
👉 Related: How to Use Power Apps in SharePoint Online: Get Started (Tutorial)
Sign up for exclusive updates, tips, and strategies
How to Extract Email Data
The first step is to build an automated cloud flow.
Naturally, since we’re talking about emails here, the trigger must be set to “when a new email arrives”.
Like this:
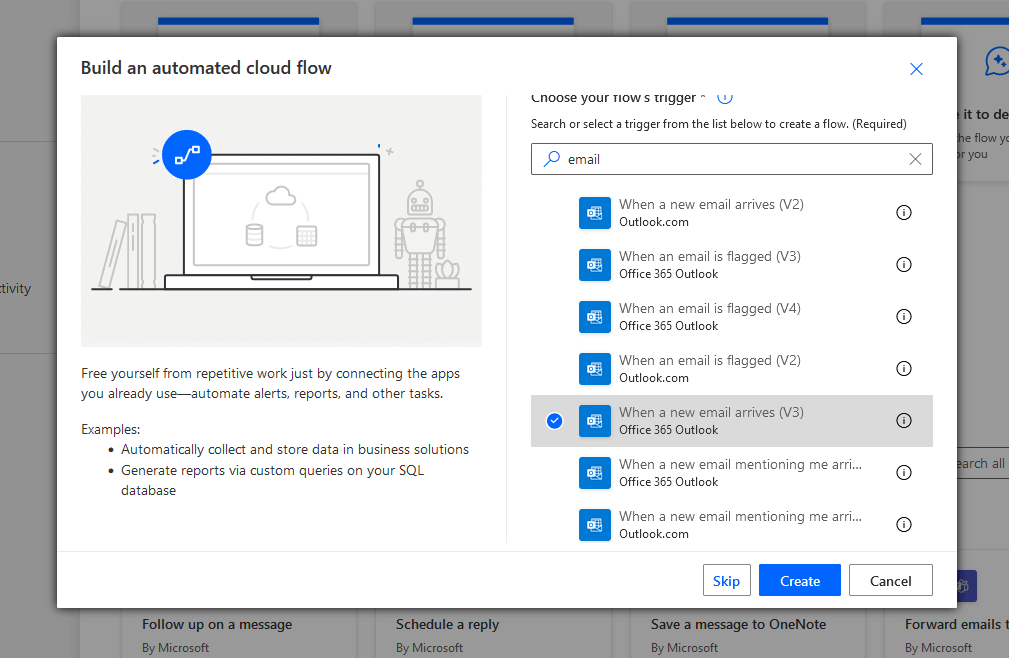
If you’re confused with the different choices:
- V2 (Outlook.com) is for free accounts like hotmail.com
- V3 (Office 365 Outlook) is for paid accounts
⚠️ Note: If you’re having an invalid connection, it’s likely you haven’t set a connection with Outlook beforehand (side panel> connections).
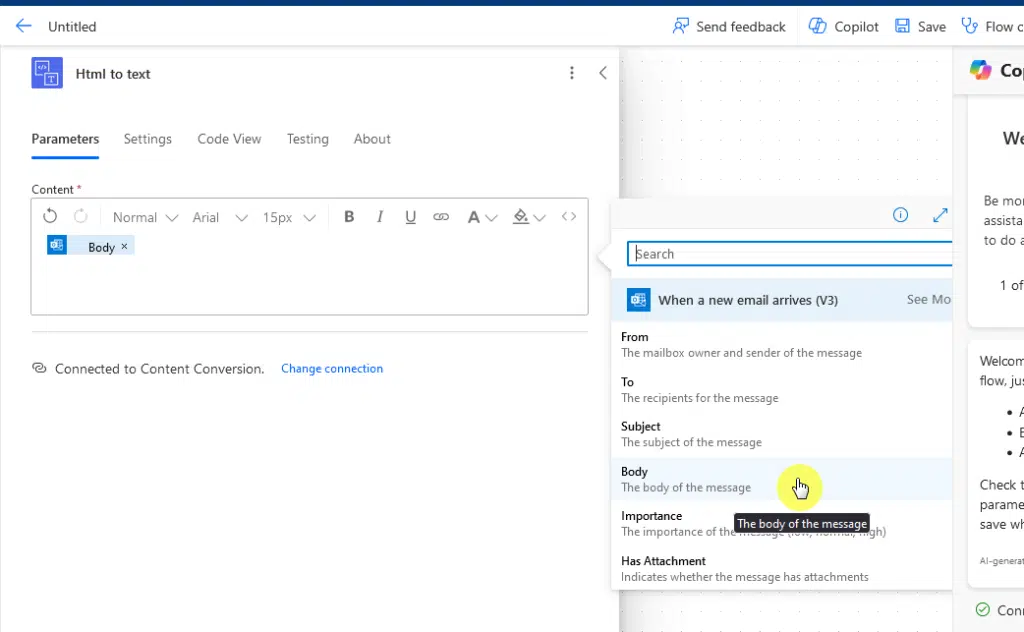
From there, you must set an HTML to text “content conversion” action — just add an action and look for it.
You then have to set the content parameters (enter data from the previous step) — make sure it’s set to the “body” of the email.
If you only need the whole email body to show up in a list, then you’re almost done now and all you have to do is create an item.
Here’s what you need to do:
- Add a new “create item” action
- Specify the site address and list name
- Fill out the advanced parameters (corresponding to the columns in the list)
For example:
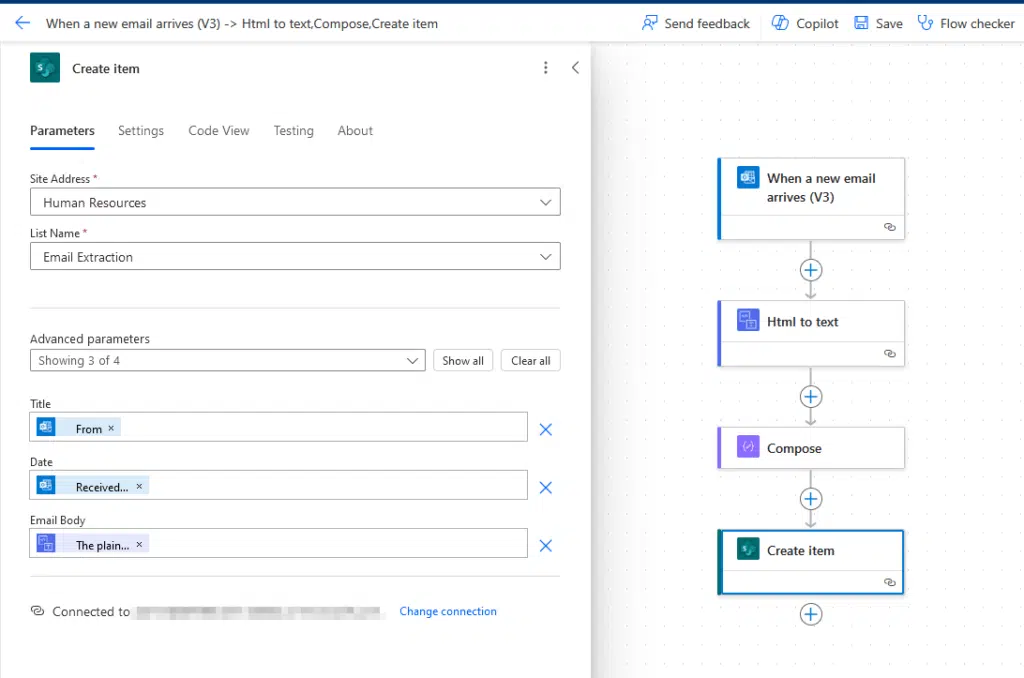
Naturally, you must already have the list set up already.
You must have seen the option in the “create item” action to directly include the body of the email as a parameter.
Unfortunately, if you do that, you will encounter an API error since Power Automate will require a string.
This is why you need to convert the HTML to text conversion before creating an item in the SharePoint list. 🙂
But if there are specific texts in the body, then I’m afraid there are quite a few things you need to do here.
👉 Related: Introduction to Microsoft Lists: The Modern SharePoint List
Extracting Specific Data
Let’s say you’re running an ecommerce website and you automatically receive email alerts for orders.
Each email will contain the:
- Customer’s name
- Product ordered
- Quantity of the product
You still have to convert the email body into text — this time though, you will need to add more actions.
Here’s an example of an email that you might receive:
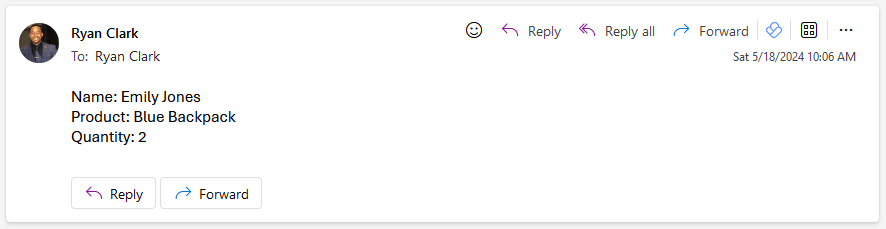
Text version:
Name: Emily Jones
Product: Blue Backpack
Quantity: 2
This is where it gets a little confusing — but bear with me for a moment here on what to do.
If the email you received is something like that, with no space in between the information, then you can tweak the compose action.
But this time, instead of entering data from the previous action, you must insert an expression:
split(replace(outputs('Html_to_text')?['body'], decodeUriComponent('%0A'), '|'),'|')[0]The window with the compose parameters must look like this:
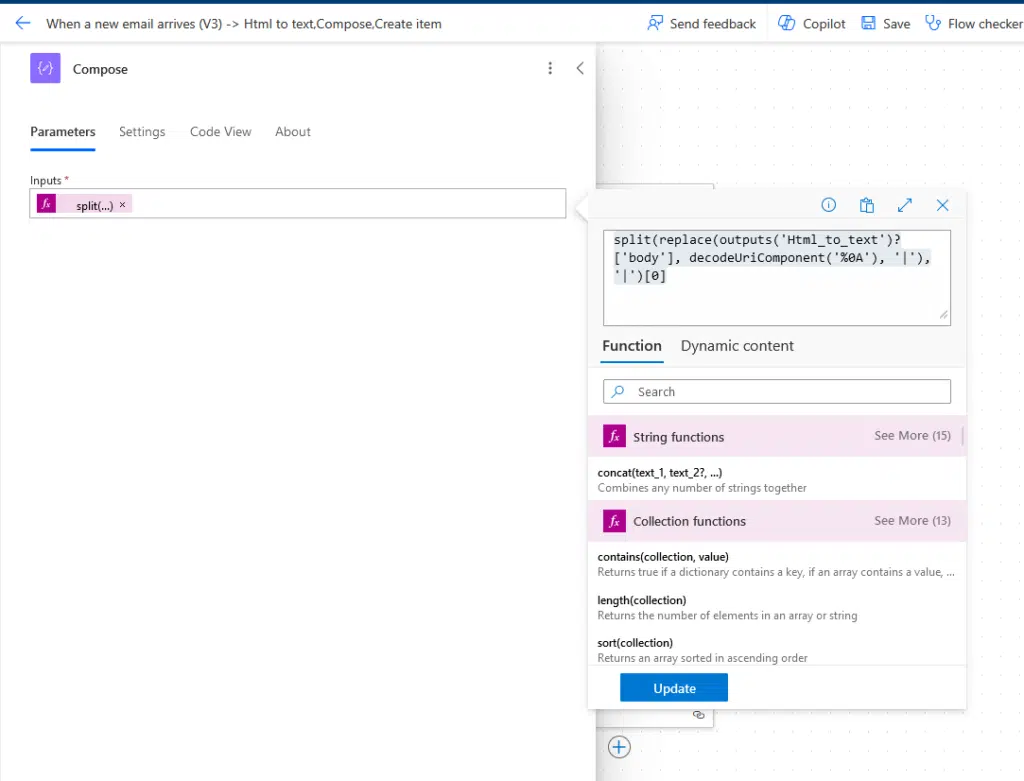
You can actually split that expression into two parts:
- Replace: Putting a pipe symbol in between the lines to replace the line break characters
- Split: It separates the text based on the pipe symbol, and the “0” pinpoints the first line in the text
The expression therefore pinpoints the first line in the email:
Name: Emily Jones
If you try to bypass the part of putting a pipe symbol (any symbol can work, btw), you will get an error message.
That’s because the output from the converted text will have a line break character to signify the line break.
⚠️ Note: If you want to read more about the expression, you can read it from Norm Young’s blog. I got the idea from there. 🙂
Anyway, you can simply copy and paste the expression to test it out with the first line of the email and experiment from there.
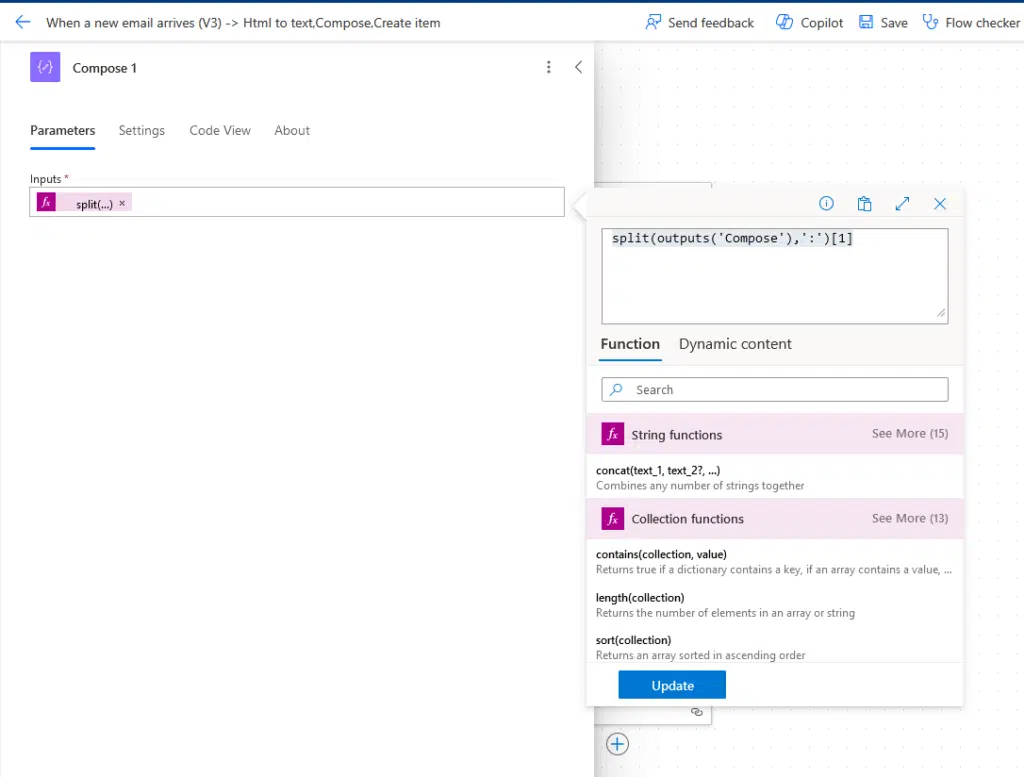
Now, you can’t send the data yet since “Name:” is still in the text, and you don’t want to include that in the list.
You will need to add another compose action with the expression:
split(outputs('Compose'),':')[1]The window must look like this:
That takes care of the first line — what about the second and third lines?
The trick here is to simply repeat the earlier steps and add them as succeeding actions from the last.
However, you must rename your actions so you don’t get confused with all the compose and splitting actions. 🙂
👍 Tip: You can copy and paste the actions. Right-click on the action you want to copy > click the add button > paste an action.
If you have reached this part, congratulations!
You’re basically done — you just have to set the last action now, which is to create an item in the list.
Here’s what it looks like:
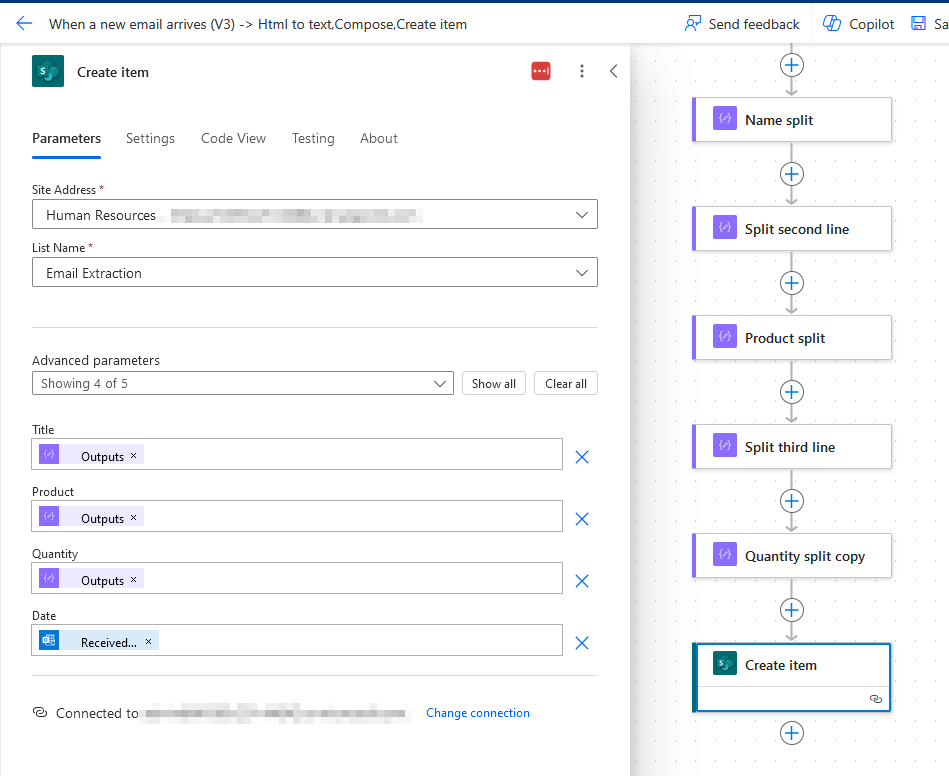
Similar to extracting email data from the whole email body:
- Add a new “create item” action
- Specify the site address and list name
- Enable the columns to write content (advanced parameters)
- Fill out the fields with the proper parameter
This is another reason why naming the action windows helps — it will give you an easier time when filling out these fields.
After trying it out, here’s what it looks like on my end:
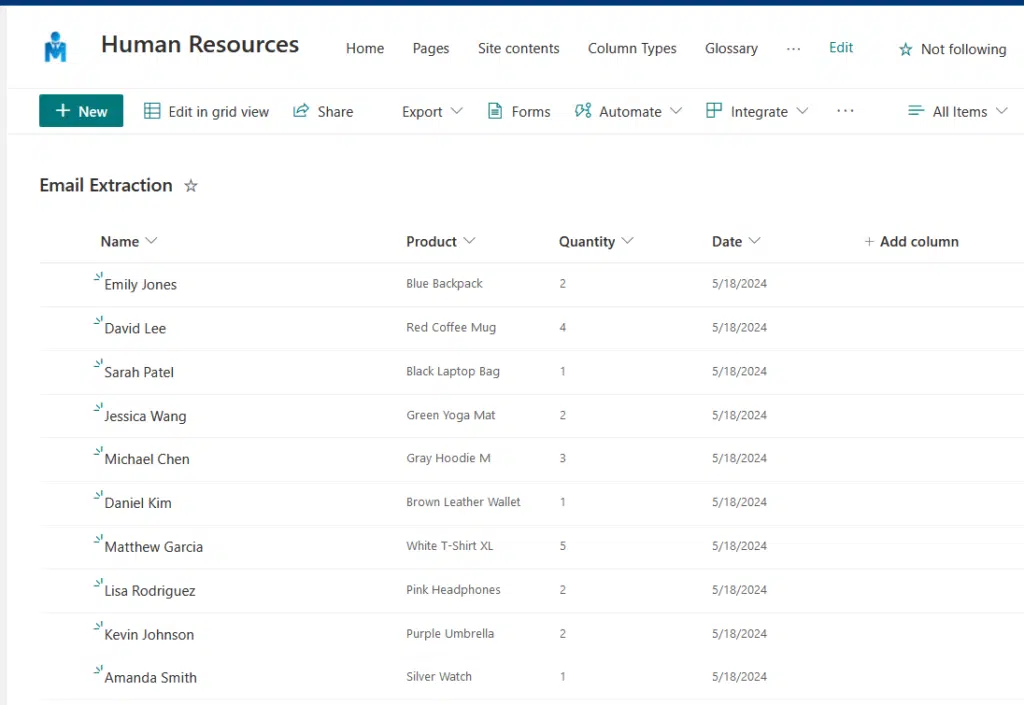
Nice!
If you’re curious about the data parameter, I added it as one of the parameters in the “create item” action.
⚠️ Note: I haven’t tried the Automate Power Pages Copilot Studio yet, so I’m not sure how much it can help the process. If you tried using it, kindly let me know. 🙂
If there’s a space between the lines?
If your email doesn’t contain spaces, then you’re set.
The problem now is if you want to extract data or parse emails with empty spaces or lines in between the information.
For example:
Name: Rachel Nguyen

Product: Stainless Steel Water Bottle

Quantity: 3
What now?
The short answer here is you will need to reorganize the actions since you will be replacing and deleting some of the steps.
To start, you will need to add another compose step after the HTML-to-text action (call it “split space”) and use the following expression:
split(body('Html_to_text'),decodeUriComponent('%0A%0A'))This is what it looks like:
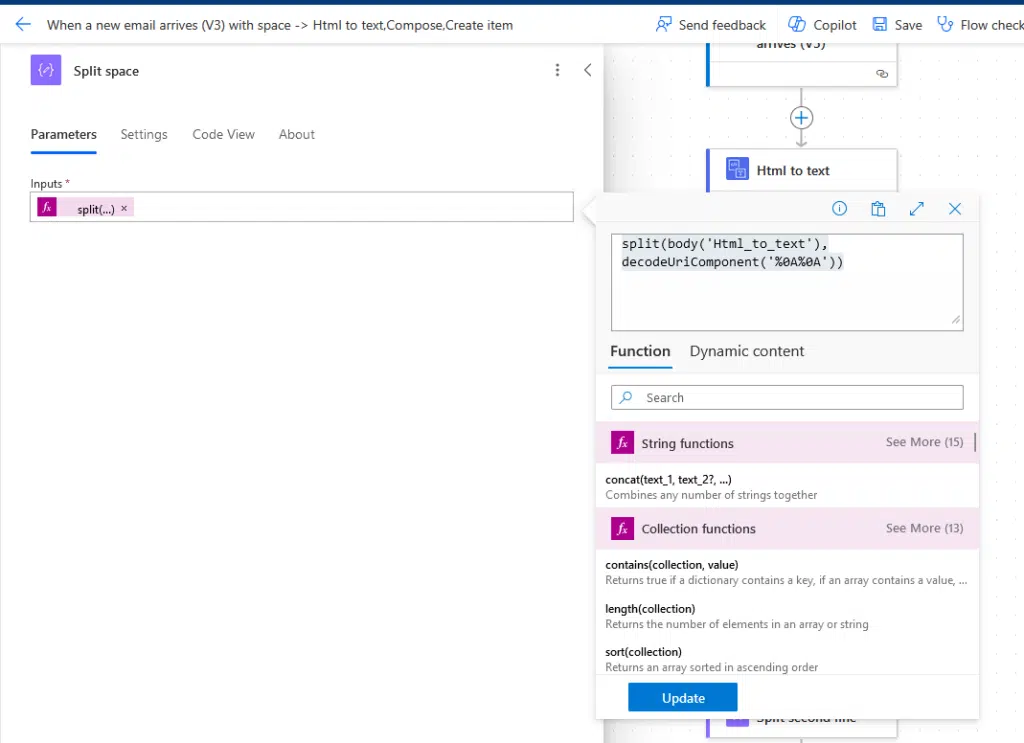
When there are spaces in the line, splitting the text using symbols won’t work quite well (it can, but there’s more to think and do).
Instead, it separates the text with the line character at the end of the line with a text and on the next empty line.
You then end up with an array, with each line with text as a different item — and since it’s now an array, you can use indexes.
The next part is to add another compose action with the following expression:
trim(split(outputs('Split_space')[0],':')[1])It looks like this:

Here’s a simple explanation of the expression:
- Split: This separates the output with the “:” symbol, outputting only the texts after that symbol
- Trim: Remove any leading and trailing whitespaces from the string
The trim symbol is important since there might be stray whitespaces that users input in the field.
In fact, you may also want to apply this in the sections earlier — to emails that don’t have empty lines between characters.
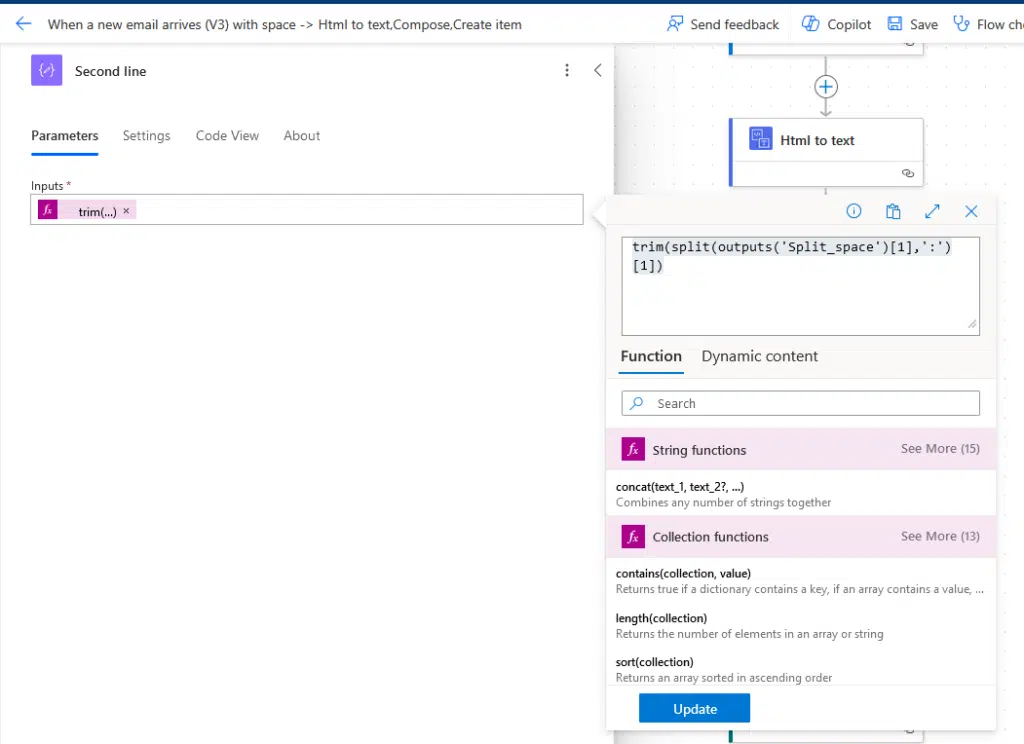
The next step is to simply copy the action and paste it into a new one, replacing the index number in the split parameter.
Like this:
trim(split(outputs('Split_space')[1],':')[1])It should look like this now:
After that, you just have to update the “create item” action with the correct parameters and fields to match the updates.
⚠️ Note: If you want to read more about the expressions here, you can read it from Tom Riha’s blog. I got the idea from there. 🙂
What if the email body rearranges?
The steps earlier are great if the emails that you receive have a consistent, standard form.
Obviously, they wouldn’t work if the information could be rearranged (like in the case when they’re manually written).
The truth:
- If there’s an identifier, like “Name:”, then there’s something you can do
- Otherwise, no, you wouldn’t be able to find the information
If there’s an identifier, what you need to do here is add a “filter array” action after splitting the text from the spaces.
Like this:
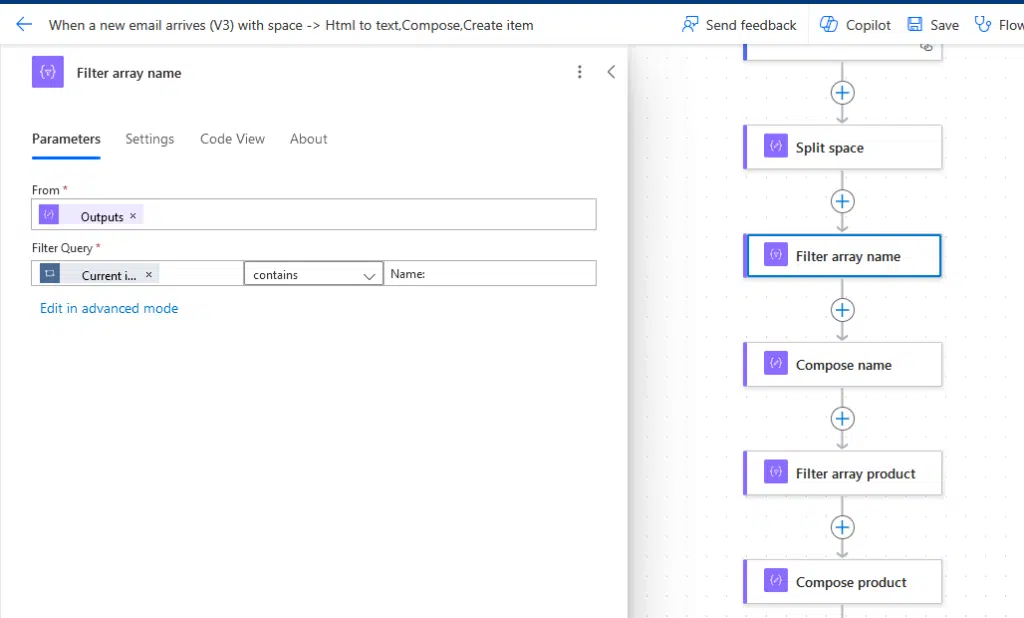
Here’s an explanation:
- The first field indicates the source of the array
- The second field describes the filter query
Since the first part of the filter query is shortened in the screenshot, you can simply write there:
item()
It basically says to search the array output in the earlier action, where an item in the array must contain the identifier.
After that, you just need to apply the trim action and change the source to the name of the filter array action.
Like this:
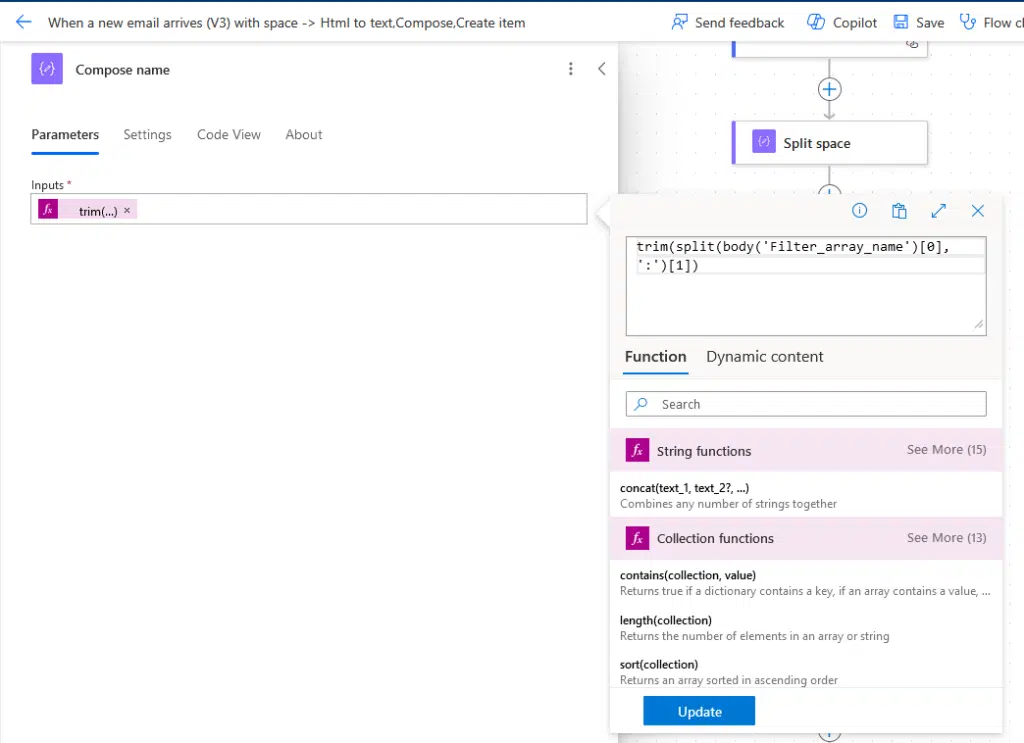
From there, repeat the filter array action + trim action for that specific information as many times as needed.
Then edit the “create item” action and you’re good to go. 👍
⚠️ Note: Any of the steps included here don’t include email attachments in the equation, only the information in the email body.
Anyway, got any questions about extracting email data and sending it to SharePoint lists? Comment below.
For any business-related queries or concerns, contact me through the contact form. I always reply. 🙂


what if the information you are trying to extract is in a form with borders?
How would you tweak this flow if you wanted to export historical emails saved in SharePoint?