

Last Updated on April 23, 2024
Do you want to create a multilingual SharePoint site?
Fortunately, it’s quite easy to add another site language to the site. The button is actually hidden on the site settings page.
In this article, I’ll show you how to create a multilingual SharePoint site, create a non-English site from the start, and more.
Let’s get started.
Table of Contents:
How to create a non-English site (default language)
Most start creating a multilingual site by adding another language on top of the default language — which is usually English.
But what if you want another language as the set language?
Well, it’s actually quite easy. The twist, however, is that you can only do this when creating a new site from the admin center.
Note: By default, the default language of a site is based on the origin of the creator’s account (where the user is located).
Previously, it was possible to do this from the homepage of the tenant. However, the recent iteration removed this.
Here are the steps:
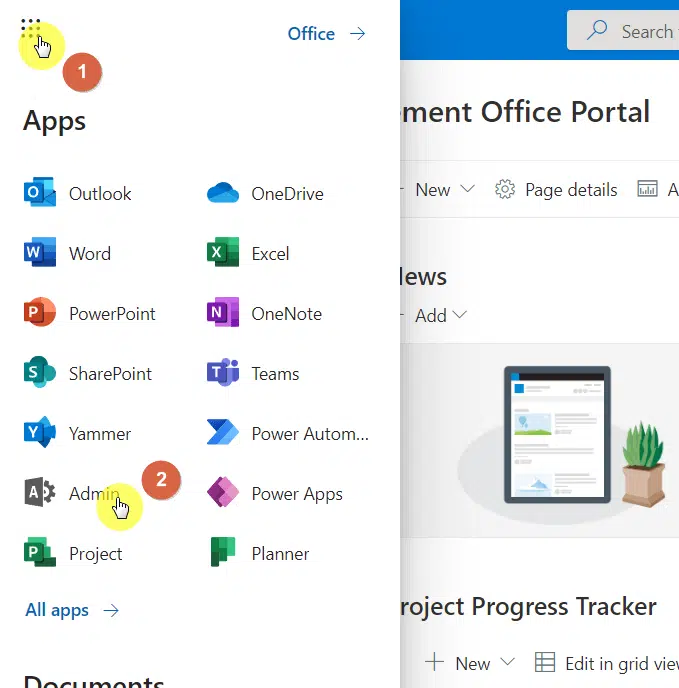
- Click the app launcher icon in your tenant
- Click the “Admin” option from the list
On the next page:
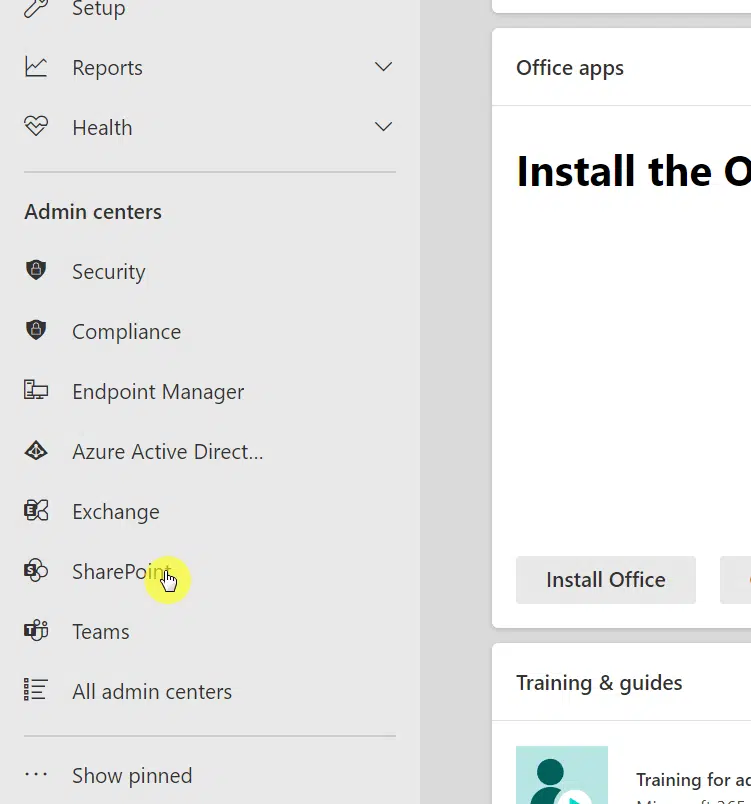
- Expand the admin center options in the left panel
- Click the “SharePoint” option from the list
In the SharePoint admin center:
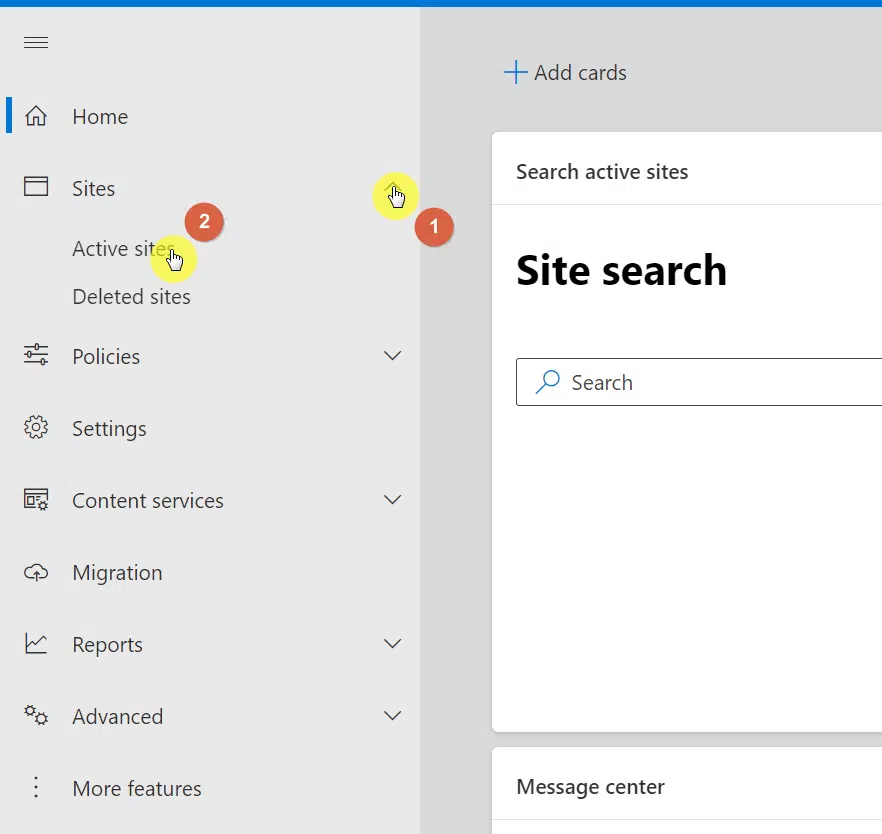
- Expand the “Sites” menu in the left panel
- Navigate to the “Active sites” page
On the next page:
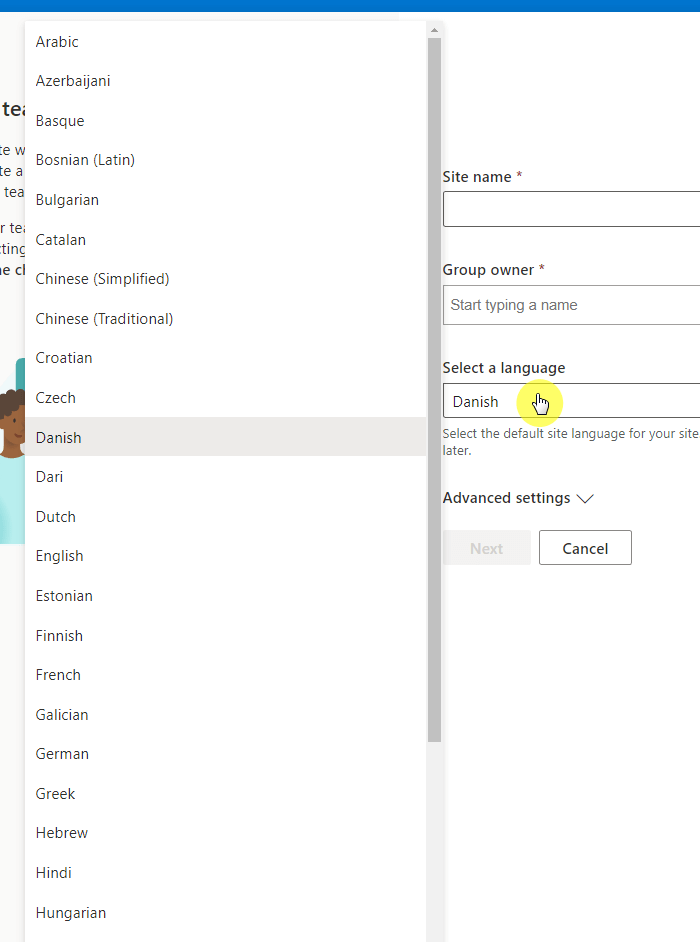
- Click the “Create” button in the command bar
- Select the set language for the site
What happens then is that all non-content-related text on the site like the menu labels, settings screen, etc. will be in that language.
Note: Changing the set language doesn’t mean that all the content you will be adding on the site will be auto-translated to that language.
Sign up for exclusive updates, tips, and strategies
There are three things you need to remember here:
- You can create any type of modern site and set any language as the “set language”.
- You can only add another language to communication sites.
- You can still create pages in different languages on any modern site.
For now, you can’t add another language to team sites — but the site will support different languages.
Note: Since a team site supports different languages, users then can change their display language to their preferred one.
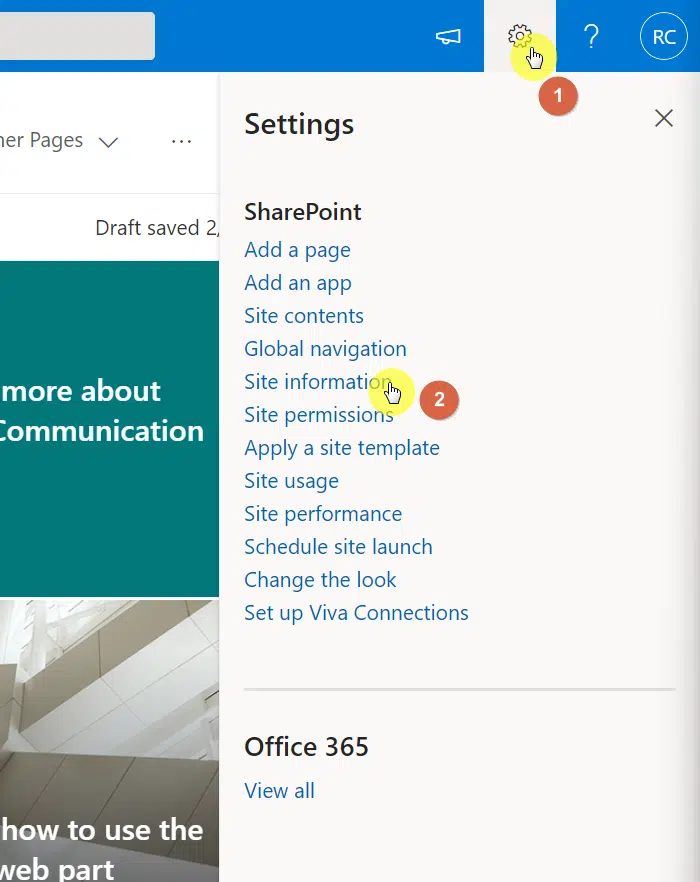
Here are the steps:
- Click the gear icon on the communication site
- Click the “Site information” option
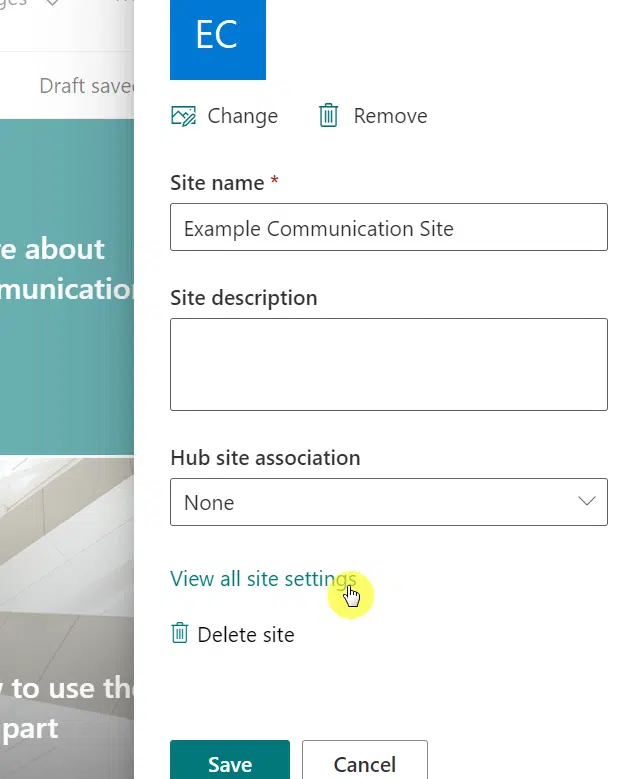
On the next panel, click the “View all site settings” link:
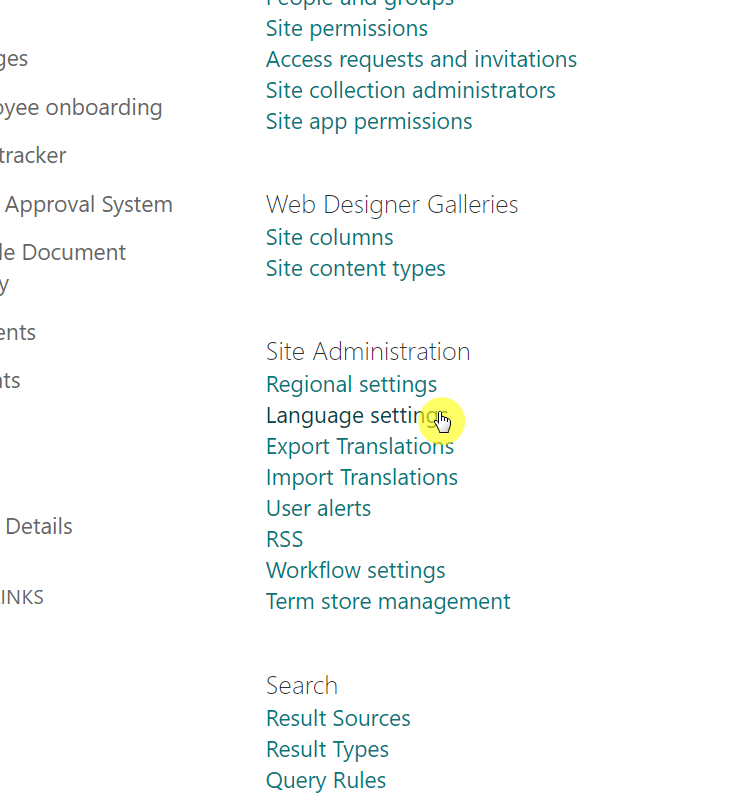
On the next page:
- Focus your attention on the “Site Administration” category
- Click the “Language settings” link
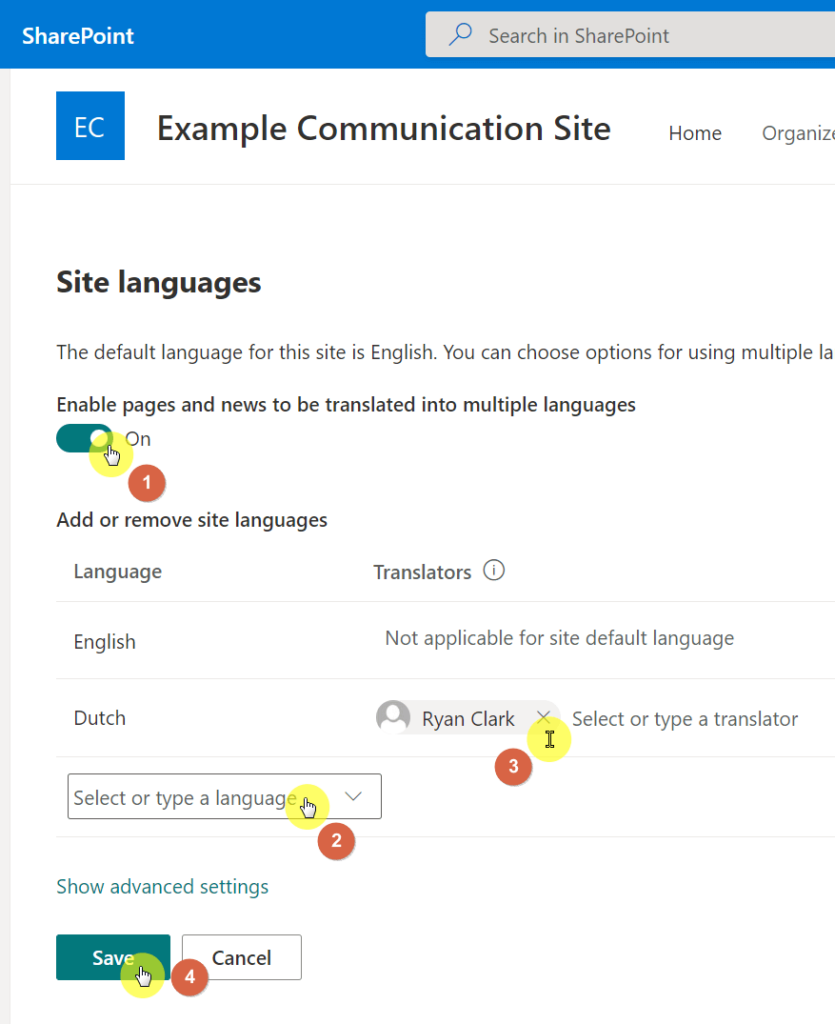
You will then get to the page where you can configure the site languages:
- Enable the feature first by toggling it
- Select the language you want to add
- Add a translator to the list
- Click the “Save” button
Once you set it up and go back to the site’s homepage, you will see a “Translation” button in the command bar:

When you click on it, the right panel will slide in where you can “Create” a copy of the page in the language you chose:
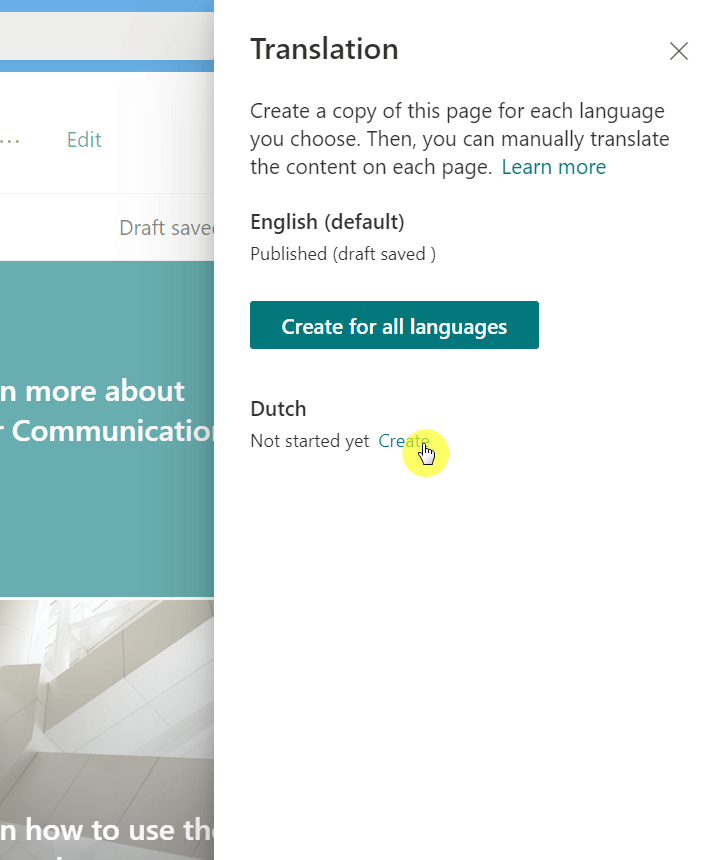
If you choose to view the new page, you will then be redirected to a copy of that page (that you still have to translate manually).
Note: The translation button will not auto-translate the page for you. It simply creates a copy of that page and tags it in that language.
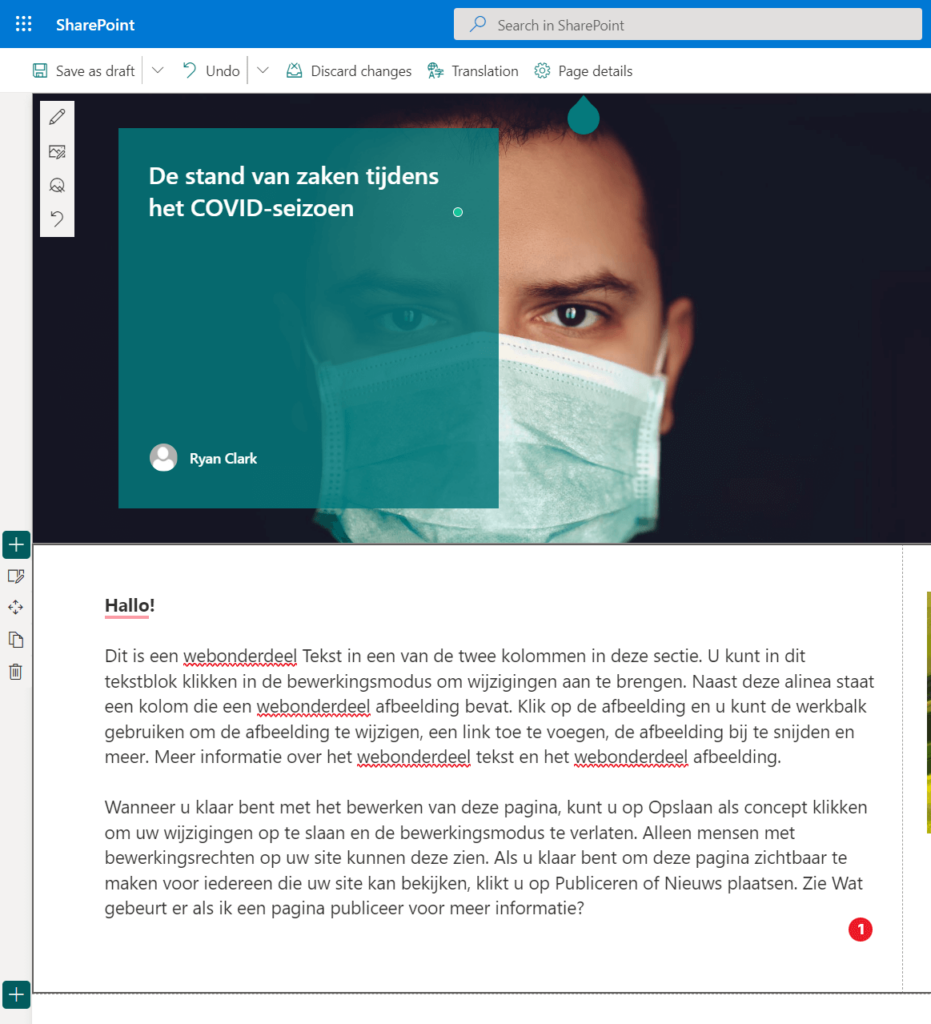
You will then have to edit that page and translate its content to the language you specified — something like this:
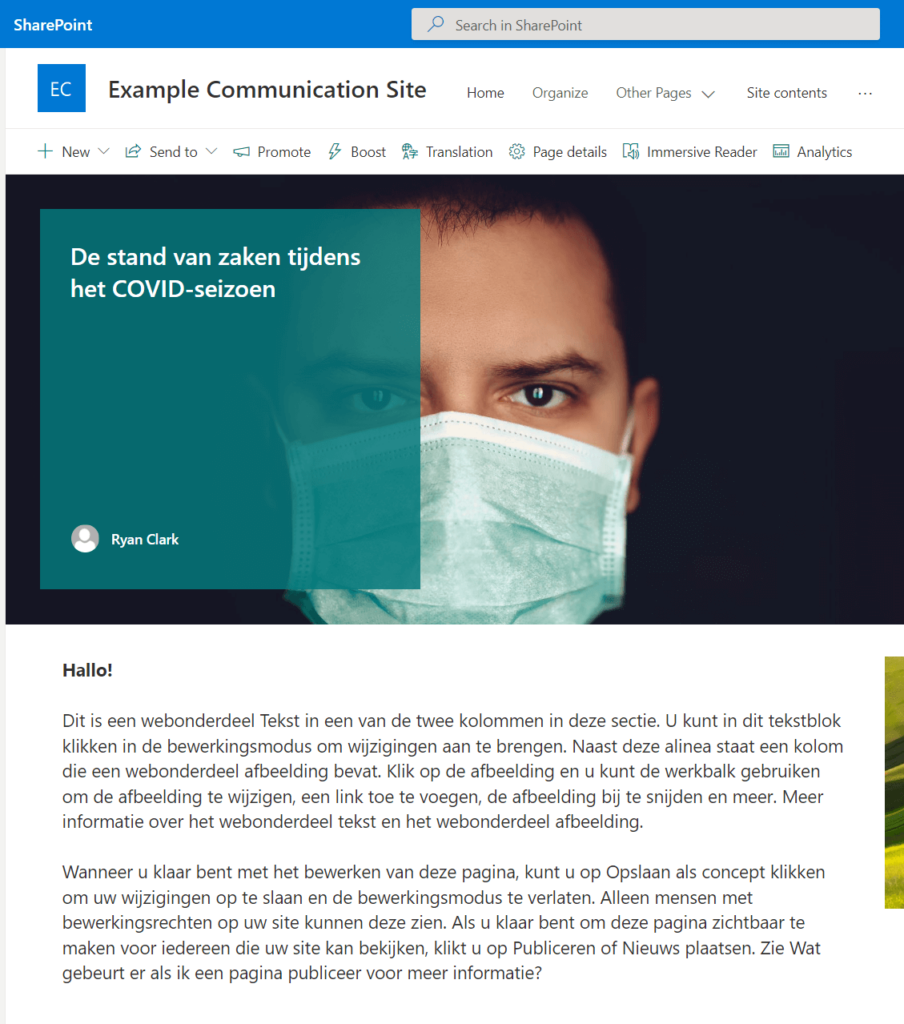
Once you publish the updated page, it will then look like this:
If you assign the translation to another user, that person will receive a “translation request” via email to start the translation.
Right after you added a new language, you can also change the site name, navigation, and even the footer’s language.
To translate the site name and description:
- Click the gear icon again on the site
- Navigate back to the “Site information” panel
You will then see a new option to translate the site name and description:
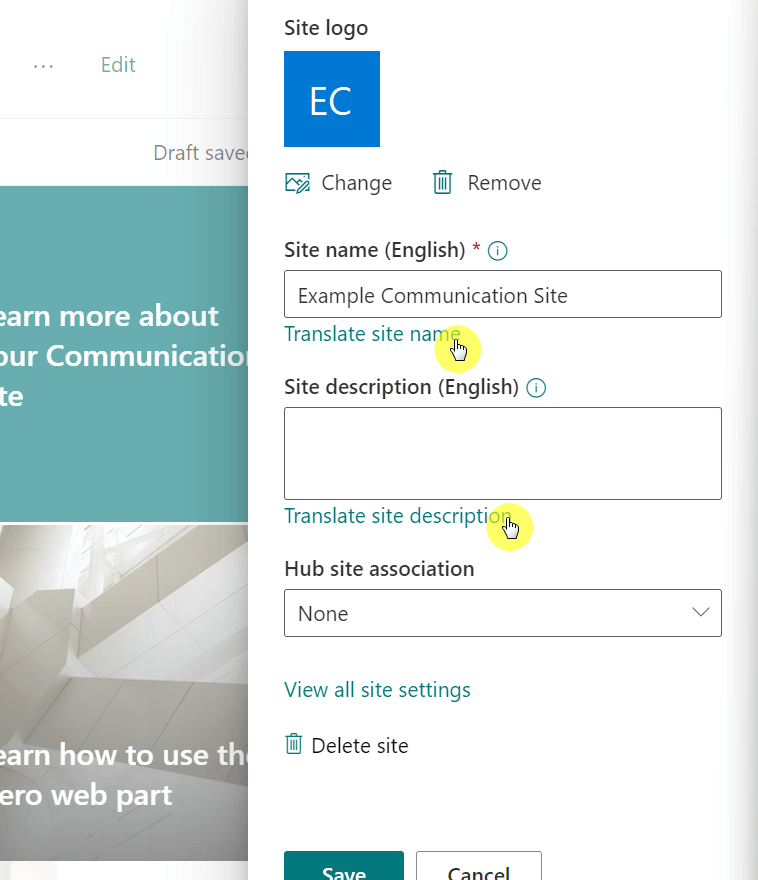
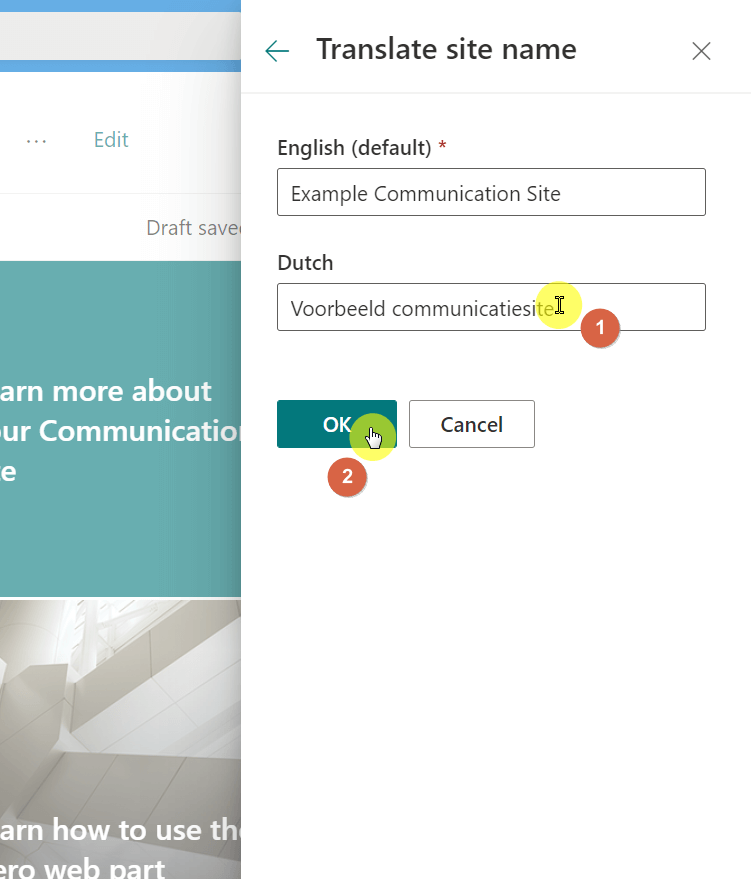
Once you click on it:
- Enter the translation on the field provided
- Click the “OK” button
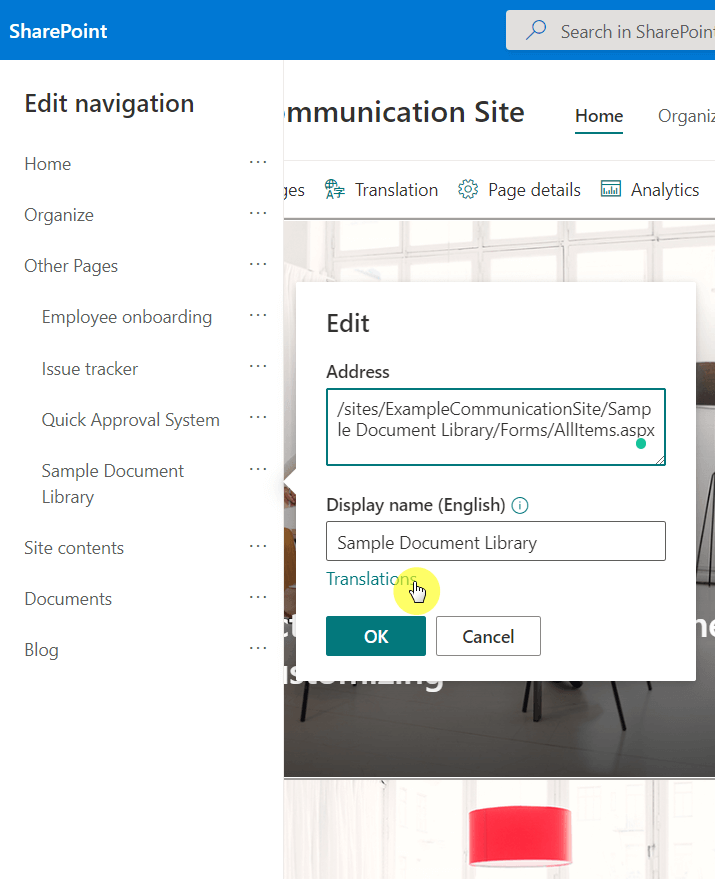
As for the navigation (and basically the footer, if you have one):
- Select the navigation label or name
- Click the “Translations” button
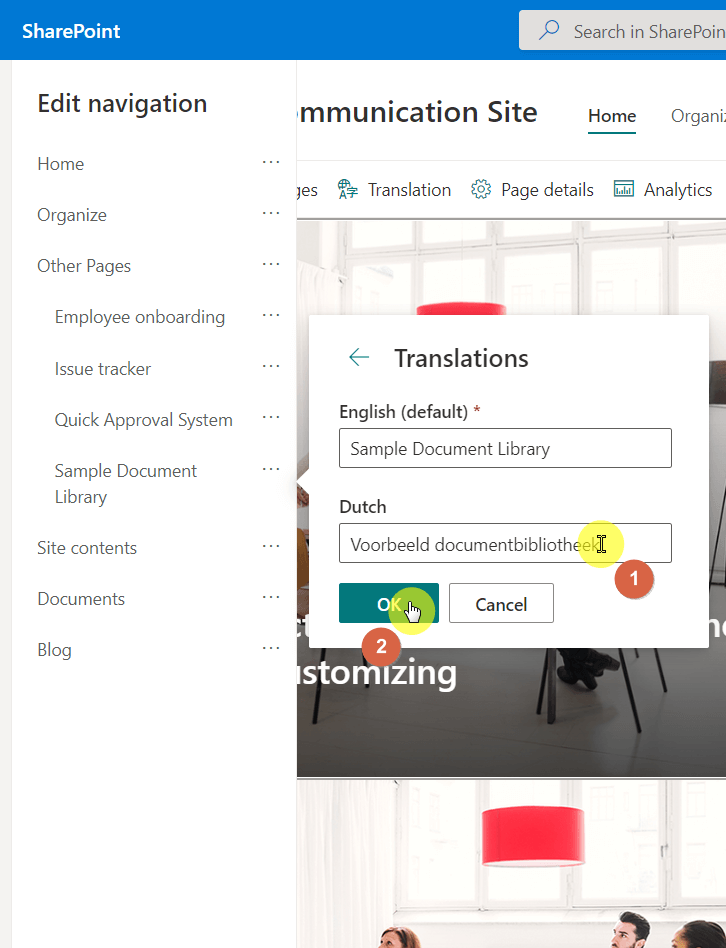
Similar to the earlier steps:
- Enter the translation to the right field
- Hit the “OK” button
How to set the default language of a user
What if your company is located in a different part of the world — in a different language — and you want to change your default language?
Here are the steps:
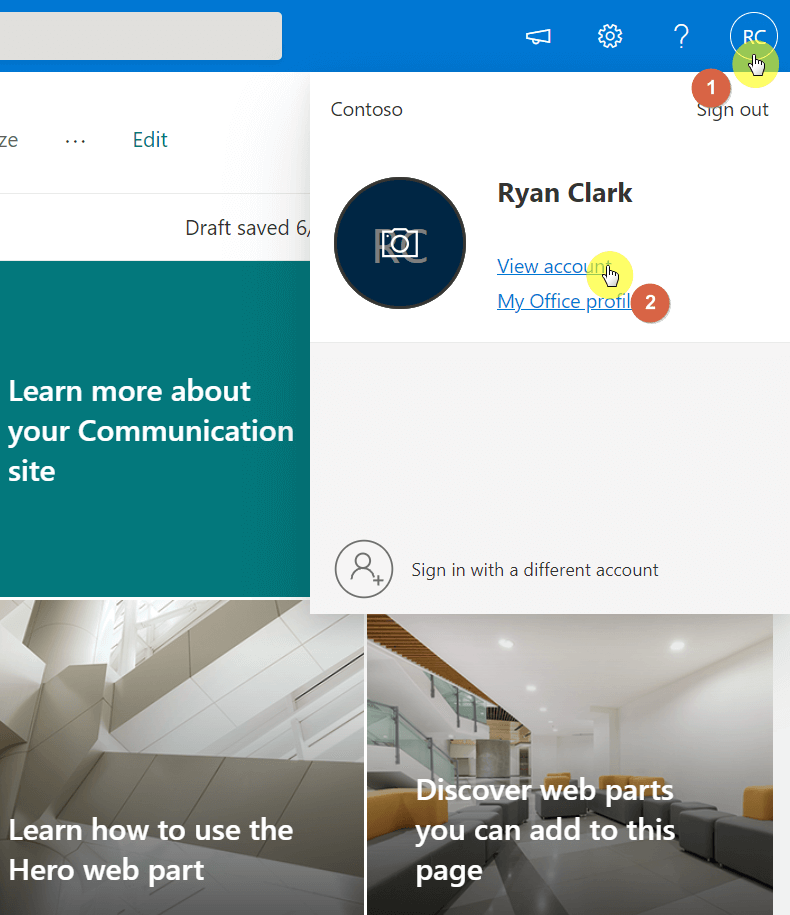
- Click your user profile picture in the upper-right hand corner
- Click the “View account” option
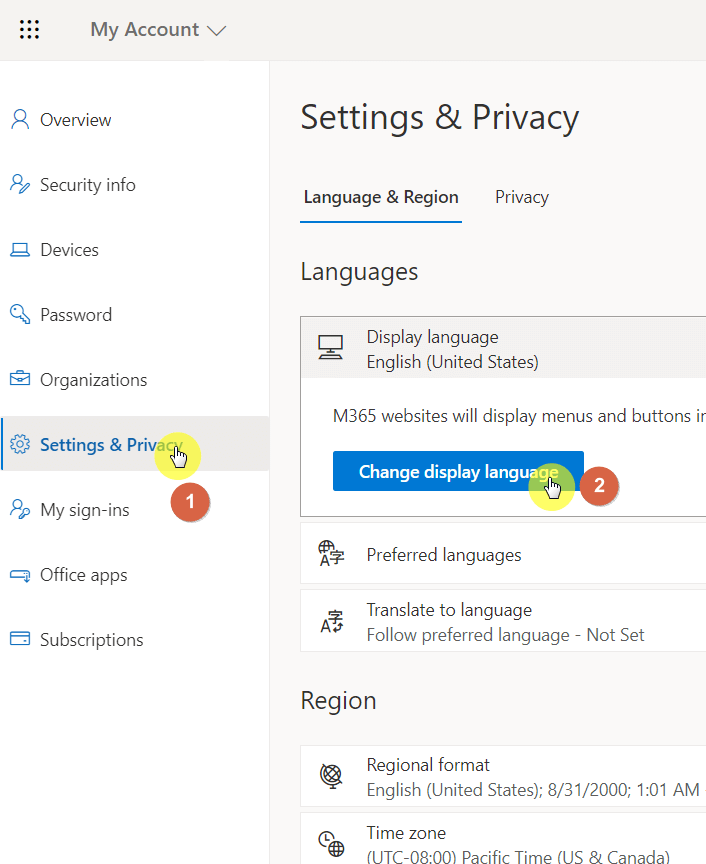
On the next page:
- Navigate to the “Settings and Privacy” page
- Click the “Change display language” button
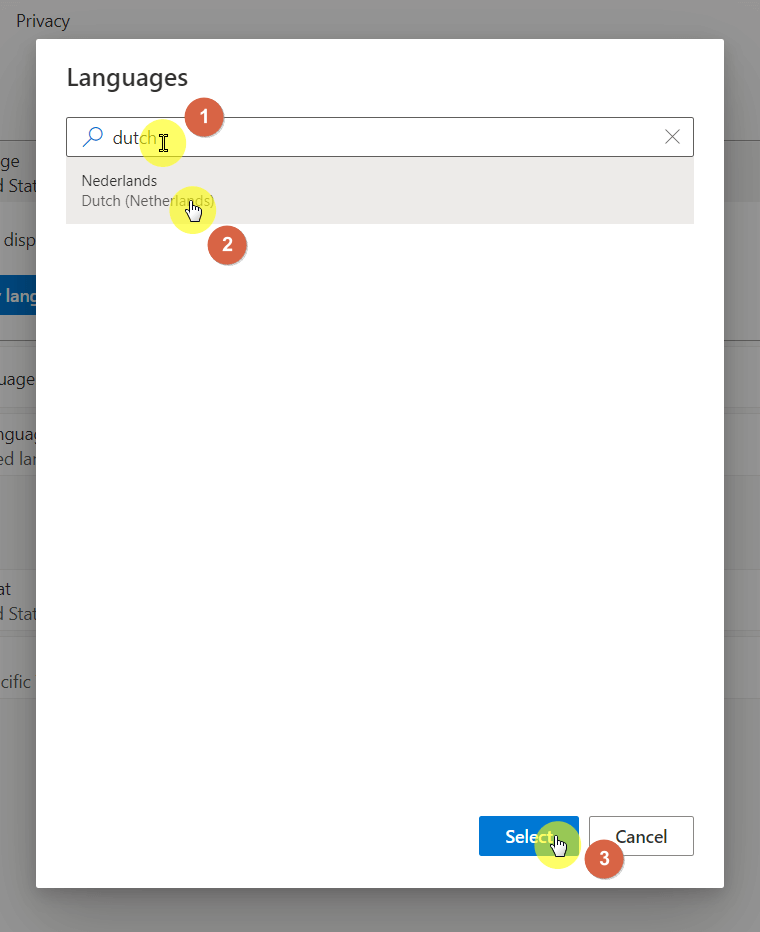
On the small window:
- Select the language you want to use
- Click the “Select” button
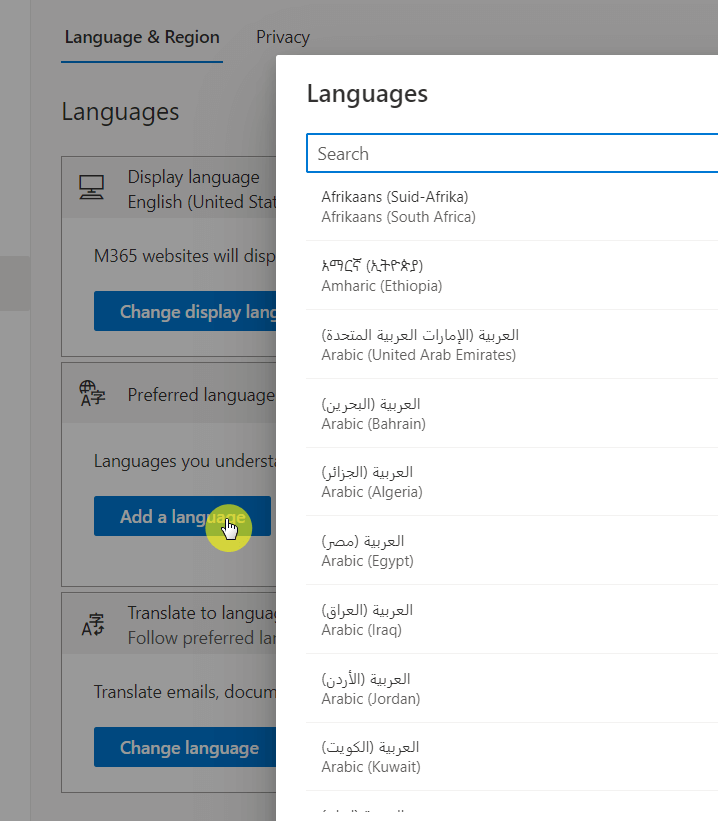
This will display the menus and buttons in this language.
You can also change the “Preferred language” to create and consume content in that language.
Do you have any questions on how to create a multilingual site? Feel free to leave your thoughts in the comment section.
For inquiries and other concerns, please use the site’s contact form and I’ll get back to you as soon as possible.


Hi! What about translating custom columns (Site or List level)?