

Last Updated on August 26, 2023
Do you need to build a human resource site?
Well then, if you’re already using SharePoint Online in your organization, there’s actually no need to look for other platforms.
In this article, I’ll show you how to create an employee-facing human resources site in SharePoint Online using in-built features.
Let’s get started.
Table of Contents:
What is a human resources site?
HR sites or portals are places that provide employees with important resources.
Some examples include:
- Handbooks
- Forms
- News and announcements
- Performance process
Having a human resources site makes it easy for employees to find the resources they need (which they usually request from HR anyway).
With a portal, important information and documents are centralized. This will avoid confusion and conflict with employees.
Of course, your organization can use basic tools like OneDrive or Google Drive. However, having a site provides employees with an interactive and educational space for their needs.
Sign up for exclusive updates, tips, and strategies
Fortunately, with the modern experience in SharePoint, creating a human resources site is actually easy.
Well, you may need to learn a few things. But overall, it’s not really that hard. Simply follow the instructions here and you will be fine.
Related: How to Create a SharePoint Online Project Site: Step-By-Step
Step #1: Create a communication site
There are different site templates in SharePoint that will result in different kinds of sites.
The most common of them are:
- Team site (with and without Microsoft 365 group)
- Communication site
Related: Using Site Templates in SharePoint Online: Beginner’s Guide
What I will be showing you here today is an employee-facing site that will allow us to share information with employees…
Without having to work with them collaboratively.
For that, the most logical choice is a communication site. It has all the features we need — without the extra ones for team collaboration.
To create a new communication site:
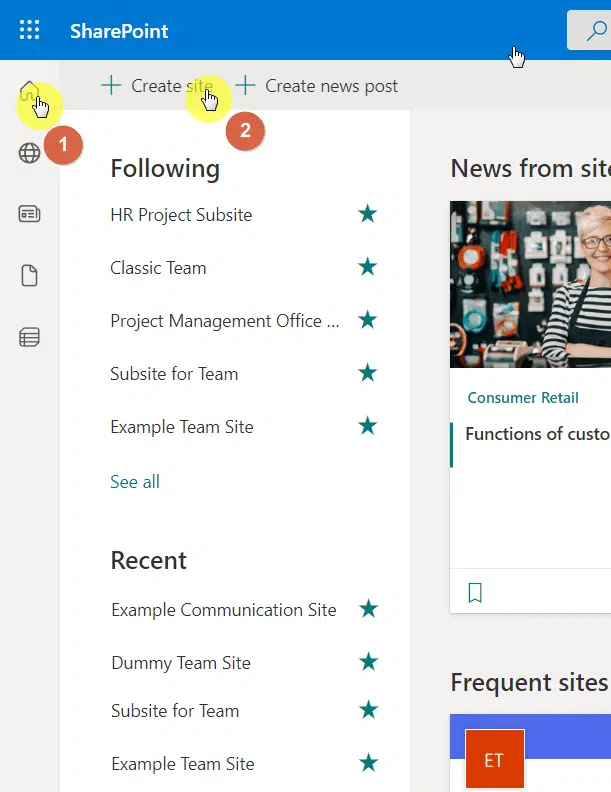
- Navigate to the start page of the SharePoint tenant (home button)
- Click the “Create site” button
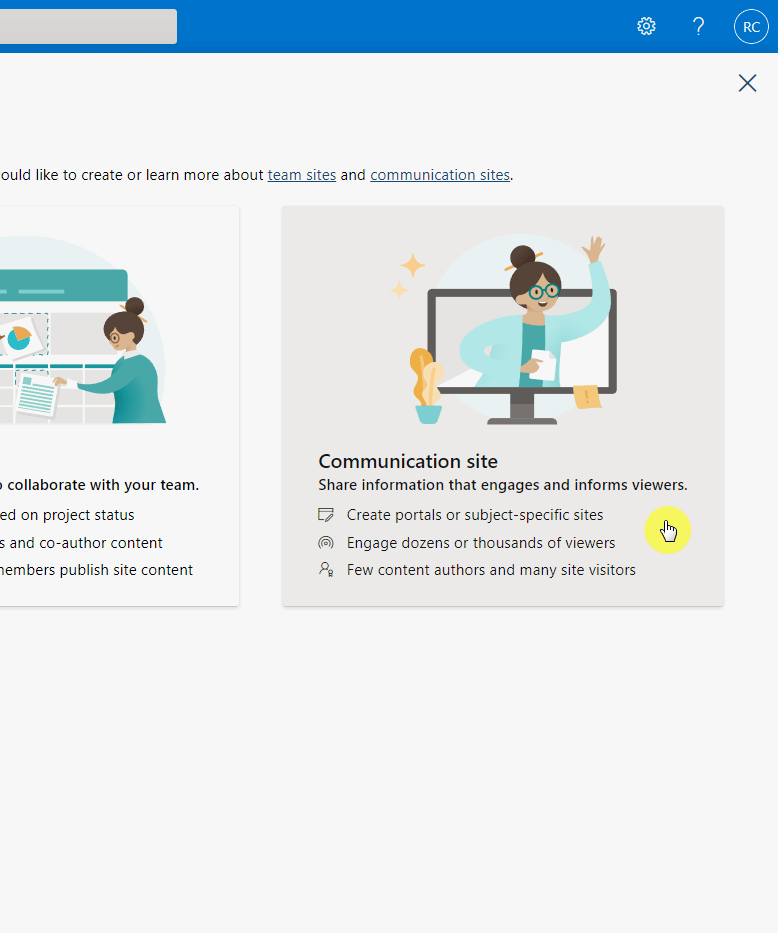
Then choose the “Communication site” option on the right panel:
On the next page:
- Supply the required information
- Confirm the site address is available.
- Click the “Finish” button

Note: For creating a site from a template, check here: How to Create a SharePoint Site From Template: Full Tutorial.
While waiting for your site to get ready, proceed with the next step:
Step #2: Determine what to put on the HR site
Though every human resources site can look different, what each one needs is more or less the same.
However, in this step, you need to be specific on the actual requirements for the site, such as:
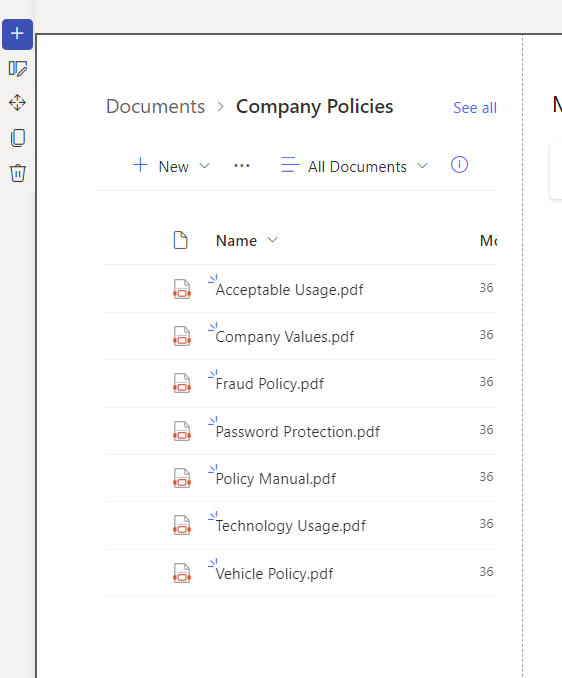
- Company policy documents
- News and announcements
- Links to various resources
- Calendar for important events
Those above are only examples. There may be a whole lot you want to include in your human resources site.
Be sure to name them since you will be working with the right web parts you can use to realize those that you want to include in the site.
Step #3: Configure the site (follow what’s in step #2)
Once your human resources site is ready, you will be redirected to it and will be greeted with a window asking you whether or not you want to start designing it.
You can always start from scratch. But if you want to start off from a template, feel free to browse the available ones.
For example, the department template seems like a good match for what I need:
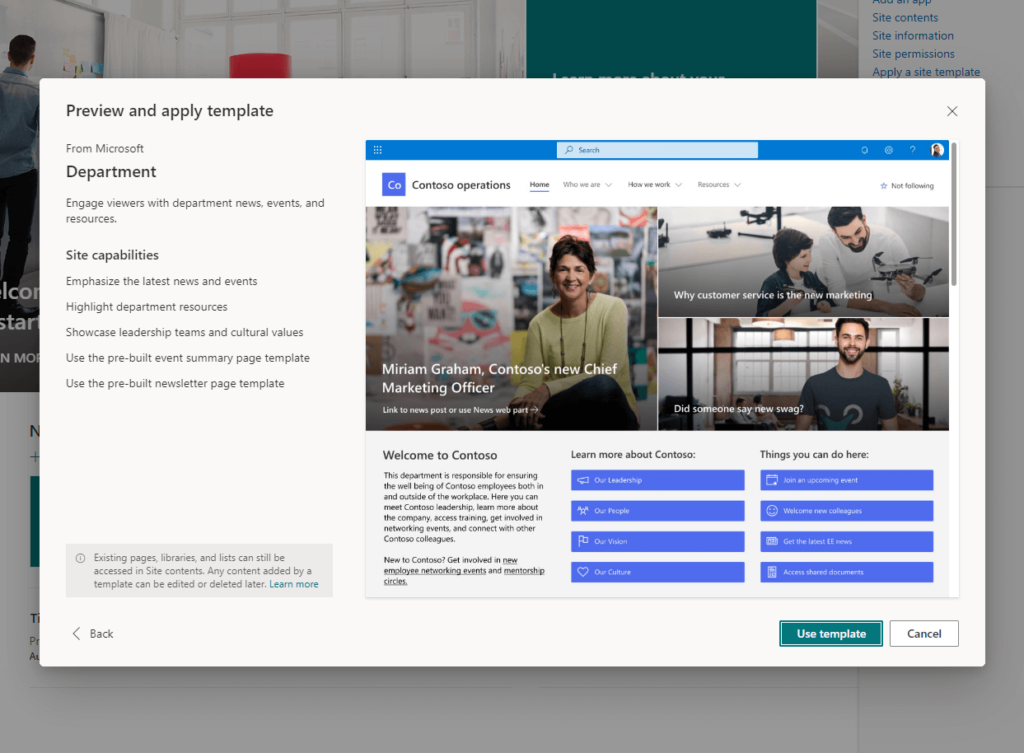
Fortunately, everything I need is in this template, so all I have to do is configure them according to how I want them.
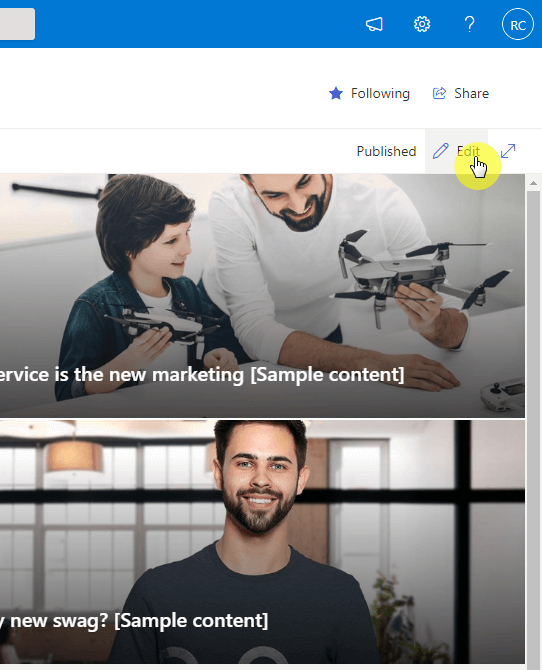
But in case you started from scratch or you want to put your own web parts:
- Make sure you’re on the homepage
- Click the edit button in the upper-right corner
If I want to put a section on the homepage where users can easily see company policy documents:
- Hover over the target section/space
- Click the plus button
- Find and click the file viewer
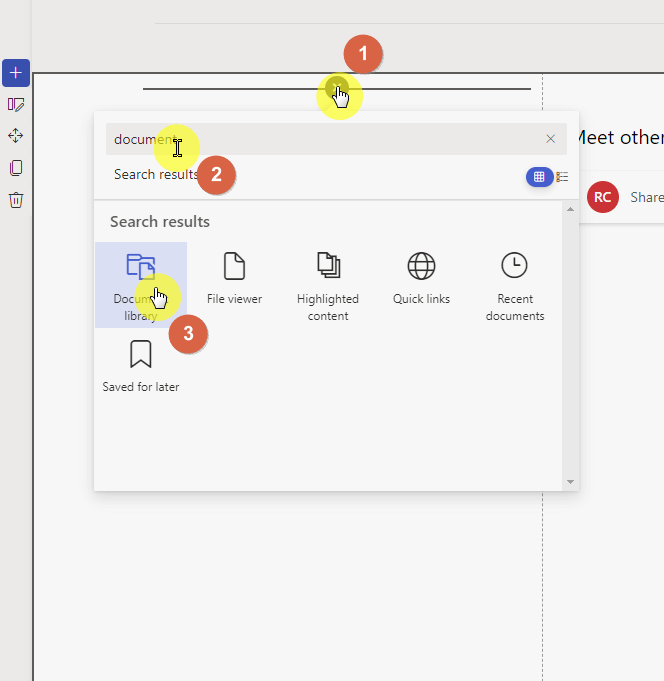
Note: For this to work, you need to create a document library first and store the policy documents there.
From there, simply navigate within the web part and find the document library that contains your policy documents.
If you want to put a section that will show news and announcements:
- Hover over the target section/space
- Click the plus button
- Find and click the news web part
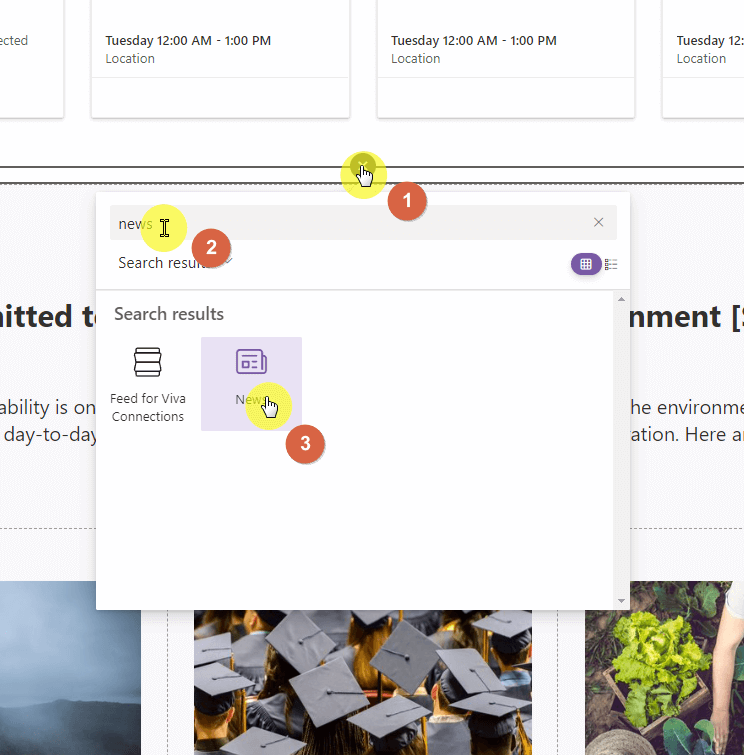
You will have to configure the web part too and specify the news source and the layout:
- Select the web part first
- Click the edit button
- Configure the web part settings (right panel)

If you want to add links to resources (which can be external):
- Hover over the target section/space
- Click the plus button
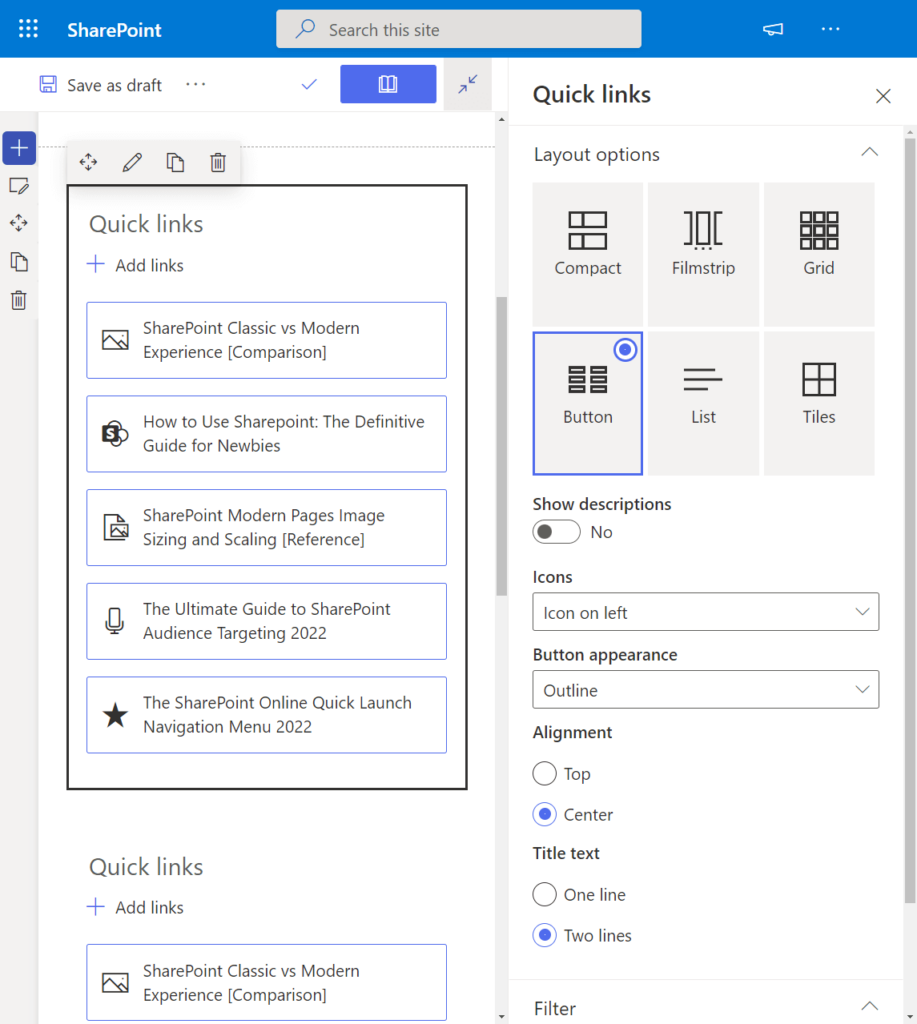
- Find and click the quick links web part
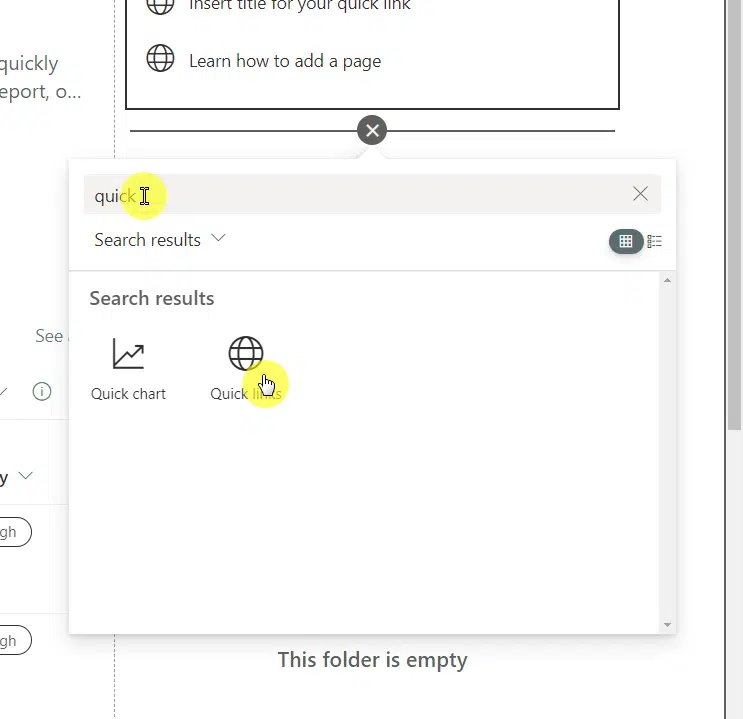
You can configure it too from the right panel after you click on the edit button:
If you want to add a calendar for upcoming events:
- Hover over the target section/space
- Click the plus button
- Find and click the group calendar web part
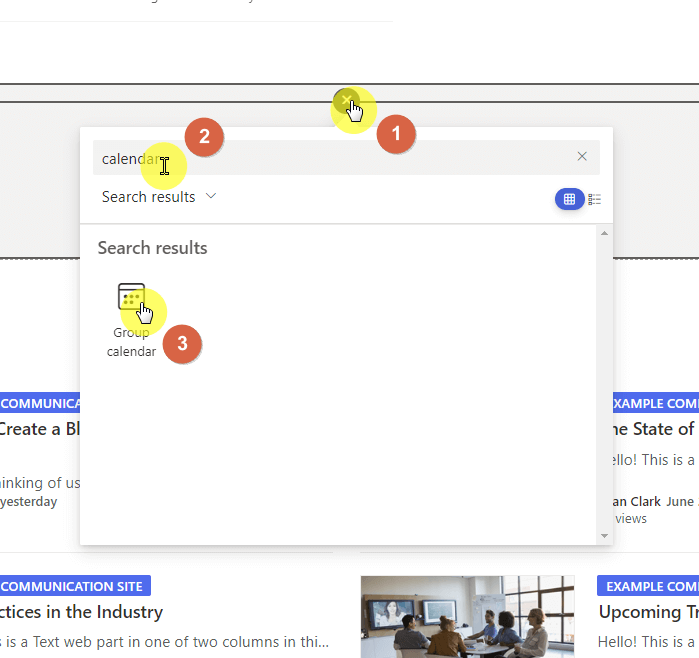
All the events planned will appear on the web part.
Unfortunately, SharePoint has limited calendar options. The group calendar is the in-built feature that will allow you to show upcoming events.
Note: If you have more requirements for your site, check out all the available modern web parts you can use SharePoint Online.
Step #4: Set up proper security for the HR site
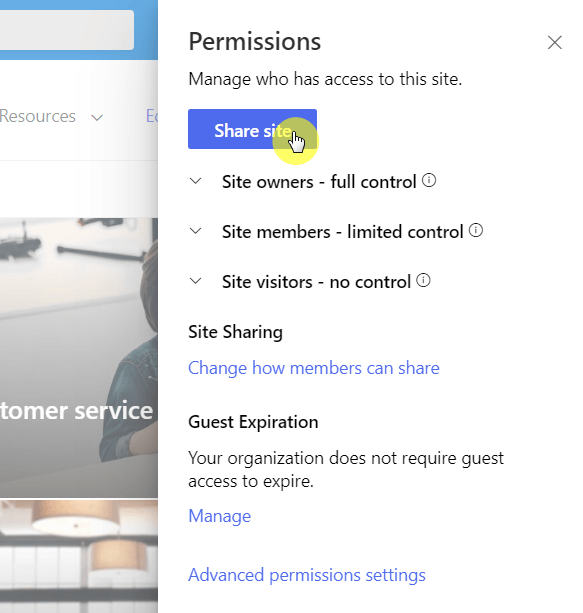
Before you formally launch your human resources site, it’s a good idea to configure the site permissions first.
Here are the steps:
- Click the gear icon in the upper-right corner
- Select “Site permissions” from the list
By default, only site owners have full control over the site. There are also no designated site members and site visitors until you specify them.
Naturally, you will want to share the site with everyone except for external users. Click the “Share site” button to do that.
On the next screen:
- Write “everyone” in the field
- Click the available option shown to you
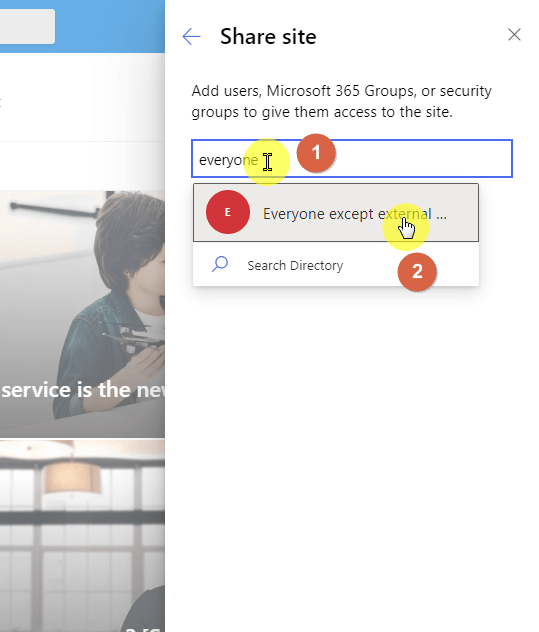
That’s it. Everyone in the organization can now access the site as a visitor. By default, these people will only have read access.
After doing all the steps above, all that’s left now is to spread the word about the new human resource site.
Note: When you share the site, there is an option you can use that will automatically send an email to those you invited.
There are a lot of important reasons why using SharePoint Online is in your best interest, especially when your company already uses it.
Here are some of those reasons:
- Creating a centralized place for updates, news, and changes in policies
- Convenient employee onboarding portal
- Easier access for employees
- Provide a more secured HR portal and document management system
You also don’t need to use third-party integrations or other tools. The in-built features in SharePoint are more than enough to handle your basic needs.
Anyway, do you have any questions on how to create a human resources site in SharePoint? Please share it below.
For inquiries and other concerns, kindly use the site’s contact form and I’ll get back to you as soon as possible.


