
![How to Create a Blog in SharePoint Online [2022 Update]](https://www.mrsharepoint.com/wp-content/uploads/2022/07/new-blog-post-1024x683.jpg)
Last Updated on June 8, 2024
Are you thinking of using SharePoint Online to blog?
Fortunately, creating a SharePoint blog is easy. In fact, if you have been using SharePoint Online, you must’ve encountered it already.
In this article, I’ll share with you how to create a SharePoint blog site quite easily and show your articles on the home page as well.
Let’s get started.
Table of Contents:
SharePoint Online is quite flexible. If you’re already using it in your organization, I don’t see a negative reason not to take advantage of it.
Here are some great ideas on using SharePoint Online for blogging:
Documenting unique experiences
Do you want to share some unique experiences that you have related to your work in the organization?
If that’s the case, using SharePoint Online to record those experiences and automatically share them with your target people is easy.
As I said, if your organization already uses SharePoint in the first place, it’s a good reason to use it to post your blogs as well so others can easily see it.
Publishing and sharing research
Do you work as a researcher for the organization?
If that’s the case, let me guess. You do your research, compile your findings in a document, and then share that document in SharePoint.
But what if you can shorten the process? How about writing directly on a SharePoint blog to directly publish your work to other people in the organization?
Sharing department news and trends
Do you regularly share news and trends with your department?
If that’s the case, writing a blog in SharePoint might make it easier — especially if your department has a site of its own.
You can even use the same blogging features to share department reports and display them separately from blogs on the homepage.
Collaborating with external users
Do you use a roundabout way of sharing what you know with external collaborators?
Well, using a SharePoint blog is a good way to collaborate with others — especially in ideas and knowledge.
Since SharePoint now has awesome sharing features, you can also coordinate projects between different teams that belong to different companies.
Documenting important projects
Lastly, you can also use the blog to document important aspects of various projects — like the challenges, problems, and even detailed instructions.
Depending on how you configure your SharePoint Online blog, you will be able to make the posts available for the whole company to use for learning from one project to another.
Because of that, you will be able to increase engagement and collaborative spirit throughout the company.
Note: If you need to create a project site, check out this guide: How to Create a SharePoint Online Project Site: Step-By-Step.
Sign up for exclusive updates, tips, and strategies
The good news is that creating a blog site with SharePoint Online isn’t complicated. I’ll walk you through each step:
Step #1: Create the blog site first (optional)
This step is optional simply because you can always use the blogging features in SharePoint on whatever site you have.
You can use an existing site, or create a new one. Others opt to create a new one due to the following reasons:
- They want a new site to serve as the “main” blogging site.
- You want to set user permissions that are unique to the other sites that you have (like the blog site being open to all).
- The blogging site will require a different permission level (perhaps, being open to all) than the existing sites.
- The main audience of the site is external users (like clients and external collaborators).
To create a new site:
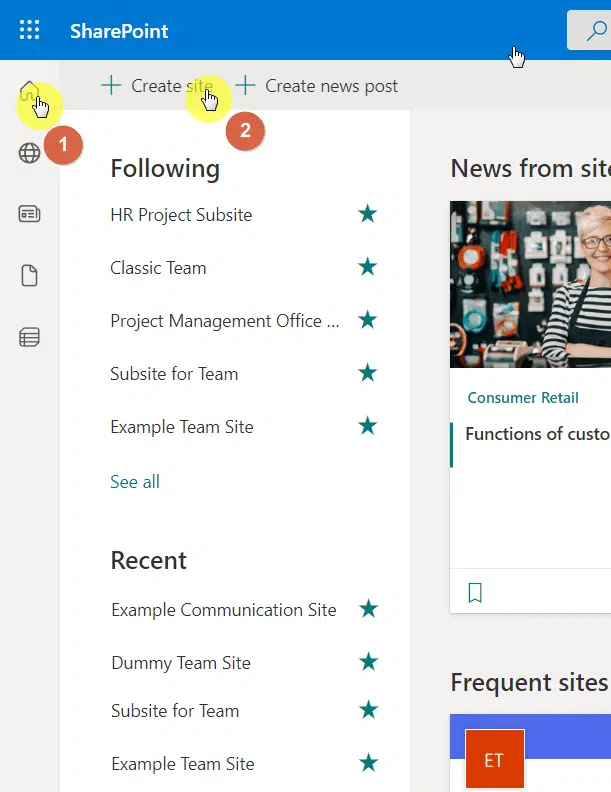
- Go to the start page of your SharePoint tenant (home button)
- Click the “Create site” button
On the right panel, choose the “Communication site” option:
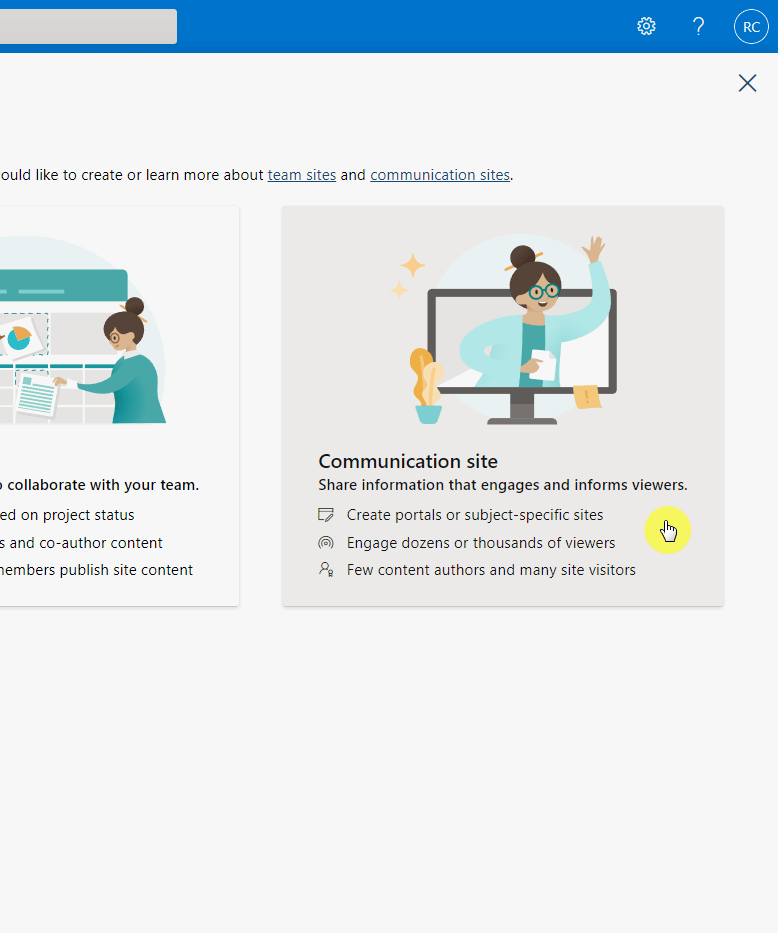
Why a communication site?
Well, if your main goal is to create a SharePoint blog site, then a communication site is the most logical choice since that’s the main purpose of this site type.
All that’s left then is to finish creating the new communication site. You can also modify its looks as much as you want before we continue.
Step #2: Create a site column in the site pages library
A little background about the site pages library:
This is a special document library that stores all the pages on the site (both those you created and those created by the system).
Note: Technically, document libraries are still lists, which means you can create new metadata (columns) on a library.
In this case, we will add a new column in the library that we can use later on to filter only blog pages when showing pages on the homepage.
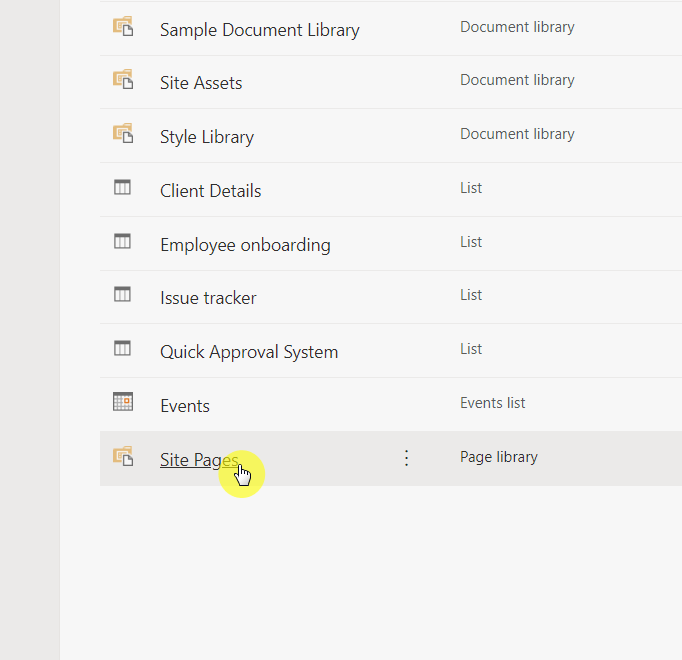
Let’s navigate first to the site pages library:
- Click the settings gear in the upper-right corner of the screen
- Select “Site contents” from the options
Find and click the “Site Pages” library:
Once you’re in the site pages library:
- Click the “Add column” header
- Select the “Choice” option from the list

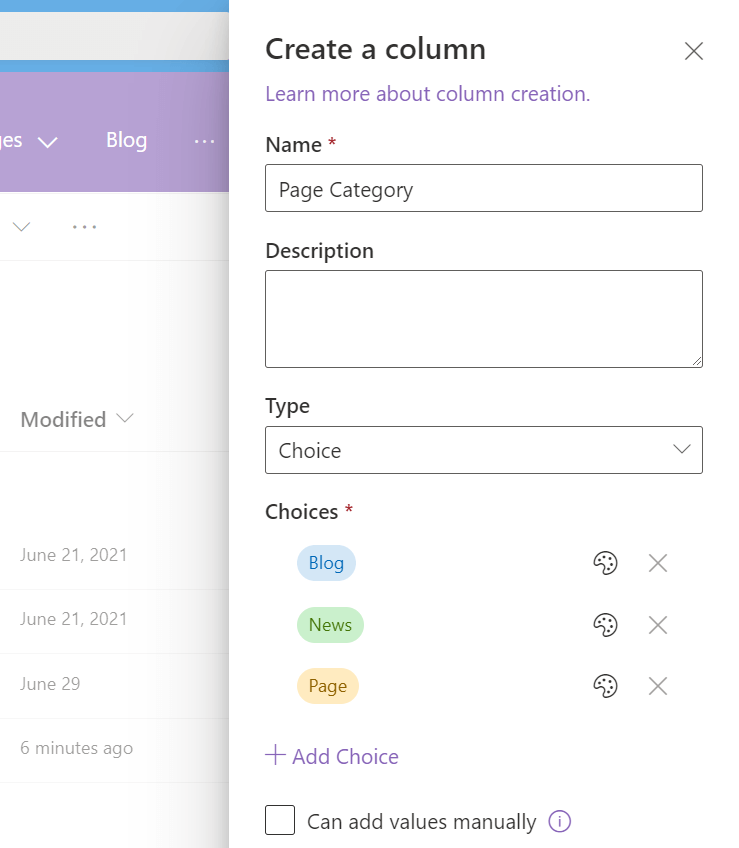
On the right panel:
- Enter a fitting name for the new column (like “page category”)
- For the choices, you can follow what I used below (blog, news, and page)
- Click the “Save” button at the bottom of the panel
A little explanation here:
This column will categorize the pages in the site pages library. That’s why I used the three basic types of pages you might create for your site.
On the other hand, feel free to add more choices if you have some other categories you want to include (like “research” or “guide” or something).
Step #3: Prepare a page template for your blog posts
If you have a page template (think of it as a blog template), it will be easier and faster for you and your users to create a new blog post.
Now, creating a template is simply duplicating a page along with its configurations so all you will have to do next time is fill out the title and the content.
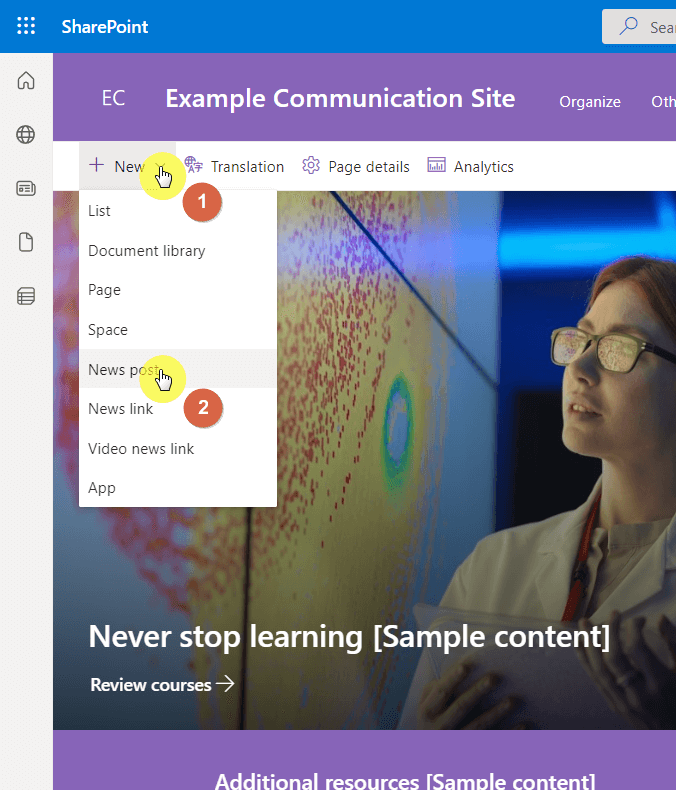
But first, you need to create a new post:
- Go back to the homepage of your SharePoint site
- Click the “New” button from the command bar
- Select “News post” from the options
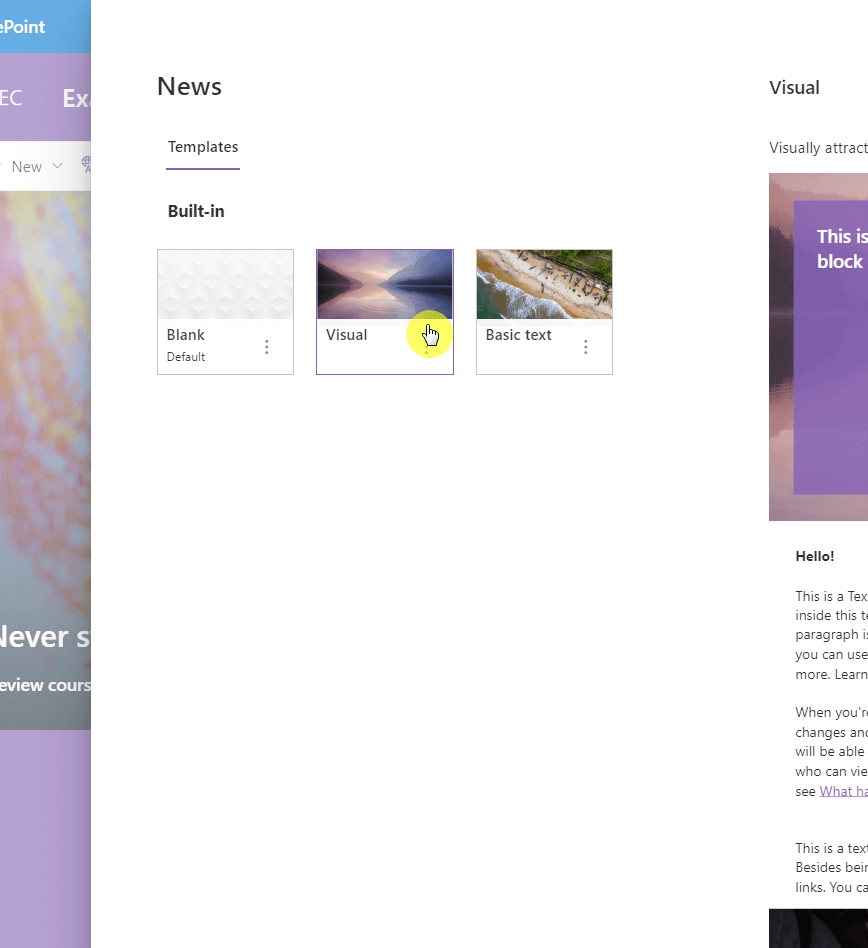
From there:
- Select the template you want to start with (I recommend the “visual” option)
- Click the “Create post” button at the lower-right corner
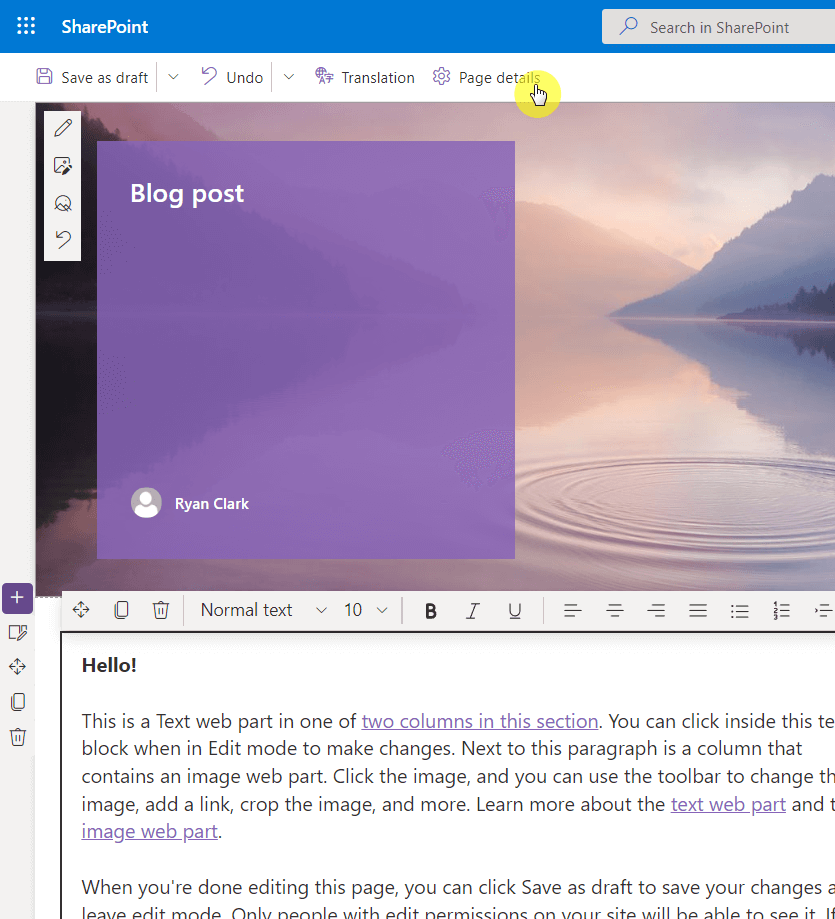
On the new post:
- Configure it as much as you want
- Feel free to change the layout as well
- Add in all the web parts you want to include in a blog post
- Click the “Page details” button from the command bar
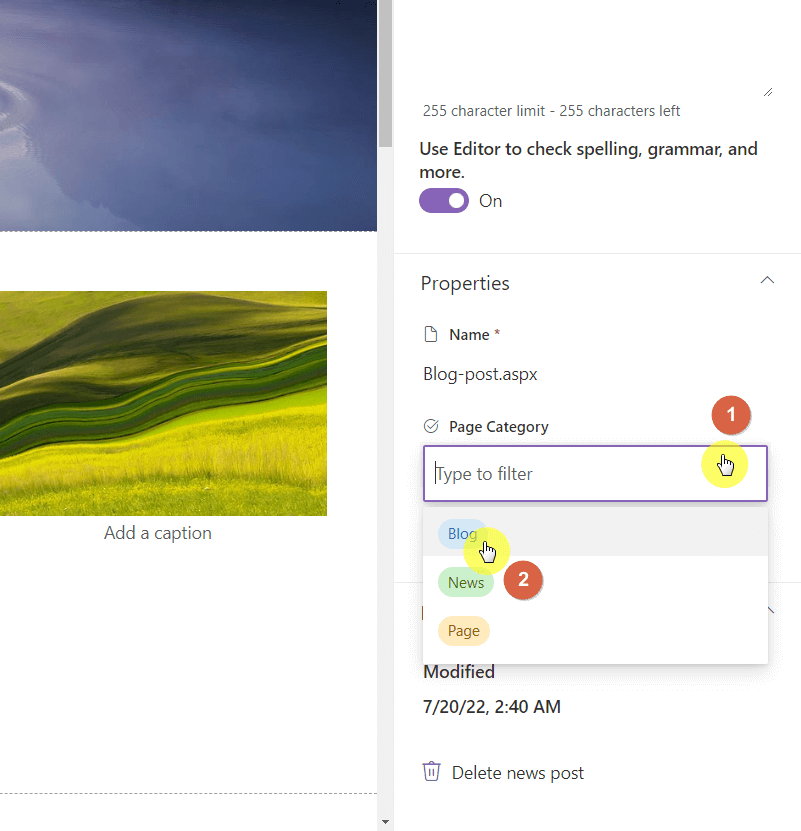
On the right panel, make sure to set the page category as a blog:
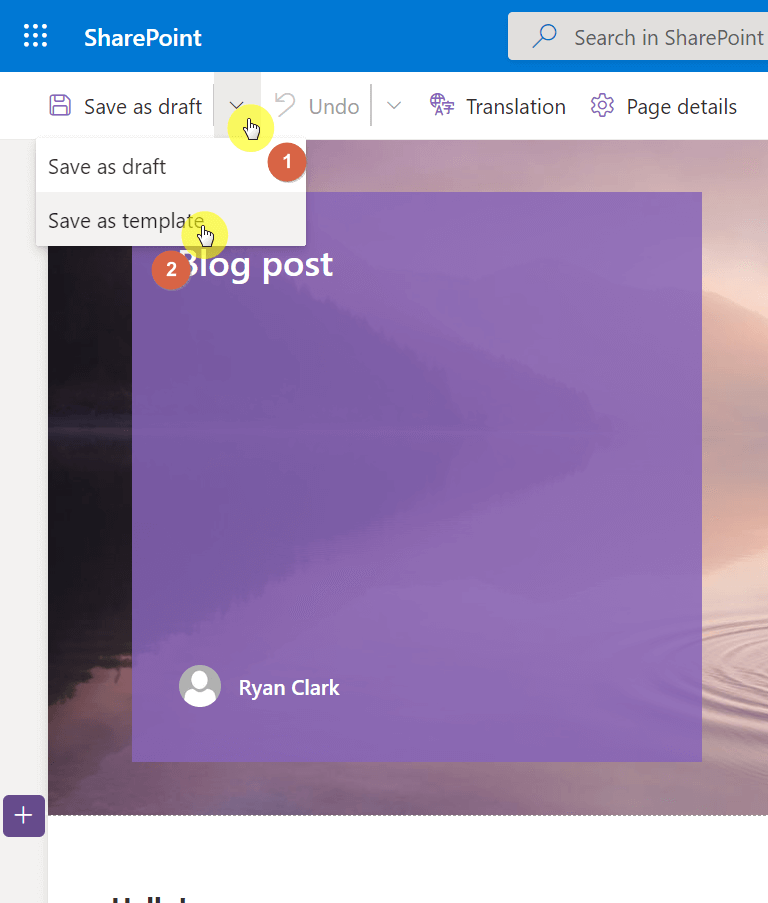
Then, save the page as a template:
- Click the save dropdown button from the command bar
- Select “Save as template“
Note: For creating a site from a template, read this tutorial: How to Create a SharePoint Site From Template: Full Tutorial.
Step #4: Start creating your blog posts
Strictly speaking, this part can be last. But I want to put it right here so you can at least see how all of this will work out on the homepage.
In this step, we will make use of the SharePoint blog page template created in the previous step and take it from there.
To do that:
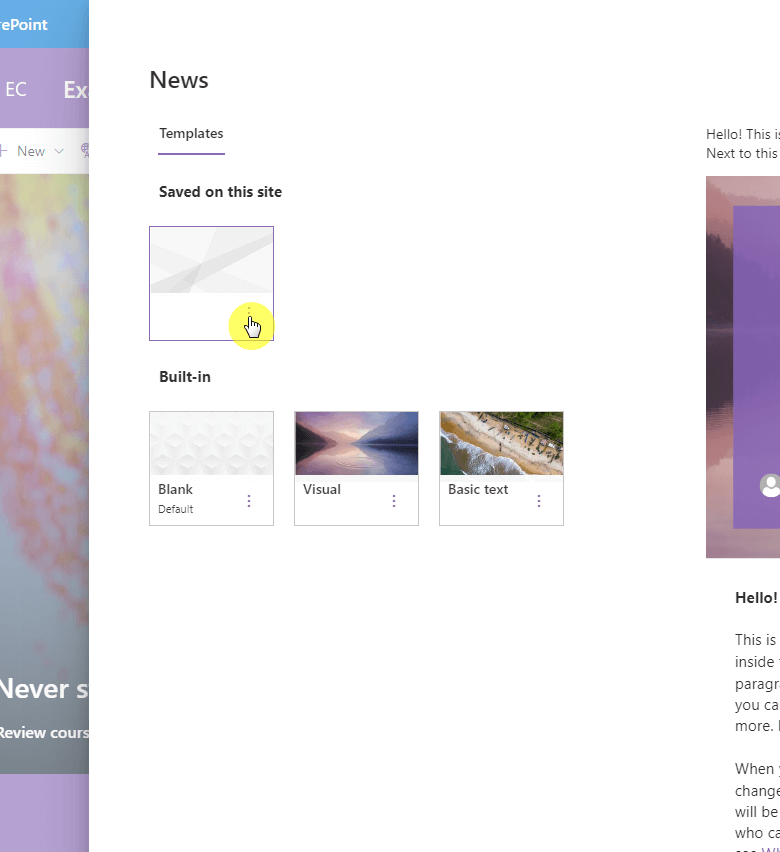
- Go back to the homepage
- Do the steps again for creating a new news post
- This time, select the newly created blog template
Finish your blog post and once you’re done, click the “Post news” button from the command bar:
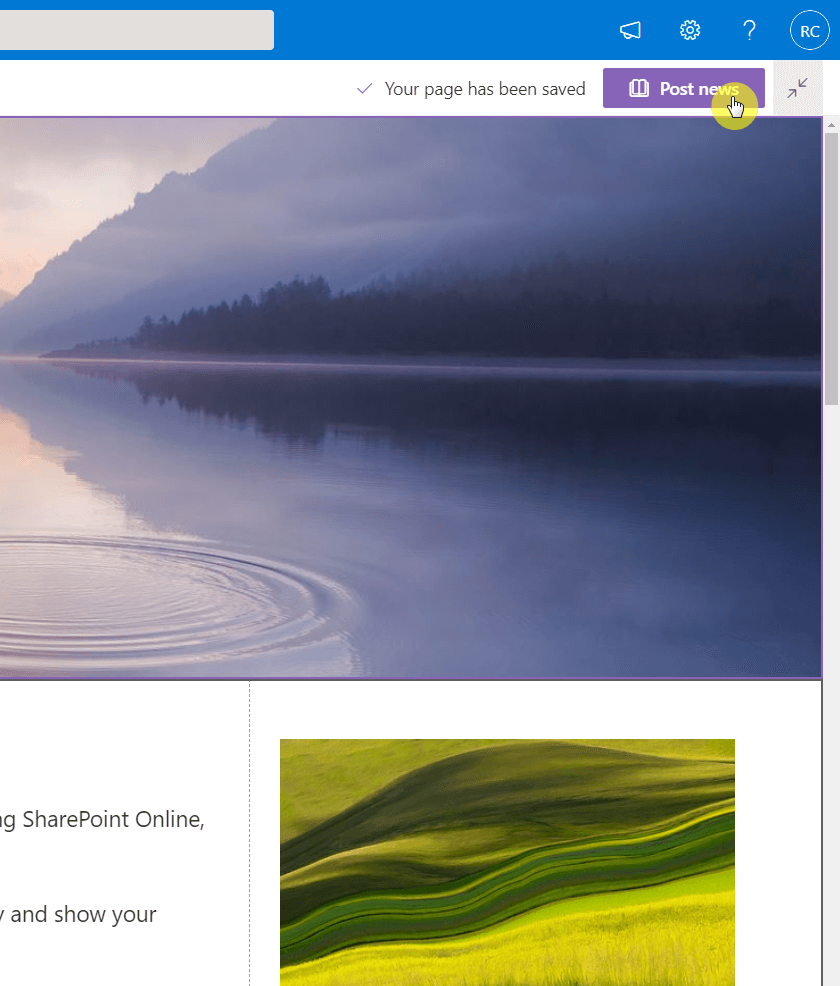
That’s it. When you start adding content in the future, simply repeat the steps above using the blog template.
Step #5: Add a modified news web part to the homepage
The final step is to add a news web part on the homepage that will show only blog posts (you can have more than one news web part).
With that:
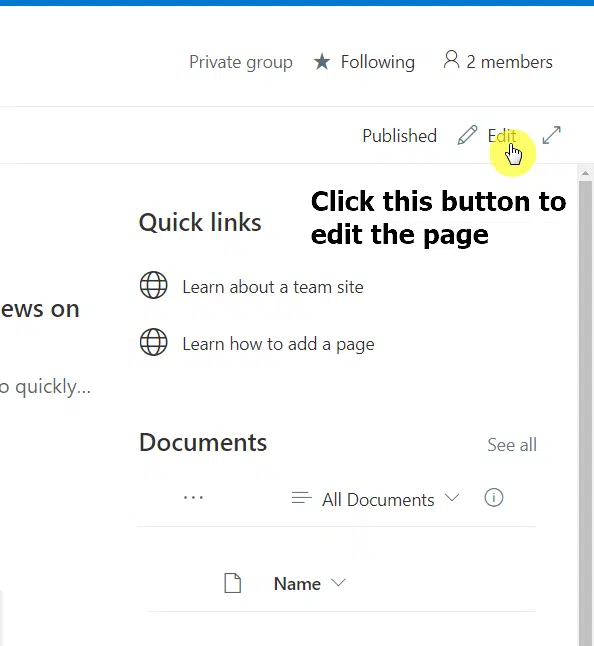
- Go to the home page of the blog site
- Click the “Edit” button on the upper-right corner
If you want to add a new news web part:
- Hover over to the area where you want to add the web part
- Click the add button
- Find and select the news web part
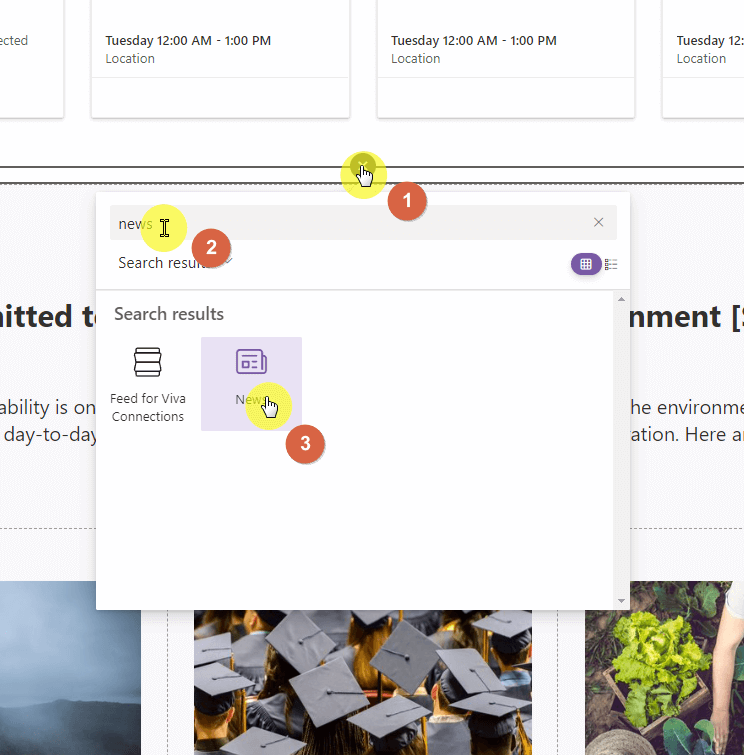
To configure the news web part to show only blog posts:
- Click the pencil button of the web part (while selected)
- On the right panel, configure the filter options
- Set the filter options to the right property (shown below)
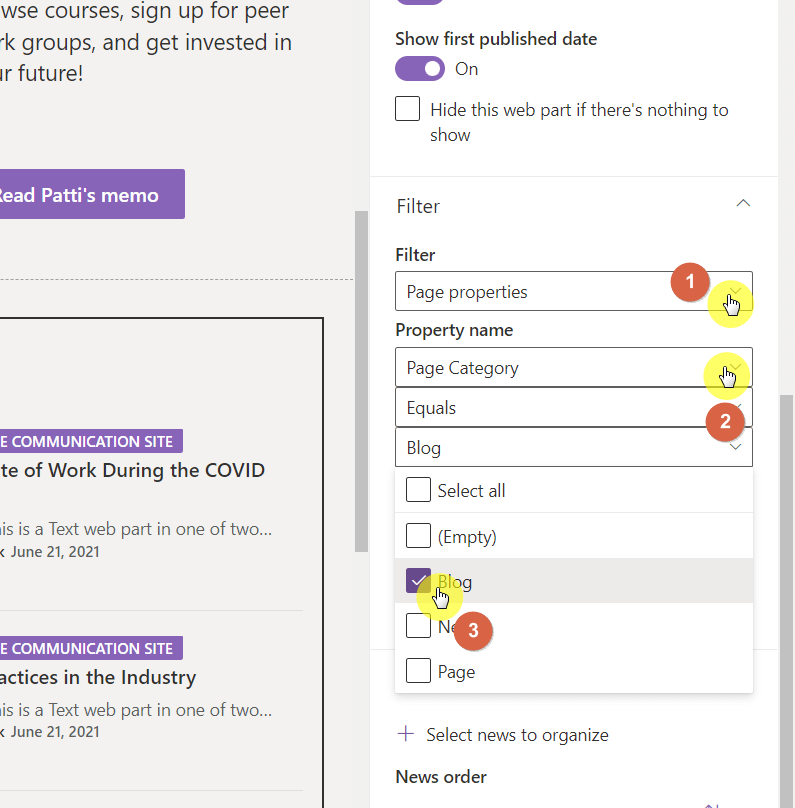
Republish the blog site and you will now see a section where only blog articles are shown.
There are a lot of benefits to having a SharePoint Online blog. Here are some of them:
1. Categorize content easily
Similar to how you can categorize pages in the site pages library, you can further categorize each blog post into different topics.
In fact, you can organize different publications on one site and categorize them into thematic content collections.
You can also display them on the home page separately — the same way you can show blog pages and news posts separately.
2. Automated Classified Content Archiving
SharePoint Online blogs are automatically categorized by date.
This means you can always locate an entry by searching for the month or year in which they were created.
It can also help with a lot of other things if you want to sort out important archival information later on.
3. Rating
SharePoint Online blog readers can submit their own comments and even hit the like button.
These features allow you to measure the readers’ interest. It’s also possible to use it to determine the general value of your blog on SharePoint Online.
It also helps that each article you write has its own views counter. There’s also a page analytics feature you can access.
Anyways, do you think you will be using SharePoint Online now to create a blog site? Share your thoughts in the comment section.
For inquiries and other concerns, please use the site’s contact form to reach out and I’ll get back to you asap.


SharePoint Online is a great platform for blogging, and creating a blog site with SharePoint is easy. You can use an existing site or create a new one, depending on your requirements. SharePoint is flexible and can be used to share unique experiences, research, department news, and trends, collaborate with external users, and document important projects. To create a blog site, you need to create a site column in the site pages library, which will categorize the pages in the library. SharePoint Online has awesome sharing features, making it easier to coordinate projects between different teams belonging to different companies.
I really enjoyed reading your article on effective development and your tips are extremely helpful. I will start implementing this technique immediately.
Thanks for sharing this valuable insight. I look forward to reading more of your articles on productivity and development!
Hi Ryan, great post. Your instructions worked perfect except for Step 5. I wasn’t able to filter by Page Properties. Any ideas the property name is greyed out.
Great article. Question, I used your excellent instructions to create a senior leadership blog on our main SharePoint intranet site. How do I give access to just the senior leadership team so that they can make blog posts whenever they like?
Great guide! SharePoint Online is such a versatile platform, and your step-by-step instructions make it incredibly easy to navigate, even for beginners. The screenshots really help clarify each stage. Thanks for keeping us updated with the latest features and tips for creating a blog in SharePoint Online.
This comprehensive guide to creating a blog in SharePoint Online offers a clear and straightforward approach for users of all levels. With the 2024 update, it integrates the latest features and simplifies the process, making it more accessible to beginners while still offering depth for experienced users. The step-by-step instructions are well-structured, ensuring a smooth setup process. A valuable resource for anyone looking to leverage SharePoint Online for blogging.
Nice post! You have the best information about why you should create a blog in SharePoint Online.