
Last Updated on September 23, 2023
Do you need to archive documents on your SharePoint site?
Well, the truth is, you may need to do this sooner or later especially if your company keeps on expanding.
In this article, I’ll show you how to archive documents in SharePoint and keep your sites clean from files that you don’t need anymore.
Let’s get started.
Table of Contents:
First, I’ll show you “true” archival options in SharePoint. After that, I will also present some options that allow you only to hide the documents.
By the way, take note that all the steps in this article only relate to SharePoint Online. For older versions (including on-premises), you can use the content organizer method.
Related: Modern SharePoint Document Management System Guide Tutorial
1. Move or delete the document
The easiest method you can use to archive a document is to simply delete it or move it to a different SharePoint document library.
By far, this is the simplest one on this list since you don’t have to set up anything. On the downside, this requires manual intervention on your part.
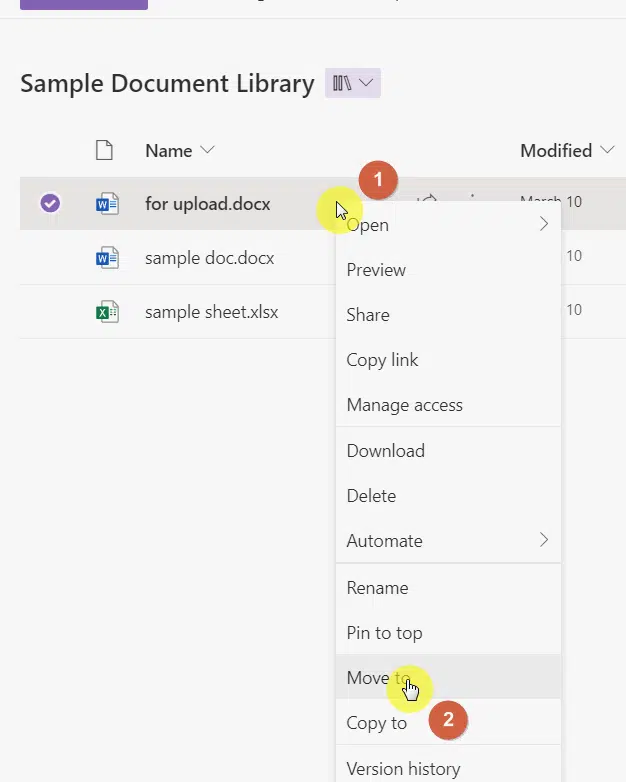
If you want to move a document:
- Right-click on the document
- Select the “Move to” option from the list
There is also a similar button that you can find in the command bar.
Note: For more options on moving/copying files in SharePoint, check out this article.
If you want to delete the file:
- Right-click on the document
- Select the “Delete” option from the list
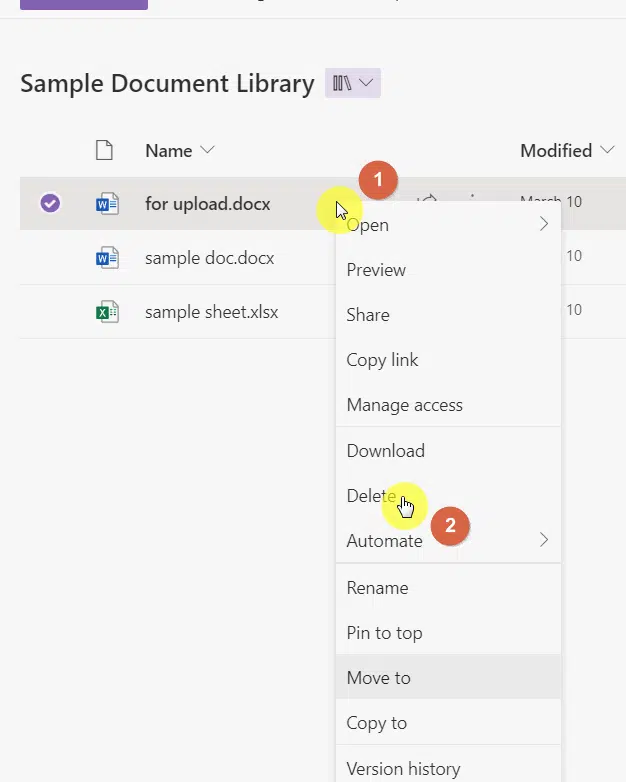
The delete button is also available in the command bar.
Note: If you deleted a file accidentally, there is still some time for you to restore it from the recycle bin. Read this to find out more.
2. Create a retention policy
How about a more automated solution to archive documents in SharePoint?
The problem with the first option is that you will have to move or remove files manually. What if there were hundreds of inactive files?
Fortunately, you can simply create retention policies that automatically delete files according to when the document was created or last modified.
Here is a summary of all the steps you need to take:
- Go to the “Compliance” app through the app launcher
- Navigate to the retention policies from the data lifecycle management section
- Create a new retention policy and set it up accordingly
Below is an example of a retention policy that deletes items on all sites a year after they were last modified:
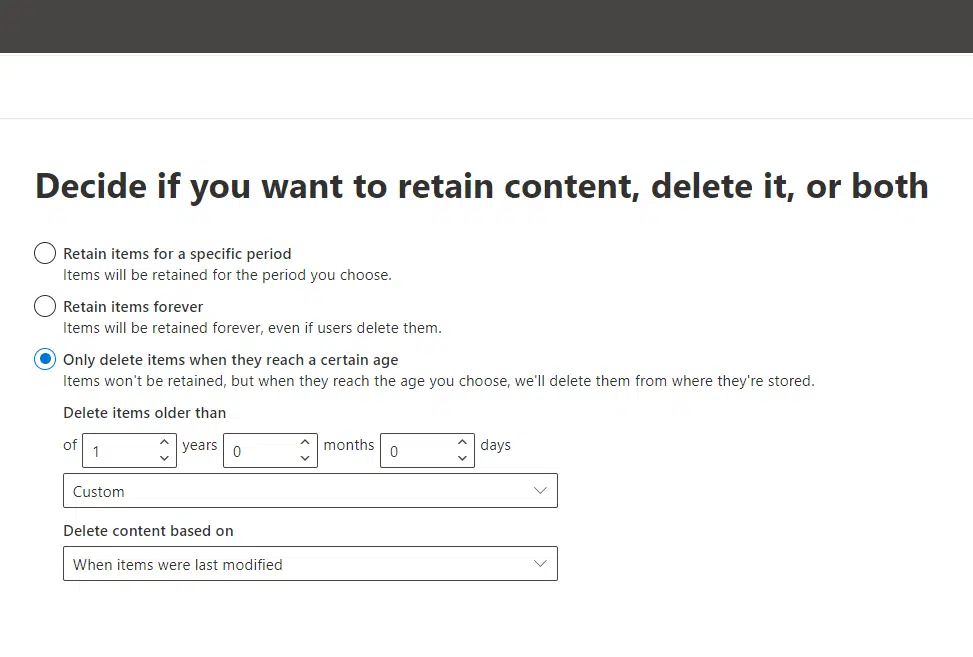
As you can see, you can set it up however you like — after a certain number of years, months, or even years.
Once the policy takes effect, all files that fit the criteria (in this case, a year after they were last modified) get deleted and end up in the recycle bin.
It’s a nice trick that enables you to automatically clean up your sites or SharePoint libraries easier and faster.
The downside to this, however, is that it only deletes the documents based on their age. That’s the sole criterion, unfortunately.
Note: For a guide on retention policy, read this article: Admin Guide: How to Create a SharePoint Retention Policy.
3. Use Power Automate
How about a more sophisticated option allowing you to truly archive documents in Sharepoint and even leave a record behind?
Using Power Automate to create a flow that will automatically archive a document from one document library to a different library.
If this is what you’re looking for — let me warn you beforehand that you must be comfortable with using Microsoft Flow to be able to implement this properly.
If you need help, Joanne Klein documented her steps in her blog on how to create a modern “transfer to another location” functionality:
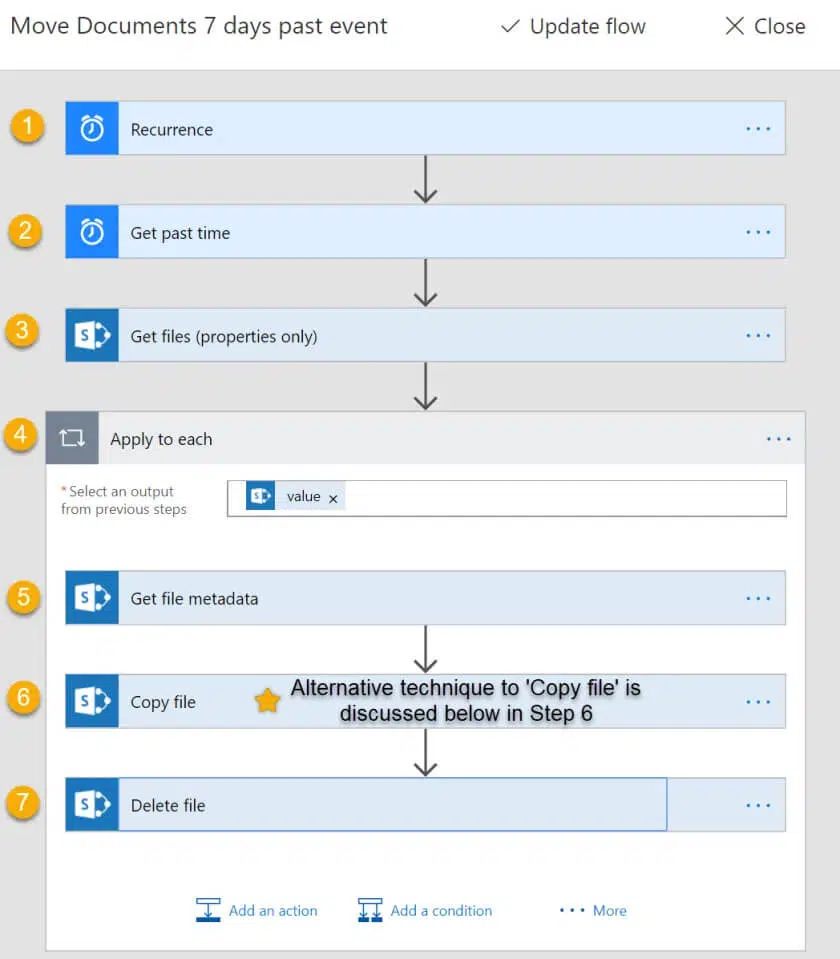
Here is a summary of all the steps you need to take:
- Create a recurrence trigger to configure the interval and frequency of the flow
- Configure the get past time for the interval and time unit
- Set up the retrieval of the files from the source document library
- Configure the retrieval of file metadata for each file
- Set up the copy path from the source to the destination
- Set up the deletion of the file from the source document library
Make sure to read Joanne Klein’s article and understand how to set up the entire functionality (since there are a few preparatory steps to take).
Note: If you need a primer on SharePoint Flow, check out this article here where I discussed the basics of Flow.
4. Hide your documents
There may be instances when you don’t need to delete a document and instead simply hide them away in the document library.
Here are things you can do:
Stop sharing the document
Think of this one as a “workaround” solution if you want to archive documents in SharePoint without actually deleting them.
This doesn’t hide the documents from site owners and administrators, only site members and visitors.
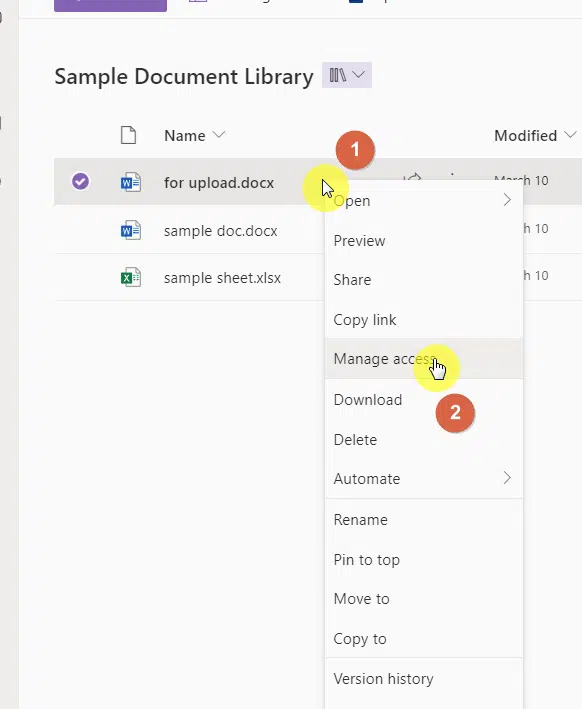
To stop sharing the document:
- Right-click on the document
- Select “Manage access” from the list
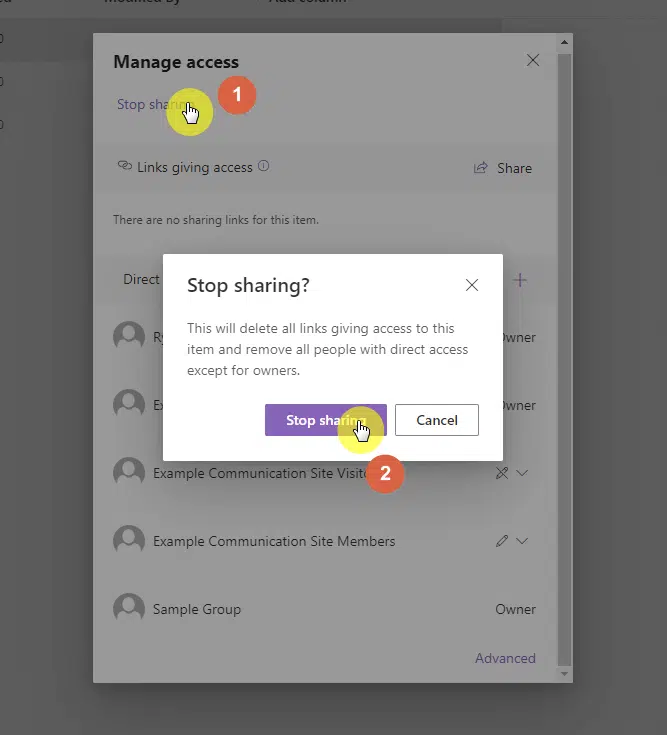
On the small window:
- Click the “Stop sharing” link near the top
- Confirm it with the “Stop sharing” button
You have the option here to either create another folder (call it “archived”) or simply do it on a specific document without moving the file.
Personally, I recommend that you move the file to another folder to declutter the document library of old files.
Note: This part explores a little the concept of permissions. If you want to learn more about it, check out my explanation on permission levels.
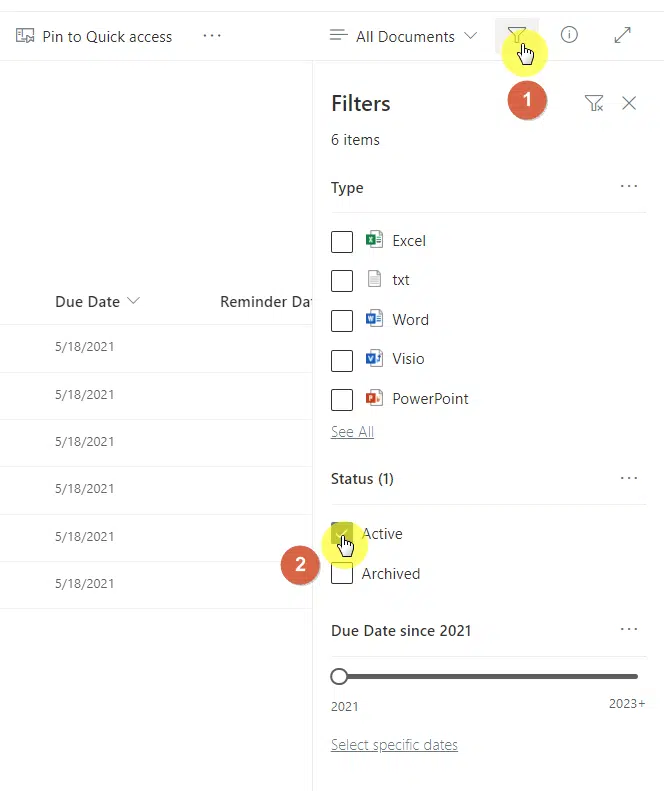
Filter out inactive files
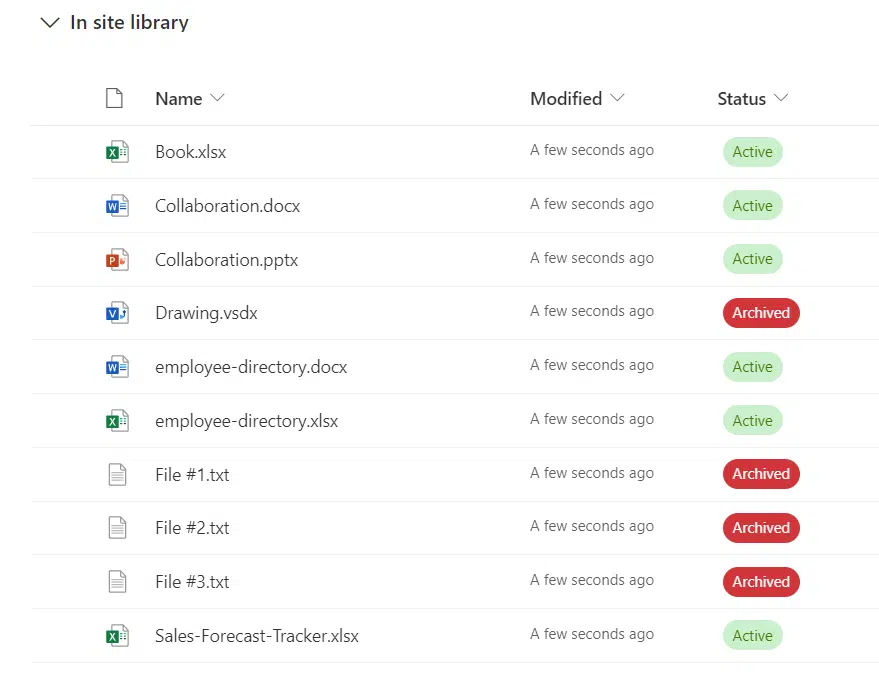
Another method you can use to hide documents is by simply creating new metadata (column) first and then filtering it out.
For example, you can create a choice column and label each document as either active or archived like what’s shown below:
Note: If you need help with creating new columns in a library (or lists), check out my guide here regarding metadata.
After tagging all your documents:
- Use a filter and show only active documents
- Hide the status column
- Save the new view and make it public
Once again, the problem with this approach is that you need to do this on every file. You also can’t tag folders through this method.
On the bright side, this is an easy method to easily hide documents from site members and site visitors.
Sign up for exclusive updates, tips, and strategies
Here are answers to the most commonly asked questions regarding this topic:
What happens when you archive documents?
Although this primarily depends on the “method” you use to archive documents in SharePoint, most of what I showed you will have your documents end up in the recycle bin.
That’s because the methods will delete the documents after a set amount of time — and all deleted files end up in the recycle bin.
The third method here, the one from Joanne Klein, has an additional benefit as it will leave behind a record of what files were archived.
For older versions of SharePoint, you can use the content organizer feature to create rules and route documents to different locations.
Yes, though it doesn’t actually “archive” a document, it still applies the same effect as site members and visitors won’t be able to see the file.
Unfortunately, if your goal is to declutter and clean up your sites or document libraries, then hiding documents simply won’t be enough.
Do you have more questions on archiving documents in SharePoint? Please share it below.
For inquiries and other concerns, kindly use the site’s contact form and I’ll get back to you as soon as possible.


