

Last Updated on August 19, 2022
Wishing each item in a list or a library has an ID?
Well, it turns out that you don’t need to create a custom list and implement an ID system all by yourself — there’s already one that exists.
In this article, I’ll show you how you can add a SharePoint list item ID column to your list (or document library) quite easily.
Let’s get started.
Table of Contents:
Yes, every time you add an item to a list or document library in SharePoint, the system automatically creates a unique ID for each item.
Basically:
- The first item added gets ID #1
- The second item added gets ID #2
- The ID number increments by one per item added
Sign up for exclusive updates, tips, and strategies
What are the features and limitations of the ID column?
The ID column includes two main features:
- ID numbers aren’t recycled. Once an ID number is assigned to an item, the ID number won’t be used on other items even if the file it was originally assigned to is deleted.
- ID numbers increment automatically. The ID system works on its own without any intervention on your part.
Like anything else, the ID column also comes with some limitations:
- The ID numbers in a list or a document library are specific only to that list or document library. That means you will not be able to reference it on other lists or libraries.
- Tracking a document works only within the same document library. Document tracking will not work across sites and other libraries.
Note: If you need to track a document across sites and libraries, you will need to use the Document ID feature.
Before we start, some list templates already include the ID column automatically without you having to do anything.
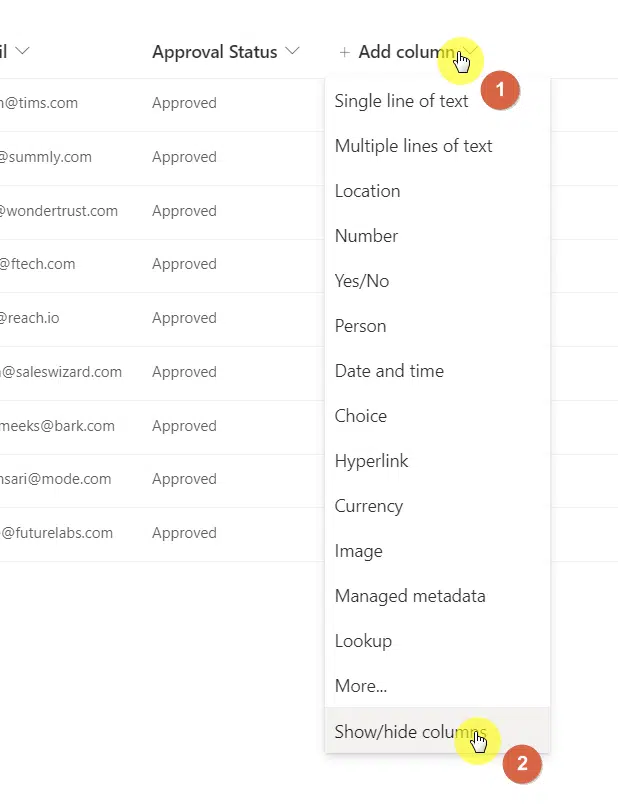
For custom lists and others that don’t show the ID column, follow these instructions:
- Navigate to the target list first
- Click the add column button
- Select the show/hide columns option
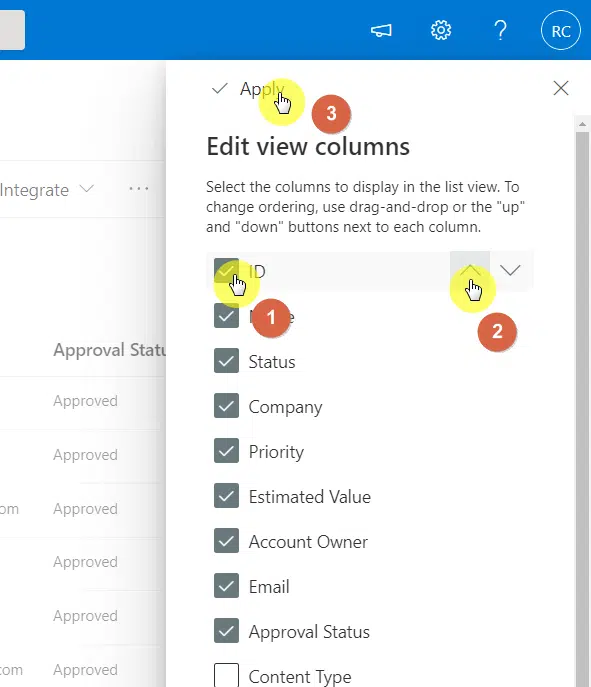
On the right panel:
- Check the box for the ID column
- Click the up button until the ID column is at the top
- Hit the apply button above
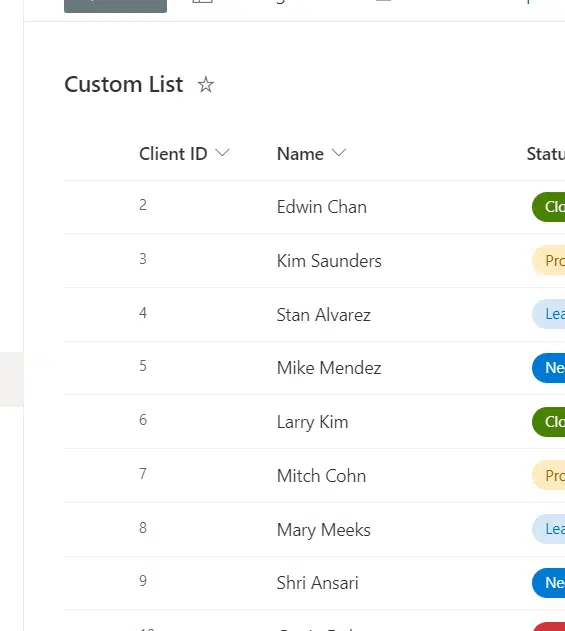
You will not see the ID column displayed on your list:

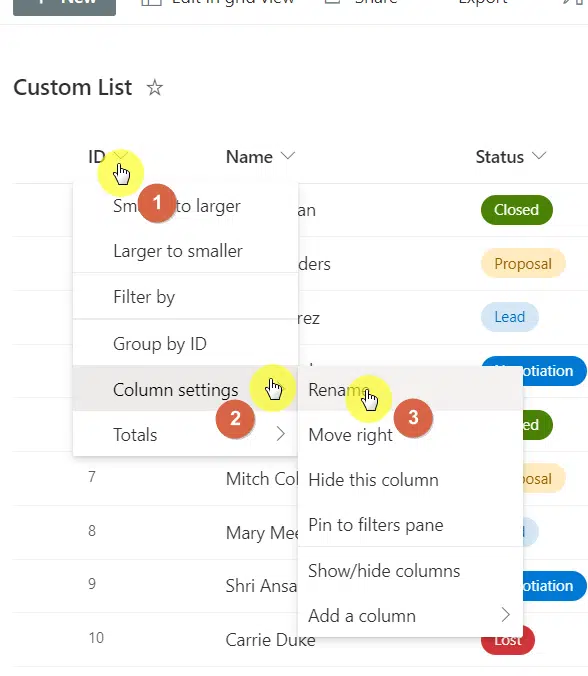
If you feel like the default ID column name is stale or boring, you can always rename it to whatever you want.
Here’s how:
- Click the ID column header
- Go to the column settings
- Hit the rename option
On the small box:
- Enter your preferred name
- Click the save button
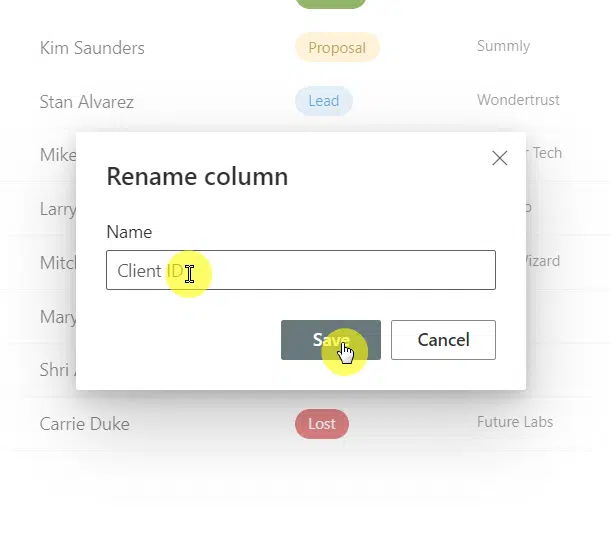
The change will take effect right away:
Not that difficult, right? Do you have more questions on this topic? If so, kindly drop your question below.
For inquiries and other concerns, kindly use the site’s contact form and I’ll get back to you as soon as possible.


