

Last Updated on February 25, 2024
Fancy using PowerShell for this purpose?
In this guide, you will learn how to use PowerShell to get all users, how it’s normally done (user interface), and more.
Let’s get started!
Table of Contents:
Benefits of Using PowerShell for This
For those who aren’t used to PowerShell, this might seem a little unnecessary.
However, using PowerShell to retrieve all users from a SharePoint site collection actually offers several benefits:
- Comprehensive user management
- Efficient bulk operations
- Custom reporting and analysis
Since PowerShell is useful for the automation of repetitive tasks, you can do this in bulk together with other tasks.
Naturally, this method is also faster if you have a lot of SharePoint sites to cover and retrieve.
In addition, extracting user data enables you to create custom reports and conduct analysis on user activity.
Related: How to Check Your SharePoint Online Usage Report (Guide)
Sign up for exclusive updates, tips, and strategies
How to Normally Get All Users from a Site
The reason why others consider using PowerShell for this as overkill is that it’s easy to do this on SharePoint Online.
Normally, you can go into the site settings > go to people and groups:
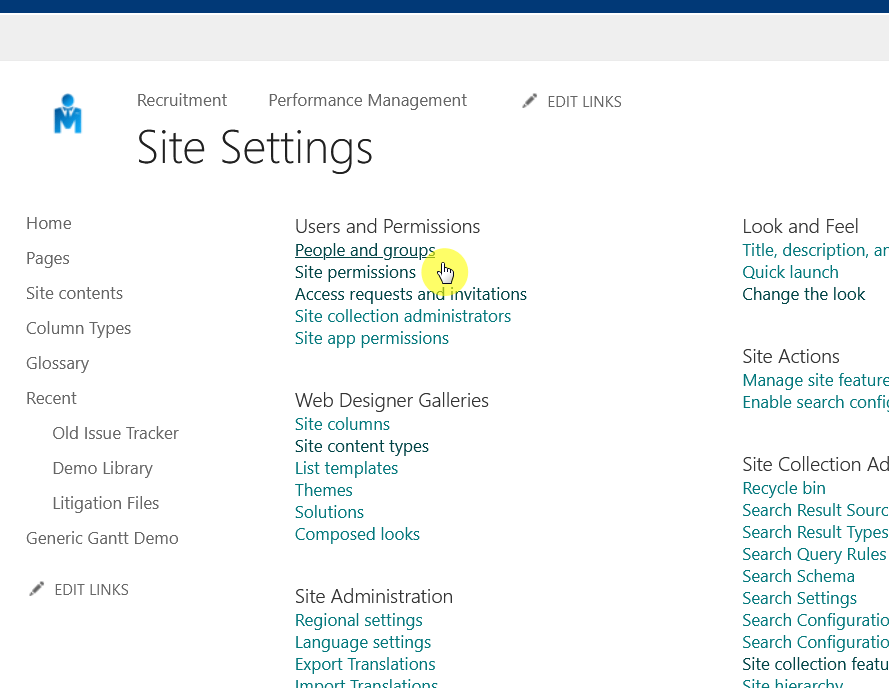
If you can’t find it, it’s the first option you see under users and permissions.
This will bring you to this page:
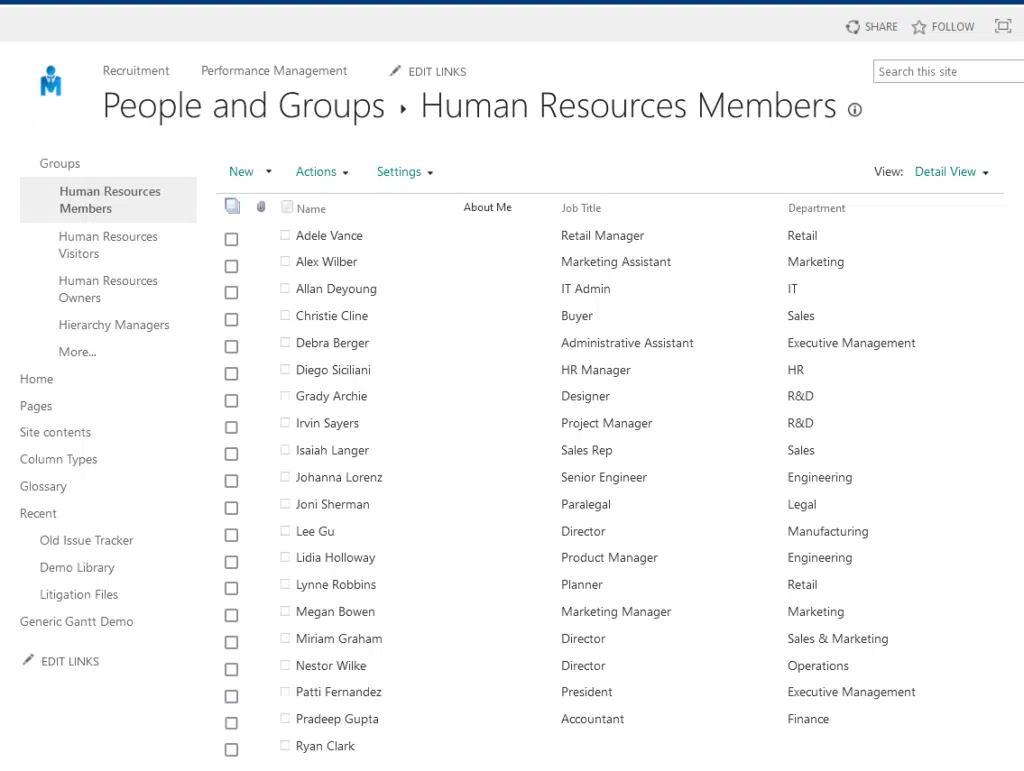
Normally, this page will contain all the members or users of the SharePoint Online site, including site owners.
However, there is actually a hidden “all people” page that you can reach with a custom link:
- Start the link with the site link
- Add
/_layouts/15/people.aspx?MembershipGroupId=0after the site name
So if my site URL is https://mrsharepoint.sharepoint.com/, then the link will be:
https://mrsharepoint.sharepoint.com/_layouts/15/people.aspx?MembershipGroupId=0
This is what you will see:
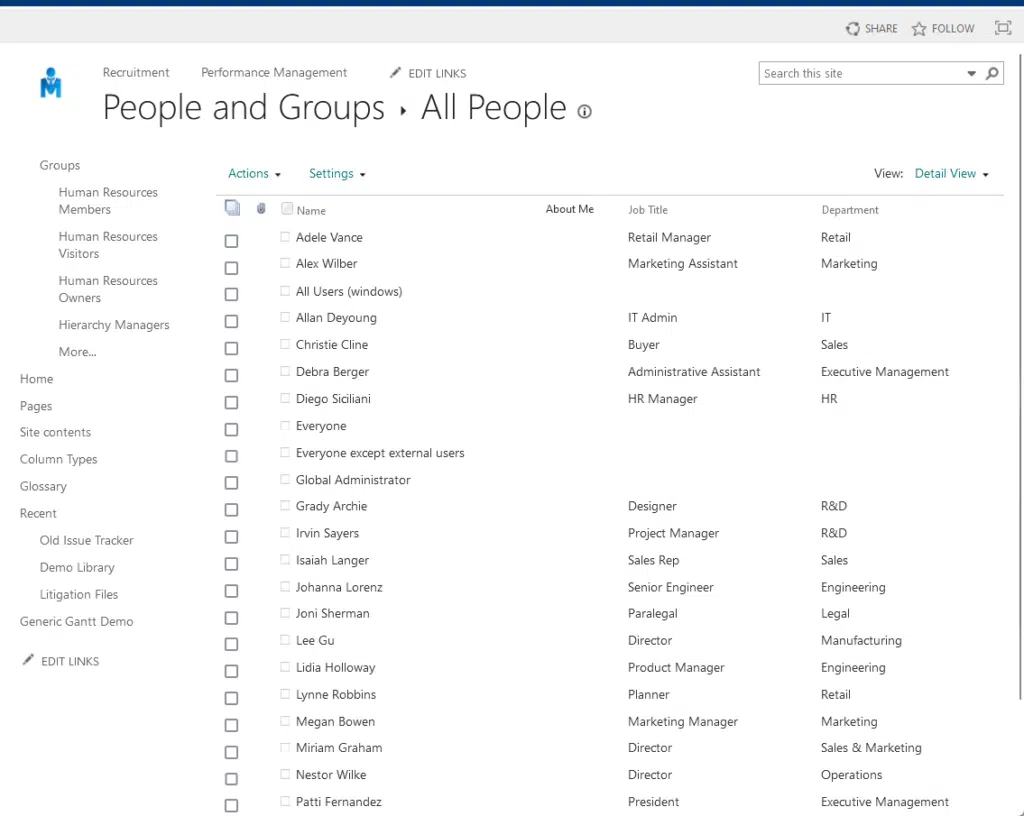
It’s that easy! 🙂
Note: To access the back end, you need to be at least a site collection administrator. There’s also no need to go to the SharePoint Online admin center.
How to Use PowerShell to Get All Users
But how easier could it be to use PowerShell?
Well, if you’re going to be copy-pasting anyway, better to just copy and paste this PowerShell script:
# Connect to the SharePoint site collection
$siteUrl = "https://yourtenant.sharepoint.com/sites/yoursitecollection"
Connect-PnPOnline -Url $siteUrl -UseWebLogin

# Get all users from the site collection
$users = Get-PnPUser

# Optionally, display the retrieved users
foreach ($user in $users) {
    Write-Output "User: $($user.Title), Email: $($user.Email), Login Name: $($user.LoginName)"
}

# Disconnect from the SharePoint site collection
Disconnect-PnPOnline
Before running the script, make sure to replace the “yoursitecollection” with the URL of your site collection.
This script does the following:
- Connect to SharePoint Online site collection using your credentials.
- Retrieves all users from the site collection using the Get-PnPUser cmdlet.
- Iterates over the retrieved users and prints their title, email, and login name (optional and can be customized).
- Finally, it disconnects from the SharePoint site collection.
Didn’t take that long to do, right? 👍 It will be fast even if you have lots of site collections to do.
How to Export All Users into a CSV File
You may be thinking that it’s useless if you want to use it in a report (imagine copying and pasting from PowerShell).
Fortunately, you can just adjust the script and include an export function.
See the following PowerShell script:
# Connect to the SharePoint site collection
$siteUrl = "https://yourtenant.sharepoint.com/sites/yoursitecollection"
Connect-PnPOnline -Url $siteUrl -UseWebLogin

# Get all users from the site collection
$users = Get-PnPUser

# Define the path and name of the CSV file where you want to export the users
$csvFilePath = "C:\path\to\your\users.csv"

# Export the users to a CSV file
$users | Select-Object Title, Email, LoginName | Export-Csv -Path $csvFilePath -NoTypeInformation

# Disconnect from the SharePoint site collection
Disconnect-PnPOnline

Write-Output "All users have been exported to $csvFilePath"
This script does everything the previous one did, with the addition of exporting the user data to a CSV file.
Make sure to replace “C:\path\to\your\users.csv” with the actual file path where you want to save the CSV file.
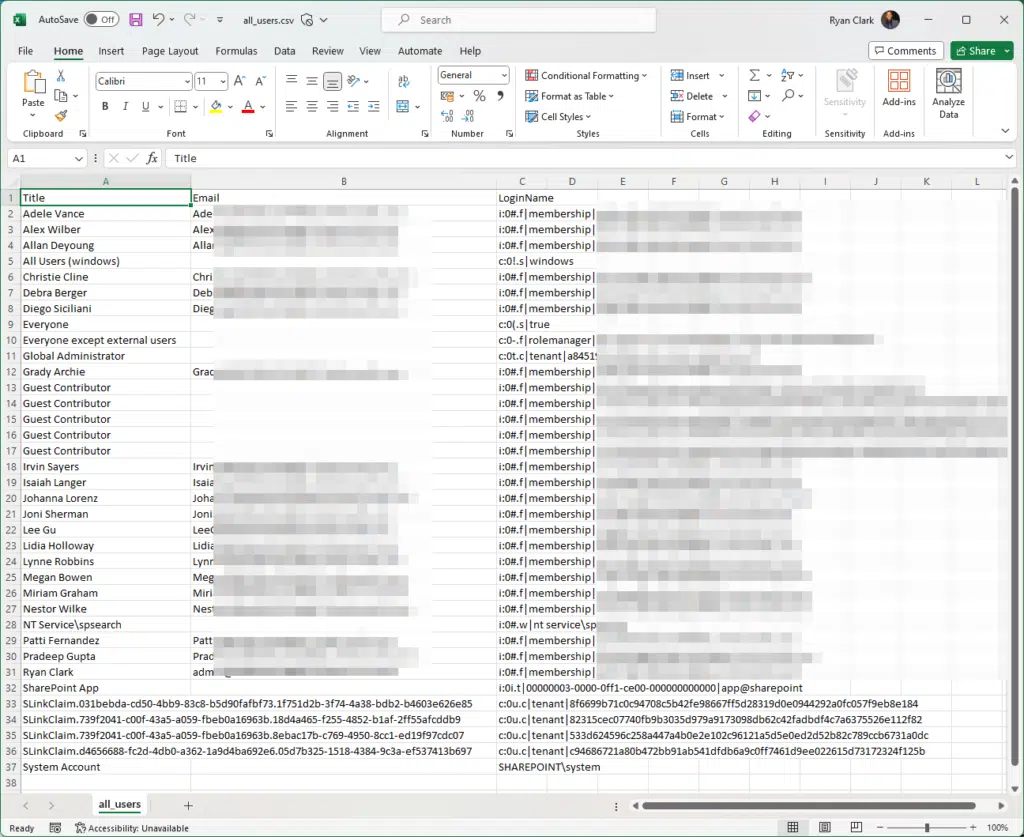
By the way, here’s the CSV file I got:
Got any questions about using PowerShell to get all users from a site? Leave a comment below.
For any business-related queries or concerns, contact me through the contact form. I always reply. 🙂


Hello Ryan,
Thanks for this article!
Could you please let us know how to adjust the script more to get the permission level of that user in that site