

Last Updated on November 14, 2024
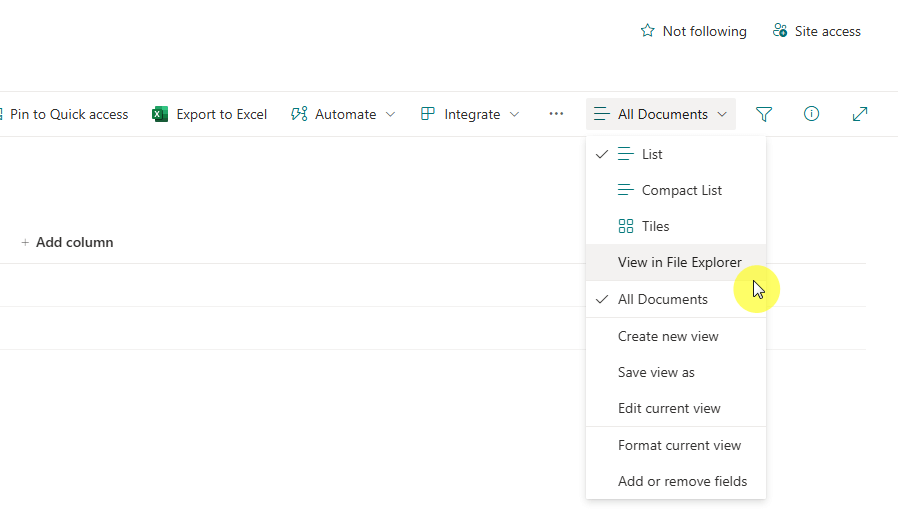
Don’t have that option?
In this guide, I will walk you through enabling the “View in File Explorer” feature in SharePoint Online.
Let’s get started.
Table of Contents:
“View in File Explorer” Feature
With this, you can open and interact with SharePoint document libraries directly through Windows File Explorer.
Here’s why this feature is helpful:
- Browse SharePoint files just like local folders.
- Drag, drop, copy, and move files without switching apps.
- Saves time by reducing reliance on the SharePoint web interface.
Well, this would make file management more seamless by providing a familiar, desktop-based interface for SharePoint content.
However, it’s important to know that the feature requires specific browser and device configurations to function.
Sign up for exclusive updates, tips, and strategies
Prerequisites for Enabling the Feature
Before it can work, there are a few requirements to meet:
- You must be using Microsoft Edge version 93 or later.
- Your device must be domain-joined or enrolled in device management.
- Confirm that modern authentication is enabled in your tenant.
It’s also important to have the right administrative permissions to configure the required settings.
Unfortunately, this wouldn’t work with other browsers like Mozilla Firefox and Safari on Apple devices.
It used to work with the 32-bit version of Internet Explorer though, but as you know, it’s not available anymore.
⚠️ Note: Technically, this could work with Google Chrome. But no promises since I couldn’t make it work myself.
Configuring Microsoft Edge Policies
You need to configure specific policies in Microsoft Edge to allow seamless integration between SharePoint and File Explorer.
Open the Registry Editor on your device and go to:
- HKEY_LOCAL_MACHINE
- SOFTWARE
- Policies
- Microsoft
- Edge
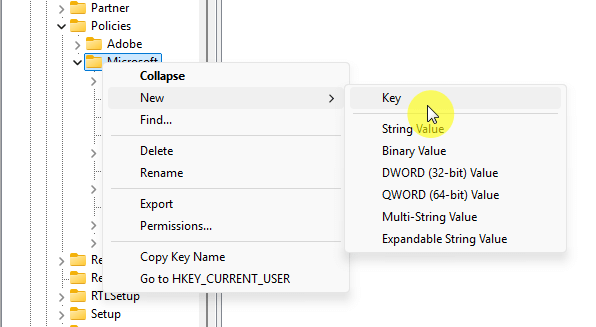
In case you can’t see “Edge”, simply create a new “Edge” key under Microsoft:
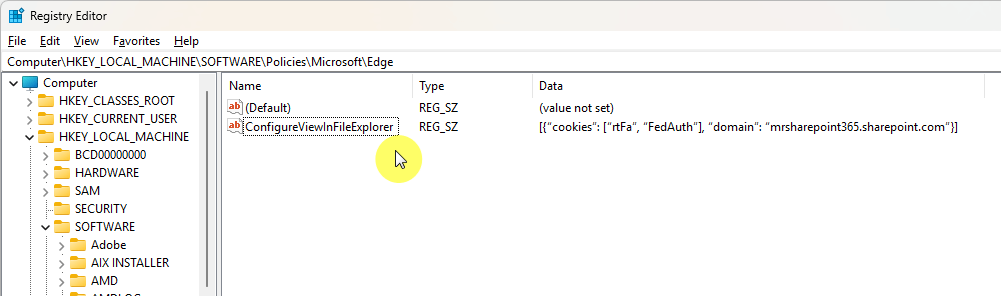
From there, add a new string named “ConfigureViewInFileExplorer”.
For the value, enter:
[{“cookies”: [“rtFa”, “FedAuth”], “domain”: “yourtenant.sharepoint.com”}]
It should look like this:
For organizations using Microsoft Intune, similar configurations can be applied through the Intune admin center.
After applying the policies, restart your browser to activate the changes.
By default, this feature is disabled in SharePoint Online.
For that, you need to use either the SharePoint Online Management Shell or Windows PowerShell.
To enable it, use the following command:
Connect-SPOService -Url https://yourtenant-admin.sharepoint.com

Set-SPOTenant -ViewInFileExplorerEnabled $true
You will need SharePoint admin permissions to make these changes.
The command enables the feature globally, but users still need the right browser and device configurations to access it.
Once enabled, restart the browser and test the feature by visiting a SharePoint Online document library.
Troubleshooting Common Issues
Sometimes, the “View in File Explorer” feature in SharePoint Online may not work as expected.
These common issues can usually be resolved with a few adjustments.
- Missing Option: Check that the feature is enabled in your SharePoint Online tenant and your browser is updated.
- Authentication Errors: Check that modern authentication is active and persistent cookies are allowed.
- Connectivity Problems: Confirm your device is domain-joined or properly enrolled in management.
If the issue persists, verify that the necessary Microsoft Edge policies are configured correctly.
Also, make sure that you’re using a supported version of Windows, as the feature doesn’t work on macOS.
In some cases, clearing your browser cache or restarting the browser may help resolve access problems.
If none of these solutions work, consider syncing the document library with OneDrive as an alternative method.
Do you have any questions about enabling this feature in SharePoint Online? Let me know below.
For any business-related queries or concerns, contact me through the contact form. I always reply. 🙂


