

Last Updated on October 25, 2024
Not happy with how OneDrive keeps popping out?
In this guide, I will show you how you can easily disable OneDrive from your Windows computer.
Let’s get started.
Table of Contents:
Unlink OneDrive from Microsoft Account
Unlinking OneDrive is the easiest way to stop OneDrive without doing any drastic actions. 🙂
This action pauses syncing and keeps your files untouched so you can keep OneDrive installed if you want to use it later.
Right-click on the OneDrive icon from your taskbar and click the gear icon then settings:
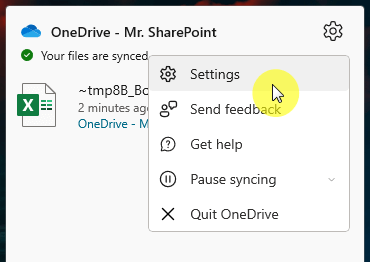
A window will appear that contains the different settings available for OneDrive.
Go to the account tab, find the account, and click the unlink this PC button.
Like this:
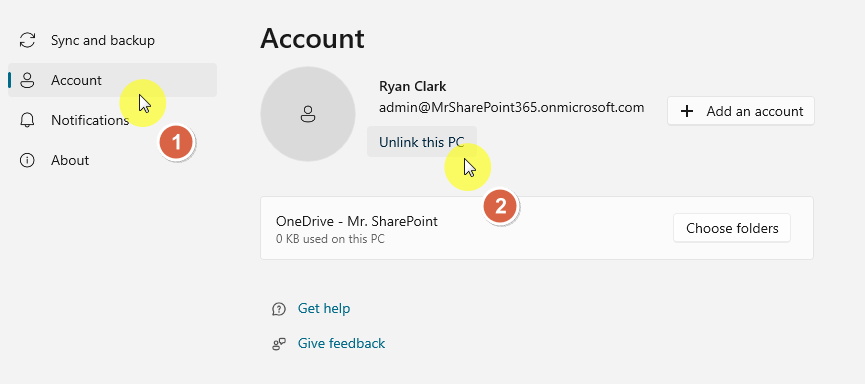
A prompt will appear, so simply confirm that you want to unlink your account.
Once unlinked, OneDrive stops syncing files, but any files stored locally will remain on your PC, which is nice! 🙂
If you need OneDrive in the future, you can always re-link your account by following the same steps and signing back in.
👉 Related: OneDrive Stop Sharing Not Working: The Simplest Solution
Sign up for exclusive updates, tips, and strategies
Temporarily Pause OneDrive Syncing
If you only want a short break from syncing files but plan to use OneDrive later, temporarily pausing it is a good option.
The difference with this one from earlier is that this method keeps OneDrive installed and ready, just with sync on hold.
It’s also easy to do since the option is there after you click on the gear icon:
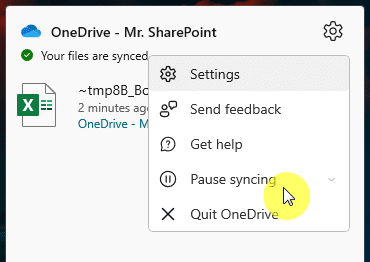
The option will open up where you can choose a duration:
- 2 hours
- 8 hours
- 24 hours
While syncing is paused, no changes will upload to or download from OneDrive.
This can be handy when you’re on a metered connection or need to conserve data temporarily.
Syncing resumes automatically after the selected time, so your files stay up to date without needing extra steps.
👉 Related: SharePoint Sync vs Add Shortcut to OneDrive (Comparison)
Disable OneDrive Startup on Windows
This method will disable OneDrive’s automatic startup when your computer starts.
This is useful if you:
- Only use OneDrive occasionally
- You want to improve boot times
- When you don’t want OneDrive in the startup
Open the OneDrive settings window again and this time, head over to the sync and backup tab.
In the preferences section, disable the option to “start OneDrive when I sign in to Windows”:
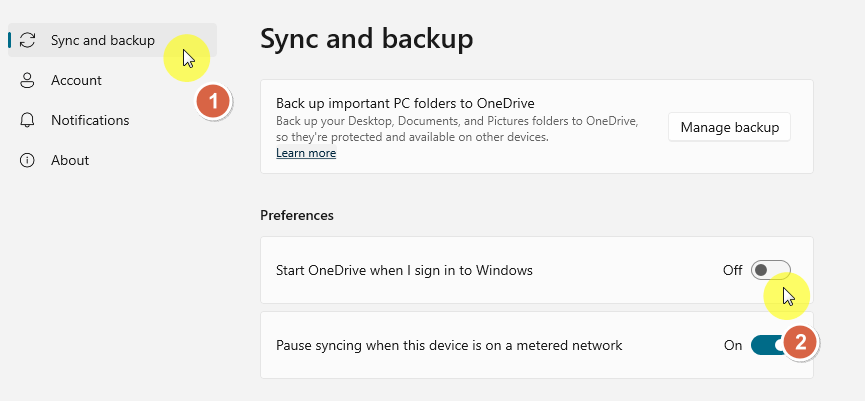
With this option turned off, OneDrive won’t start up every time you log in.
You can still open it manually whenever you need it by searching for “OneDrive” in the Start menu.
👉 Related: How to Reset OneDrive on Windows 10/11 (Complete Tutorial)
Uninstall OneDrive Completely
Lastly, if you don’t plan to use OneDrive at all, uninstalling it completely can free up space and prevent any background activity.
Keep in mind, though, that uninstalling removes the app from your system
However, files already synced to OneDrive remain accessible online via the OneDrive website.
To uninstall, search for “installed apps” from your taskbar:
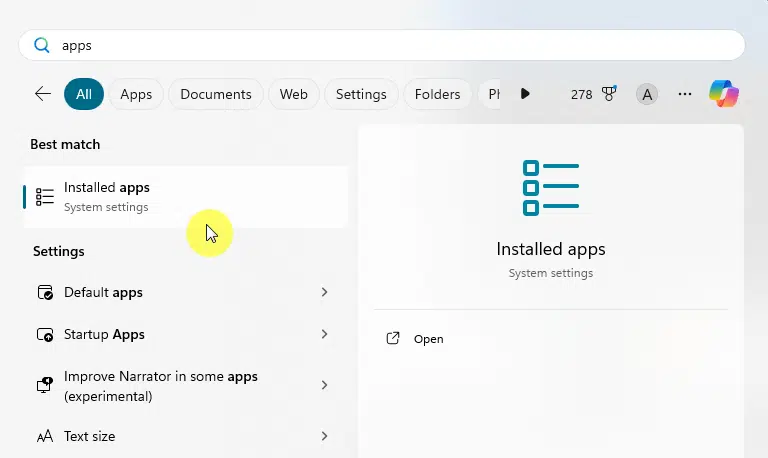
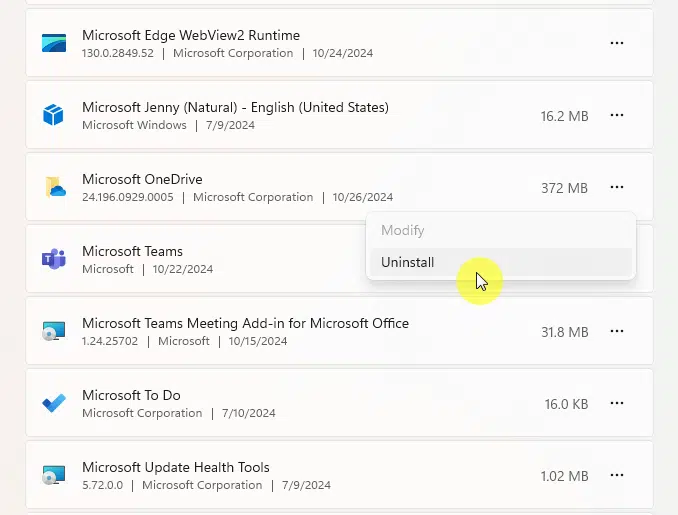
Find “Microsoft OneDrive” from the list of installed apps in Windows settings.
Once you find it, click the ellipsis button and then select uninstall.
Like this:
Confirm the action and you’re done! 🙂
Once uninstalled, OneDrive will no longer sync files or run on your computer.
If you change your mind, you can always reinstall it from the Microsoft Store.
Remember, uninstalling won’t delete files stored in your OneDrive folder, they will remain accessible on your device.
If you want the local files, like maybe for free storage, you need to manually delete them.
Do you have any questions about disabling OneDrive on your computer? Let me know below.
For any business-related queries or concerns, contact me through the contact form. I always reply. 🙂


Great blog, Nice informative enjoying while reading your post waiting for your new post.