

Last Updated on December 4, 2024
Want to create a form for your list?
In this guide, I will show you how to easily create forms in SharePoint Online using the new forms feature.
Let’s get started.
Table of Contents:
What’s the new forms feature?
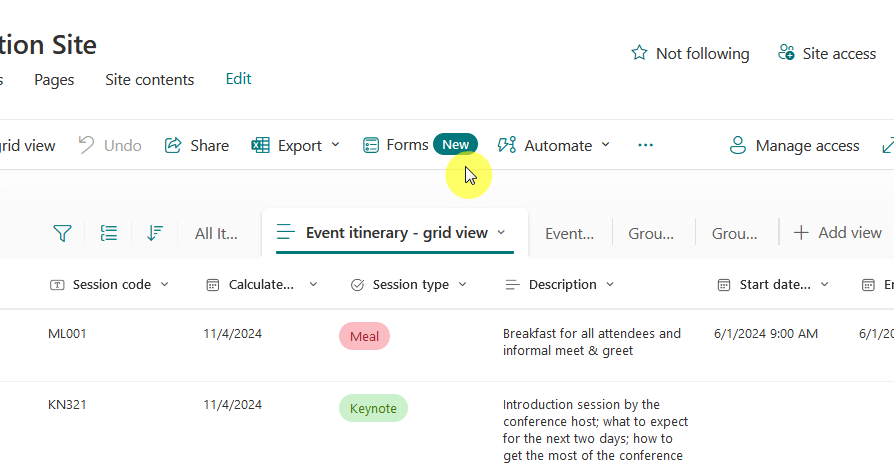
You may have noticed the “Forms (New)” button in the command bar and wondered what that might be.
Well, this one, in the spirit of the modern experience, makes creating forms easier and even more flexible.
What’s new here are the following:
- Forms can now be created directly from the SharePoint list toolbar.
- Add, remove, and rearrange fields to suit your needs.
- New themes allow forms to match your site’s style.
- Forms automatically adjust to different screen sizes.
- Easily share forms with internal users or teams.
That’s right, the forms integrate seamlessly with SharePoint lists and you can even customize it to match the looks.
Submissions are stored in the list as list items, which you can then use for reporting or automation later on if you want.
Sign up for exclusive updates, tips, and strategies
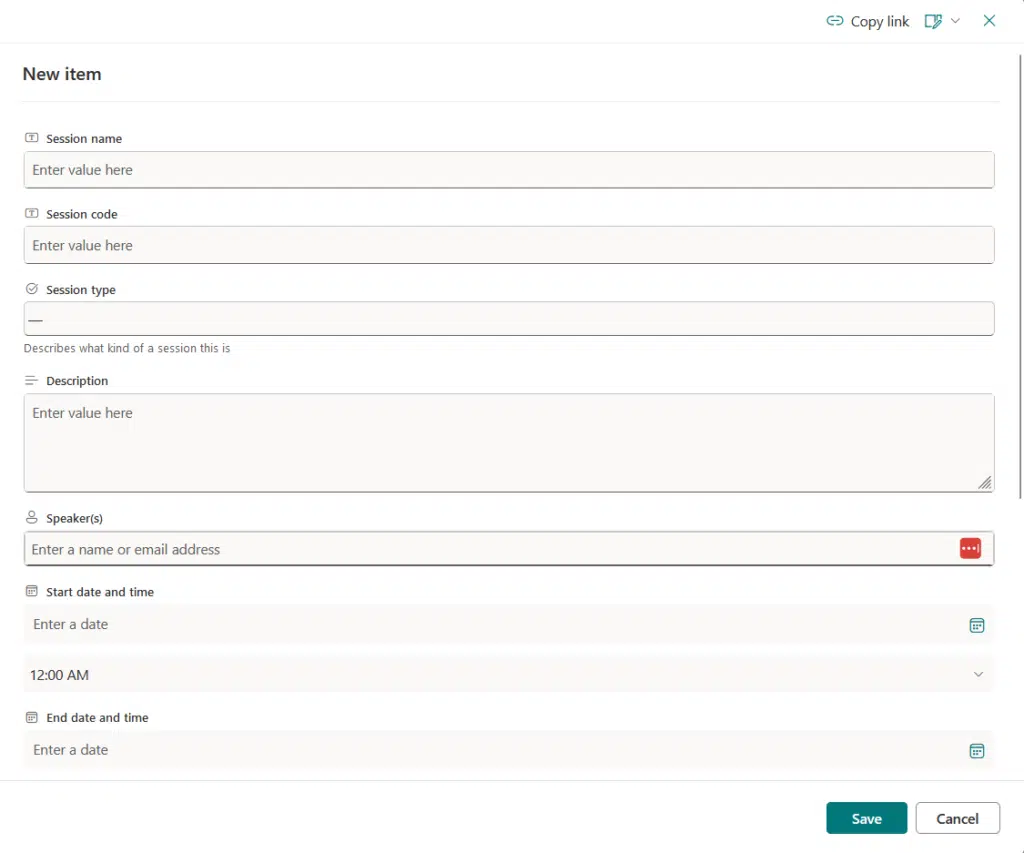
The forms here have the same functionality as the form you see when you hit the “Add new item” button in a list.
The difference here is that the new forms feature allows you to:
- Completely customize the form yourself
- Decide what data to collect, and map it to a column
- Share the form with other users
Forms integrate tightly with SharePoint, allowing users to automate processes like approvals or notifications.
By the way, these forms also work well across devices, and they can look good on them too. 🙂
Fortunately, creating new forms in SharePoint Online is straightforward.
Here’s how:
Step 1: Start the form creation process
Start by going to the list where you need the form.
Then click the “Forms (New)” button:
If you have created other forms before, this will show up in the new window, otherwise, it will be empty.
The only button there that you can click is the “New form” button:

This opens the form editor, where you can begin customizing fields and layouts.
Step 2: Customize your form
The form editor, by default, will contain the fields that correspond to the columns that you have in the list.
Here’s what it looks like:
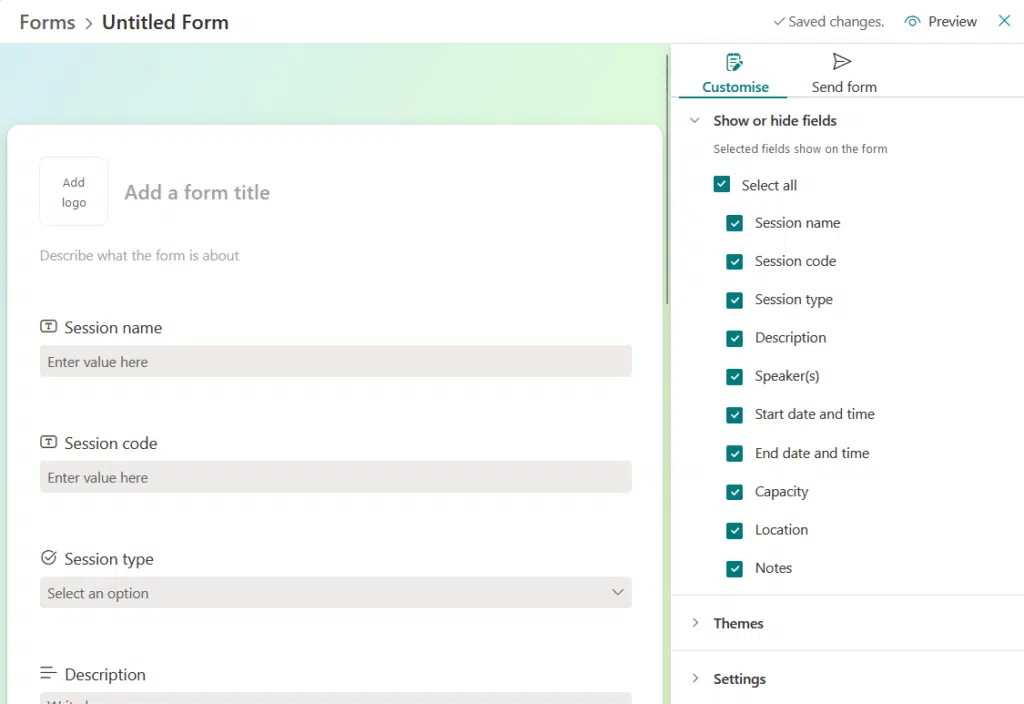
As you can see, you can add a logo, add a form title, and include a description of what the form is all about.
Here’s a list of things you can do here:
- Add or remove fields
- Rearrange fields
- Set default values
- Apply themes
- Add descriptions
Well, not “technically” remove the fields, since they’re tied to columns, but you can choose to hide them in the form.
Doing that though will mean that users won’t be able to enter any data for that column, which would lead it to being empty.
For designing the form, you can go to themes:
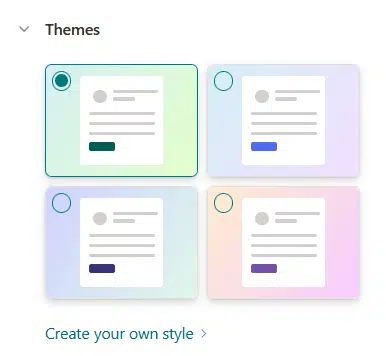
Currently, there are four default color schemes or styles to choose from.
Fortunately, if you don’t like any of them, you can create your own style.
Simply click on its link and you will see this:
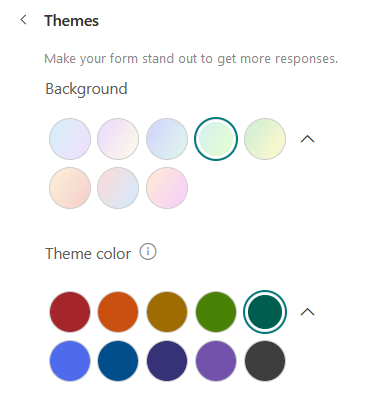
As you can see, you can make the form match how your SharePoint site looks like with a background color and a theme color.
Lastly, you can share the form as well.
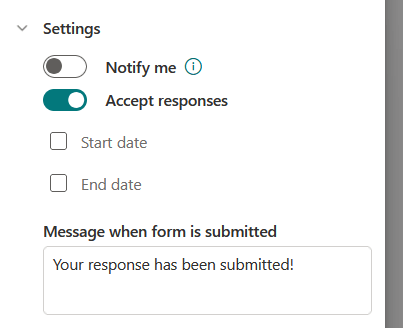
But before that, you may want to go to the form settings first and make sure the form accepts responses.
There are other settings in it as well:
Nice!
Now, before you share the form, make sure to preview it first and see what it looks like.
Once it’s ready, go to the “Send form” tab, copy the link, and send it to the recipients.
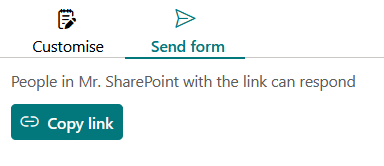
That’s it!
Your recipients will then be able to fill out the form and they don’t even need to go through the actual list.
Managing the Form Responses
The responses in the form will then register as a new list item, with the correct data in the right columns.
You will then be able to use these responses as normal list items and do with them as you need to.
Basically, it’s like the users adding a new item to the list, but they’re using the form to do that instead of the default form.
Do you have any questions about creating new forms in SharePoint Online? Let me know below.
For any business-related queries or concerns, contact me through the contact form. I always reply. 🙂


