

Last Updated on January 24, 2024
Can you still add barcodes to SharePoint automatically?
In this guide, I will show you how you can easily create barcodes for items in a SharePoint list — all automatic.
Let’s get started.
Table of Contents:
SharePoint Online allows users to integrate barcodes into lists and libraries.
This integration helps in tracking and managing items more efficiently.
Here’s how barcodes (QR codes) are used in SharePoint Online:
- Inventory tracking: SharePoint lists with barcodes simplify tracking physical assets.
- Data retrieval efficiency: Scanning barcodes speed up information retrieval in SharePoint.
- Enhanced security: Barcodes enhance item/document tracking and security within organizations.
Barcodes offer a streamlined and efficient way of managing a wide range of data.
They save time and enhance accuracy and security in data management.
Sign up for exclusive updates, tips, and strategies
Fortunately, it’s not that hard to do in SharePoint Online.
Users of older versions might be confused since the option was available immediately.
However, in SharePoint Online, you must first enable a specific site collection feature.
Step 1: Enable the In Place Records Management
Go to the site settings of the site collection where the target list resides.
Then go to the site collection features:

From there, scroll down until you see the in place records management feature.
All you have to do is click the activate button:
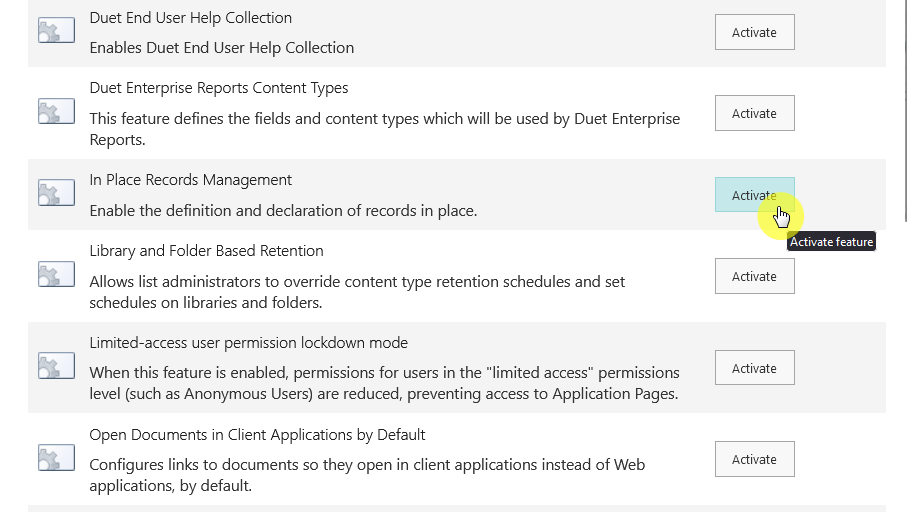
This will give you access to a specific setting in the list.
Step 2: Enable Barcodes
Navigate to the list where you want to add barcodes.
Go to the list settings > information management policy settings option:
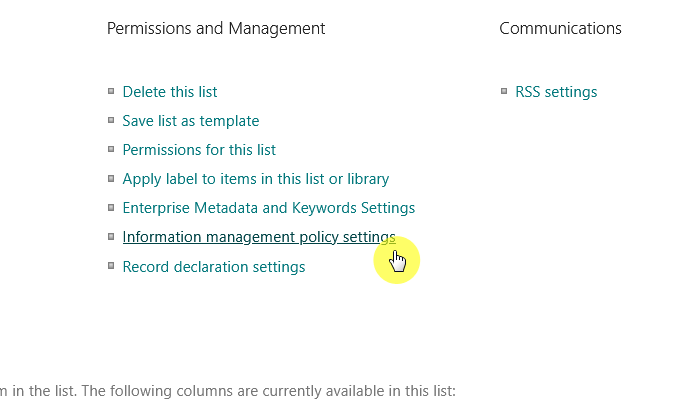
You will likely find 2 content types inside:
- Item
- Folder
Click the item option and tick the enable barcodes box near the bottom:

Don’t forget to save the changes by pressing the OK button.
Step 3: Edit view columns
The step above will make the 2 barcode-related columns to be available.
Now you have 2 options here:
- Edit the view columns
- Create a new view
The second option will still require the first one — showing the barcode-related fields.
Click the view options > add or remove fields:
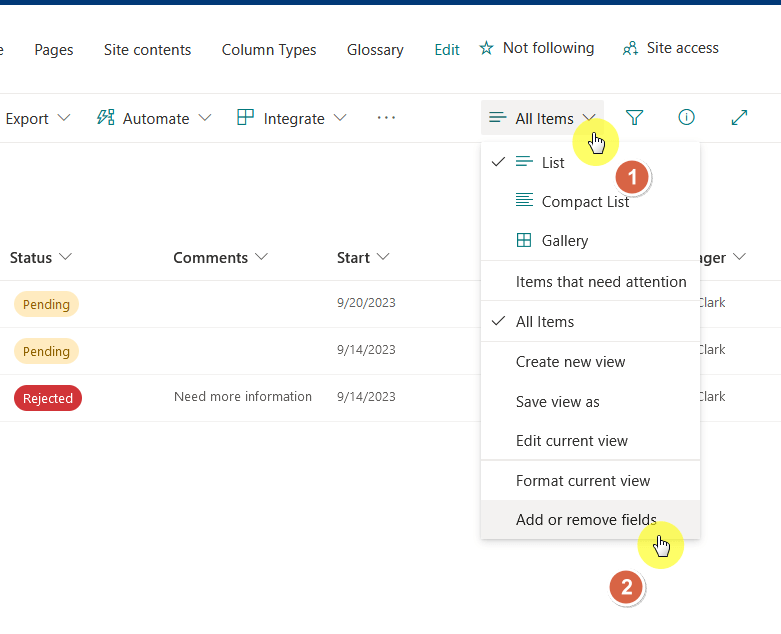
From there, enable the barcode value column and barcode column.
You can also move them up or down the list so they’re more visible:
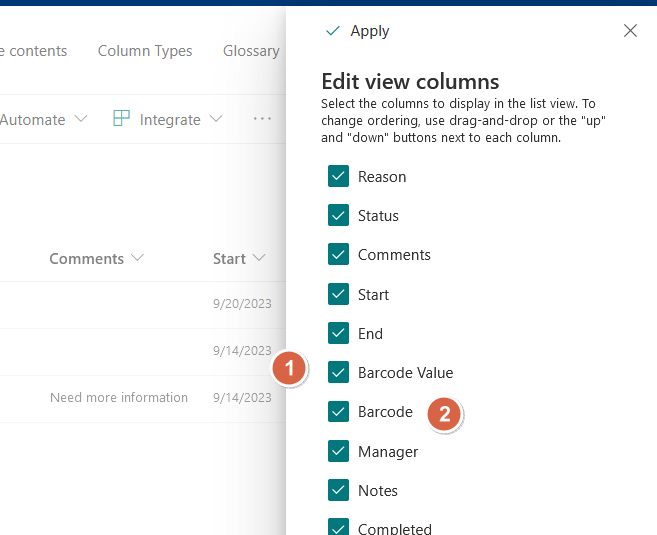
Don’t forget to click the apply button to save the changes.
Now, when you add a new item, a barcode is automatically created:
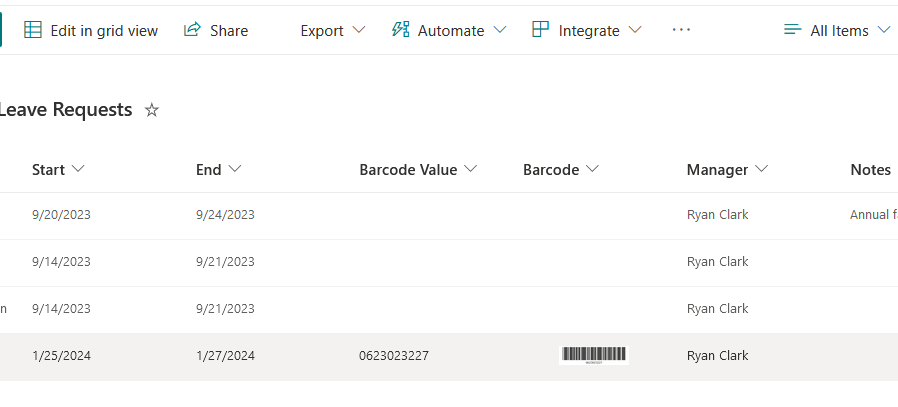
Unfortunately, this barcode auto-generating feature doesn’t work for old items.
The integration of barcodes into SharePoint Online lists presents a transformative approach to data management.
By automatic barcode generation, organizations can significantly enhance efficiency, accuracy, and security.
If you have more questions about creating barcodes automatically, feel free to leave a comment.
For further inquiries or any business concerns, kindly use the site’s contact form. I’ll respond promptly.


Thank you for this article. How do you print the barcode?
Double click and Save as a Picture or Copy and paste on a word or other document type to print #Simple.
Thank you for this article. How do you print the barcode?