
Last Updated on August 15, 2024
Want to create a page?
In this guide, I will walk you through creating a page in SharePoint Online in a few simple steps.
Let’s get started.
Table of Contents:
SharePoint pages, like webpages, are tools in SharePoint for sharing information and communicating within your organization.
Here’s what you can do with them:
- Present data, updates, or announcements to your team
- Embed different types of content like text, images, videos, and documents
- Structure and display content in an organized manner
These modern pages are stored within the site pages library where you can easily edit, update, or delete them as needed.
You can also add multiple pages to a site to allow for a more organized and structured approach to content management.
They are also especially useful in creating dashboards, project updates, and communication hubs for the organization.
👉 Related: SharePoint Pages vs Sites vs Web Parts (Beginner’s Guide)
Sign up for exclusive updates, tips, and strategies
How to Create a Page
Creating a SharePoint page is a straightforward process.
Here’s how:
Step 1: Create a new page
Get to the SharePoint site where you want to create the page.
While on the home page or the site contents page, click the new > page button from the dropdown menu:
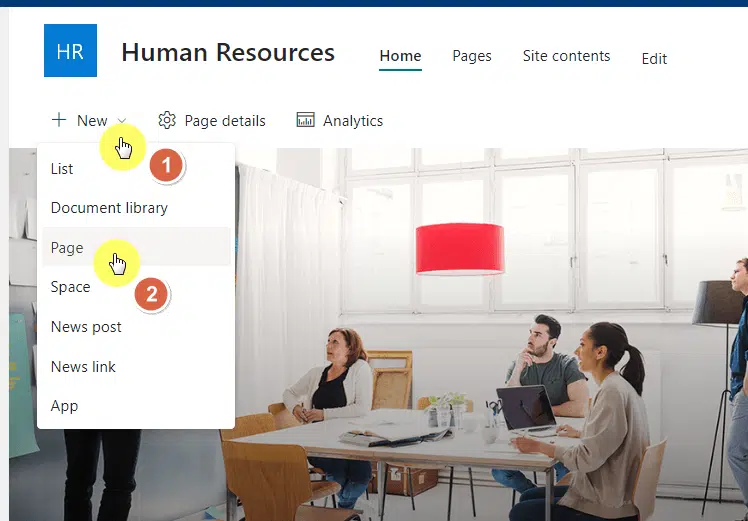
This will open the right panel.
Step 2: Choose a template
On the next page, you have to select from various site page templates.
Take your pick from the different options and then click the create page button:
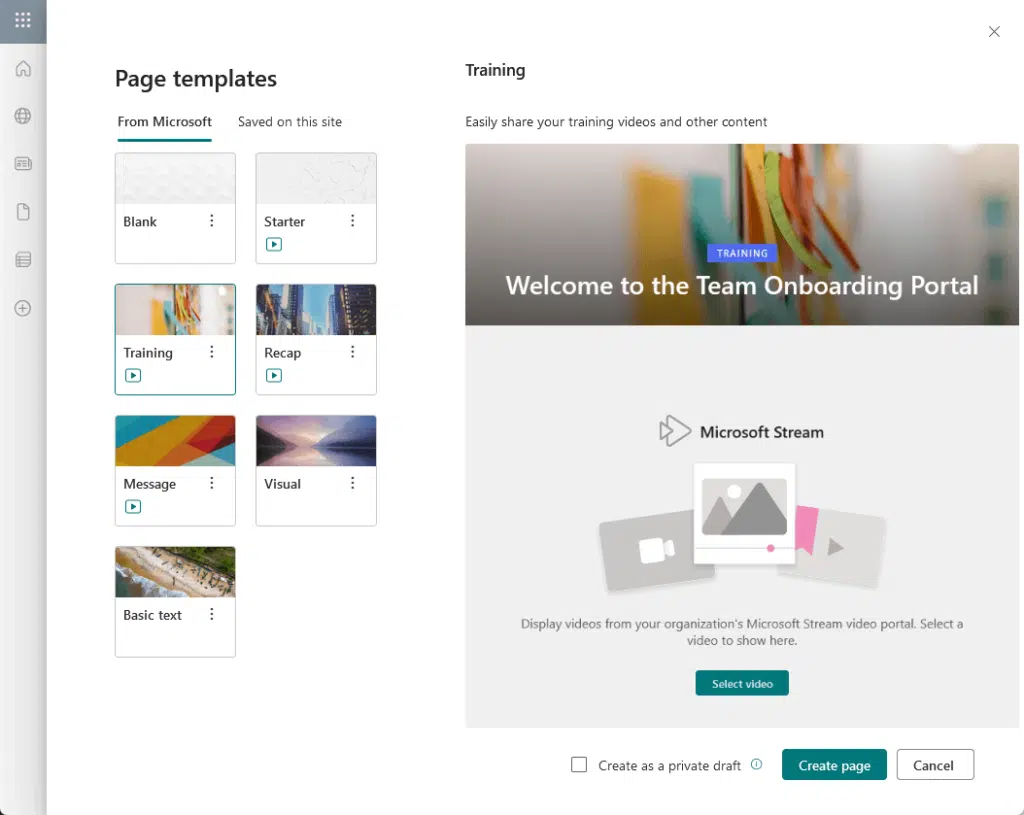
If you’re curious about the “saved on this site” option, that’s where pages that you saved as a template would appear. 🙂
You can also save the page as a private draft where it’s only visible to you and to whom you share it.
⚠️ Note: Since modern sites are the default, you won’t be able to create classic pages on these sites.
Step 3: Build your page
Fill out the page with content.
There are various web parts that you can add if you want to add different kinds of content.
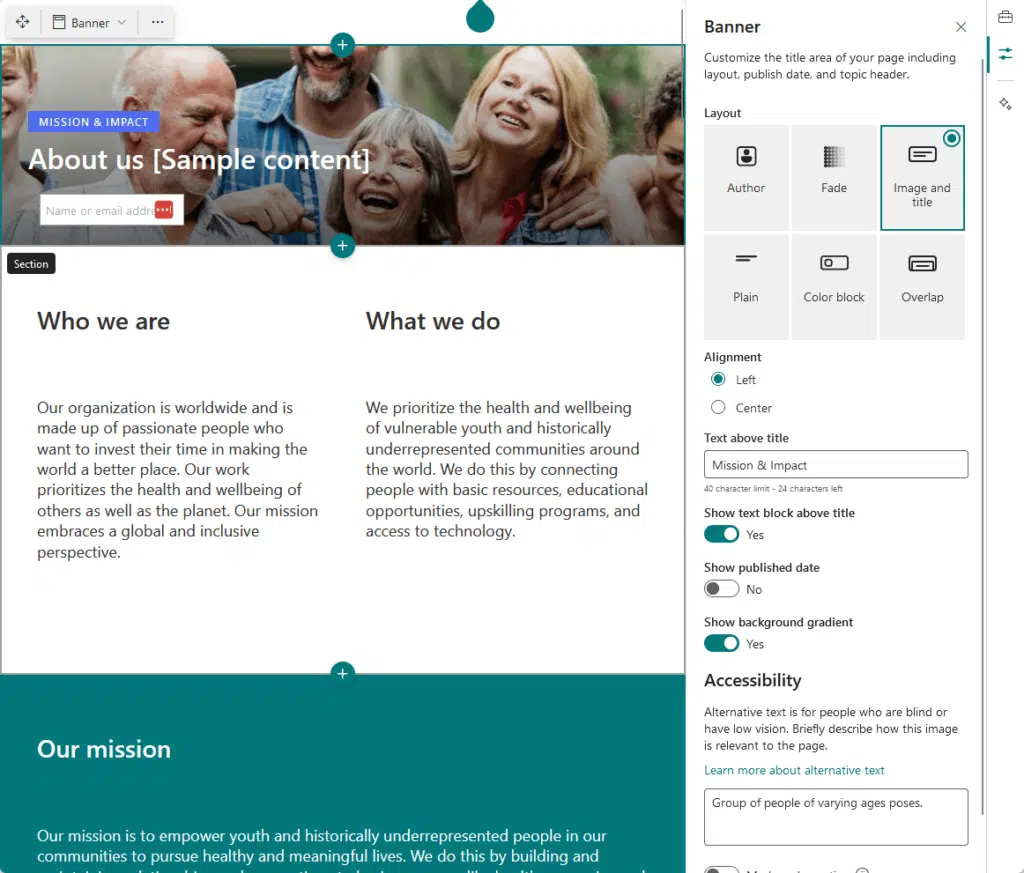
You can create all kinds of pages and customize them accordingly using web parts.
For example, through the image web part, you can add your own images or use stock images.
All the web parts have editable properties, some with special settings like being able to set an image focal point.
👉 Related: Modern SharePoint Web Parts: List of All Available Web Parts
Step 4: Publish the page
All that’s left is to publish the page once you’re ready.
Here’s what it looked like when I published a glossary page before:
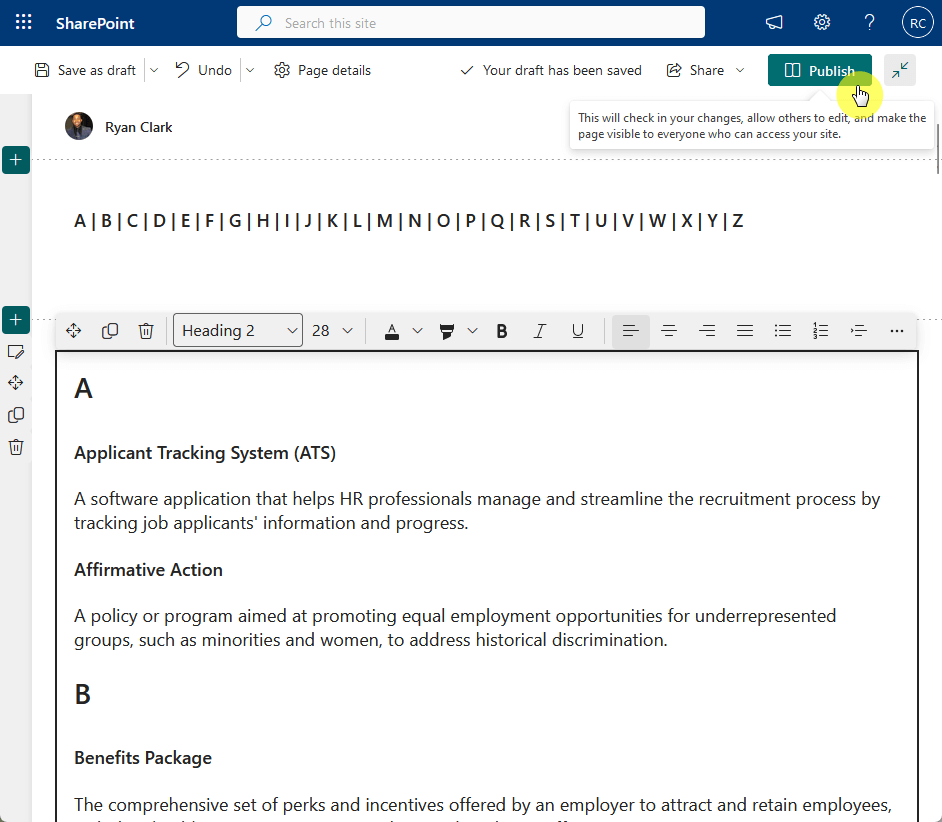
You can also just save the page as a draft and continue later on. 🙂
👉 Related: How to Create a SharePoint Glossary Page (Step-by-Step)
How to Edit a Page
If you want to edit a page, all you have to do is head to the site pages document library.
Simply get to the site contents page first and from there, click the site pages library from the list.
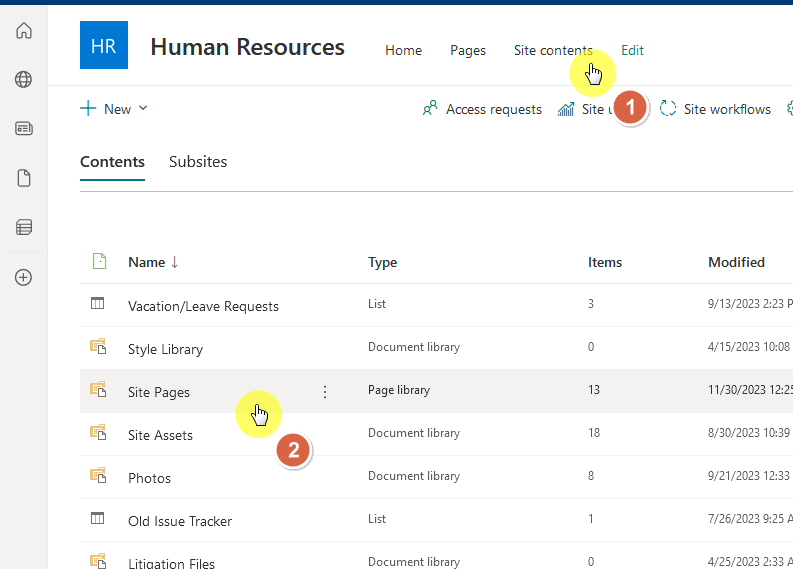
The next page will contain all the pages on the site.
Simply click on the news post or page you want to edit and it will open that same page in page editing mode. 🙂
⚠️ Note: You can also do a web search right in the SharePoint app to quickly find the page that you want to edit.
Troubleshooting Common Issues
You may encounter some challenges.
Here are common issues and what you can do:
- Page not saving: Check your internet connection
- Web part errors: Remove and re-add the web part
- Page layout problems: Adjust the section or column settings
- Publishing issues: Make sure there are no draft conflicts
- Missing content: Refresh the page or clear your browser cache
Besides these, you might want to check for any ongoing issues within your SharePoint environment.
Anyway, got any questions about creating a page in SharePoint Online? Let me know below.
For any business-related queries or concerns, contact me through the contact form. I always reply. 🙂


Thanks for your great content for SharePoint owners and end users. Super useful. 🙂