

Last Updated on July 7, 2024
Want to create a new group for permissions?
In this guide, I will walk you through the steps of creating a new group in SharePoint Online.
Let’s get started.
Table of Contents:
A SharePoint group is a collection of users who are given permission to access and interact with sites, lists, and libraries.
Here are the types of default SharePoint groups:
- Members: Users who can view, add, update, and delete items in existing lists and libraries.
- Owners: Users with full control over the site, including settings, permissions, and content.
- Visitors: Users with read-only access to the site and its contents.
How do these groups simplify permission management?
That’s simple — because of these groups, you don’t have to assign permissions to individual users one at a time. 😅
Instead of doing it on an individual basis, you assign permissions to a group, and that would affect everyone in that group.
👉 Related: SharePoint Groups & Permissions Explained: How Permission Levels Work
Sign up for exclusive updates, tips, and strategies
How does it differ from Active Directory groups?
If you’re confused between the two, that’s understandable because both groups are related to user permissions.
However, both types of groups serve different purposes and actually have unique characteristics under the hood.
Here are some of their key differences:
- Creation: SharePoint groups are created within SharePoint itself, while AD groups are created in Active Directory.
- Scope: SharePoint groups are specific to a SharePoint site or collection, while AD groups can be used across multiple applications and services within the domain.
- Management: SharePoint groups are managed by SharePoint site owners, whereas AD groups are managed by IT administrators within the Active Directory.
From the name itself, SharePoint groups are ideal for managing permissions within SharePoint site collections.
AD groups are more about broader access control across different systems and applications within an organization.
There’s no need to choose between the two though since it’s important to have them for flexibility. 🙂
👉 Related: SharePoint Group vs Active Directory Group (Comparison)
How to Create a New Group
Here are the steps you need to follow:
Step 1: Go to the advanced permissions settings
Navigate to the SharePoint Online site where you want to create a group.
From there:
- Click the gear icon on the top right
- Select site permissions
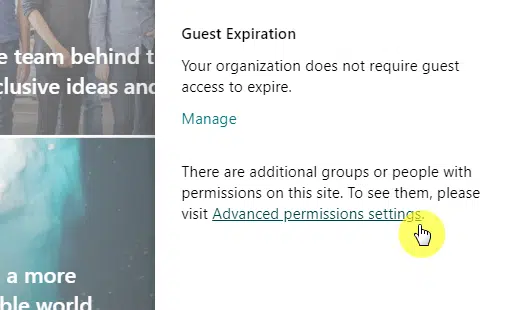
This will open the basic site permissions page (or settings) in that pane.
What you need to do here is click the advanced permissions settings link near the bottom:
Nice! 👏
Step 2: Create the group
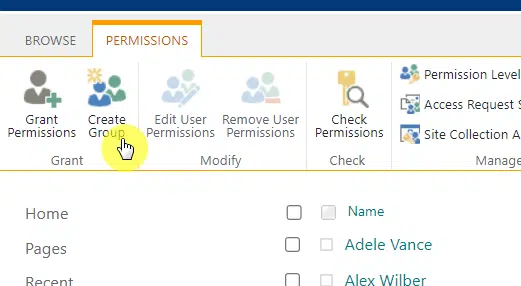
If you followed the steps earlier correctly, you should now be on a classic-looking page.
This is where you can change various advanced permissions settings on the site.
Click the create group button from the ribbon:
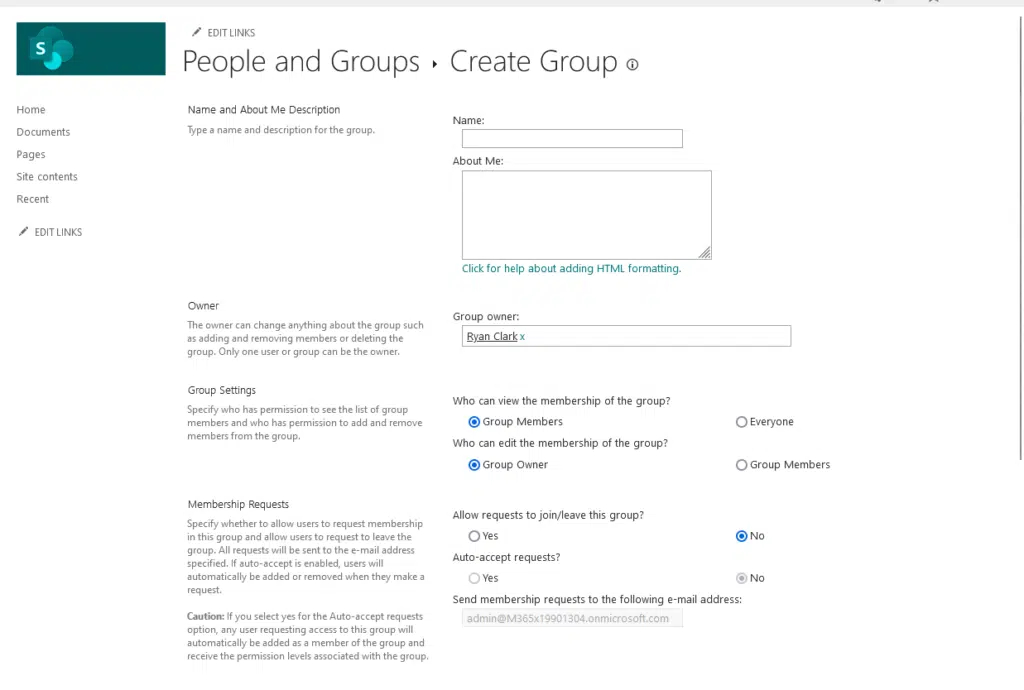
The create group page starts with filling out basic details like the name.
Start with the basics and complete the form until you get to the group permission section.
It helps here if the group name and description are clear and descriptive to avoid confusion in the future.
The start of the form looks like this:
Now let’s proceed to the last part. 🙂
Step 3: Specify the group permissions
The last part now is to specify the permission level that group members would get.
There are six levels here:
- Full control
- Design
- Edit
- Contribute
- Read
- Restricted view
What you need to do here is check the boxes of the permission levels you want to provide to the group members.
For example:
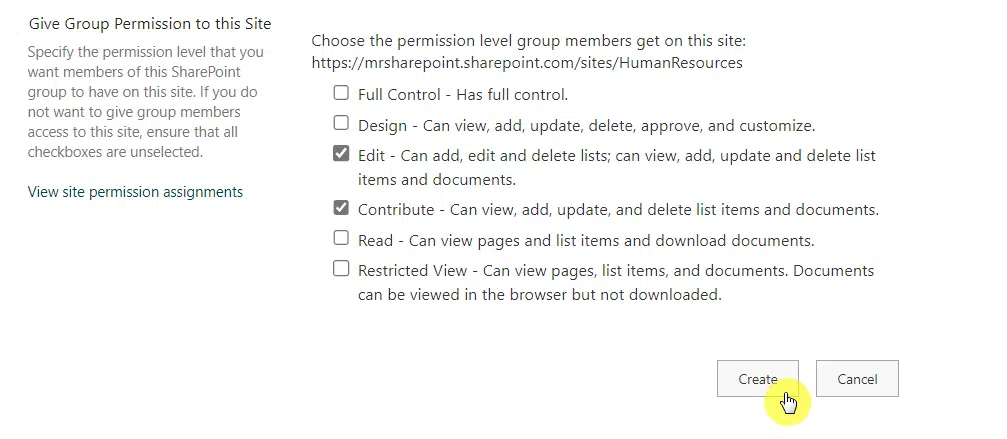
After you click on the create button, the group will be created and it will automatically open the group.
⚠️ Note: You must have site owner or full control permissions to create a group.
How to Change Group Permissions
In the future, it’s possible that you may need to change the permission level of the group.
Changing group permissions allows you to update what group members can do without going through each member.
For this, you need to go back to the advanced permissions settings page:
- Navigate to the site
- Click gear icon > site permissions
- Click the advanced permissions settings link
⚠️ Note: If you don’t follow or you’re not sure, you can check the first step of the earlier section about creating a new SharePoint group. 🙂
From here, select the name of the group you want to change permissions for.
Once it’s selected, the edit user permissions button from the ribbon will be available — click on that button.
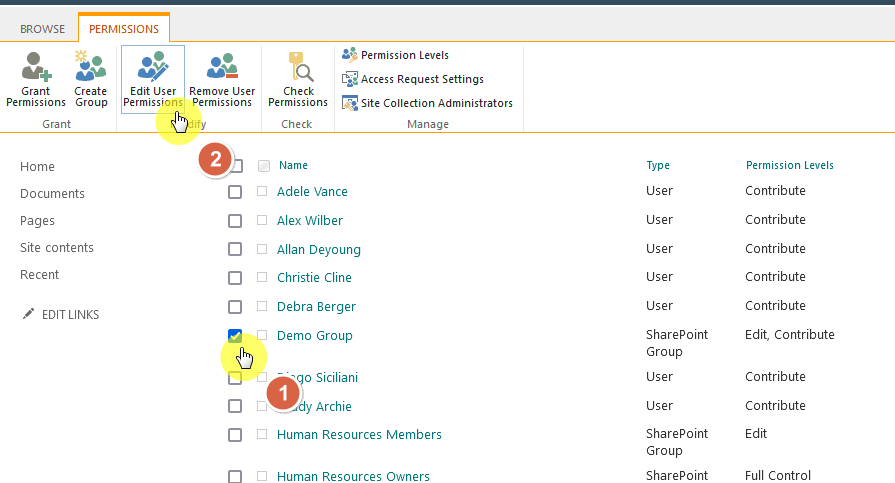
This will bring you to a screen that’s similar to the screenshot I showed in step 3 of the previous section.
Before making any changes, communicate with the group members about any changes to their permissions.
You will then be able to reselect the permission levels of the group:

After you click the ok button, the changes will be saved.
It’s best if you review the current permissions of the group first before making changes to avoid unintended access.
Nice! 🙂
How to Add and Remove Users From the Group
After creating the group, there’s no one in it yet. 😅
Part of group management is managing the membership, which involves adding and removing users.
To add members, go back to the advanced permissions settings page:
- Navigate to the site
- Click gear icon > site permissions
- Click the advanced permissions settings link
⚠️ Note: If you don’t follow or you’re not sure, you can check the first step of an earlier section about creating a new group. 🙂
Once you’re on the page, all you have to do is click on the group’s name (not merely select it through its checkbox).
Like this:

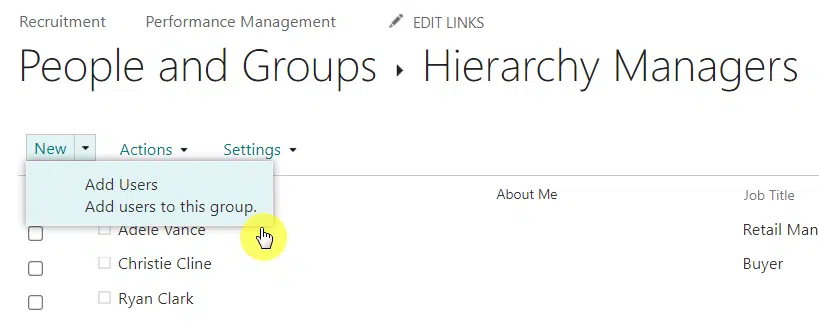
The next page will show the users who are part of the group.
Since the group is fairly new, you won’t see anyone here (which is why you need to add users here). 😅
Click the new button > add users (just the new button right away):
This will open a small window where you can share the site and invite the members to the group.
Type the names of the people you want to invite and a suggestion box will open for you to select that user.
Like this:
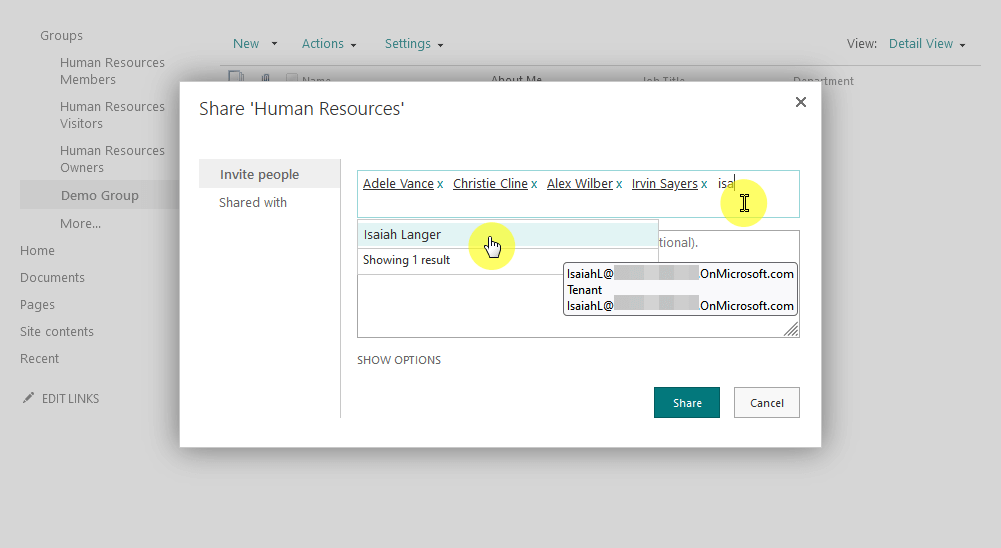
⚠️ Note: When adding external users, verify that external sharing settings are enabled.
Click on the share button once you’re done, and the names of those people will appear on the page. 🙂
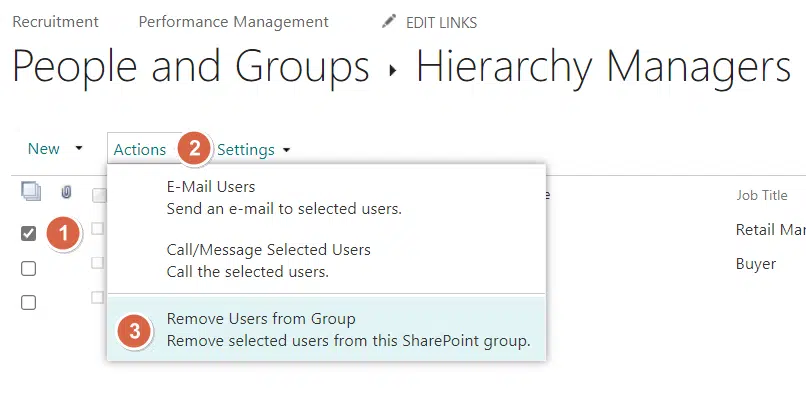
If you want to remove anyone, simply select their name through the checkbox, click actions, and then remove users from group.
Like this:
As I shared earlier, when you’re about to make a change, like removing a user, make sure to communicate with them. 🙂
Benefits of Groups for Permission Management
I have already mentioned the most obvious benefit of using groups.
They simplify the process of assigning and maintaining permissions so users have the right access levels.
Specific benefits include:
- Assigning and removing permissions to multiple users at once (saves time and effort)
- Uniform permission levels across different users within the same group
- Easily manage permissions for large numbers of users (for scalability)
In terms of security, groups also help maintain it since permissions can be tightly controlled and monitored, and easily at that. 🙂
Using groups also makes audits and compliance checks easier since permissions are centrally managed.
You can virtually customize SharePoint groups to fit the specific needs of different projects or departments. 👍
You need to manage existing Sharepoint groups effectively to ensure that users have the right permissions and that the environment is secure.
Here are a few practices that can help:
Regularly review group memberships
Doing regular reviews helps make sure that only the necessary users have access to specific groups
What you need to do:
- Monthly audits: Check group memberships to make sure they’re current.
- Remove inactive users: Remove users who no longer need access.
- Update roles: Adjust permissions as users’ roles change.
As you may know already, having regular reviews also prevents unauthorized access.
While you do this, make sure to document changes for future reference in case you need to backtrack in the future. 🙂
Use descriptive names and detailed descriptions
Obviously, when you use clear names and descriptions, it makes it easier to understand the purpose of each group.
Here’s what I recommend:
- Include roles: Use job titles or departments in group names.
- State purposes: Describe the group’s function in the description.
- Mention owners: Include the group owner’s name for accountability.
In addition, having descriptive names and detailed descriptions will make management easier, especially in large environments.
Limit the number of group owners
Like with any other group, having too many owners can lead to confusion and mismanagement. 😅
Here’s what you can do:
- Select key individuals: Choose a few responsible people as owners.
- Assign backup owners: Have backup owners for continuity.
- Review ownership: Regularly review and update the list of owners.
When you limit the number of owners, you also help maintain control and accountability in the group.
This then makes it easier to track changes and updates. 🙂
Monitor and audit permissions regularly
An important reason for regular monitoring is to make sure that permissions are set correctly and there are no risks.
Here’s what I recommend:
- Use audit logs: Check logs for unauthorized changes.
- Set alerts: Get notifications for permission changes.
- Perform random checks: Conduct random audits to verify permissions.
If you audit regularly, you will be able to identify and resolve security issues quickly when they arise (because they will).
👉 Related: SharePoint Permissions: Best Practices to Implement
Troubleshooting Tips
The truth is that managing these SharePoint groups, especially when there are a lot of them, comes with a lot of challenges.
Here are some common issues and how to resolve them:
1. Cannot access the “create group” option
If you can’t see the option to create a group, it may be due to insufficient permissions.
Here’s what you can do:
- Check permissions: make sure that you have site owner or full control permissions.
- Contact admin: Ask your SharePoint admin to grant you the necessary permissions.
- Verify site settings: Check that the site settings allow group creation.
If you still can’t access the option, you might need to try to log out and back in or use a different browser.
Unfortunately, browser issues can cause access problems (sometimes).
2. Adding external users fails
You might face issues when adding external users to a group.
When that happens, try these out:
- Check external sharing settings: Make sure external sharing is enabled at the site and organization levels.
- Verify email addresses: Check that the email addresses are correct and valid.
- Confirm permissions: See that you have the required permissions to add external users.
If you’re not an administrator yourself, and the external sharing is disabled, contact a SharePoint admin.
👉 Related: External Sharing in SharePoint Online: How Does It Work
3. Permissions not applying correctly
Sometimes, permissions assigned to a group may not apply as expected.
Here’s what to do:
- Refresh settings: Refresh the site permissions settings page.
- Reassign permissions: Try removing and reassigning the permissions.
- Clear cache: Clear your browser cache and cookies.
If permissions are still not applying correctly, check for any inherited permissions that might be conflicting with your settings.
👉 Related: How to Set Unique Permissions on a SharePoint Subsite Only
4. Group membership changes not reflecting
Changes to group memberships may not reflect immediately.
Whenever that happens, do these:
- Allow time: Sometimes changes take a few minutes to propagate.
- Sync manually: Manually sync the site if the changes are not appearing.
- Check browser: Use a different browser or incognito mode to see if the changes reflect.
If changes are still not reflecting, check your network connection and make sure there are no interruptions.
Anyway, got any questions about creating a new group in SharePoint Online? Let me know.
For any business-related queries or concerns, contact me through the contact form. I always reply. 🙂


