

Last Updated on September 10, 2024
Not sure how to create a list?
In this guide, I will walk you through creating a list in SharePoint Online and how to add data to your list.
Let’s get started.
Table of Contents:
Lists are one of the core features in SharePoint Online, along with document libraries (they’re practically lists.
Basically, you can use these lists to organize and manage data in a structured format for various purposes.
Here’s what you can do with lists:
- Track data: Store items like tasks, contacts, or inventory records.
- Customize columns: Add different data types, such as text, numbers, or dates.
- Sort and filter: Easily organize data by sorting and applying filters.
- Create views: Set up custom views to display specific data based on conditions.
- Set permissions: Control who can access and edit the data.
You would definitely like lists since they’re highly flexible.
You can use them in different scenarios — from simple to-do lists to complex project management systems.
They’re also integrated with other Microsoft 365 tools. 🙂
👉 Related: SharePoint 101: What Is a List and How to Create One
Sign up for exclusive updates, tips, and strategies
What methods can you use to create lists?
What’s nice here is that there are several methods to create a SharePoint list depending on your needs.
Here are the available methods:
- Blank list: Create a new list with no predefined columns
- From an existing list: Duplicate the structure of an existing list (no data copied)
- From Excel: Import data from an existing Excel spreadsheet
- From CSV: Import a CSV file
- Using templates: Choose from built-in templates
You will see all these options when creating a list using the SharePoint Online interface.
Each of the methods above is designed to suit different use cases, like whether you want to start from scratch or not. 🙂
Step-by-Step Guide to Creating a List
What’s nice here is that creating these lists is straightforward.
Step 1: New list
Navigate to the SharePoint site where you want to create the list.
Select the new button > list option from the dropdown menu:
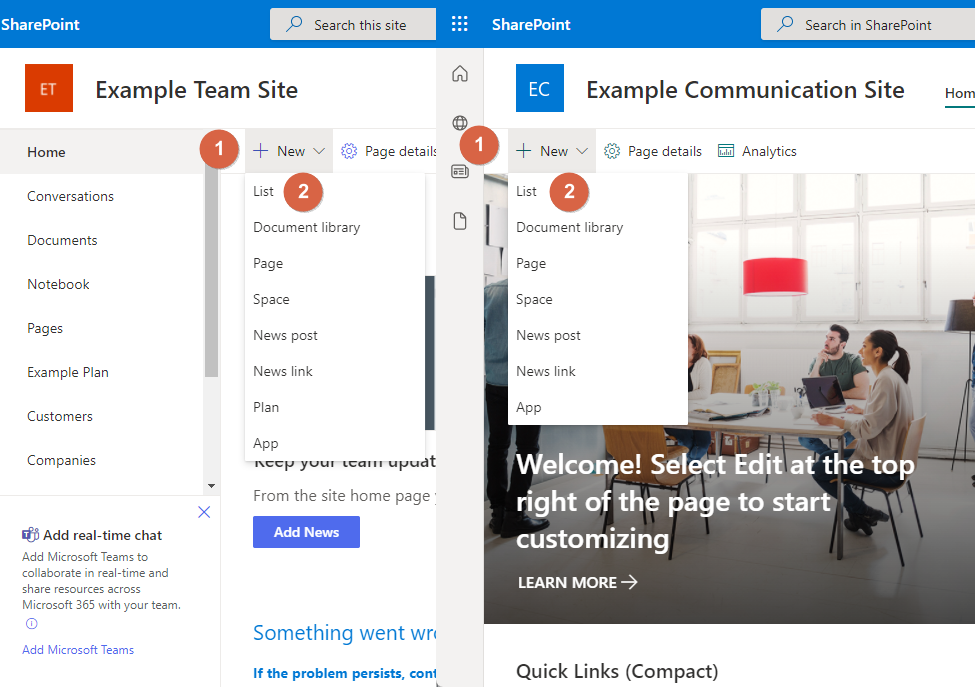
You can find this option on both the home page and the site contents page.
Nice! 🙂
Step 2: Select the method
After clicking the list option, a smaller window will appear where you can choose how to create the list.

All you have to do here is click the option that you want to use:
- Blank list
- From an existing list
- From Excel
- From CSV
If you decide to create from scratch, this is what you will see:
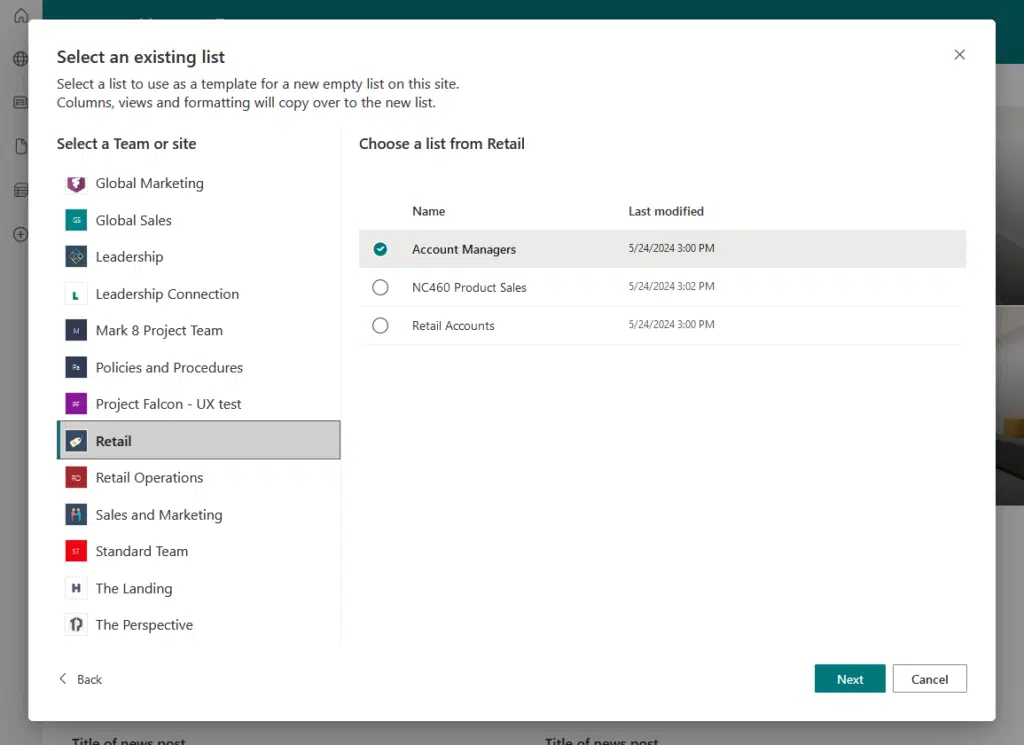
If you want to start from an existing list, naturally, you would need to guide the system and show it where the list is.
It looks like this:
If the choice is from Excel or CSV, and the file is already on the site, you just need to find and select it.
You can also upload the file directly to the site:
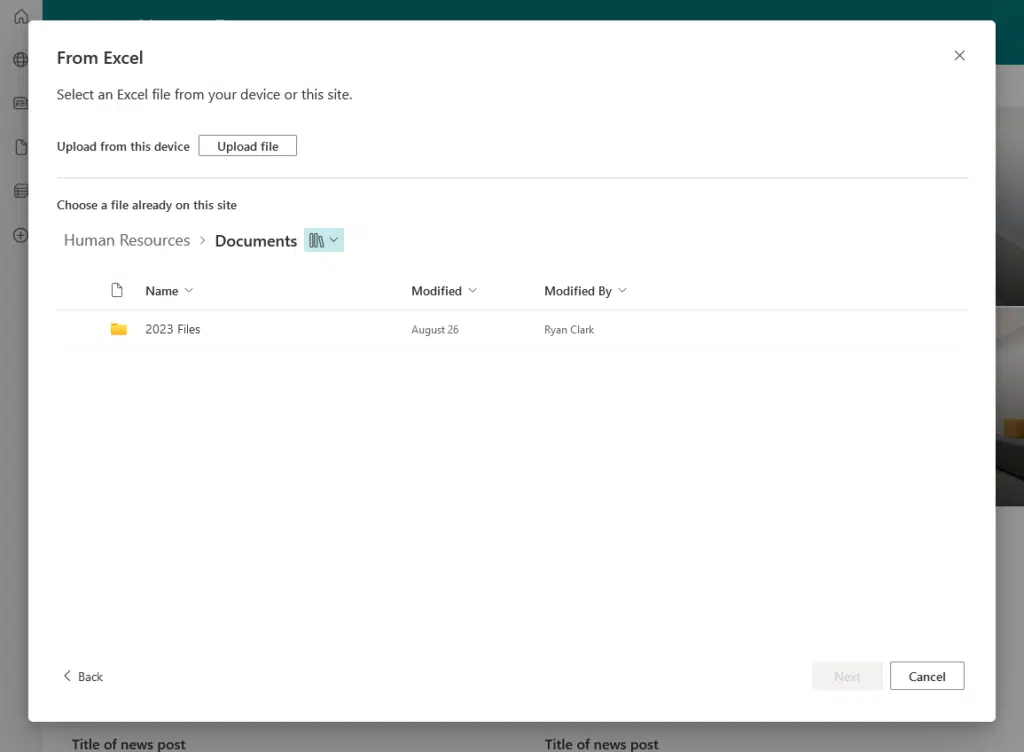
The file has to come from the site (you can’t use an Excel file from other SharePoint sites).
If you want to use a template, you just need to click on the template that you want to use from the selection.
Before you can use it, SharePoint will show you a preview of how it looks and what columns it comes with:

When you use a template, data is not included — only the columns (design and all) and the views (if there are any).
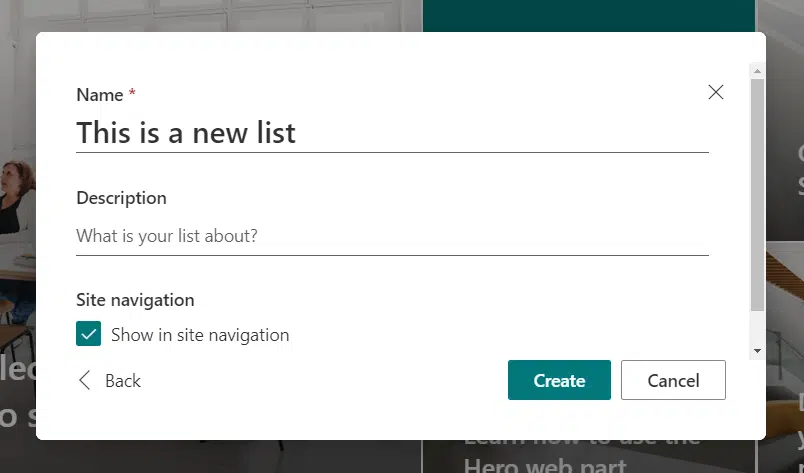
Step 3: Name your list and add a description
After selecting your choice, the last step will always be about entering a name and a description for the list.
If the option about the list showing in the site navigation is checked, then the list will appear there. 🙂
Don’t forget to select “create” to finally create that SharePoint list.
Customizing the List
After creating the list, you can then customize the list and make it more useful for your specific needs.
Other people still want to say they want to “create custom lists”, but it basically refers to the processes here. 🙂
A custom list has a lot of customizations, making it distinct from a “regular” list without much customizations.
Let me show you some of the basics:
1. Adding and modifying columns
Similar to Excel, columns are the backbone of your Microsoft SharePoint list.
Each of the columns will store different types of data like text, numbers, dates, and even choices.
If you want to add a column, find the + add column button after the right-most column and select the type of column:
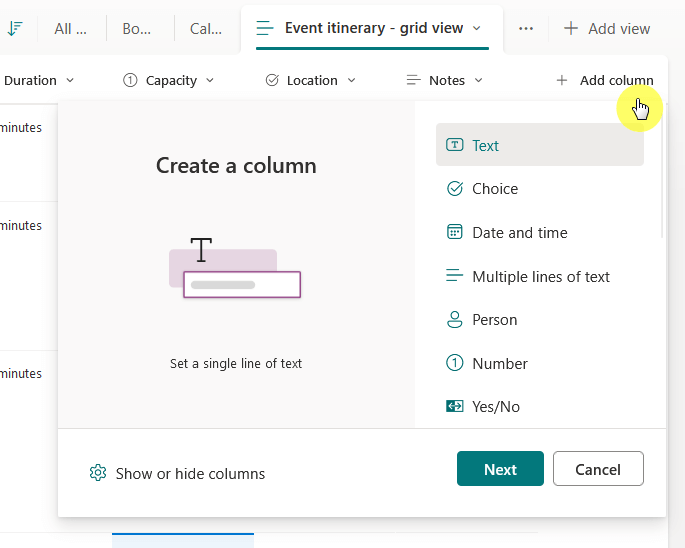
After that, a panel to the right will allow you to enter more information about that column.
You can also change the type of column right on the panel and the succeeding configurable settings will also change.
Like this:
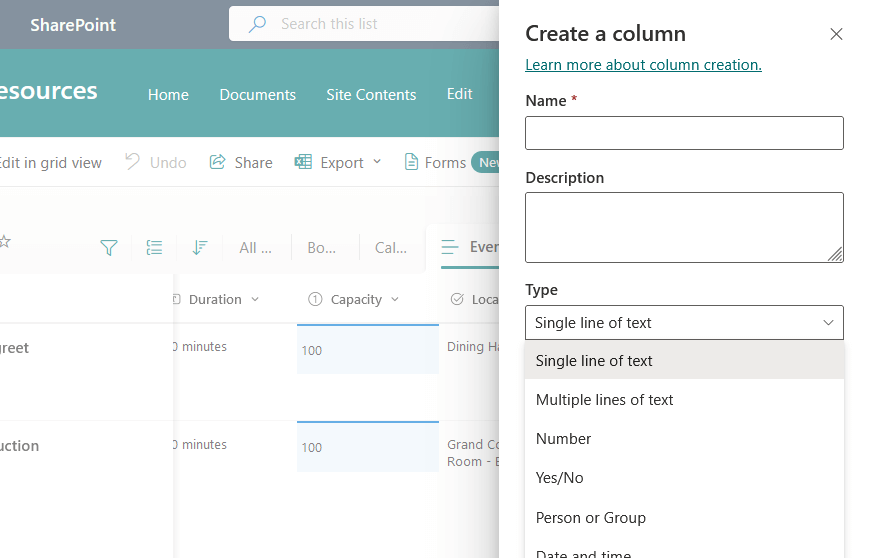
You can also modify the existing column in the list.
Simply select the column header, and choose what you want to do — in this case, it’s like editing the column.
A right panel will appear that looks similar to what you will see when creating a new column, though this is filled out.
You can then change the information and settings here, like changing the name of the column and other settings.
👉 Related: SharePoint Column Types Explained: Overview and Use Cases
2. Conditional formatting
If you’ve used conditional formatting on Excel spreadsheets, it works pretty similarly on a SharePoint list.
Basically, it will allow you to apply visual cues (highlight important data) to list items based on their values.
Here’s what you can do:
- Color-code items: Apply different colors to cells or rows based on conditions.
- Add icons: Use icons like checkmarks or warning symbols.
- Custom rules: Set up custom rules to format items based on specific conditions.
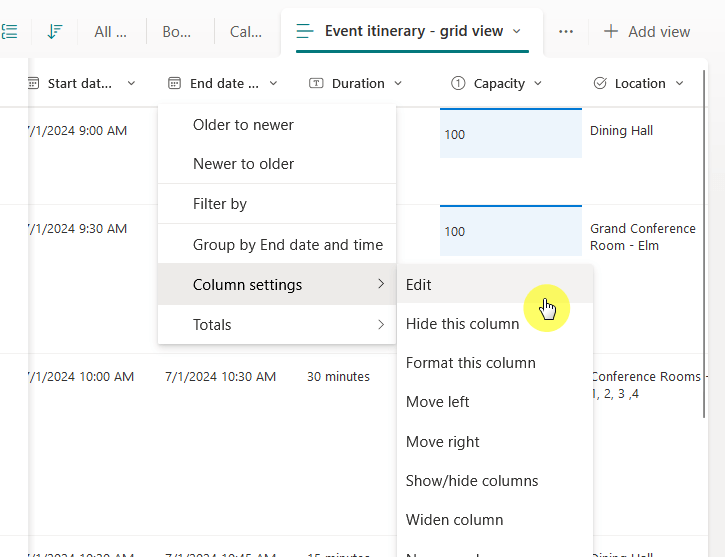
You may have seen the option for this already.
If you select a column header > column settings, there’s a format this column option near the top:
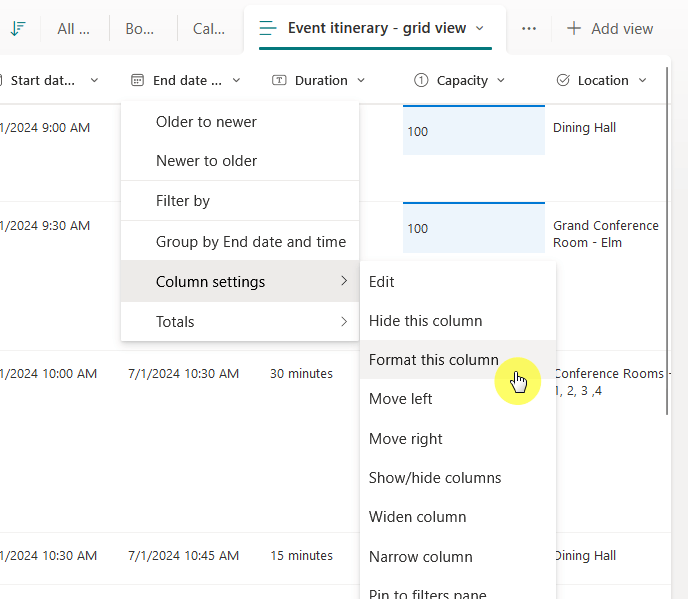
You will then see three options:
- Background colors
- Choice pills
- Conditional formatting
Here:

You will then be able to add rules and what styles will be applied.
There’s also an advanced option where you can use JSON to change the display of the column.
👉 Related: How to Apply SharePoint Column Formatting: Beginner’s Guide
How to Add Data to Your List
Now let’s talk about adding data to the list, which is simple and can be done in various ways.
Let’s start with the most common route:
1. Manually adding items
I say common since this is the usual way of adding data to the list.
At the top of the list, click on the + add new item button:
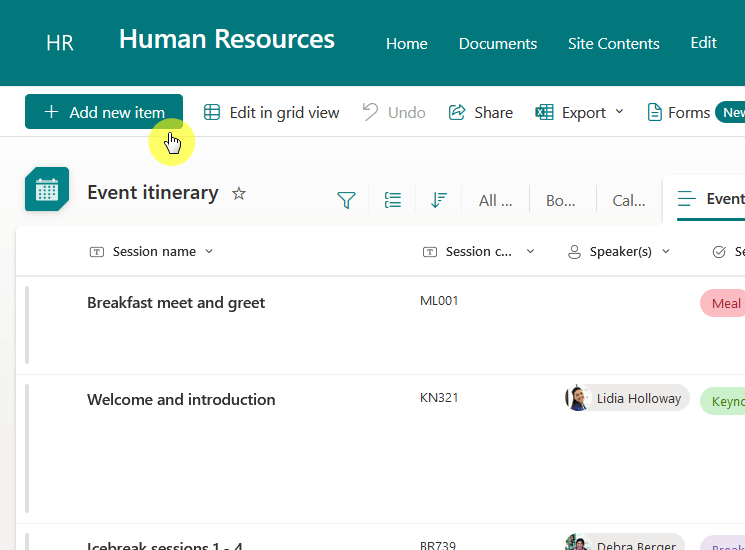
This will then open a panel where you can enter data for each column in your list.
For example:
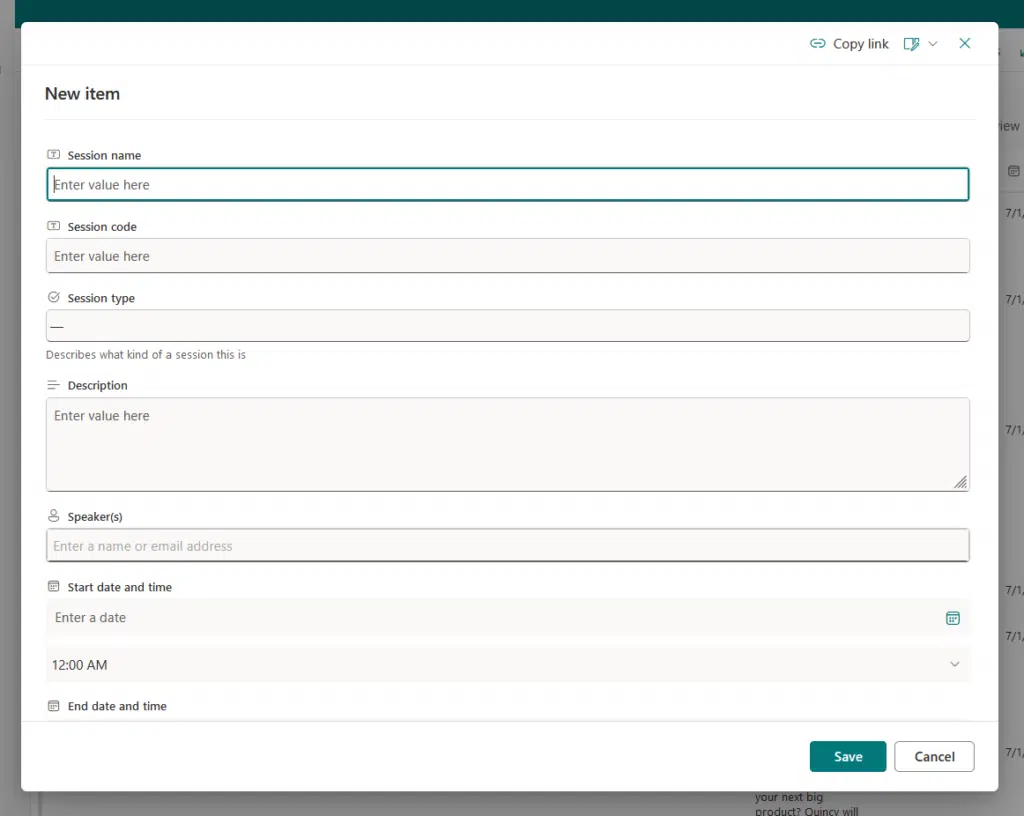
If a column is marked as required, you won’t be able to save the item without entering data in that column.
2. Edit in grid view
You can use this option if you want to make changes to multiple items at once or add new data in the grid view.
The button for it is located just beside the button for adding a new item:
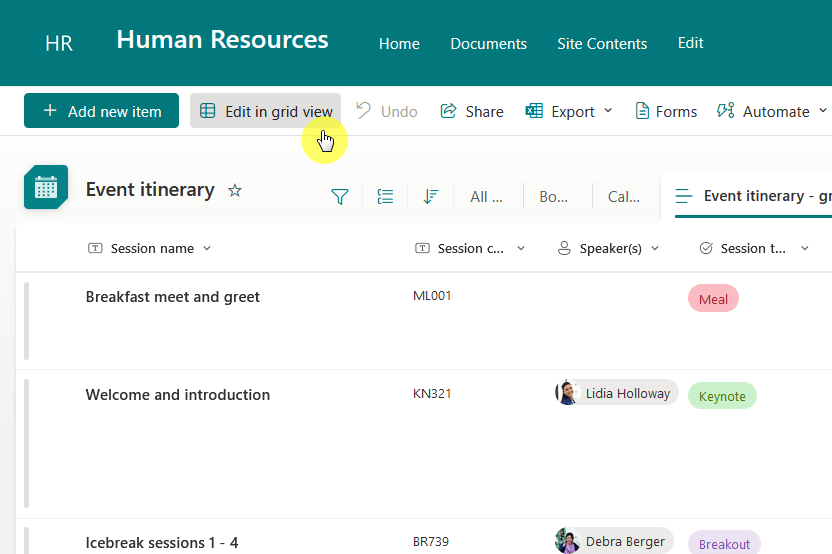
Once activated, you will be able to edit items like you would in a spreadsheet where you can update several rows quickly.
If there are items already in the list, the bottom row is where you can add new items (there’s a button for adding new items).
Here:
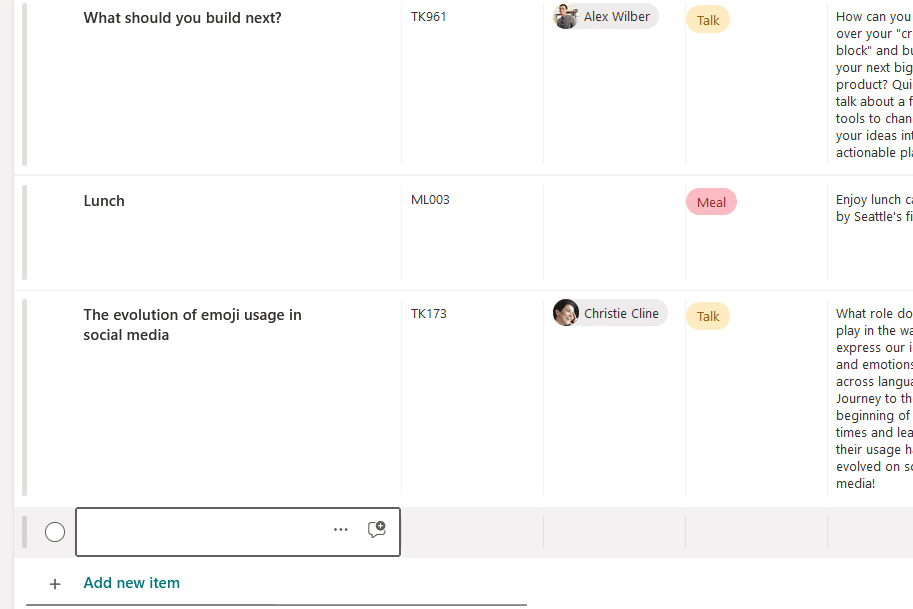
You can also copy data from an Excel file and paste it directly into your SharePoint list while in grid view.
3. Using forms to add data
This is rather new where you can add data through a form.
Naturally, you would need to create a form first and customize it to match your needs.
It looks like this:
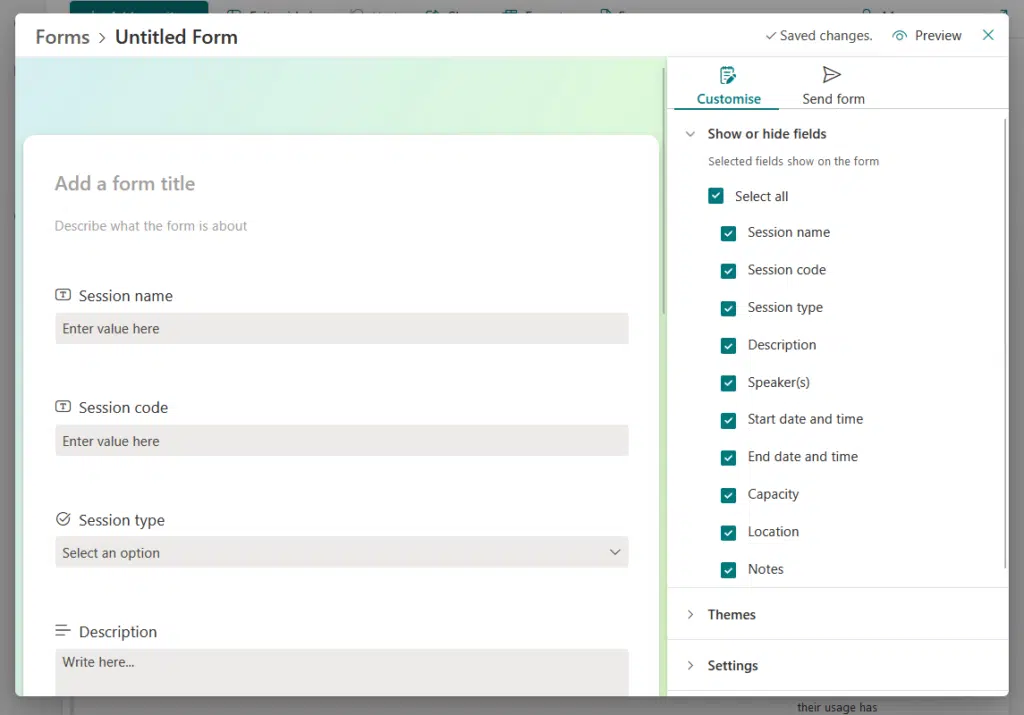
These forms can include:
- Dropdowns
- Menus
- Checkboxes
- Other input methods
You can then choose which columns appear on the form, show or hide fields, choose a form theme, and more. 🙂
Managing List Views
Views help you organize and display data in different ways so it’s easier to find and focus on relevant information.
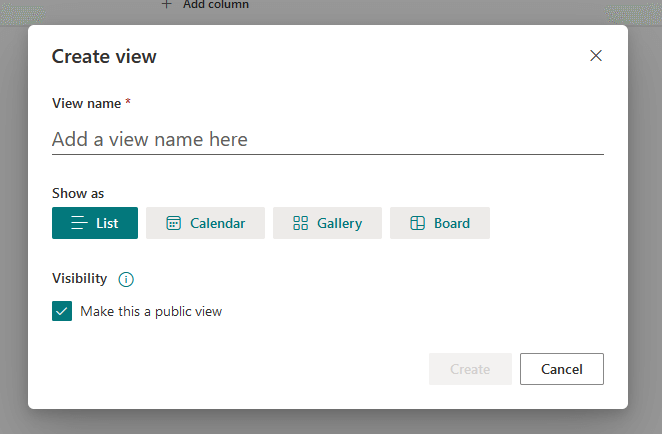
There are different view types available:
- List view
- Calendar view
- Gallery view
- Board view
What’s nice here is that you can create multiple views to suit specific needs, like filtering or sorting items.
You can quickly find the option to create a view, which is on the right side of the tab above the column headers:
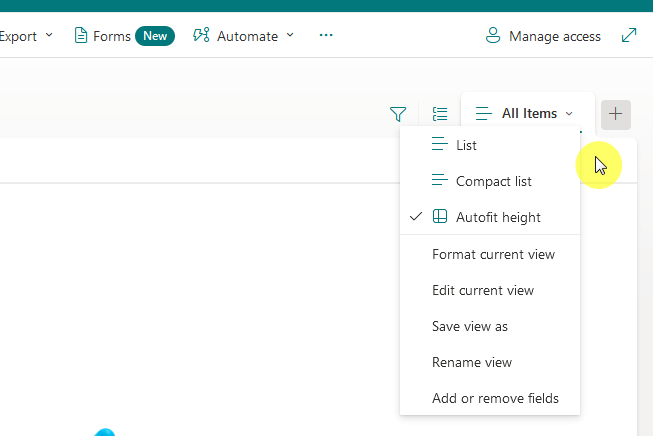
From there, you will be able to select the type of view that you want to use.
For example, if want to create a simple list view, here’s what you will see:
Different views would have different options, the same as how it is with list types.
You can also customize the view according to how you like it.
When you have created a view, it will appear like a tab, and when you click on it, you will find different options.
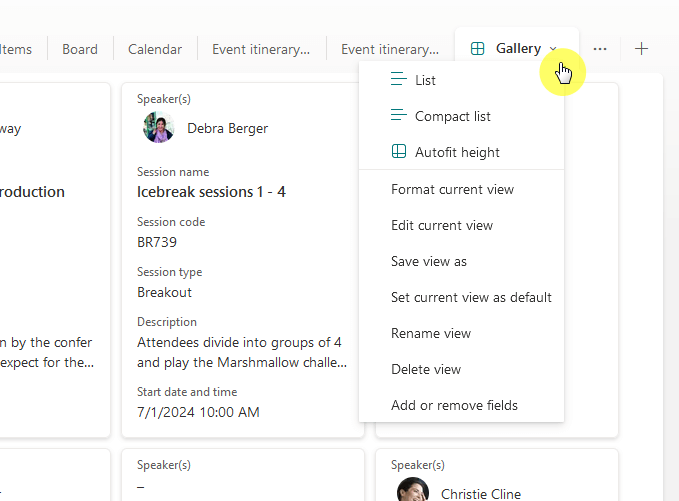
There’s an edit current view option there in the dropdown, which will open another classic-looking page.
You can do a lot of things here like sorting and filtering, grouping items, configuring item lists, and many more. 🙂
It looks like this:

There’s also the format current view that will allow you to access the card designer and conditional formatting.
👉 Related: How to Create a View in a SharePoint List (Tutorial)
Additional List Features
There are also several features that would make data management more efficient.
Let me mention some of them:
1. Version control
Version control helps you track changes to list items over time.
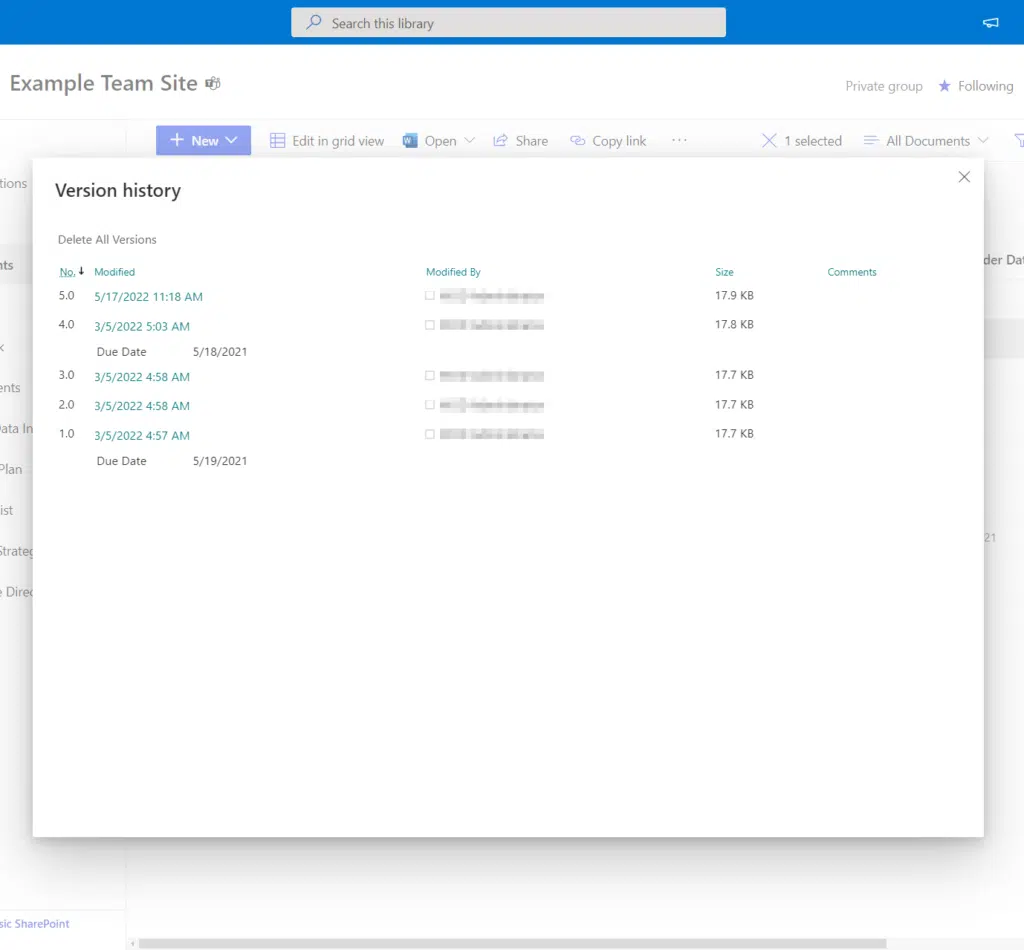
Here’s what version control offers:
- Track changes: View a history of edits, including who made each change and when.
- Restore previous versions: Revert to an earlier version of a list item if something was changed incorrectly.
- View version history: Check past versions for comparison or auditing purposes.
I would say that this is especially useful in collaborative environments where multiple people work on the same data.
It provides something like a safety net where no important data is lost and any mistakes can be easily corrected. 🙂
👉 Related: SharePoint Version Control: The Strongest Feature?
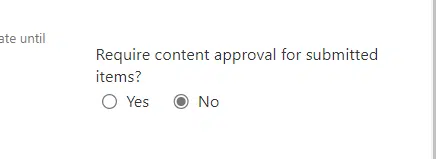
2. Approval settings
This feature, when enabled, will put items in a draft state until an approver approves the items or changes.
Here’s what approval settings allow:
- Content review: Items must be reviewed and approved before being published.
- Approval status: A new column tracks whether an item is approved, rejected, or pending.
- Approver comments: Approvers can leave feedback or comments on why an item was approved or rejected.
However, you need to enable this first in the list settings > versioning settings:
This feature is helpful when multiple users contribute to the list, and you want to vet the information first. 🙂
3. Task automation
Like any automation, this helps with repetitive tasks and workflows through the power of Power Automate.
Here are a few automation options:
- Send notifications: Automatically notify team members when a new item is added or updated.
- Start approval processes: Trigger an approval workflow when a new item is submitted.
- Update data: Automatically update or move list items based on certain conditions.
For this, you can either use the automate option (premade flows) or go with the integrate option.
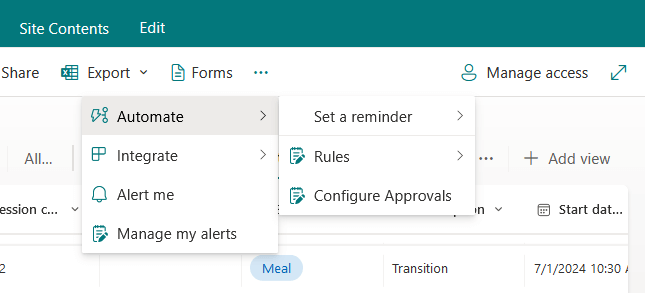
The automate option is limited to creating a reminder, creating rules, and setting up an approval process.
The integrate option will allow you to not only create Power Automate flows but also tap Power Apps and Power BI.
Nice! 🙂
👉 Related: Microsoft Flow Approval: Multiple Approvers (Guide)
Using a list can make organizing, tracking, and managing data simple and efficient.
As a core feature, there’s a lot more about lists than what this guide can offer (I can but it will be super lengthy).
Anyway, got any questions about creating lists in SharePoint Online? Let me know below.
For any business-related queries or concerns, contact me through the contact form. I always reply. 🙂


