

Last Updated on July 7, 2024
Want to copy a site?
In this guide, I will walk you through the steps of copying a site using PowerShell.
Let’s get started.
Table of Contents:
What does copying a site mean?
As the word suggests, copying a site means creating a duplicate copy with its structure, and settings.
The main components involved here are:
- Site structure: This includes the site hierarchy, pages, and navigation elements.
- Lists and libraries: All lists and document libraries, along with their content, are copied.
- Site settings: Configuration settings, permissions, and customizations are replicated.
- Web parts and apps: Any web parts or applications used on the site are included in the copy.
Those experienced in SharePoint Online like it because it’s a safe way to experiment with changes without affecting the live site.
The problem nowadays is that there’s no “save as template” feature anymore in modern site templates. 😅
⚠️ Note: The method that I will describe here doesn’t copy the contents as well as the images, unfortunately.
In addition, this doesn’t work on top or root SharePoint site collections, only with subsites.
Sign up for exclusive updates, tips, and strategies
How to Copy a Site With PowerShell
Here’s what to do:
Step 1: Connect and export
The first step is to connect to the source site and then export the site template.
Here’s the script you can use:
$SourceSiteUrl = "https://yourtenant.sharepoint.com/sites/source"
Connect-PnPOnline -Url $SourceSiteUrl -Interactive

$TemplateFile = "C:\path\to\template.xml"
Get-PnPSiteTemplate -ExcludeHandlers PageContents -Out $TemplateFile
The template contains the source site schema of the original site (source site).
In the template file, images won’t be included since it would generate an error and cut off the process.
Step 2: Create the target subsite
If you don’t have an existing destination site yet, here’s how:
$ParentSiteUrl = "https://yourtenant.sharepoint.com/sites/parent"
$TargetSubsiteUrl = "https://yourtenant.sharepoint.com/sites/parent/targetsubsite"
Connect-PnPOnline -Url $ParentSiteUrl -Interactive
New-PnPWeb -Title "Target Subsite" -Url "targetsubsite" -Template "STS#0"
That will create a new site on the parent site.
On the other hand, if you already have an existing site, you only need to connect to it.
Here’s how:
$TargetSiteUrl = "https://yourtenant.sharepoint.com/sites/target"
Connect-PnPOnline -Url $TargetSiteUrl -Interactive
Nice! 🙂
Step 3: Apply the site template
For the last part, you need to apply the site template that was saved on your computer from the first step.
I’m referring here to the given template XML file from the earlier step (remember its location).
Here’s the script:
#Config Variables
$SiteURL = "https://yourtenant.sharepoint.com/sites/target/"
$TemplateFile ="C:\path\to\template.xml"
#Connect to PnP Online
Connect-PnPOnline -Url $SiteURL -Interactive
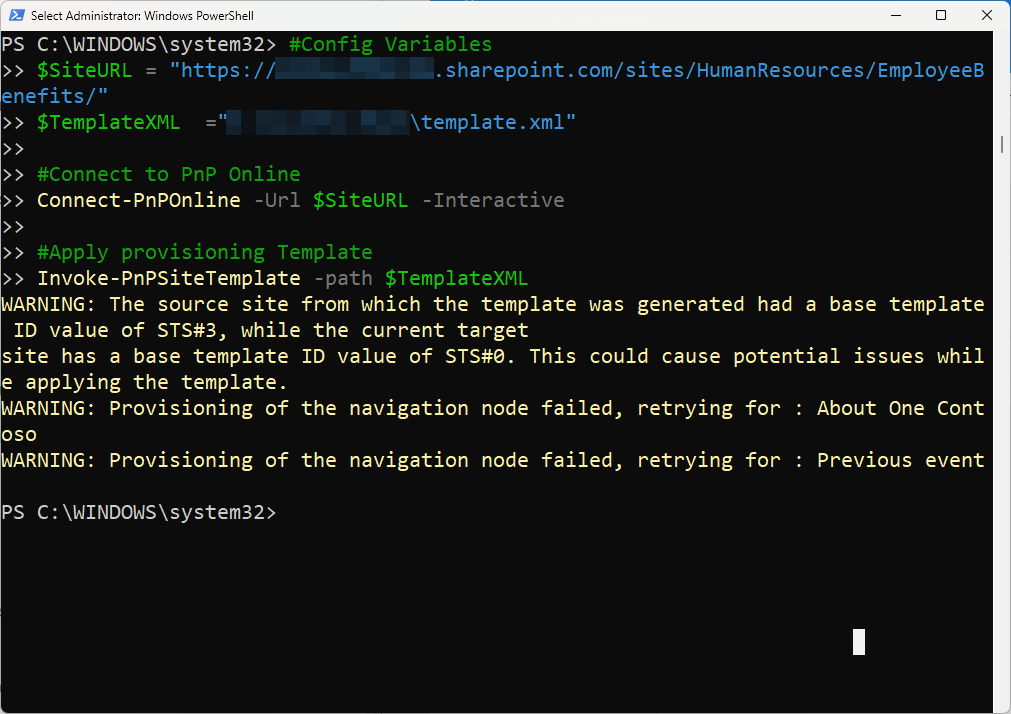
#Apply provisioning Template
Invoke-PnPSiteTemplate -path $TemplateFile🖐️ Disclaimer: When I tested my original script, I encountered an error. But thanks to the answer here, I was able to solve it. 🙂
If that’s successful, the script will apply the same template to the target site along with some warning:
That will apply the template to the site.
Troubleshooting Common Issues
Unfortunately, when copying an entire site using PowerShell, you may encounter some issues.
Although I fixed some issues from the script, others may arise such as:
1. Issue: Permission Errors
Getting permission errors will disrupt the copying process.
From the name itself, it happens when the account doesn’t have the required permissions on the source or target site.
Here’s what you can do:
- Verify permissions: Make sure that the account has the correct permissions on both sites.
- Admin rights: Check that the account has site collection admin rights.
- Custom scripting: Make sure custom scripting is enabled on both sites.
If you still face permission issues, you may need to re-check the permissions and make sure there are no restrictions applied.
2. Issue: Connection Problems
If you have a spotty internet connection, connection problems may occur.
On the other hand, it’s also possible that the PowerShell module isn’t configured correctly.
Here’s what to do:
- Network connectivity: Check if your network connection is stable.
- PnP PowerShell module: Verify that the PnP PowerShell module is installed and updated.
- URL accuracy: Double-check the URLs of the source and target sites.
If connection problems persist, you can try reconnecting or using another network to rule out local connectivity issues.
3. Issue: Script Execution Failures
This might be annoying sometimes. 😅
But script execution failures may arise due to incorrect scripts, outdated cmdlets, or missing components.
Here’s what you can do:
- Update cmdlets: Make sure that all cmdlets used are up to date.
- Check scripts: Review the scripts for syntax errors.
- Dependencies: Confirm that all necessary components and modules are installed.
If there are still script execution failures, check out the PnP PowerShell documentation for the problem (or updates).
4. Issue: Data Loss or Incomplete Copy
I already solved the issue with the images.
But sometimes, not all data is copied over, which leads to incomplete site duplication.
Here’s what you can try:
- Template integrity: Verify the integrity of the site template file.
- Data limits: Check that data limits and quotas are not exceeded.
- Retry operation: Attempt the copy operation again to see if the issue persists.
To prevent data loss, I recommend that you back up your site data before initiating the copy process.
Importance of Site Duplication
You may know some of these already.
But here are the key benefits of site duplication:
- Testing: Use duplicated sites to test new features or updates without affecting the live site.
- Staging: Create a staging environment to preview changes before implementing them on the production site.
- Backup: Maintain backups of your site for disaster recovery and data protection.
- Training: Use duplicates for training purposes without risking any data or settings on the live site.
The best here is that you minimize the risks with direct changes to live environments.
But before doing anything else, always make sure that your duplicated sites are tested thoroughly before use.
Anyway, got any questions about copying a site with PowerShell? Let me know below.
For any business-related queries or concerns, contact me through the contact form. I always reply. 🙂


