
Last Updated on October 25, 2024
Want to configure the sharing options of your library?
In this guide, I will show you how to easily change the sharing options of a document library in SharePoint Online.
Let’s get started.
Table of Contents:
Where can you find the library’s sharing options?
You might’ve tried finding a “share” button or link for the whole library, right?
However, as you might’ve realized, there’s no such button or link, instead, you need to either:
- Share each document individually
- Grant access to the whole library
If you want to grant access to the whole library, you need to get to the library settings and change the permissions there.
This includes external sharing (yes, you can share a SharePoint document library with external users).
But note that you need to enable external sharing if you want to share the library with outside users.
👉 Related: How to Add External Users to SharePoint (Beginner’s Guide)
Sign up for exclusive updates, tips, and strategies
Changing the Library’s Sharing Options
Fortunately, it’s not that complicated.
Here’s how:
Step 1: Access the library settings
To begin, click on the gear icon in the upper-right corner and click the “library settings” option:
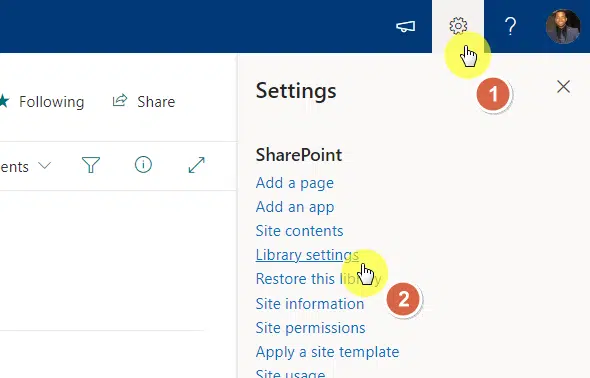
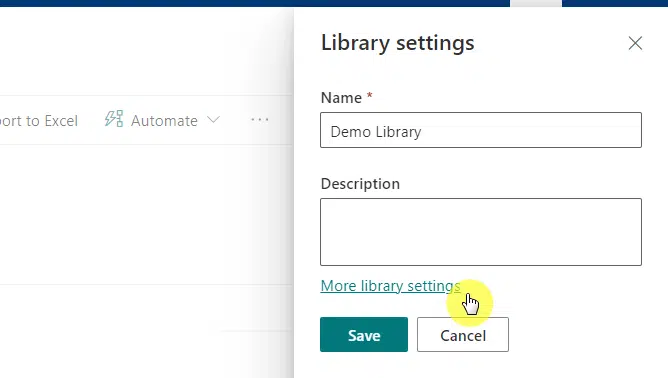
The options you will see are all basic, the name and the description of the library.
What you need to do is see “more library settings”.
Click the link:
Nice! 🙂
Step 2: Find the “permissions” option
Now that you’re in the library settings, it’s time to find the permissions option.
Under the permissions and management group, click the “permissions for this document library” option:
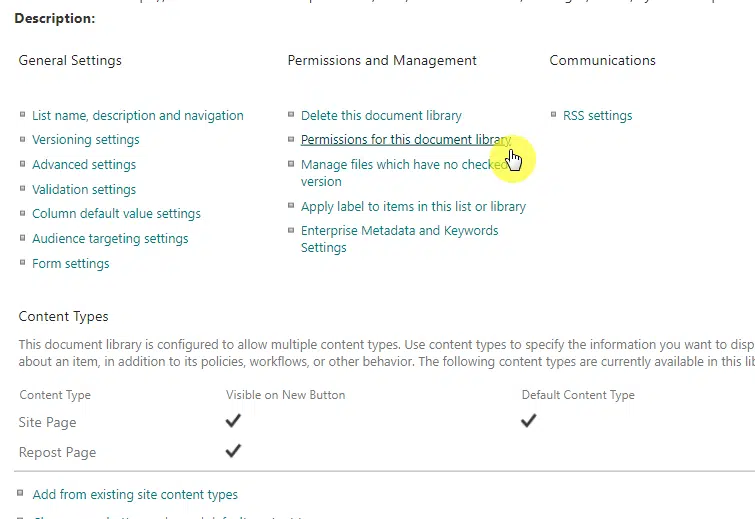
If you have a problem finding it, the group is the center column, and the option is the second in the list.
This will open the permissions management page of the document library.
👉 Related: SharePoint Permissions: Best Practices to Implement
Step 3: Grant, edit, or remove permissions
Once you’ve opened the permissions page, you can grant, remove, or edit permissions.
This is what you will see:
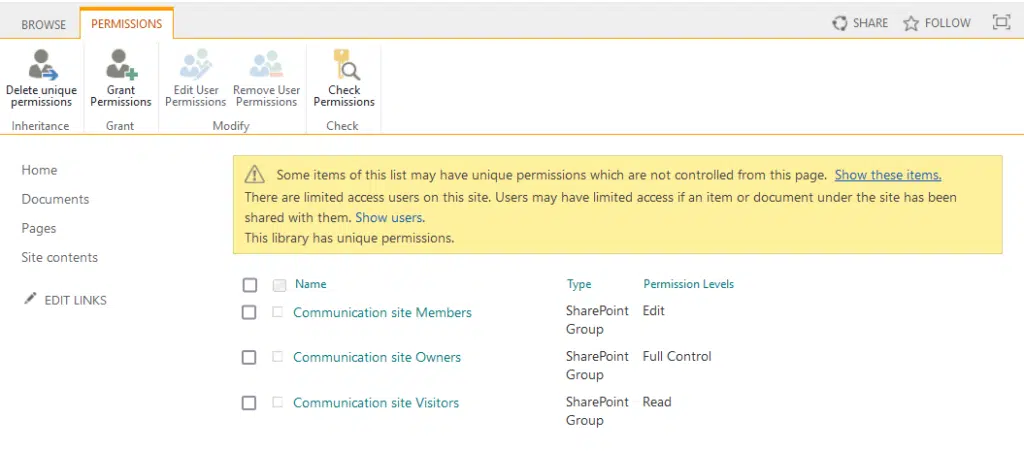
Here’s a little explanation of the options you see:
- Click “Grant Permissions” to add new users or groups.
- Select a user or group to edit their permission levels.
- Choose “Remove User Permissions” to revoke access.
Each user or group can be given different access levels, such as read, edit, or full control.
If you want to “share the library”, click on the “grant permissions” button and you will be able to add new users/groups.

There’s a button below the window for sharing files including those with unique permissions.
Items with unique permissions have different permissions than what was inherited from the SharePoint site permissions (default).
👉 Related: How to Set Unique Permissions on a SharePoint Subsite Only
Properly Setting Sharing Options
This is important since sharing options controls who can interact with your documents in your SharePoint Online site.
Regularly reviewing sharing options is a good practice to avoid unwanted access.
Do you have questions about changing the sharing options in a document library? Let me know below.
For any business-related queries or concerns, contact me through the contact form. I always reply. 🙂


