

Last Updated on July 7, 2024
Want to bulk upload files with PowerShell?
In this guide, I will walk you through the steps for bulk uploading files to SharePoint using only PowerShell.
Let’s get started.
Table of Contents:
How to Bulk Upload Files
Fortunately, bulk uploading files to SharePoint with PowerShell is straightforward.
⚠️ Note: By the way, I will be using PnP PowerShell here, so no need for web server extensions or something. 🙂
Here’s a script you can use:
# Connect to SharePoint Online
$siteUrl = "https://yoursharepointsite.sharepoint.com"
Connect-PnPOnline -Url $siteUrl -Interactive

# Parameters
$localFolder = "C:\path\to\your\files"
$libraryName = "Shared Documents"

# Upload files to SharePoint
$files = Get-ChildItem $localFolder -File
foreach ($file in $files) {
    Add-PnPFile -Path $file.FullName -Folder $libraryName
}
The script above will basically retrieve the files from the local folder.
After that, it will loop through each file and upload them to the SharePoint library.
You will see something like a file log in PowerShell:
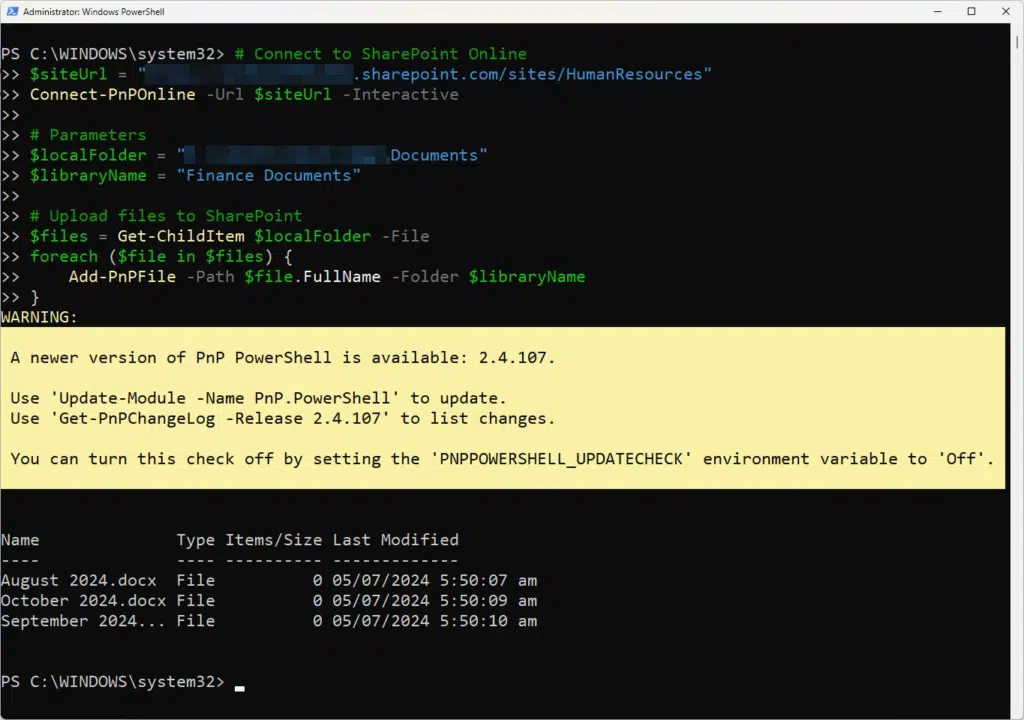
Nice! 👏
👉 Related: How to Upload Files to SharePoint Online Using PowerShell
Sign up for exclusive updates, tips, and strategies
How to Upload Files With Metadata
Not only can you upload multiple files, but you can also upload them together with their metadata. 🙂
This makes them easily searchable, and well, takes away the extra work you have to do after the upload.
Step 1: Ready the CSV
Naturally, you need to decide on the metadata to include.
For example:
- Title
- Year
- Department
- Review status
It can be as simple as this:
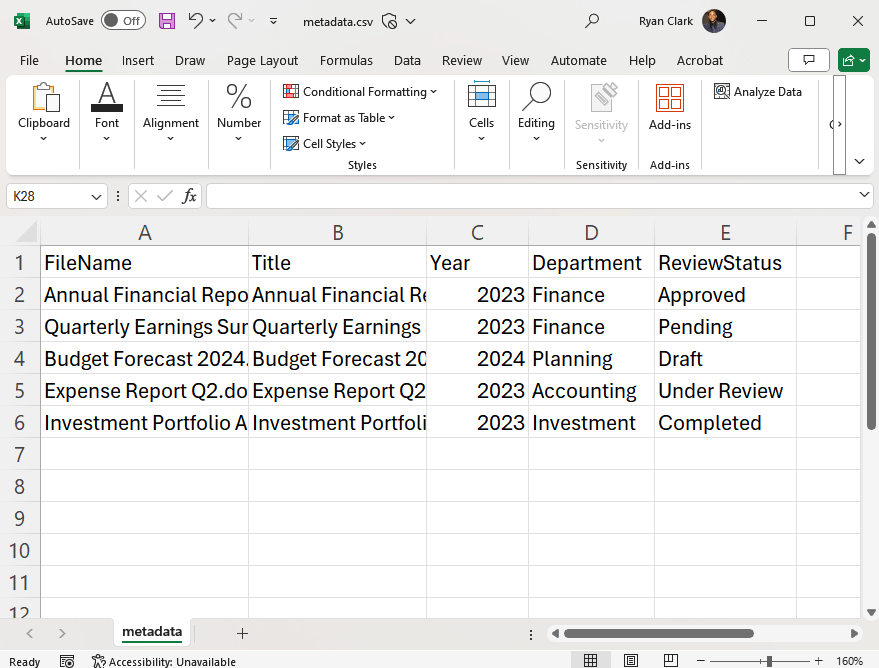
After that, prepare the SharePoint document library by creating the metadata columns.
Step 2: Upload the files
After that, all you need to do is run the script.
Here’s the PowerShell script I use to upload the files:
# Parameters
$siteUrl = "https://yoursharepointsite.sharepoint.com"
$localFolder = "C:\path\to\your\files"
$csvPath = "C:\path\to\metadata.csv"
$libraryName = "Shared Documents"

# Install PnP PowerShell if not already installed
if (!(Get-Module -ListAvailable -Name "PnP.PowerShell")) {
    Install-Module -Name "PnP.PowerShell" -Force
}

# Connect to SharePoint Online
Connect-PnPOnline -Url $siteUrl -Interactive

# Import metadata from CSV
$metadata = Import-Csv $csvPath

# Upload files and set metadata
foreach ($item in $metadata) {
    $filePath = Join-Path $localFolder $item.FileName
    Add-PnPFile -Path $filePath -Folder $libraryName -Values @{
        "Title" = $item.Title;
        "Year" = $item.Year;
        "Department" = $item.Department;
        "ReviewStatus" = $item.ReviewStatus
    }
}

# Recursively upload files from subfolders
$items = Get-ChildItem -Path $localFolder -Recurse
foreach ($item in $items) {
    if ($item.PSIsContainer) {
        # Create folder in SharePoint
        $folderPath = $libraryName + "/" + $item.FullName.Replace($localFolder, "").Replace("\", "/")
        New-PnPFolder -Name $item.Name -Folder $folderPath
    } else {
        # Upload file
        $filePath = $item.FullName
        $folderPath = $libraryName + "/" + $item.DirectoryName.Replace($localFolder, "").Replace("\", "/")
        Add-PnPFile -Path $filePath -Folder $folderPath
    }
}
⚠️ Note: Don’t forget to change the metadata part in the script according to what metadata you’re also using.
As you can see from the script, it reads the metadata from the CSV file into a PowerShell variable.
It then loops through each item in the CSV, uploads the file, and sets its metadata on the SharePoint site. 🙂
It looks like this in PowerShell:
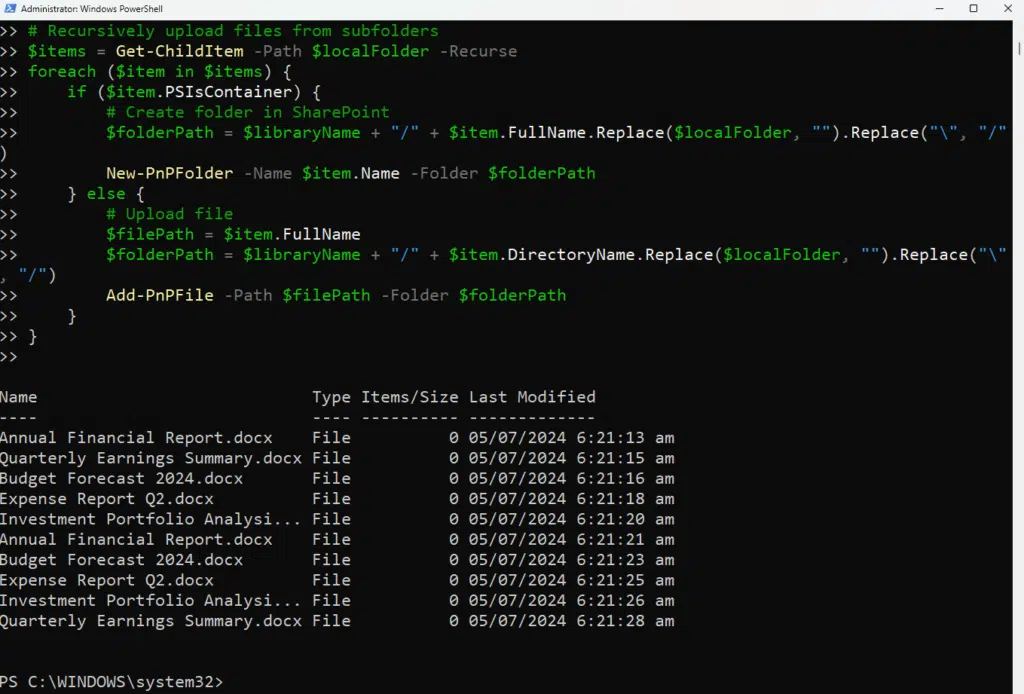
Easy! 😎
Why use PowerShell for this?
Using PowerShell for bulk uploading files to SharePoint offers several advantages.
Some examples:
- PowerShell scripts can automate the upload process to save time and effort.
- Bulk uploading through PowerShell is faster compared to manual uploads.
- Scripts make sure that all files are uploaded uniformly with the correct settings.
PowerShell is a powerful tool ideal for handling large volumes of files and metadata.
It supports advanced features like batch processing and error handling for a smooth and reliable upload process. 😎
Anyway, got any questions about bulk uploading files using PowerShell? Let me know below.
For any business-related queries or concerns, contact me through the contact form. I always reply. 🙂


Hi thx for help, but why the uplouad code tell me the next error, i am the administrator of this site.
Add-PnPFile : Acceso denegado.
En línea: 3 Carácter: 5
+ Add-PnPFile -Path $file.FullName -Folder $libraryName
+ ~~~~~~~~~~~~~~~~~~~~~~~~~~~~~~~~~~~~~~~~~~~~~~~~~~~~~
+ CategoryInfo : WriteError: (:) [Add-PnPFile], ServerUnauthorizedAccessException
+ FullyQualifiedErrorId : EXCEPTION,PnP.PowerShell.Commands.Files.AddFile
Add-PnPFile : Acceso denegado.
En línea: 3 Carácter: 5