

Last Updated on September 23, 2023
What settings will you find on the document library settings page?
In this article, I will provide an overview of the document library settings page on SharePoint Online and each item on the page.
Let’s get started.
Table of Contents:
Technically, a document library in SharePoint is a place where you can store, organize, and collaborate on files with other users.
As a SharePoint user, you will find libraries to be one of the most useful and powerful features of the platform.
Related: SharePoint Document Library Types: Differences Between Them
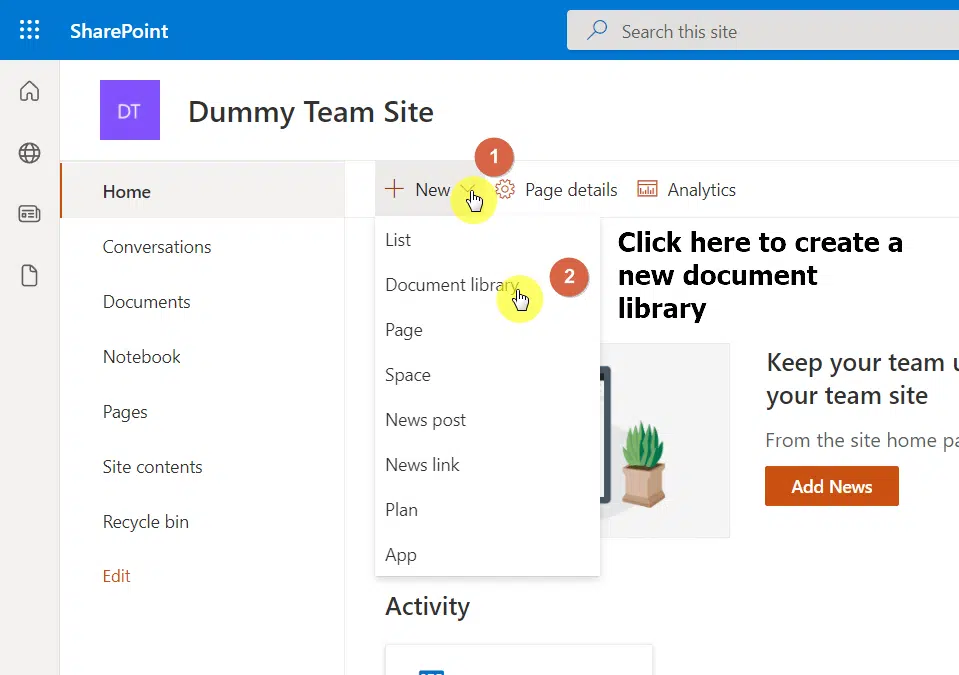
Before anything else, in case you’re new to SharePoint Online, I want to show you how you can create a library in SharePoint.
It’s a straightforward process. Here are the steps:
- Go to the site where you want to create the library.
- Click the new button and then the document library option.
From there, all you have to do is give it a name, and a description (optional), and choose if you want it to show in site navigation.
Once you have created your library, you can start uploading files or creating new ones directly within the library.
Related: How to Upload Files and Documents to a SharePoint Library
Accessing Library Settings
Now that you have a document library, it’s time to learn how to access the document library settings page.
There are two sets of steps to follow, starting with the following:
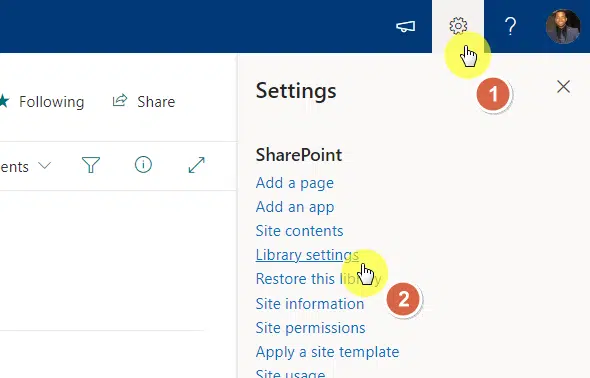
- Navigate to the target document library.
- Click the gear icon.
- Select the library settings option.
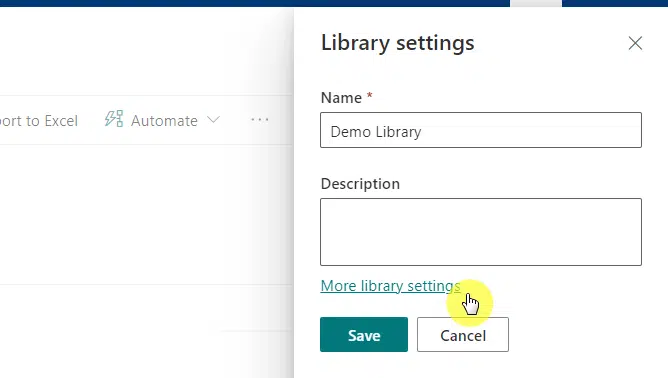
This will open a panel where you can change the name and the description.
From there, click the more library settings link:
You will then find all the document library settings here grouped into the following:
- General settings
- Permissions and management
- Communications
- Columns
- Views

Sign up for exclusive updates, tips, and strategies
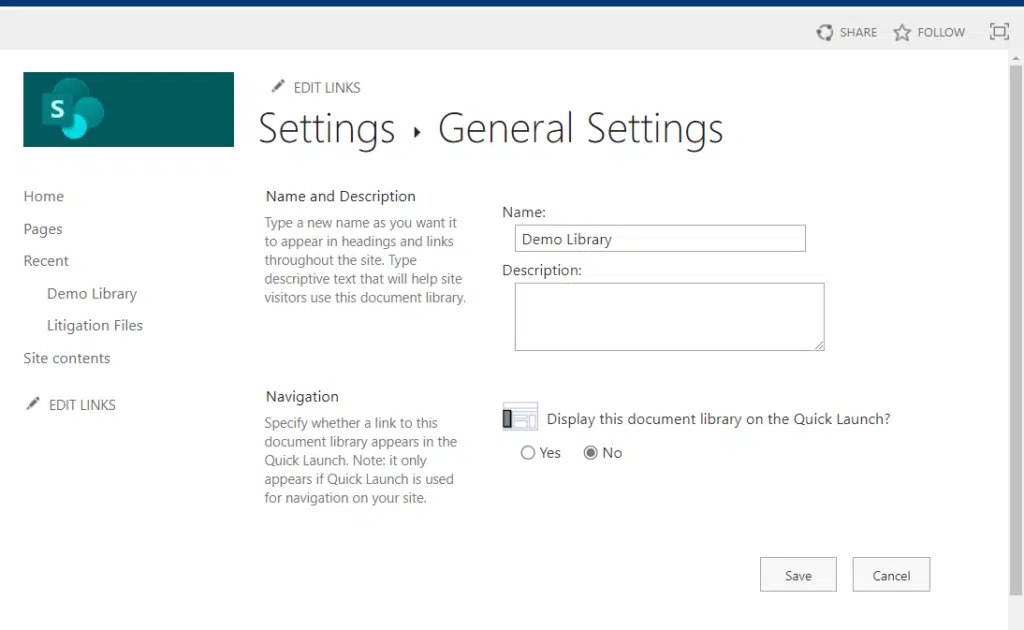
General Settings
To put it simply, general settings contain the settings for changing the basic properties of the document library.
Currently, it includes seven subgroups:
- List name, description and navigation
- Versioning settings
- Advanced settings
- Validation settings
- Column default value settings
- Audience targeting settings
- Form settings
From the name itself, this is where you can change the library name and description.
Similar to when creating a new document library, you can also choose whether or not to display the document library on the quick launch.
Versioning settings
This is the place where you can enable or disable the versioning for the library.
Enabling versioning allows you to keep track of changes made to documents and restore previous versions when needed.

Related: How to Restore a SharePoint Page (Undoing Changes Guide)
You can also set limits on the number of major versions and minor versions to keep and require content approval for submitted items.
All the settings you will find here include:
- Content approval
- Document version history
- Draft item security
- Require check out
Related: Major Version vs Minor Version: SharePoint Online Versions
Advanced settings
You will find a lot of settings in advanced settings.
It offers more options for customization, such as allowing or disallowing attachments, enabling or disabling folder creation, etc.
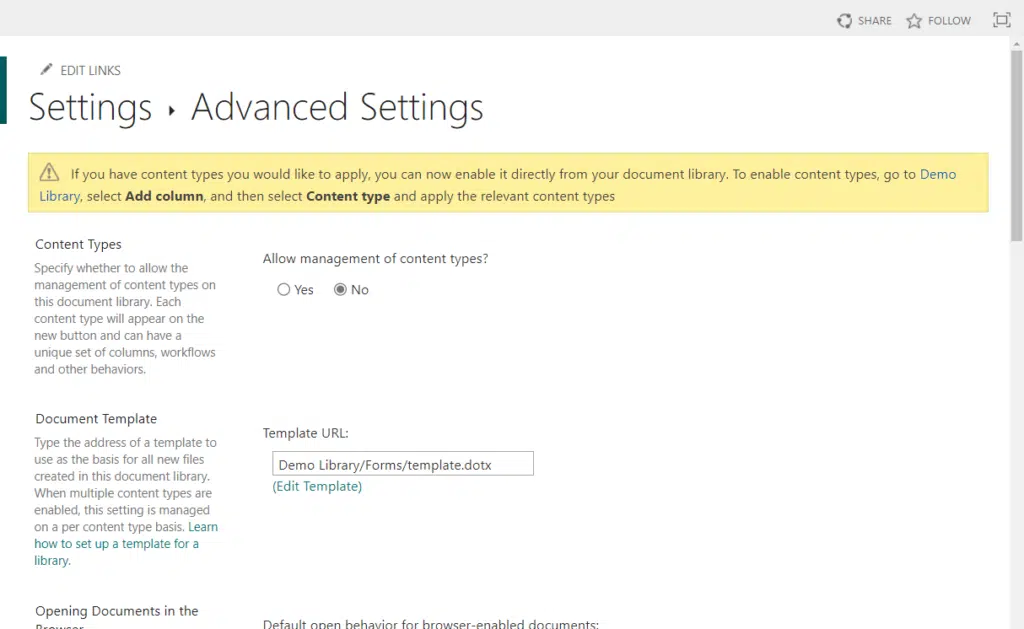
Among the settings you will find here include:
- Content types
- Document template
- Opening documents in the browser
- Folders
- Search
Validation settings
If you want to pass some kind of criteria for allowing files into the library, this is the way.
Validation settings allow you to specify rules that must be followed when adding or editing items in the library.
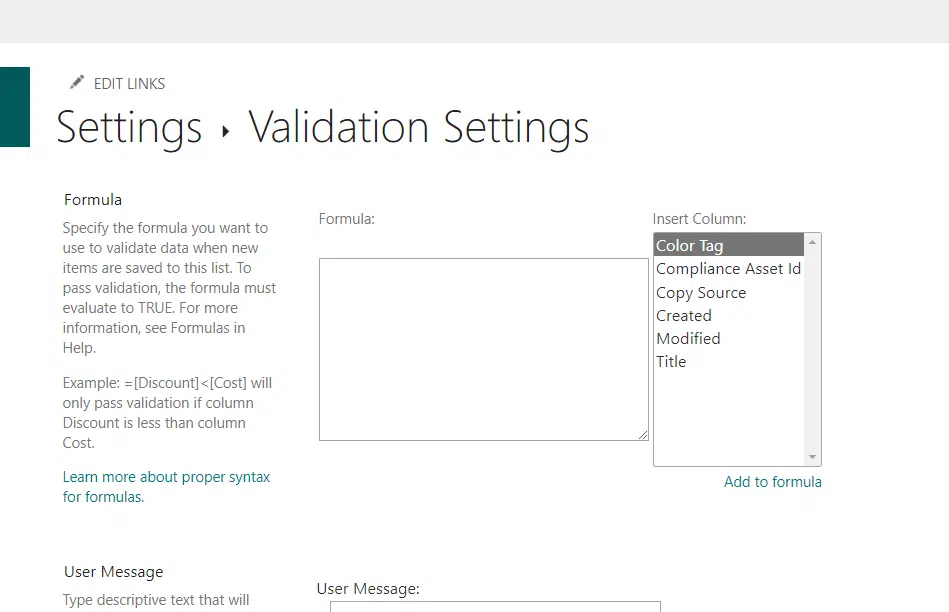
For example, you can require that a certain field be filled out or that a certain file type be uploaded.
The page contains:
- A formula field
- What columns you can use as criteria
- User message
Column default value settings
Column default value settings allow you to set default values for specific columns in the library.
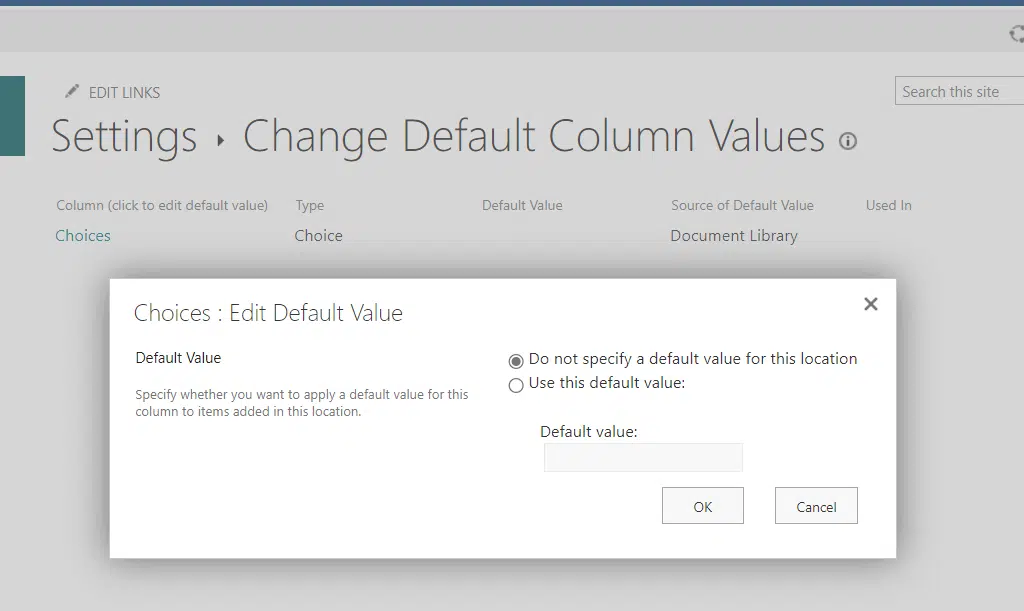
This can save time when adding new items and ensure consistency across the library.
However, you can only see columns here if you have columns in the document library where a default value can be applied.
Audience targeting settings
If you’re not familiar with this, audience targeting allows you to personalize your content to specific security groups.
With that, this page will allow you to enable the feature:
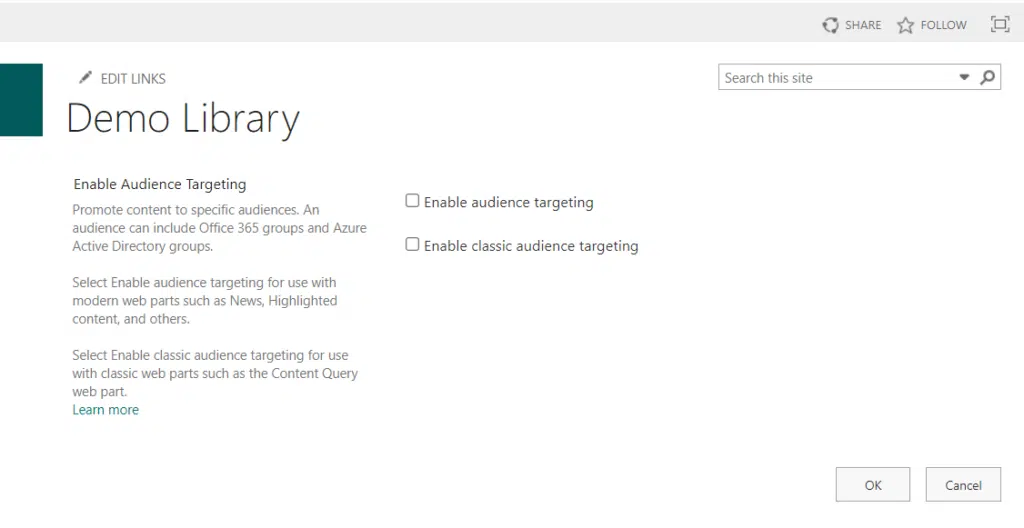
You can see from the image above that there are only two choices here:
- Enable audience targeting
- Enable classic audience targeting
This can be useful for restricting access to sensitive documents.
Related: The Ultimate Guide to SharePoint Audience Targeting
Form settings
This is mostly useful in lists. When you click the new button, you will see a form where you can enter metadata information.
Since document libraries are basically lists, this setting is still present:
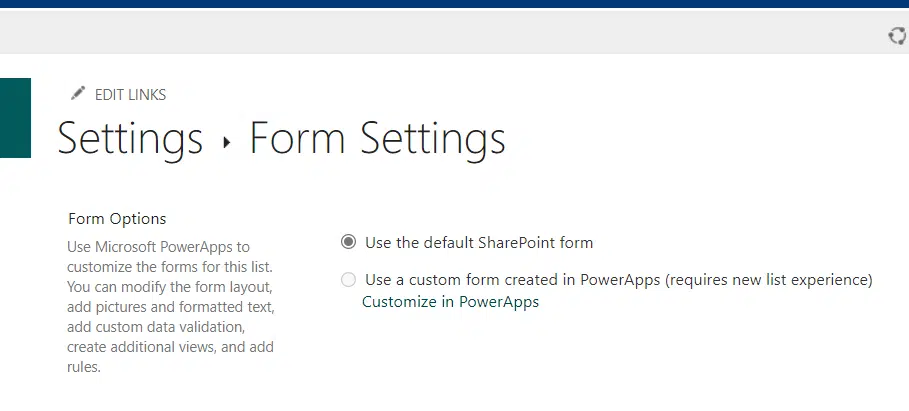
If you want to create a new form, you simply have to click the customize in PowerApps.
You can still use this though on your document library. But it’s mostly not needed (since you mostly upload documents).
Permissions and Management
Naturally, you need to be able to manage permissions and other related settings.
Many of them here can be done in the front end due to the modern experience.
Related: Modern SharePoint Document Management System Guide Tutorial
Delete this document library
If you want to delete the entire document library, you simply have to click this option.
You will then see this:
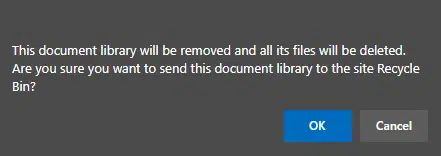
Once you confirm your decision, the system will delete the entire document library, including all the files and folders.
In case you deleted the document library accidentally, there is still a way to restore it in the recycle bin.
Related: How to Restore a Library in SharePoint Online (Quick Guide)
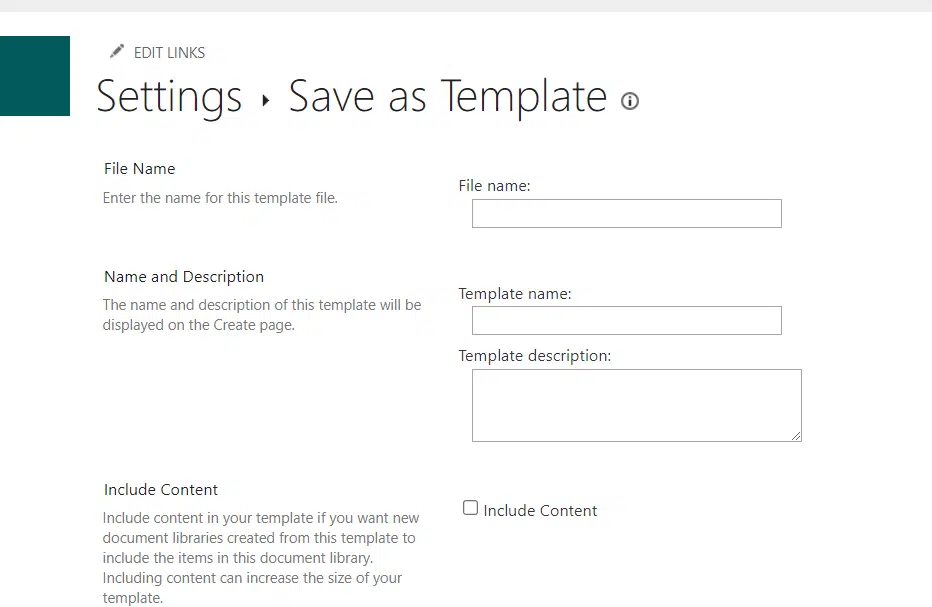
Save document library as template
This will allow you to create a template of the document library you can use to create a duplicate of the library.
You simply have to supply the file name and the template name (description and content are optional):
In the modern experience, you can create a new list from an existing list.
Unfortunately, there is no similar method when it comes to document libraries yet so this still works pretty well.
Related: Duplicate SharePoint Lists: How to Create a Custom List
Permissions for this document library
In the classic experience, this was where admins and site owners can change the document library permissions.
You will see here all the users, and their user permissions (permission levels):
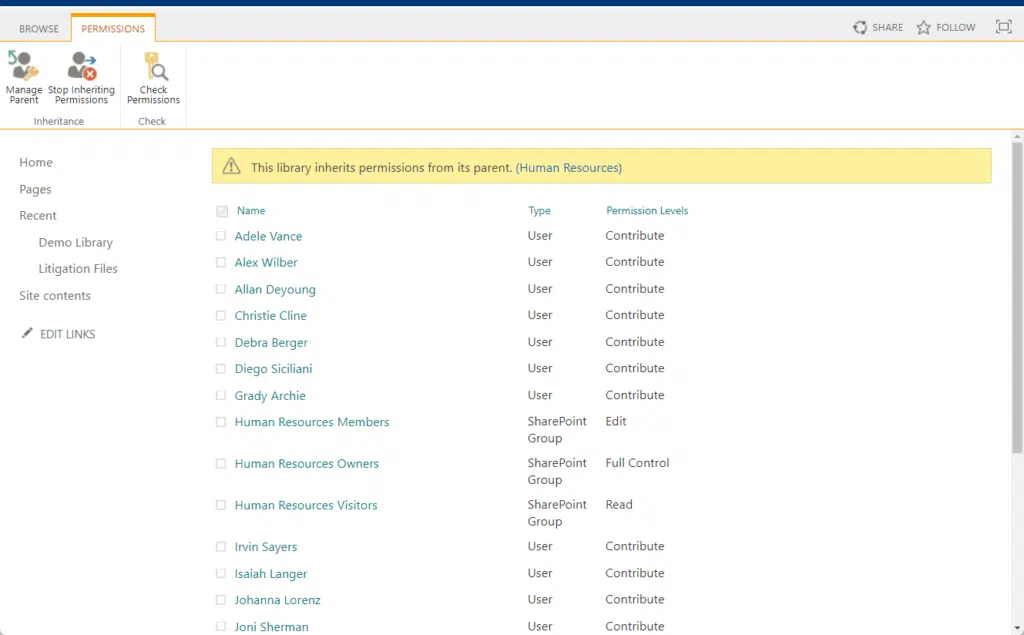
However, if you want to change document library permissions in the modern experience, I don’t recommend doing it here.
That’s because you have to stop inheriting permissions first while you can easily do it on the library page in a more granular way.
Related: SharePoint Permissions Explained: How Permission Levels Work
Manage files which have no checked in version
When users are required to check out and they forgot to check in the documents, the files are still uploaded but only visible to the uploader.
You will be able to see all those files on this page:
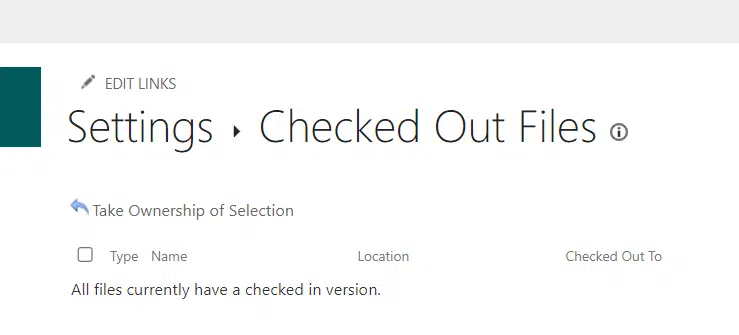
This can also happen in the classic experience when users don’t fill out the mandatory fields when uploading files.
Related: How to Force Check in a Document in SharePoint (Guide)
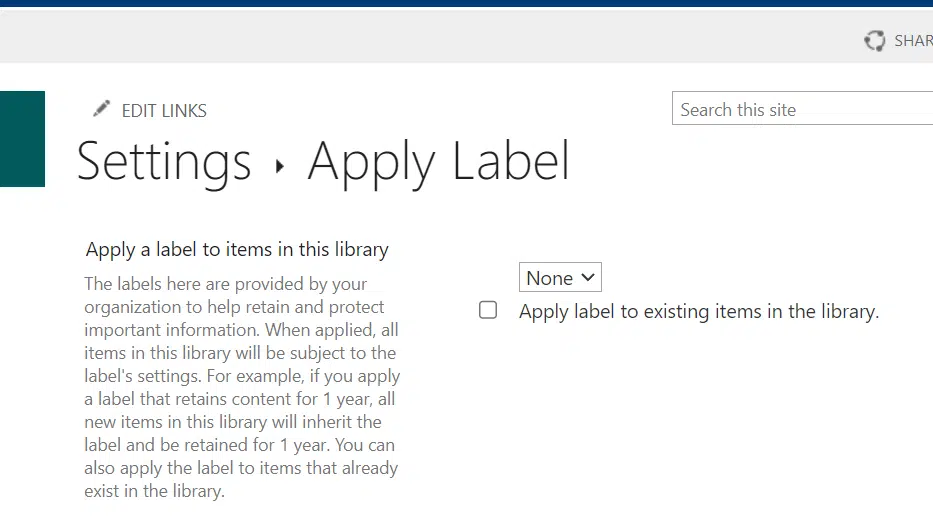
Apply label to items in this list or library
Do you want to apply retention labels to your files?
If yes, you must create the policy and the labels first and then go to this page to apply the label to the whole document library.
Related: Admin Guide: How to Create a SharePoint Retention Policy
Enterprise Metadata and Keywords Settings
Enterprise keywords basically let you tag items in the library to make searching them easier.
You will have to enable the feature first on this page:
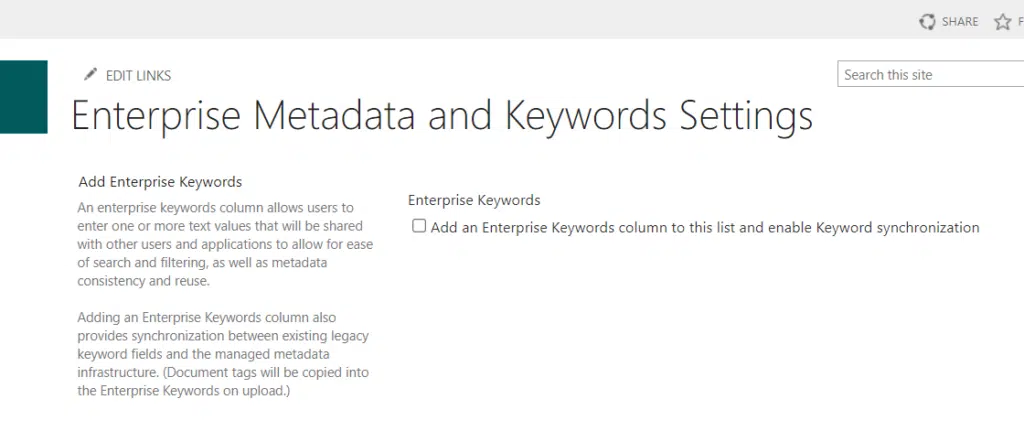
A new column will then appear where you can write keywords to tag the documents with.
Related: SharePoint Managed Property: The Ultimate Beginner’s Guide
Communications
This settings group will allow to set up of RSS feeds that will keep users informed on the changes in the document library.
RSS Settings
In SharePoint, you can set up an RSS feed for a library or list so that users can subscribe to it in their RSS reader.
Once set up, users can subscribe to it by clicking the RSS Feed button in the library or list and they can add the feed to their RSS reader.
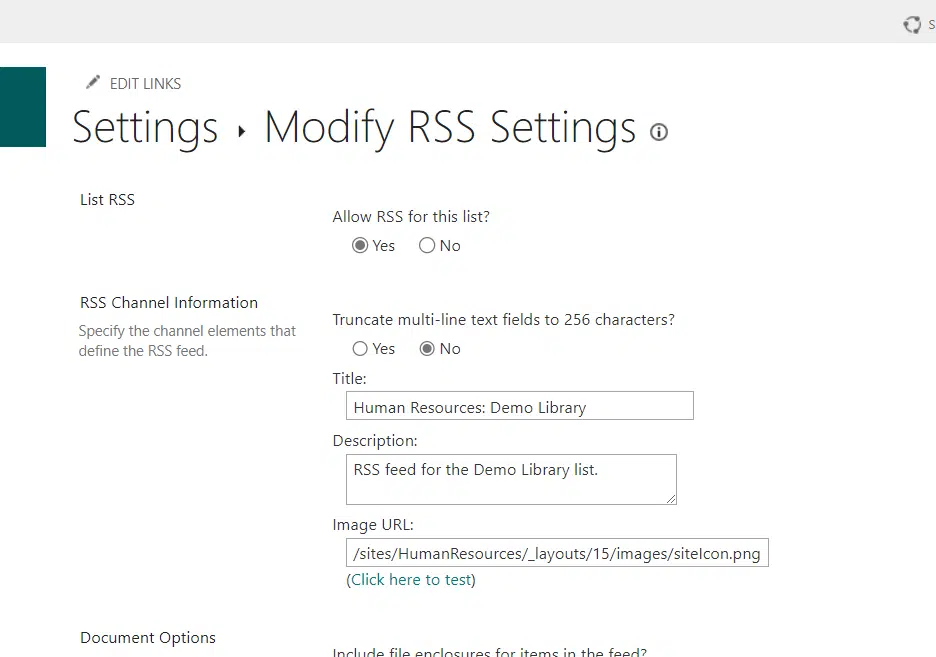
The settings on this page include:
- Allowing RSS for the list
- Specifying the channel elements included in the feed
- Configuring links and enclosure settings
- Selecting the columns to display in the RSS description
Related: How to Add a SharePoint Modern RSS Feed (Walkthrough Guide)
Columns
Columns are the building blocks of a SharePoint library.
They help organize and categorize your documents, making finding the information you need easier.
Now, there are a lot of changes you can do in the columns in the front end — but there are still a few advanced ones only available here.
Create Column
The create column is one of the most basic things you will do in SharePoint Online.
When you click on it, you will be able to create a column, configure it, and set up column validation if you want to.
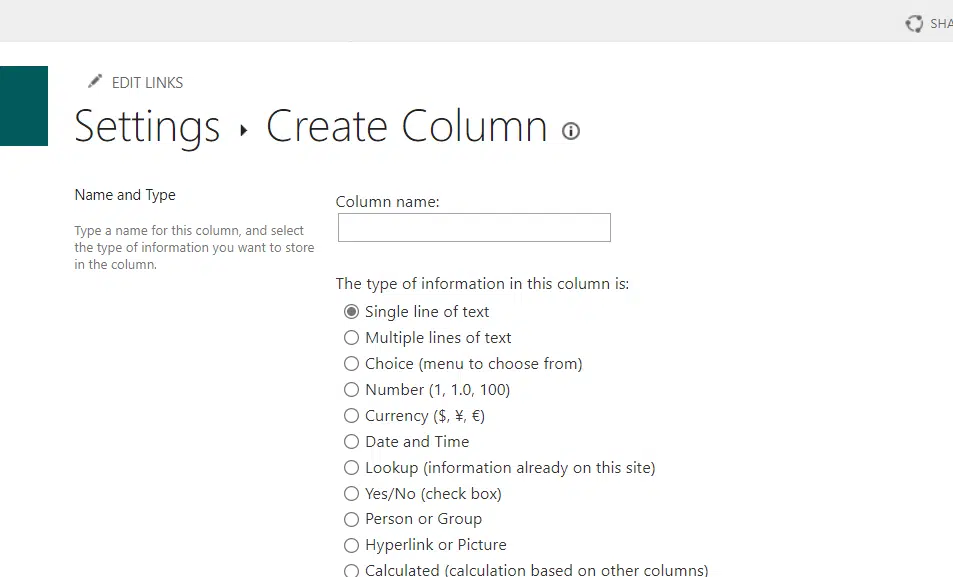
For creating a column, you don’t have to get here in the library settings since you can easily create a column in the document library.
But it’s only in library settings where you can:
- Create a calculated column
- Create an external data column
Add from Existing Site Columns
You can also add columns from existing site columns.
This option is helpful when you want to reuse columns across multiple libraries within the same site collection.
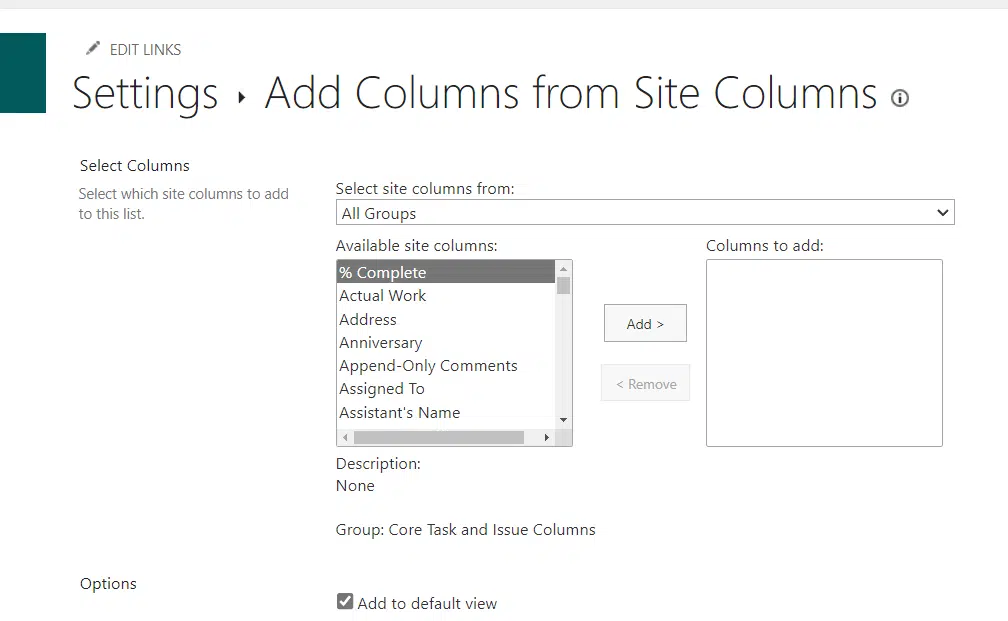
The benefit of site columns is that they provide a consistent way of categorizing and tagging content across the site collection.
Examples of use cases that benefit site columns include:
- Project management
- Document control
- Event planning
Column ordering
From the name itself, this is the place where you can change the order of the columns.
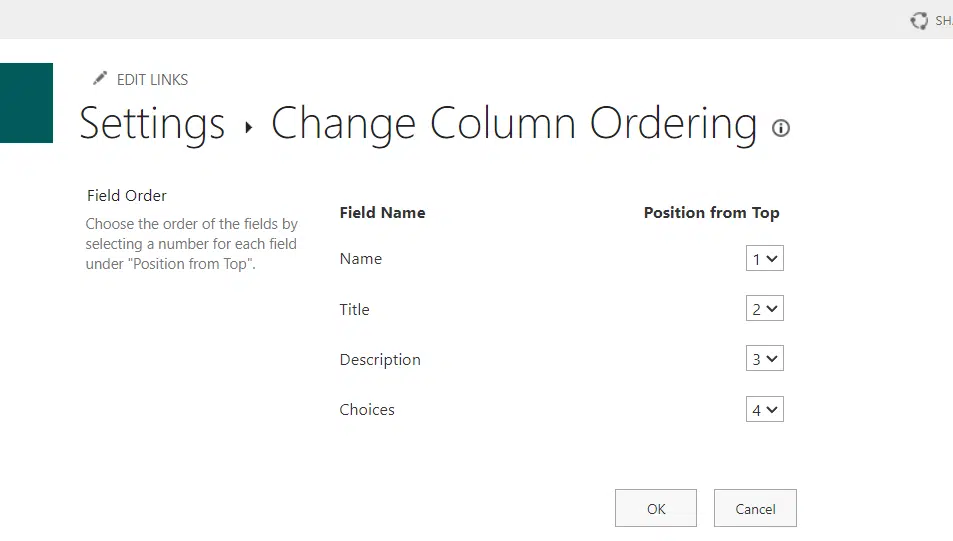
However, you can now easily change the order of the columns in the front end so this page is like a legacy of the classic experience.
Indexed Columns
Indexed columns are used to improve the performance of your SharePoint library.
By indexing a column, you can quickly filter, sort, and search for documents based on that column’s values.
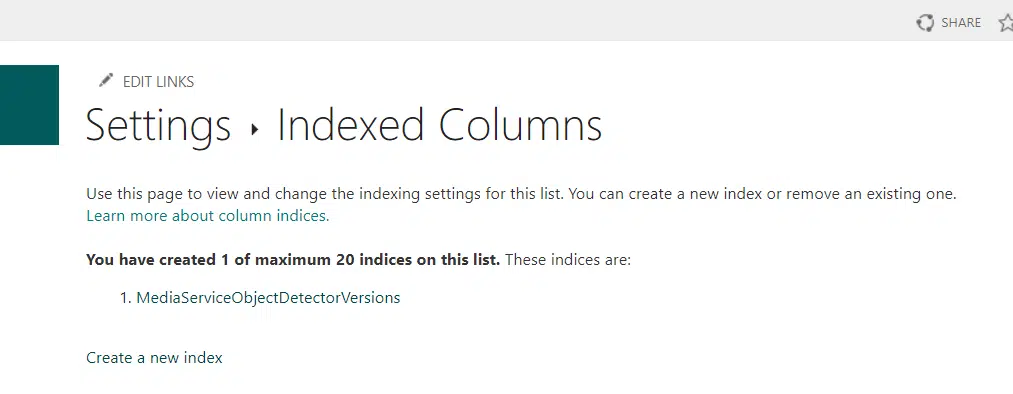
There’s not a lot here since the page basically shows you the indices on the library.
You can also click on the indices listed or create a new index.
Views
Views in SharePoint libraries are a great way to organize and customize your content.
They allow you to filter, sort, and group items based on specific criteria.
Like many of the settings here, creating and changing views can be done in the document library itself.
Create View
When you go inside the create view settings page, you will be able to choose a view type:
- Standard view
- Calendar view
- Datasheet view
- Gantt view
- Custom view in SharePoint Designer
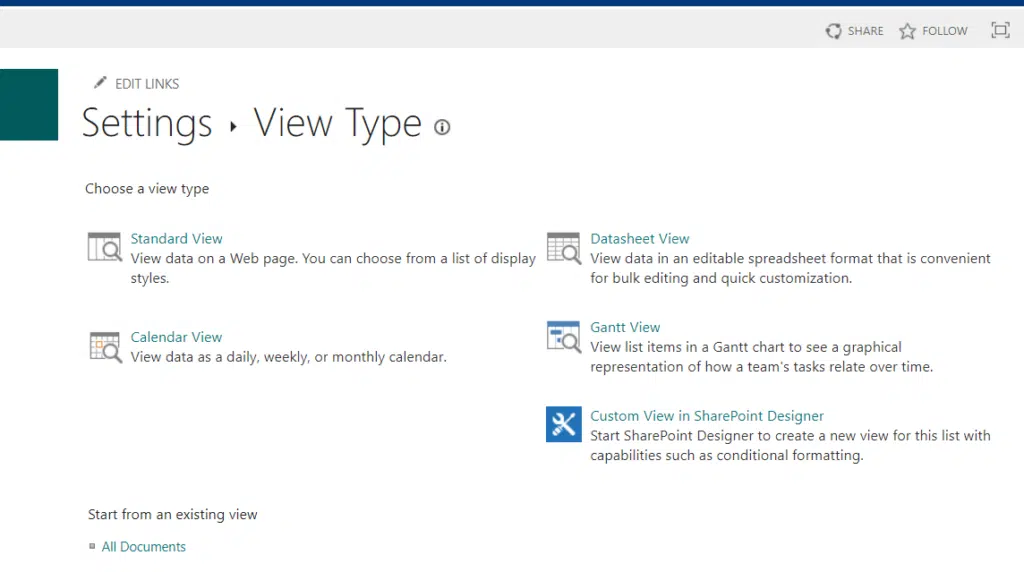
When you click on a specific type of view, you will be able to configure that view.
For example, if you create a new standard view, you will see the following settings:
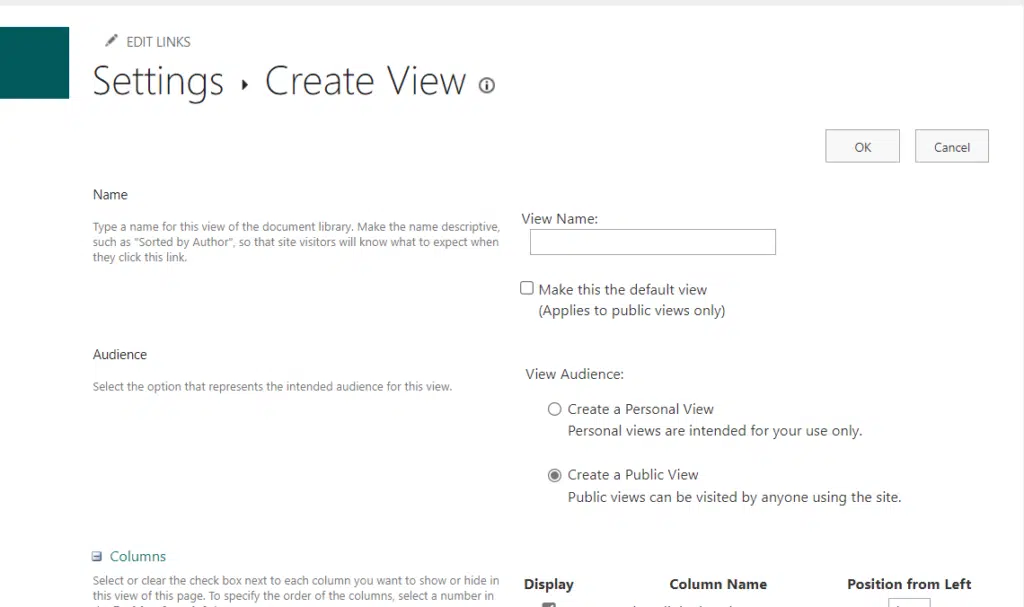
You can customize your view by selecting which columns to display, sorting the items, and applying filters.
There is also a setting to group items by specific columns to make it easier to find what you’re looking for.
Related: How to Create a SharePoint Custom List View (Quick Tutorial)
How to manage your document library settings
It might feel a little overwhelming at first. But the more you use it, the more you become familiar with the settings.
For managing the settings, I recommend ten reminders:
- Plan your structure: Before creating a new library, plan the structure carefully. Consider the types of documents you will be storing, the metadata you will need to categorize and search those documents, and the views you will need to display them effectively.
- Leverage versioning: Enable versioning to keep track of changes made to documents and lists. This provides an audit trail and allows you to revert to previous versions if necessary.
- Use site columns and content types: Make use of site columns and content types to ensure consistent metadata across your SharePoint environment. This can make it easier to search for and categorize documents.
- Manage permissions carefully: Be careful when assigning permissions to ensure that users can only access the files and folders they need. Use SharePoint groups to manage permissions rather than assigning permissions to individual users.
- Regularly review and clean up: Regularly review your library to check for outdated or irrelevant documents and metadata. Regular clean-up helps maintain the relevance and efficiency of your library.
- Train your users: Make sure that all users are trained on how to use the library and understand the importance of following the set guidelines and procedures.
- Use alerts and communication features: Utilize SharePoint’s alerts and communication features to keep your team informed about changes to documents or lists.
- Backup your data: Ensure regular backups of your SharePoint Library to avoid data loss. This can often be managed through your organization’s IT department.
- Test changes: Before implementing any significant changes, test them in a controlled environment to understand their impact.
- Stay updated: Keep up to date with SharePoint updates and new features, as these can offer enhanced functionality and security.
Got any questions about the settings page in the document library in SharePoint? Share them in the comments.
For business inquiries and concerns, kindly send a message using the form on this page and I’ll get back to you.


