

Last Updated on June 8, 2024
Are you looking for a way to ensure that the right people see the right content?
Well, that’s what the SharePoint audience targeting feature is all about. It’s a convenient feature that’s directly related to SharePoint permissions.
In this article, let’s talk about audience targeting in SharePoint. I’ll also show you how to set it up on your site, step by step.
Let’s get started.
Table of Contents:
Audience targeting is a feature that allows you to personalize your content to specific security groups. This makes sure your users see the most relevant content for them.
For example, if you have a group for admin personnel, then you can use audience targeting to make sure that those people will see content made for them.
Here’s how it works:
- By default (no audience was targeted), users will see all content and items according to their access level.
- Once you specify an audience for specific content or item, then that content or item will be shown to that audience.
Now, there are specific places you can set target audiences:
- Site lists and document libraries (including site pages)
- New web part
- Navigation links
- Quick links web part
- Highlighted content web part
Sign up for exclusive updates, tips, and strategies
It’s easy to confuse audience targeting with permission levels in SharePoint.
But there are clear differences between the two:
- The permission level of a user determines what he or she can access on your site (content, files, and even the site itself).
- Audience targeting displays the content or item to a user that belongs to a specific security group you specified.
- Even if you set up audience targeting on content or item, others can still see the content or item through search or if they know the link to it.
It’s important that you don’t think of audience targeting as a way to control security (or as a means to hide content or items from specific people).
Audience targeting is not a replacement for permissions. Specifying a user will never prevent users from seeing the content or item on the site.
If you want to learn more about permissions, I wrote an article that clearly explains how permission levels work in SharePoint.
Here are the places where can set up audience targeting:
1. Site lists and document libraries (including site pages)
To make use of audience targeting, you need to enable it first on lists and document libraries that have the items or content you want to use targeting with.
Note that this includes site pages — the place where you can configure the audience targeting for site pages.
Navigate to the site list or document library first and click on the gear icon at the upper-right corner of the page.
You will then see either “List settings” or “Library settings” on the option, depending on if you’re on a list or a library.
After that, find “Audience targeting settings” under the “General Settings” column. Once you do, click on it to proceed.
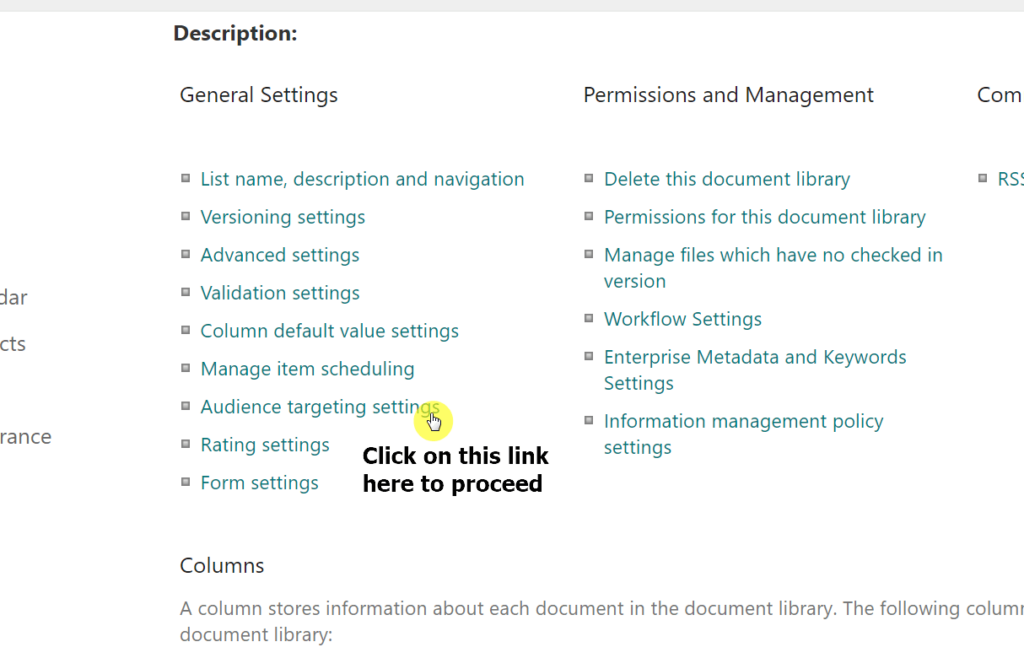
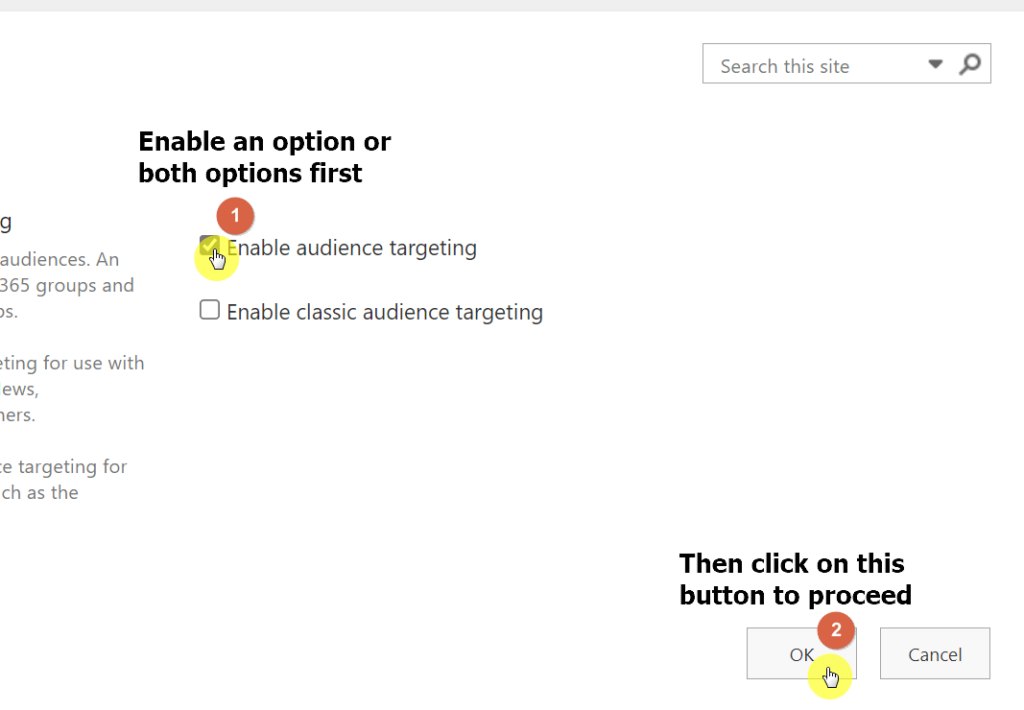
You will then see two settings you can enable on the next page:
- Check the “Enable audience targeting” option if you want to use audience targeting with modern web parts.
- Check the “Enable classic audience targeting” option if you want to use audience targeting with classic web parts.
Note that you can always select both as you see fit. There’s no harm if you enable both options.
For this article, since what we will be using are all modern web parts, then let’s select the first option only.
Once you made your choice, click on the “OK” button.
After enabling the audience targeting feature on a list or library, you will then see a new column named “Audience” where you can set the audience.
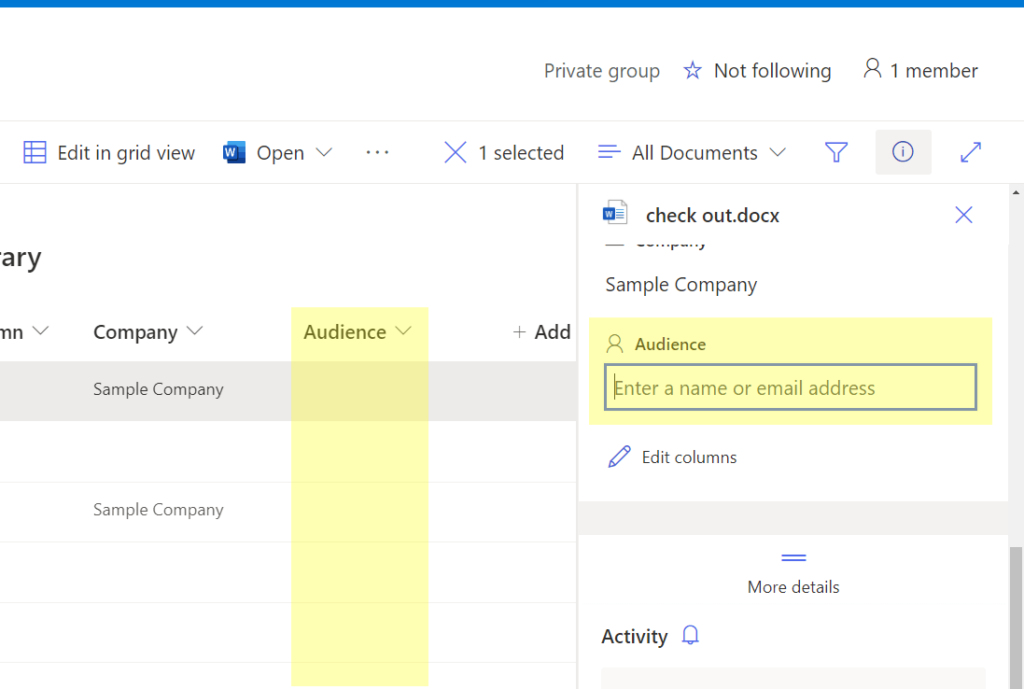
Though it only states there to enter a name or email address, you can enter a security or Microsoft 365 group in the column.
2. News web part
To enable audience targeting on the news web part, you must first configure audience targeting on the site pages.
It’s a requirement to configure audience targeting on the site pages first since news or posts are stored in the site pages library.
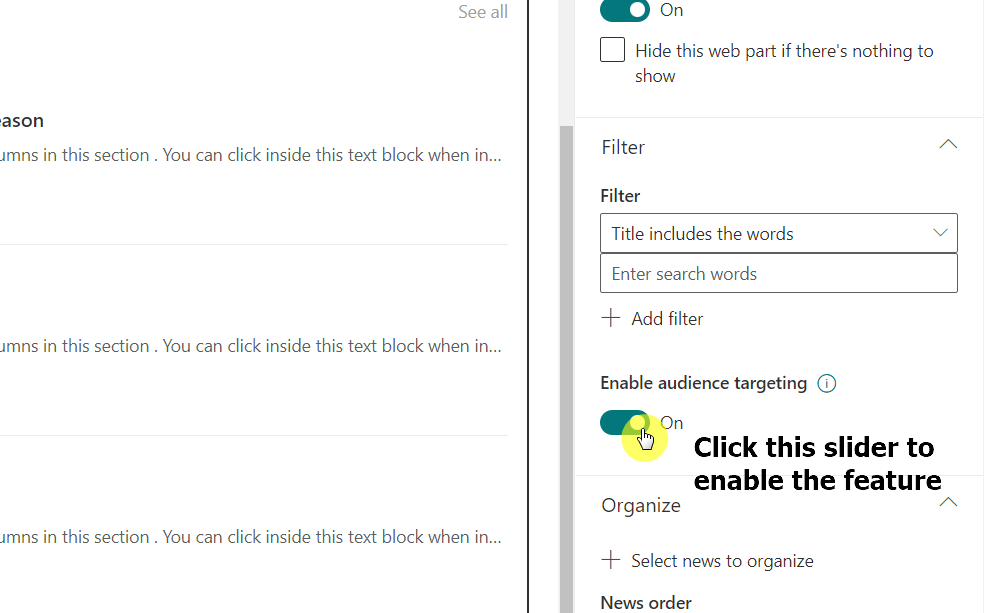
Once you do, go back to your news web part and click on the pencil icon (edit icon).
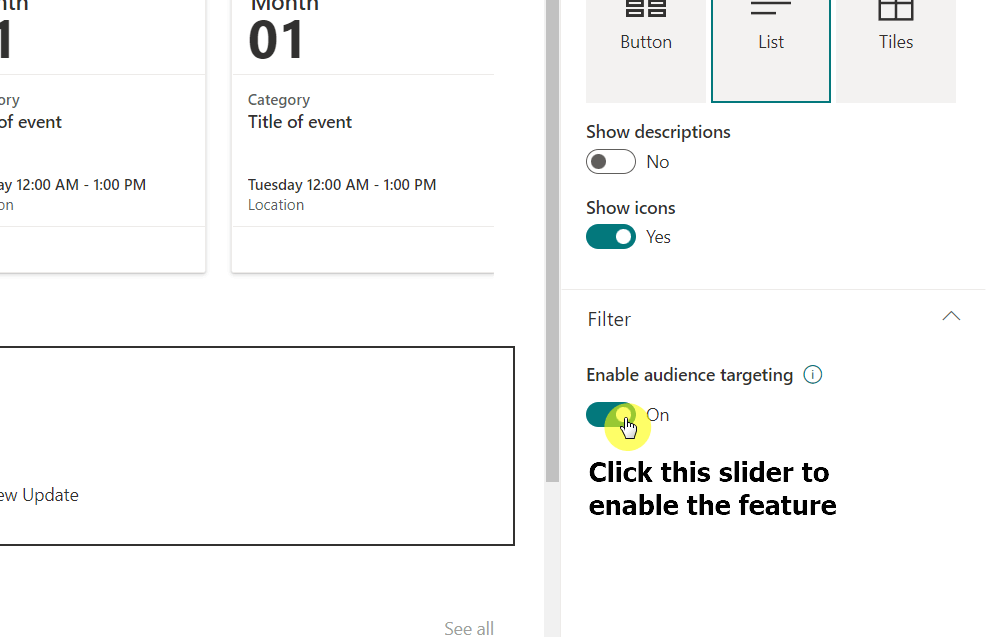
Then, find the “Enable audience targeting” option and click on the slider to “On”.
3. Quick links web part
You can also do the same on the quick links web part, though there’s an additional step you have to do.
Click on the pencil icon (edit icon) of the quick links web part.
Then, find the “Enable audience targeting” option and click on the slider to “On”.
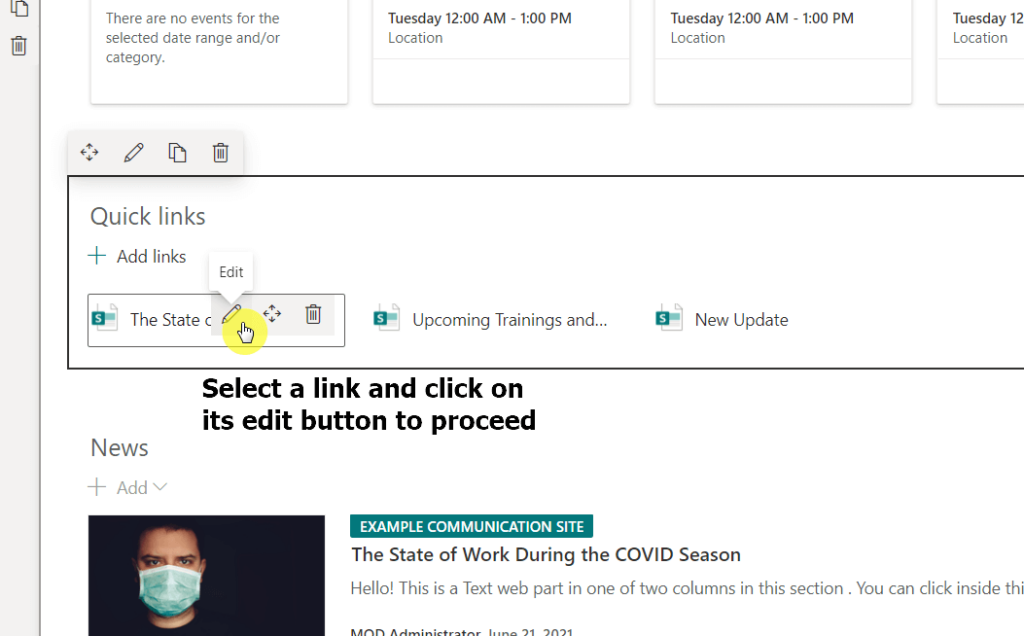
After that, go back to the web part and click on a link that you want to set audience targeting with. You will then see an “Edit” icon you can click.
On the right panel, you will see a form where you can specify the audiences to target.
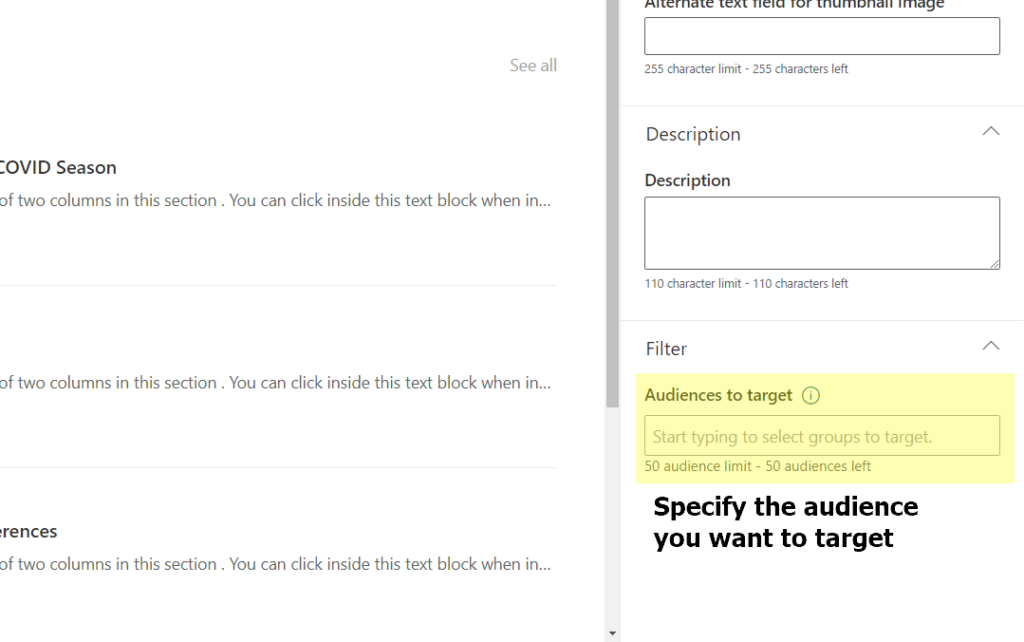
Note that if you leave this form blank, the link will be shown to everyone who has access to the site. In addition, you can select up to 50 groups (only) to target.
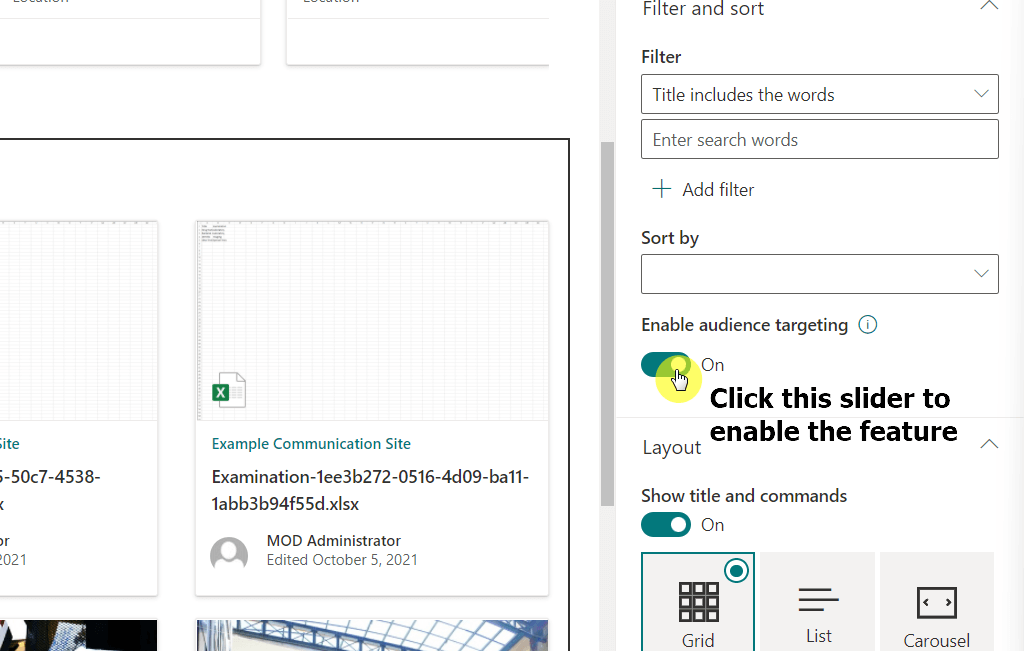
4. Highlighted content web part
The highlighted content web part is a popular web part that many advanced users like to use in the pages because of the many configurations it allows.
Through the HCWP element, you can show information on the page and make sure of the document library as the source.
Note that you need to have enabled the audience targeting first on the target document library and configured it already.
Anyways, to target an audience with the highlighted content web part, click on the pencil icon (edit icon) of the web part.
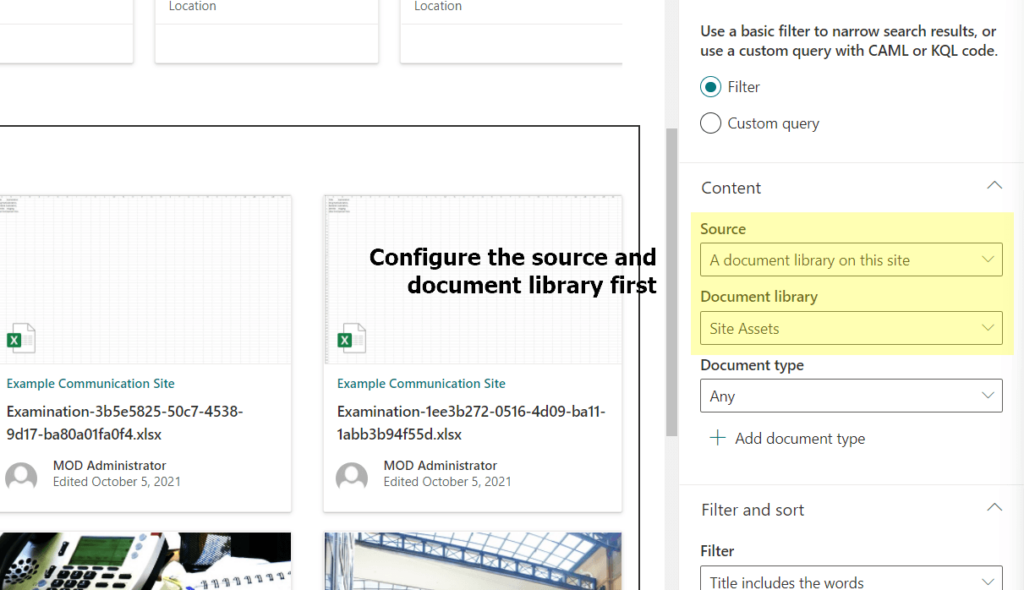
Whether you use the filter or custom query method, make sure you set the source and document library first.
Then, scroll down until you find the “Enable audience targeting” option and click on the slider to “On”.
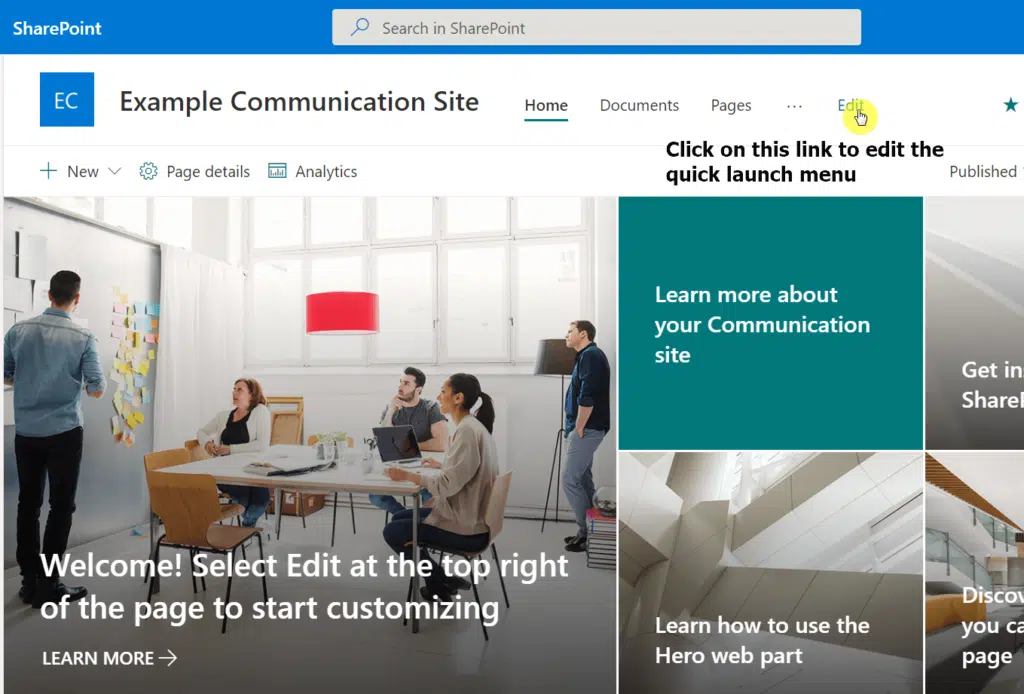
Both team and communication sites have a quick launch feature or a navigation panel (though where it’s located depends on the site type).
As you may already know, you can edit it (move the links up and down, add new links, promote or demote pages, etc.).
To do so, simply click on the “Edit” button.
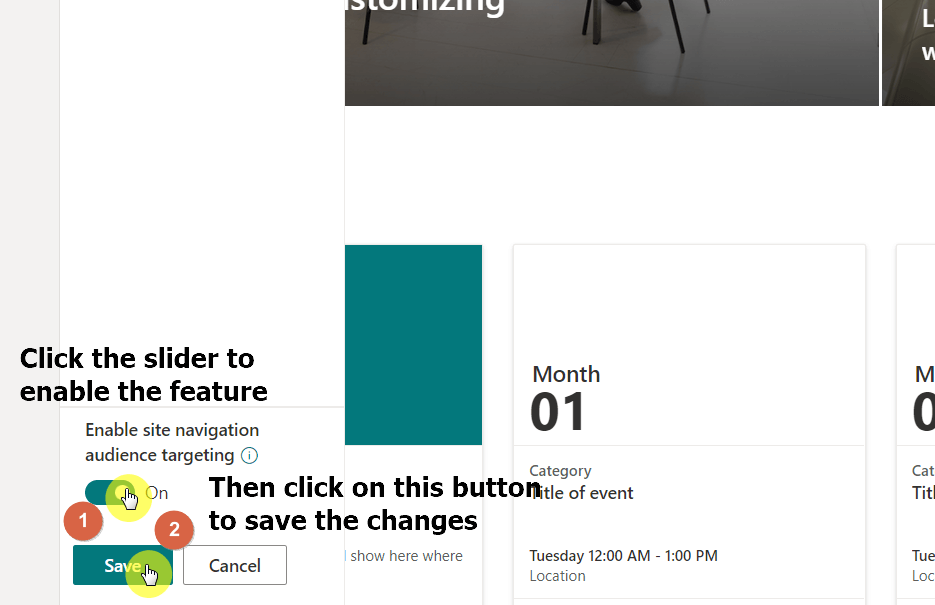
At the bottom of the edit navigation panel, you will see the option to enable the audience targeting feature.
Simply click the slider to “On” and click on the “Save” button.
If you want to read more, I wrote an article about the quick launch feature in SharePoint, including a method to hide it from the users.
Setting up audience targeting on your site
Targeting an audience can help especially if you want to personalize the expertise of your site visitors and show them the content that they need.
Fortunately, it’s quite easy to do as you have seen from the steps I showed earlier. Don’t forget that you must enable the feature on the list or library first.
Do you have some questions about audience targeting? If so, kindly leave your comment below, and let’s talk about it.
For inquiries and concerns, please send me a message through my contact page and I’ll get back to you as soon as possible.


Why can I see the SPO groups under the audience column on my libraries but don’t get them on my navigation ? At the navigation it seems I only get M365 Groups
Currently you can only use Azure Active Directory groups (including security groups, Microsoft 365 groups, and AAD dynamic groups) to target audiences.
See here for more details.
I get that audience targeting in SPO is mostly for navigational purposes, but what if I have static content on a page, that I want to display to different target audiences? Say I have a textbox, that I only want certain people to see. That doesn’t seem possible today, but do you know of any workarounds or 3rd party solutions for such a use case?
Hi Allan – You could build a SPFX webpart to handle this.
For SharePoint Online, you can create Audiences in the User Profiles section.
Can these created Audiences be used with the above Web parts?
Great question. Only sites that use classic templates can be customized based on audience.
How do I set target audiences on List Views or at least prevent the user from toggling to them? Turning on Metadata Navigation and Configuring Views for this location no longer works.
Could create a permission level that prevents view creation for end-users. You could then have public views that have the specific data you need to showcase and then private views where needed. The only other thing I can think of is using JSON or SPFx to manipulate the front end but not sure if that would meet your requirements.
Is it possible to filter the user selection that will appear in audience targeting?
Guest users in a group cannot see client side targeting.
This is correct.
Hi
Is it possible to read all audience targeting settings, including IDs and groups, from a site using PowerShell, so one can see which groups are being used where?