

Last Updated on December 13, 2023
Found the App Step in SharePoint Designer Workflow grayed out?
The good news is that it’s quite easy to enable App Step in SharePoint. The only thing you need is the Workflow App ID.
In this guide, I’ll show you how to enable App Step in SharePoint to elevate workflow permissions step-by-step.
Let’s get started.
Table of Contents:
Have you created a SharePoint 2013 workflow?
If you did, then you must have encountered some problems when a user who started the workflow doesn’t have the right permissions.
That’s understandable. With SharePoint 2013 workflow, the initiator must have the right permissions to complete the actions in the workflow.
To remedy this, you can provide the workflow with its own permission set so it doesn’t have to rely on the user’s permission level.
The problem is that the App Step button in the SharePoint Designer Workflow is grayed out:
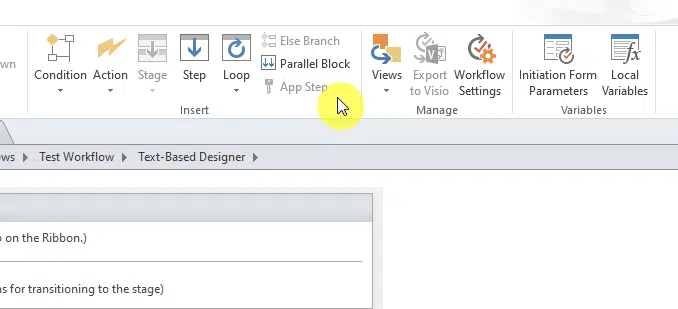
App Step is an action that will give the actions in SharePoint Designer Workflows elevated permissions.
Through this, the user that initiated the workflow doesn’t need to have the right permissions for the workflow actions.
Unfortunately, App Step is disabled by default in any site collections within the tenant. You will have to manually activate it.
This is done for security purposes.
Note: For more on security, go here: SharePoint Security: The Best Practices Guide.
Sign up for exclusive updates, tips, and strategies
Follow the three short steps I explained below. The steps are easy. But they will take you to different places in SharePoint.
Before you do the first step, take note of the following:
- The steps will require you to be either a site owner or a site collection administrator.
- SharePoint 2010 workflows aren’t supported in App Step.
- App Step gives a workflow full control permission.
Step #1: Activate workflows can use app permissions
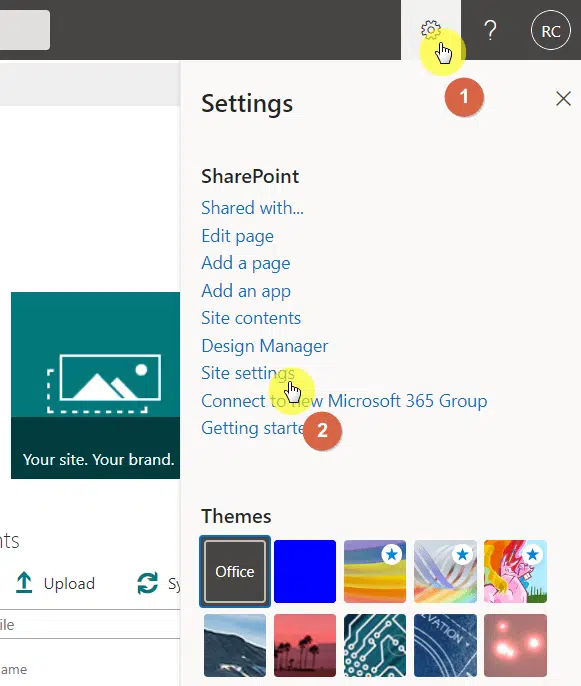
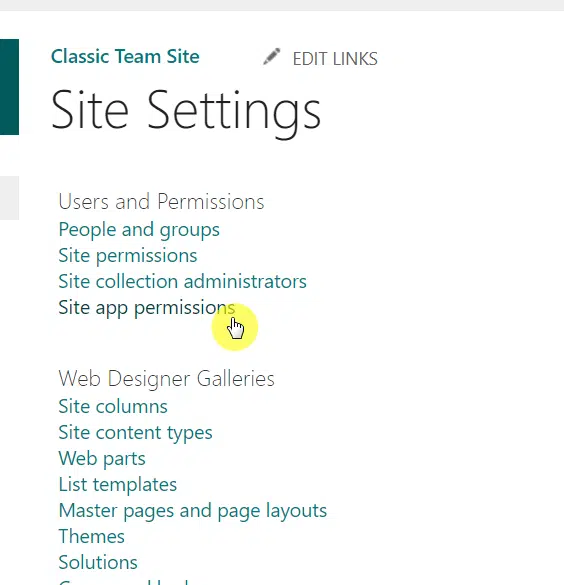
The first thing to do is to go to the site settings page:
- Click the gear icon on the upper right side
- Select site settings from the options
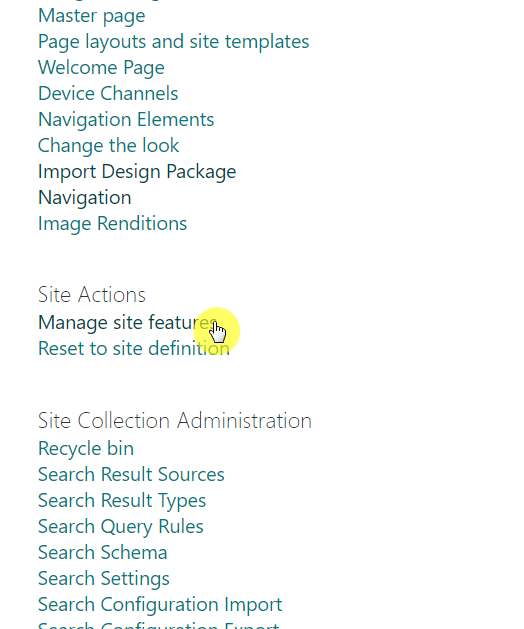
From there, click the manage site features button below site actions:
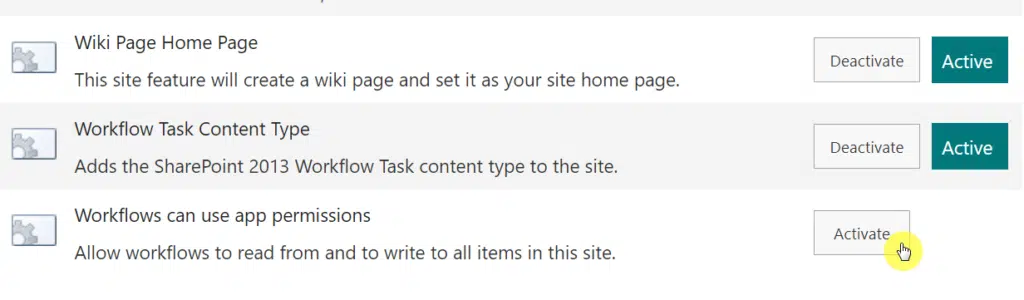
Then do these steps:
- Scroll down to the bottom
- Find the entry so workflows can use app permission
- Click the activate button
Step #2: Get the Workflow App ID
For this next part, you will have to go back to the site settings page:
- Navigate back to the site settings page
- Click site app permissions below users and permissions
This page lists all the apps installed on the site and their app identifier.
What you need to do here is only copy a portion of the identifier for workflow in SharePoint. Copy the characters between the last | symbol and the @ symbol.
For example:
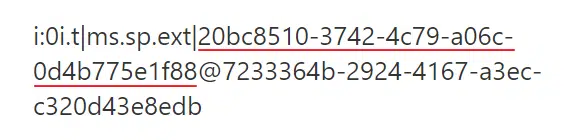
In the sample above, the only characters you have to copy are the underlined ones:
20bc8510-3742-4c79-a06c-0d4b775e1f88Step #3: Provide Workflow App permission
This last step is fairly easy.
Navigate first to this page using your own site link:
http://tenant.sharepoint.com/sites/sitename/_layouts/15/appinv.aspxOn the page:
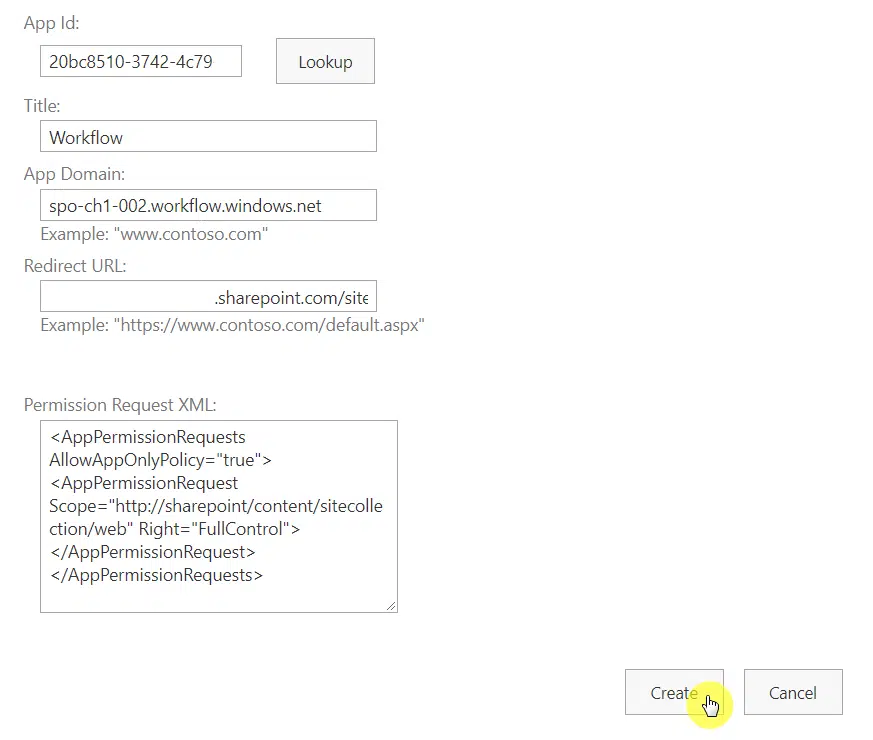
- Paste the App ID on the right field
- Click the lookup button

After you click the lookup button, the system will automatically fill out the other fields except for the permission request part.
For that, you need to paste this code:
<AppPermissionRequests AllowAppOnlyPolicy="true">
<AppPermissionRequest Scope="http://sharepoint/content/sitecollection/web" Right="FullControl">
</AppPermissionRequest></AppPermissionRequests>
Then click the create button:
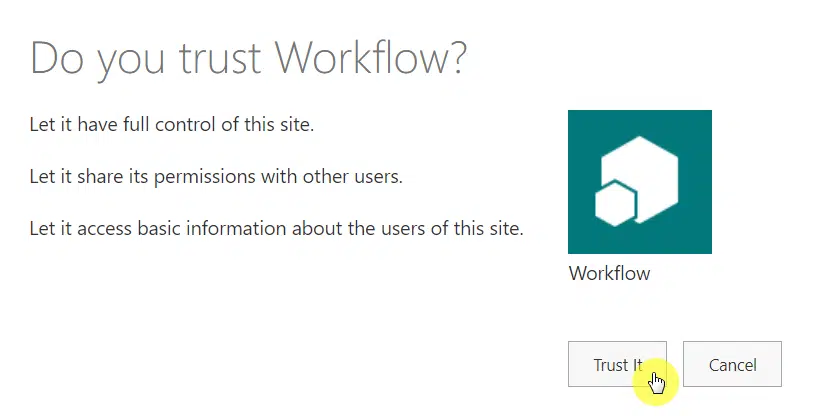
Finally, the system will confirm if you trust Workflow.
Click the trust it button to proceed:
If you have done everything that I explained above, all you have to do now is to restart SharePoint Designer.
You can now use App Step so the actions of the workflow can read from and write to all items on the site.
If App Step is still disabled, you might need to uncheck the automatic update option in the workflow settings.
This will ensure that the current user will not need to have edit permission on the list to configure the SharePoint 2013 workflow.
I will create a SharePoint Designer tutorial soon so I can shed more light on this amazing tool (will update this line when it’s live).
Did you encounter any problems or errors? Let me know in the comments.
If you need professional help, please send me a message using the contact form on this page.


