

Last Updated on December 23, 2024
Need to add a user?
In this guide, I will show you different methods of adding users to SharePoint Online.
Let’s get started.
Table of Contents:
What happens when you add a user?
Basically, when you add someone to SharePoint, several things happen so they can access the site or resources.
Here’s a summary of it:
- The user gets an invitation
- User permissions are granted
- The user appears in the site settings
- Audit logs are updated
Once the user accepts the invitation, they’re automatically granted access, so make to assign the right permissions.
On the other hand, you can always kick them out of the site, but there’s still some risk if you invite the wrong person.
👉 Related: User Information List in SharePoint Online (Quick Guide)
Sign up for exclusive updates, tips, and strategies
What’s nice here is that there are several ways to add someone to SharePoint Online.
Here’s how to do each one:
Although we’re talking here about the admin center, this process is still straightforward.
It’s a great way to manage permissions across multiple sites as you won’t need to hop on each site.
Go to the SharePoint admin center and then to the active sites page, which looks like this:
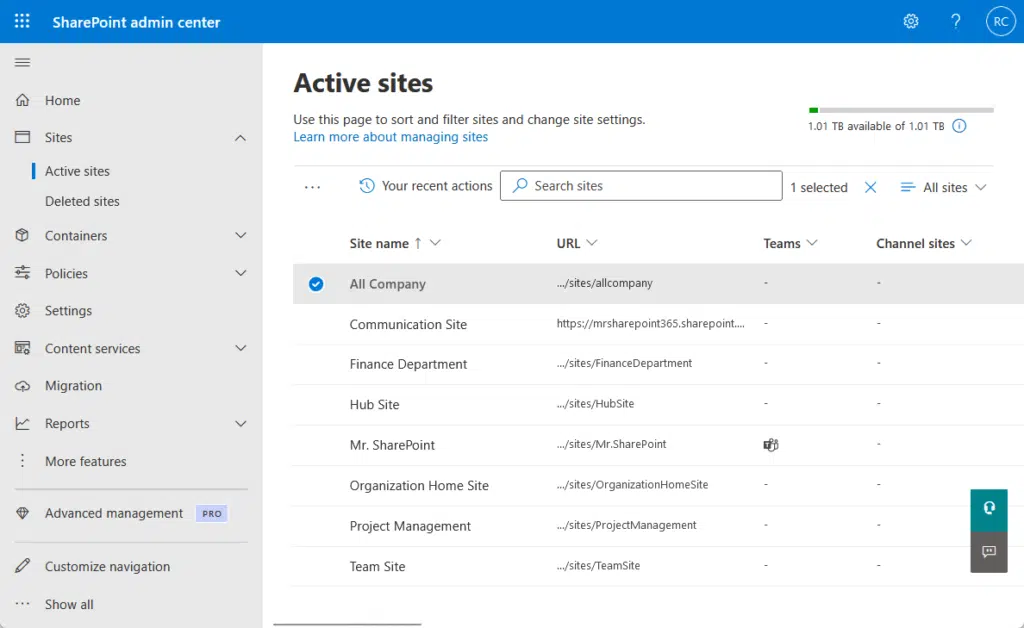
Click on the site where you want to add the user to.
It will open the general settings of the site.
From there, go to the membership tab and to the role where you want to add the user:
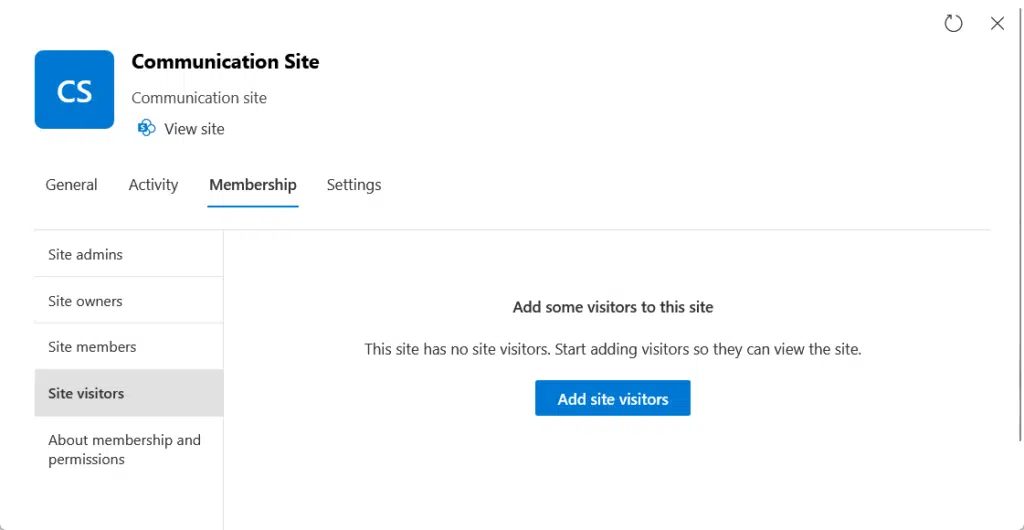
In my example above, I intentionally chose “site visitors” since it’s the safest role to give to a user.
But if the user needs to collaborate, then “site members” would be the best role to give.
From there, all you need to do is click on the “Add site visitor” button and enter the name or email address.
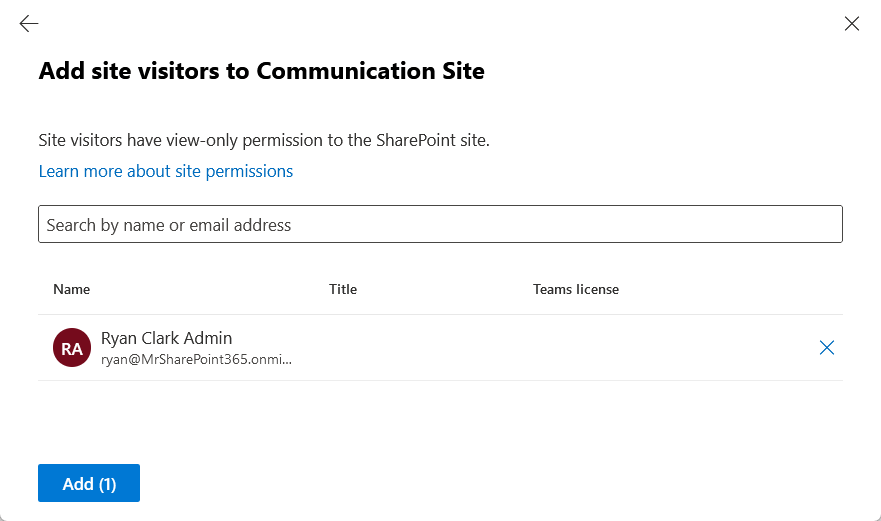
Click the add button once again and the invitation will then be sent.
👉 Related: SharePoint Groups & Permissions Explained: How Permission Levels Work
It’s only natural that you can add someone to SharePoint from a site.
For team sites, the easiest way to do this is to click on the member count in the top-right corner of the site:
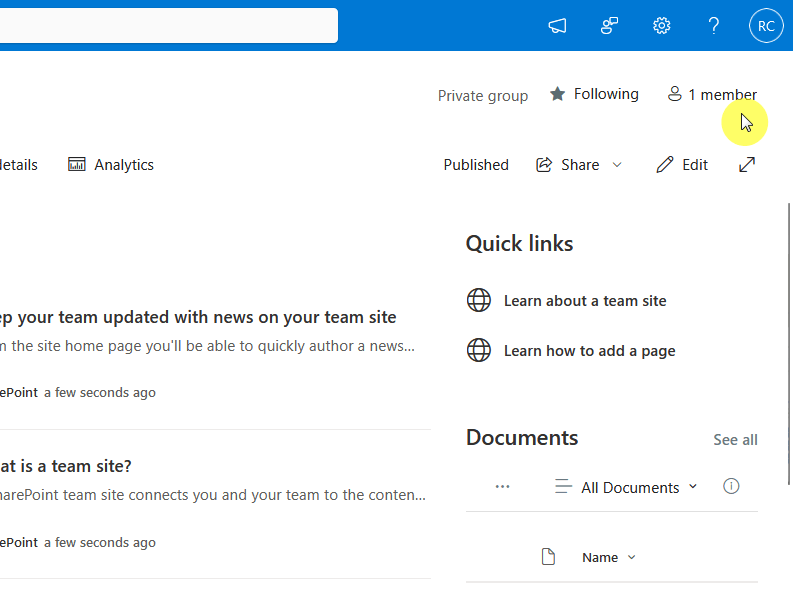
This will open the group membership page in the side panel.
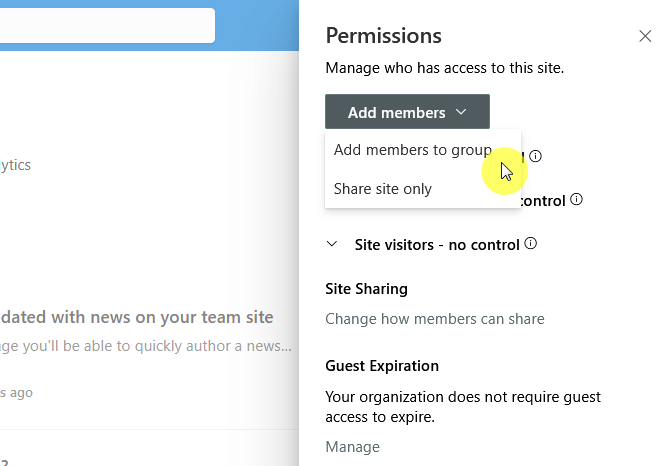
But you can also get on this page by clicking on the gear icon, click site permissions then add members to group.
Like this:
The page you’re on will give you a list of all the team or SharePoint group members and owners on the site.
If you’re a site owner, you can also change the roles of each user as well as remove them from the site or group.
To add someone, click on the add members button:
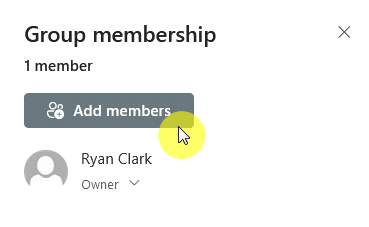
On the next page, you will be able to enter the name of the user you want to add and their role on the site.
For communication sites, click on the gear icon and then site permissions, then click on the share site button:
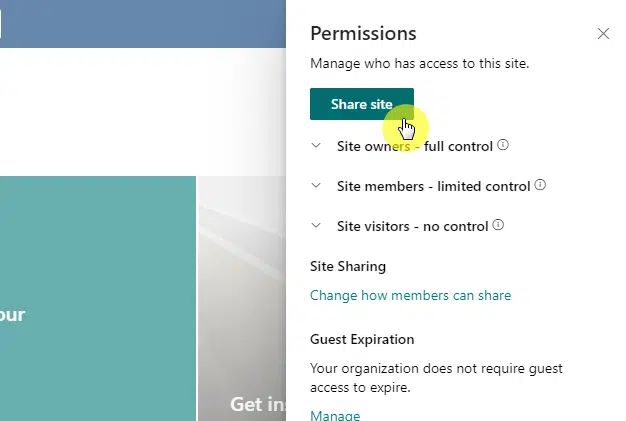
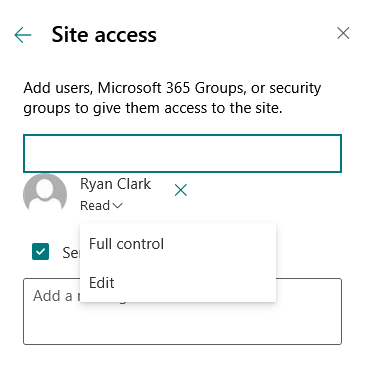
After that, you will be able to enter the name of the user you want to add to the site and specify their permission.
Like this:
Nice! 🙂
After that, users will then receive an email that you have invited them to the site.
As you can see, it’s pretty simple and lets you control access without admin center tools.
👉 Related: How to Share a SharePoint Site With Everyone (Tutorial)
Using PowerShell
You can also use PowerShell to add users to SharePoint Online, which is preferable for large-scale environments.
Make sure to install the SharePoint Online Management Shell first, and then run this script to connect your site:
# Connect to SharePoint Online
$AdminSiteURL = "https://yourtenant-admin.sharepoint.com"
$Credential = Get-Credential
Connect-SPOService -Url $AdminSiteURL -Credential $Credential
Replace <yourtenant> with your actual tenant name, then a prompt will appear for your username and password.
Next up, you can then add a user to the site using this script:
$SiteURL = "https://yourtenant.sharepoint.com/sites/YourSite"
$UserEmail = "EmailAddress"
$GroupName = "Members"

Add-SPOUser -Site $SiteURL -LoginName $UserEmail -Group $GroupName
Replace <YourSite> with your site name, then the user’s email, and <Members> with the group name to add the user.
Nice! 🙂
👉 Related: How to Connect to SharePoint Online Using PowerShell With MFA
Technically, the second method I described earlier, adding someone directly from the site, can do this.
But make sure to check that external file sharing is set to “Anyone” (this is in the SharePoint admin center).
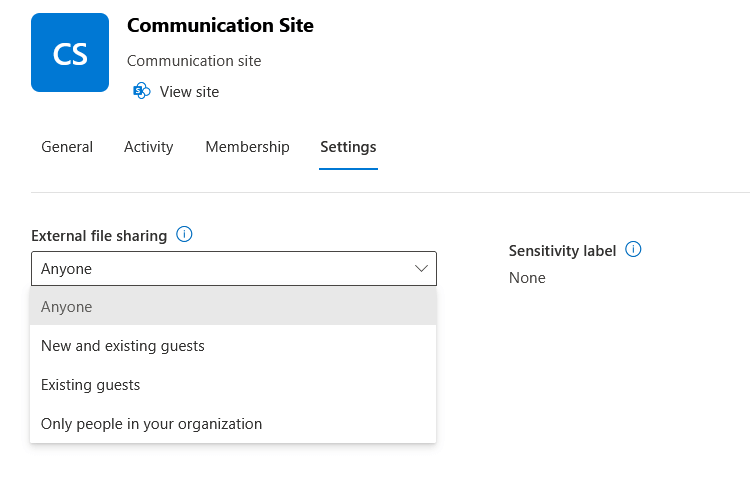
This is so external users can access files and lists on the site that you want to share with them.
If you want the specifics on how to share a site with external users, I will link another guide below with the instructions.
👉 Related: How to Share a SharePoint Site With External Users
Do you have any questions about adding someone to SharePoint Online? Let me know below.
For any business-related queries or concerns, contact me through the contact form. I always reply. 🙂


