

Last Updated on February 17, 2025
Not sure how to set up unique permissions?
In this guide, let’s talk about how to easily set up unique permissions in SharePoint Online.
Let’s get started.
Table of Contents:
How Does Unique Permissions Work
As you may know, permissions are inherited from the parent SharePoint site, library, or folder.
But it’s possible to break this inheritance and assign specific permissions, these are then called unique permissions.
Here’s how it works:
- SharePoint automatically applies permissions from the parent to all sub-items
- Stop permission inheritance for a file, folder, or page
- Edit access (grant or restrict) for specific users or groups
As for granting access, avoid using too many unique permissions as it can make permission management complicated.
In fact, I think it’s best to limit their use and rely on SharePoint groups when possible.
But if you must, always document changes and do periodic audits to make sure you have proper access control.
Sign up for exclusive updates, tips, and strategies
Setting Up Unique Permissions for Files and Folders
Fortunately, setting up unique permissions isn’t that difficult.
Step 1: Break the Inheritance
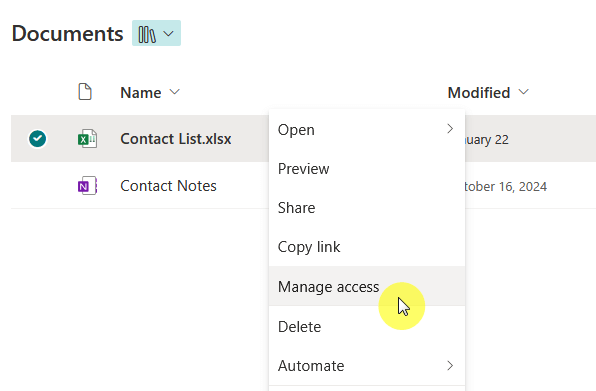
For example, let’s say you want to set up unique permissions for an item in a specific document library.
Go to that library, right-click on that file, select Manage access, then to advanced settings from the ellipsis (…).
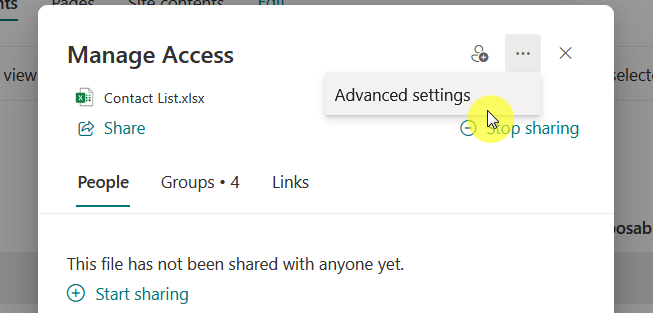
This will bring you to another page that lists the permissions for that item.
Now, because of permission inheritance, this item will have the same permissions as the document library it belongs to.
What you need to do here is choose “Stop Inheriting Permissions” to break the link to the parent permissions:
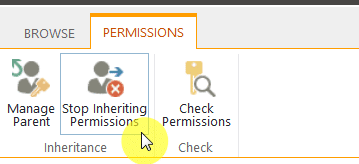
Note that if you want to reverse this, click delete unique permissions to delete any custom permissions.
Step 2: Assigning Unique Permissions
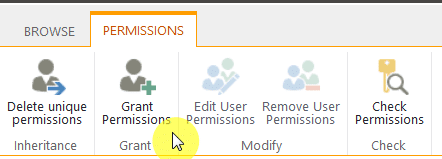
Once you have broken the inheritance, you will be able to have unique permissions assigned to the item.
For that, you can either click “Grant Permissions” or use the share feature in the front end and share the file.
If you use the grant permissions feature, you will then be asked to enter names/email addresses and their permission level.
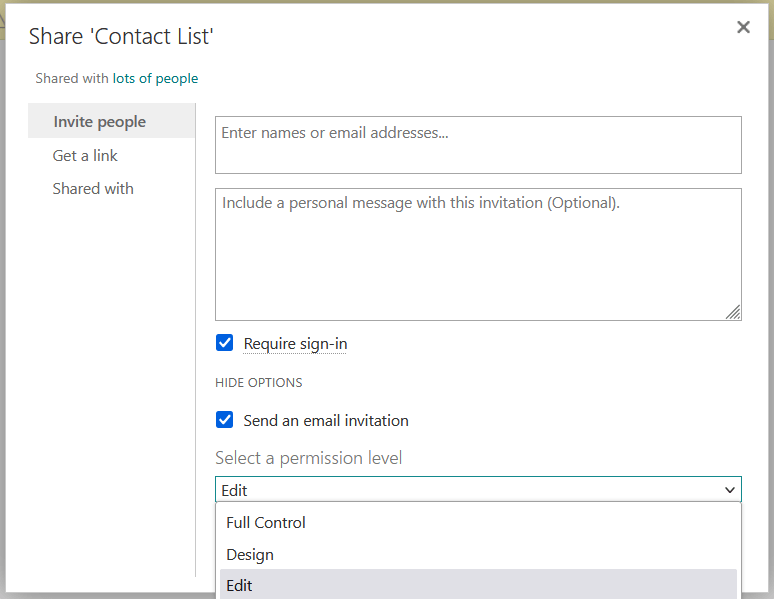
Don’t forget to specify the permission level here (click the show options button).
You can also freely remove users or groups that shouldn’t have access to the file or item.
The remove user permissions button in the permissions tab becomes clickable when you select a user or group.
Potential Challenges and How to Address Them
As I mentioned earlier, managing unique permissions can lead to complications if not handled carefully.
Here are some common issues you might encounter:
- Tracking multiple unique permissions
- Unauthorized access risks
- Difficulty in managing large teams
- Users losing access unexpectedly
- Performance issues
The solutions to these are simple.
First, audit the permissions regularly and update them as necessary.
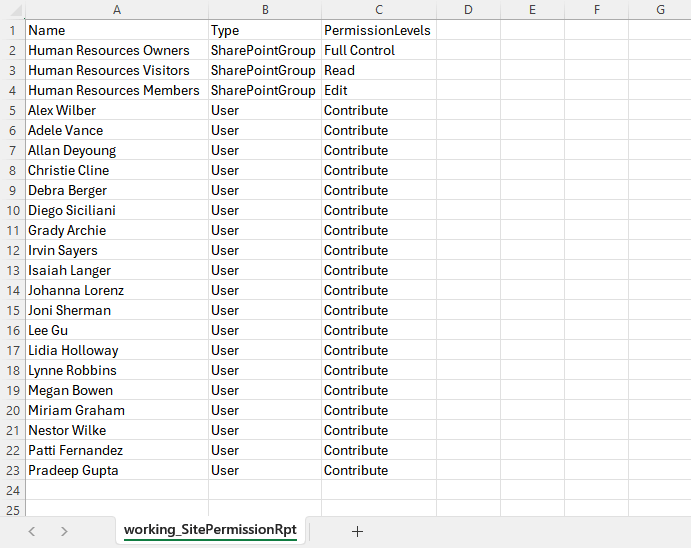
Get the site permissions report using PowerShell where you can review and track permission access on the site.
Then use the best practices for managing permissions like documenting changes and teaching members about it.
It’s also a good idea to organize the users into permissions groups to simplify the management of permissions.
Do you have any questions about unique permissions in SharePoint Online? Let me know below.
For any business-related queries or concerns, contact me through the contact form. I always reply. 🙂


