

Last Updated on January 26, 2025
How to assign roles to users?
In this guide, I’ll give you a walkthrough on how to assign roles to users in SharePoint Online.
Let’s get started.
Table of Contents:
SharePoint Online provides three primary roles to manage user access:
- Owners: With full control of the site, including settings and user permissions
- Members: Who can add, edit, and delete content within the site
- Visitors: With read-only access to the site and its contents
Each role serves a unique purpose.
Owners manage the structure and overall administration of the site while members create and update content.
Visitors can view content but cannot make changes, which makes it ideal for those who only need to consume information.
All these simplify access management so every user has the right level of access to the site.
👉 Related: SharePoint Groups & Permissions Explained: How Permission Levels Work
Sign up for exclusive updates, tips, and strategies
Assigning Roles to Users
As you know, assigning roles in SharePoint Online helps control user access.
Fortunately, this is quite easy to do:
Step 1: Access site permissions
Navigate to the site first where you want to manage permissions.
From there, click on the settings gear, then select “Site permissions” from the list:
This will open the permissions panel.
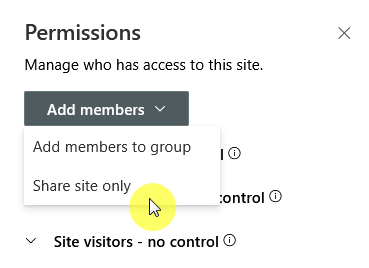
Step 2: Add the user
Starting with team sites, you will be able to add users here in two ways:
- Add members to group
- Share site only
For example, if you share the site only, the next screen will allow you to enter the user’s name or email address.
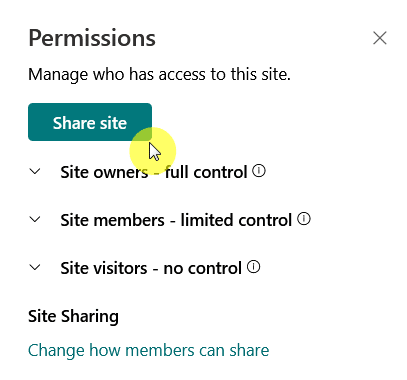
It’s also the same in communication sites.
The only difference here is that the button is “Share site”:
Nice!
👉 Related: How to Grant Access in SharePoint Online (+Lists and Libraries)
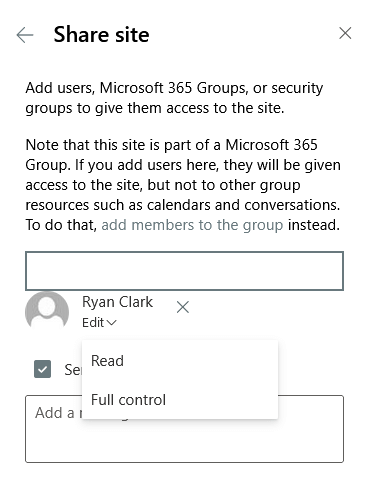
Step 3: Assign a role
After that, you will be able to assign a role to the user.
For both types of sites, you will see this:
That’s it!
Always double-check user permissions to prevent accidental over-access or restrictions.
Changing Roles of Current Users
The steps earlier detail how to assign roles to users that you would be adding.
But what if you wanted to change the role of those who are already added?
For this, simply open site permissions again, then go through the roles and you will see the users with that role.
To change the role, press the dropdown button on the permission label, and change it accordingly:
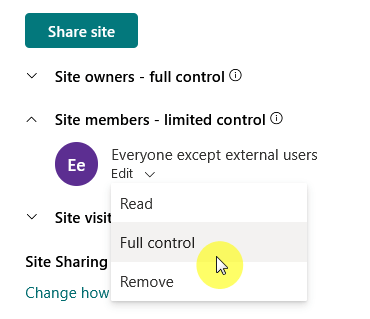
In the example above, I changed the role to the security group and gave it “Full control”.
The effect is that the group will disappear from the site members group and will move to the site owners group.

Changing roles is a great way for users to have the access they need without compromising site security.
Using groups rather than assigning permissions individually makes ongoing changes much easier to manage.
Good Role Assignment Practices
As you know, proper role assignment keeps your SharePoint site secure and organized.
Here are a few practices that I suggest:
- Audit permissions to make sure they align with current needs.
- Restrict “Owner” roles to key administrators.
- Assign roles to groups instead of individual users for easier management.
- Keep track of custom roles and any updates to permissions.
Avoid giving excessive access to users who don’t need it to help prevent unauthorized access.
Do you have any questions about assigning roles to users in SharePoint Online? Let me know below.
For any business-related queries or concerns, contact me through the contact form. I always reply. 🙂


