

Last Updated on January 14, 2025
Need to share your site?
In this guide, I will show you how to grant access to SharePoint Online, especially in lists and libraries.
Let’s get started.
Table of Contents:
SharePoint permission levels determine what actions users can take within a site.
What’s nice though is that these levels are pre-configured sets of user permissions grouped to match common roles.
Here are the default SharePoint permission levels:
- Full control
- Design
- Edit
- Contribute
- Read
- View only
- Limited access
These levels simplify access management by aligning permissions with typical user needs.
You can assign them to individuals or groups, though I highly recommend using groups to make it more efficient.
But when customizing access, always choose the least permissive level required for the user’s tasks.
👉 Related: SharePoint Groups & Permissions Explained: How Permission Levels Work
Sign up for exclusive updates, tips, and strategies
Granting access to a SharePoint site allows users to collaborate and perform tasks effectively.
For a SharePoint team site, click the gear icon and then site permissions:
You will have 2 choices here:
- Add members to group
- Share site only
Choose the option best suited for your needs:
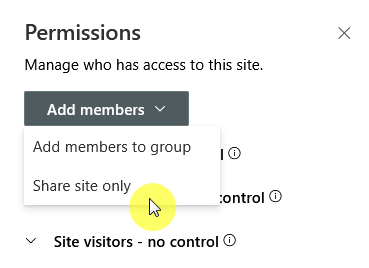
Unless the user is a “regular” in the team, the “Share site only” option will suffice, especially when sharing it externally.
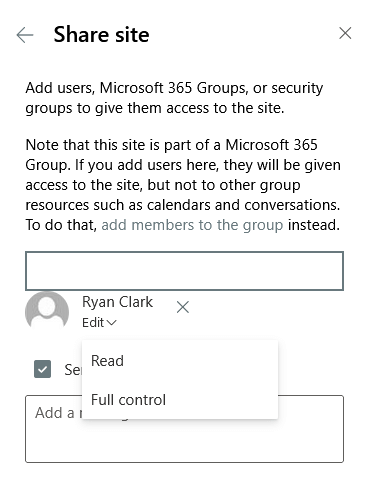
On the next page, you have to enter the email address or the name of the user you want to share the site with:
For communication sites, it’s easier.
When you click the gear icon, go to “Site permissions”, and this time, you will see a “Share site” button:
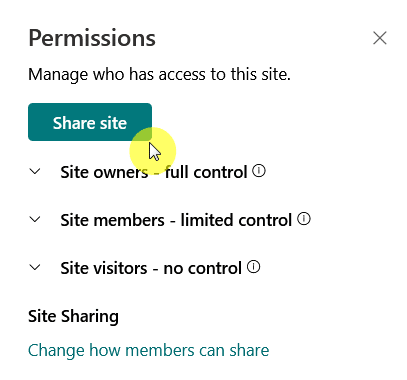
Similarly, enter the email address or the name of the user or group and you’re done. 🙂
As for using groups, instead of assigning permissions to individual users, add them to groups like “Members” or “Visitors.”
👉 Related: How to Share a SharePoint Site With External Users
Sharing lists and libraries in SharePoint allows users to collaborate efficiently on specific content.
This is easier in lists since you can just click the “Share” button in the command bar:
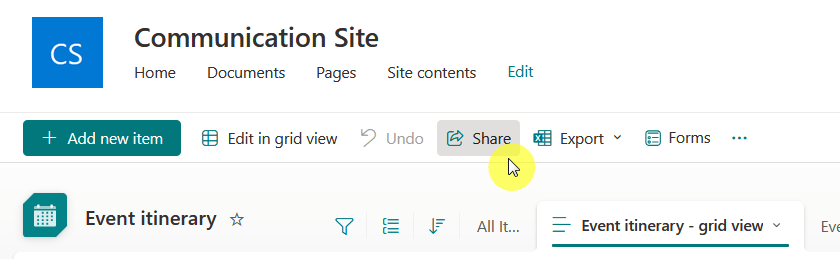
You will then see the familiar share window where you can add the name, group, or email of the user/group.
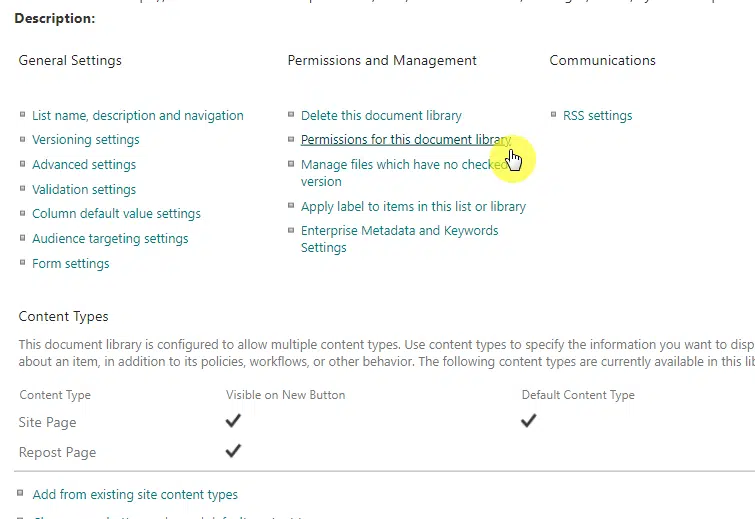
But for libraries, it’s a little different since you need to get into the library settings page through the gear icon.
Click the “more library settings” and then find the “Permissions for this document library” setting on the next page.
Like this:
That’s it!
On the next page, you will be able to grant, remove, or edit user permissions on the document library.
It looks like this:
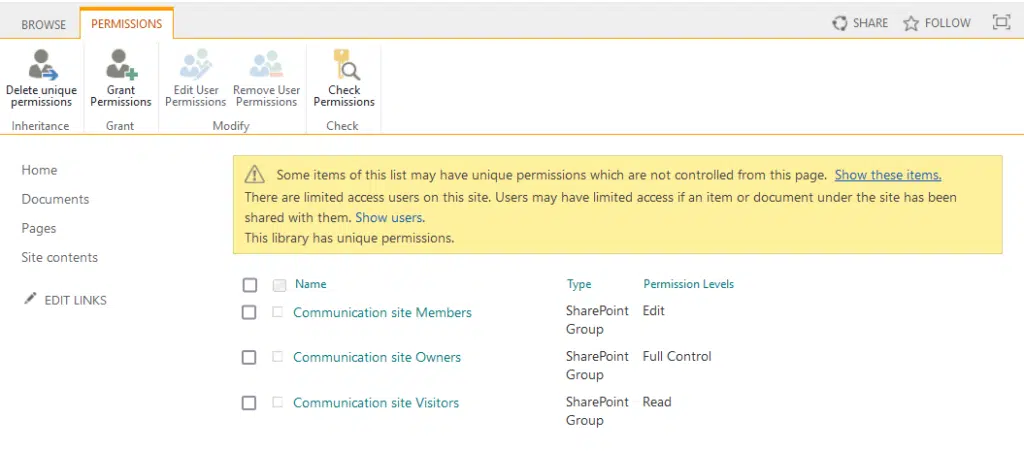
Nice! 🙂
👉 Related: How to Change Sharing Options of Document Library in SharePoint
Common Mistakes to Avoid
Managing SharePoint permissions is straightforward, but common mistakes can lead to problems.
Here are some errors to watch out for:
- Granting excessive permissions
- Not reviewing permissions
- Ignoring groups
- Breaking inheritance too often
- Overlooking item-level permissions
These mistakes can expose sensitive information or cause workflow disruptions.
Always assign the minimum necessary permissions, and review access frequently to maintain security.
Do you have any questions about granting access to SharePoint Online? Let me know below.
For any business-related queries or concerns, contact me through the contact form. I always reply. 🙂


