
Last Updated on January 14, 2025
Need to update the permissions?
In this guide, I will show you how to change permissions in SharePoint Online including unique permissions.
Let’s get started.
Table of Contents:
SharePoint permission levels define a user or group’s actions on a site, library, or item.
Basically, they control access and determine who can view, edit, or manage content.
What’s nice is that SharePoint provides default permission levels to make management easier.
The default permission levels you will find in SharePoint are the following:
- Full control
- Design
- Edit
- Contribute
- Read
- Restricted view
- Limited access
As you might already know, these levels can be assigned to individuals or groups.
Groups help organize users with similar access needs, like “Team Members” or “Visitors.
On the other hand, custom permission levels can also be created when needed like in cases where unique access is required.
👉 Related: SharePoint Permissions: Best Practices to Implement
Sign up for exclusive updates, tips, and strategies
How to Access Site Permissions
Managing site permissions in SharePoint Online starts with knowing how to access them.
Here’s how to get there quickly:
Click the gear icon in the top-right corner of your site and then select the site permissions option:
This will open the basic permissions settings for the site.
Click “advanced permissions settings” for more detailed options:
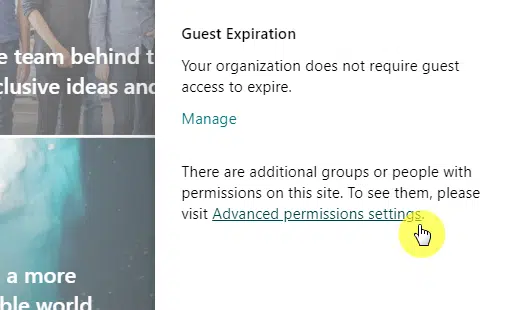
Once inside the permissions page, you will see a list of groups and users with access to the site.
Each group has a permission level assigned, such as full control or read.
From here, you can view, edit, or remove permissions as needed.

By the way, if you’re managing a team site, it helps when you use groups to simplify updates.
This way, adjusting permissions becomes quicker and keeps things organized.
👉 Related: SharePoint Groups & Permissions Explained: How Permission Levels Work
Thankfully, adjusting permissions for a SharePoint site is simple.
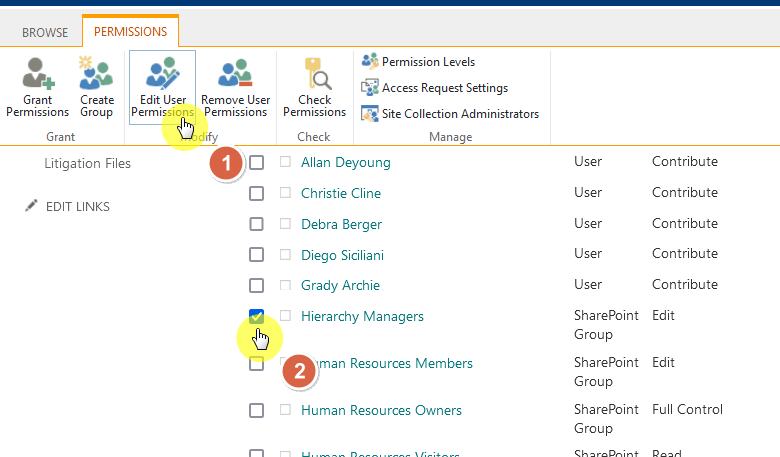
Follow the steps mentioned above to access site permissions, and after that, select the target user or group.
Then click the “edit user permissions” button:
This will bring you to the edit permissions page.
What you need to do here is to choose a permission level by selecting or unselecting permissions.
Don’t forget to click the “OK” button to confirm the updates:

That’s it! 🙂
You can also remove permissions by selecting a user or group and clicking the “Remove User Permissions” button.
In a way, you can see here the wisdom of using groups to organize permissions instead of assigning them individually.
👉 Related: How to Easily Change Group Permissions in SharePoint
How to Set Unique Permissions for Libraries and Folders
Sometimes, you need to limit access to specific libraries or folders in SharePoint.
You can do this by breaking permission inheritance and assigning unique permissions.
Open the document library settings or folder settings to get to the permissions page of that library or folder.
For libraries, you can simply open a library, click the gear icon, then library settings:
Click the more library settings link, and on the next page, find the “Permissions for this document library” link:
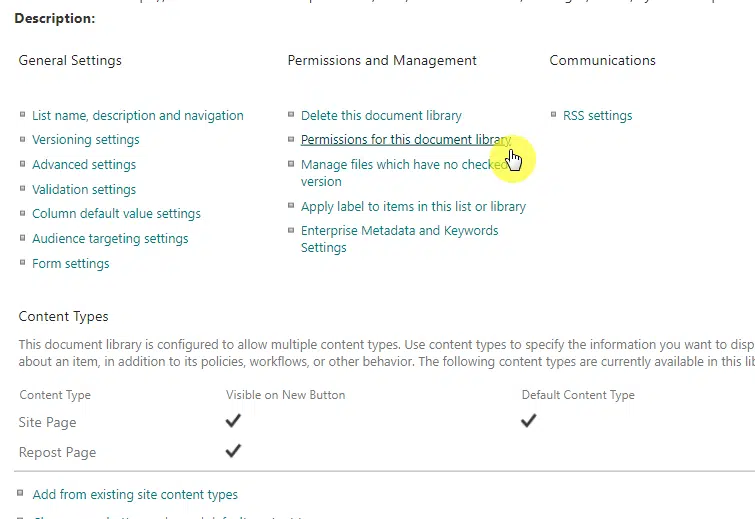
You can also do this by clicking the three dots (⋮) next to the library name in the site contents.
For folders, click its three dots (⋮), then manage access, then another three dots, then advanced settings:
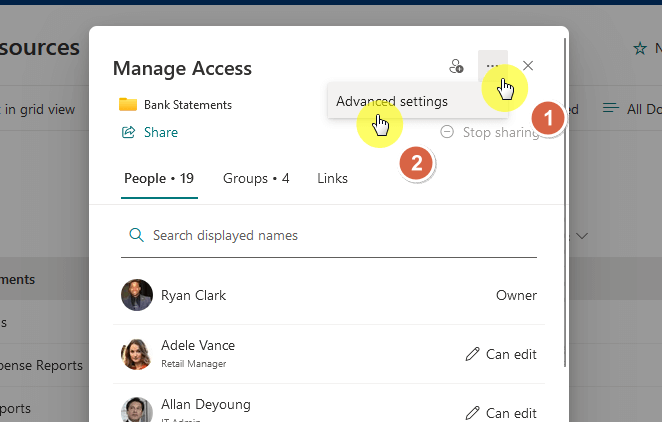
Once you’re on the permissions page, all you have to do is click the “Stop Inheriting Permissions” button.
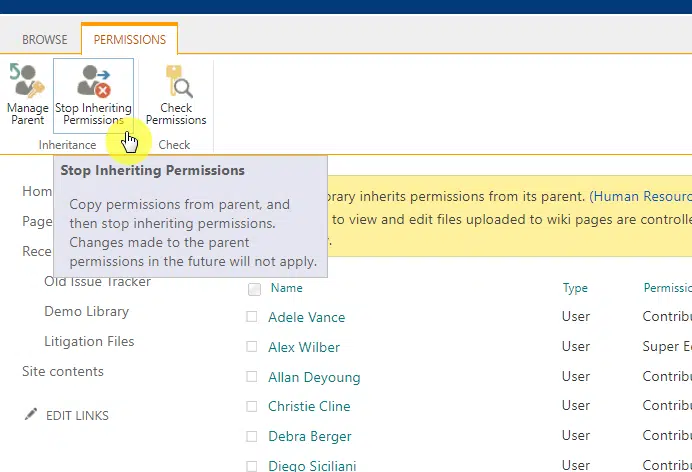
After that, you will be able to add or remove users and assign the desired permission level to each user.
The buttons for those are found in the ribbon:

Now, doing this allows you to control who can access specific content, but it can also complicate permission management.
My advice is to use this sparingly or even better, create a group with unique permissions and add the user to the group.
👉 Related: How to Restrict Access to a Folder in SharePoint
Creating and Assigning Custom Permission Levels
Custom permission levels in SharePoint let you define specific access tailored to your needs.
If you have noticed on the permissions page, there’s a “Permission Levels” button in the ribbon:
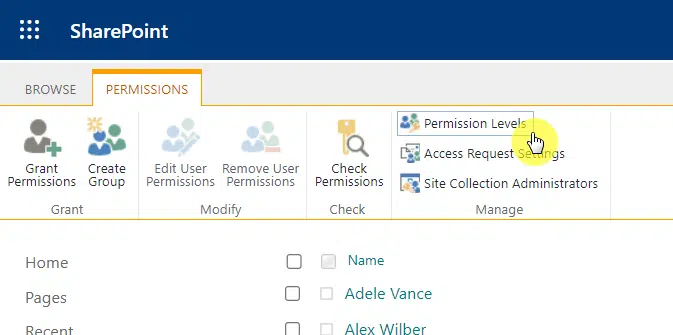
This will bring you to a page with the different permission levels on the site.
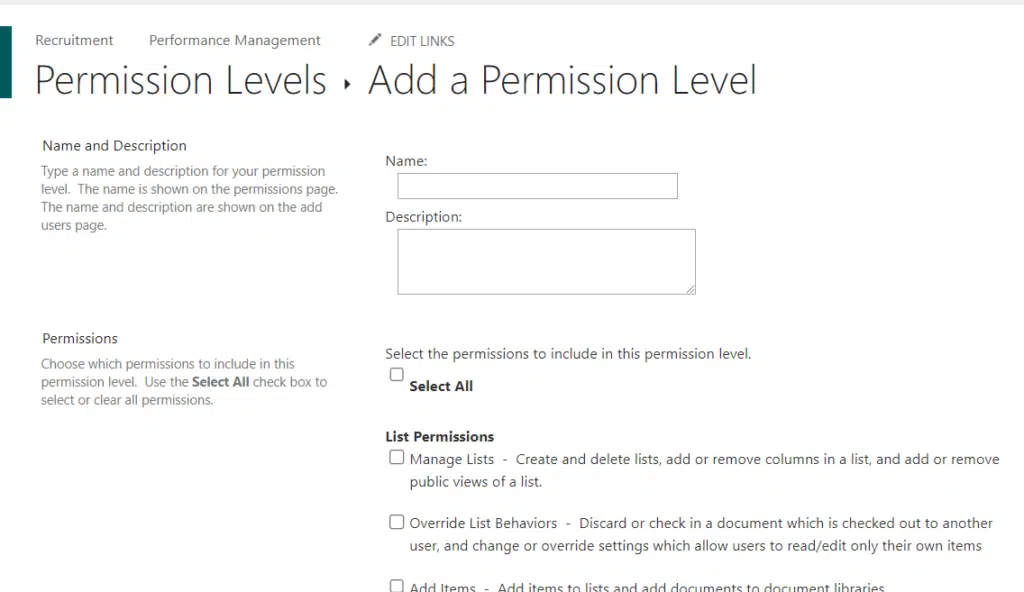
To create a new one, click on the “Add a Permission Level” link near the top.
Like this:
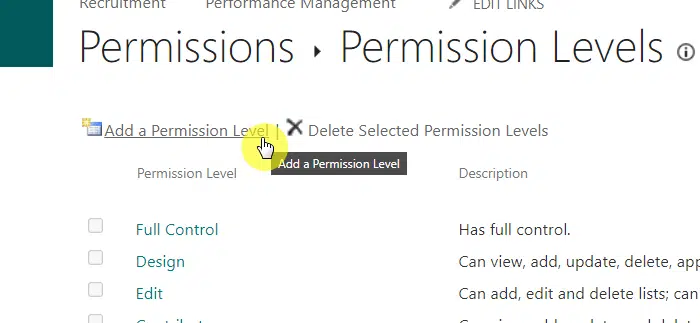
You will then see a form where you can create a new permission level.
Simply fill it out starting with the name and description, then choose the permissions you want to include:
Don’t forget to save the custom level you created, and you can then use it on the site.
Remember that custom levels are useful when default ones don’t fit specific needs, edit rights only without delete permissions.
👉 Related: How to Create a SharePoint Custom Permission Level (Guide)
Do you have any questions about changing permissions in SharePoint Online? Let me know below.
For any business-related queries or concerns, contact me through the contact form. I always reply. 🙂


