

Last Updated on November 22, 2024
Want to create a team site?
In this guide, I will show you step-by-step instructions on how to create a team site in SharePoint Online easily.
Let’s get started.
Table of Contents:
A team site is one of the main types of modern sites in SharePoint Online.
In contrast to communication sites, a team site is designed to become a workspace for collaboration for teams.
Its key features include:
- Integration with Microsoft Teams
- Shared document libraries
- Task management tools
- Automatic link with Microsoft 365 groups
From its name, team sites are designed to help with teamwork, hence its features.
These SharePoint sites prioritize tools that keep everyone aligned and provide access to real-time updates for efficient collaboration.
👉 Related: SharePoint Team Site vs Communication Site (Differences)
Sign up for exclusive updates, tips, and strategies
Fortunately, creating a team site is simple and straightforward.
Follow these steps:
Step 1: Create site option
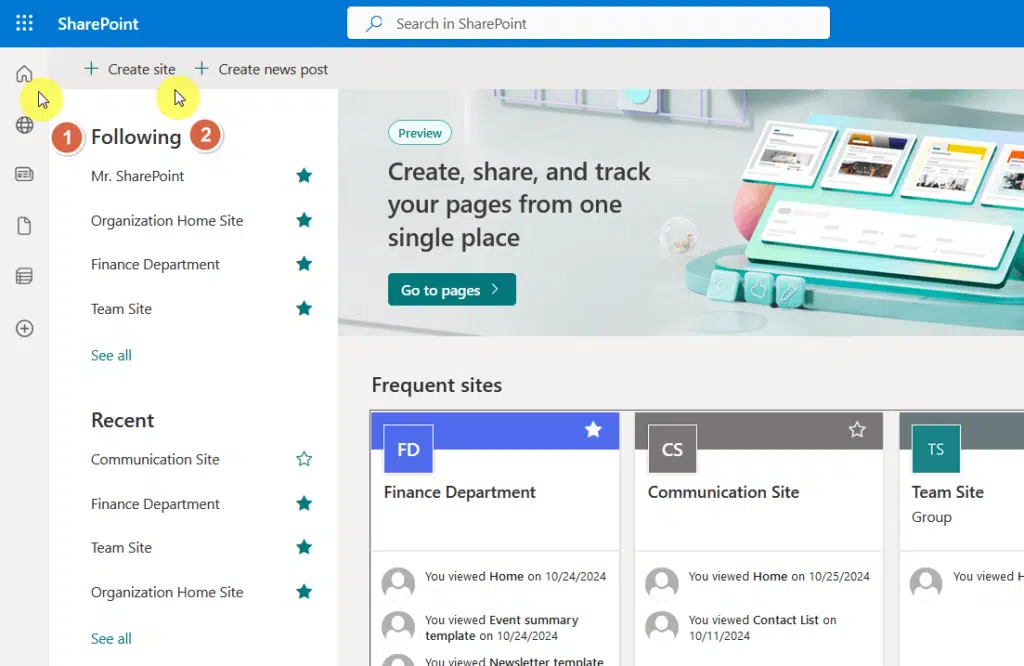
The first step is to go to the SharePoint start page (home button in the sidebar).
You should then see the “Create site” button, click on it:
This will begin the setup process.
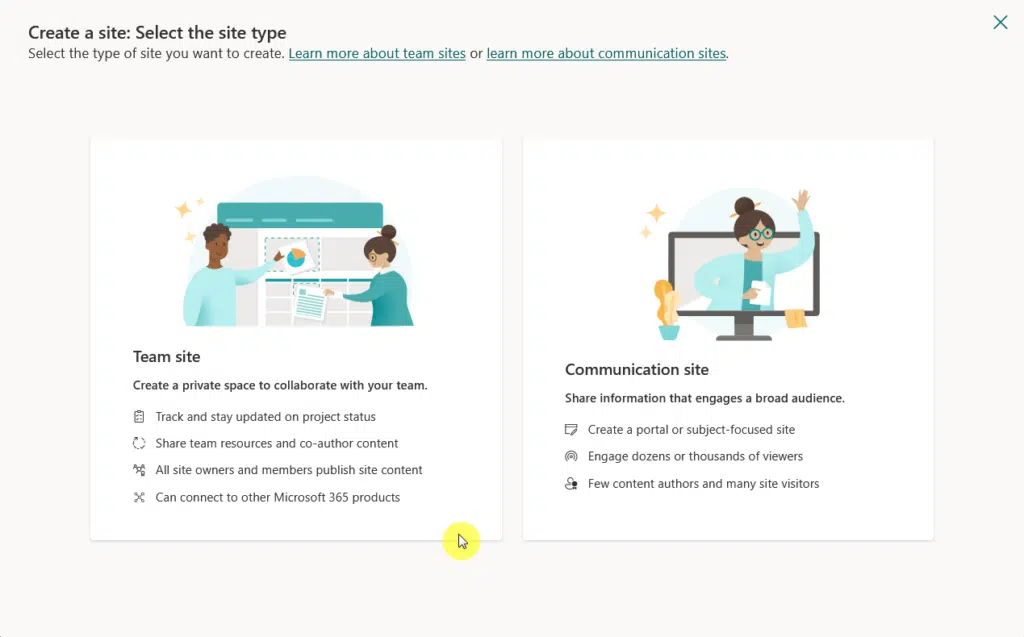
Next up is to simply select the team site option in the site classification section.
Like this:
Nice! 🙂
Step 2: Configure the team site
After selecting your option from the previous section, you will then be presented with the available team sites.
The standard team is how the default team site looks like:
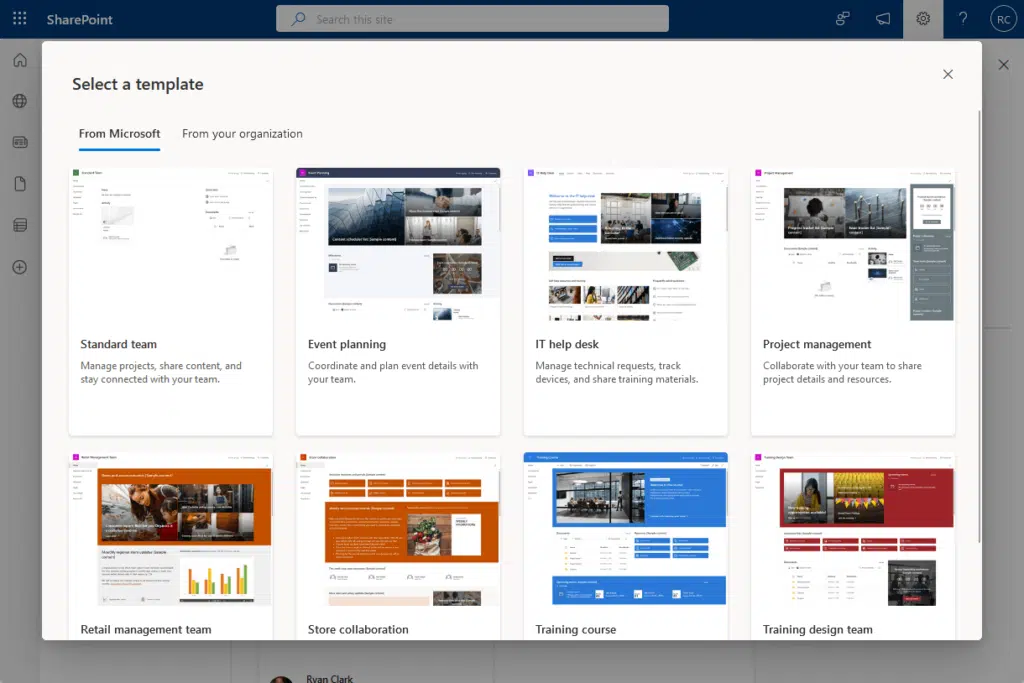
Anyway, just select the template that’s best suited to your needs (you can replace it anytime).
After selecting a template, you will then have to provide some information about the site like the site name, description, etc.
The group email address and SharePoint site address will automatically be filled out according to the site name.

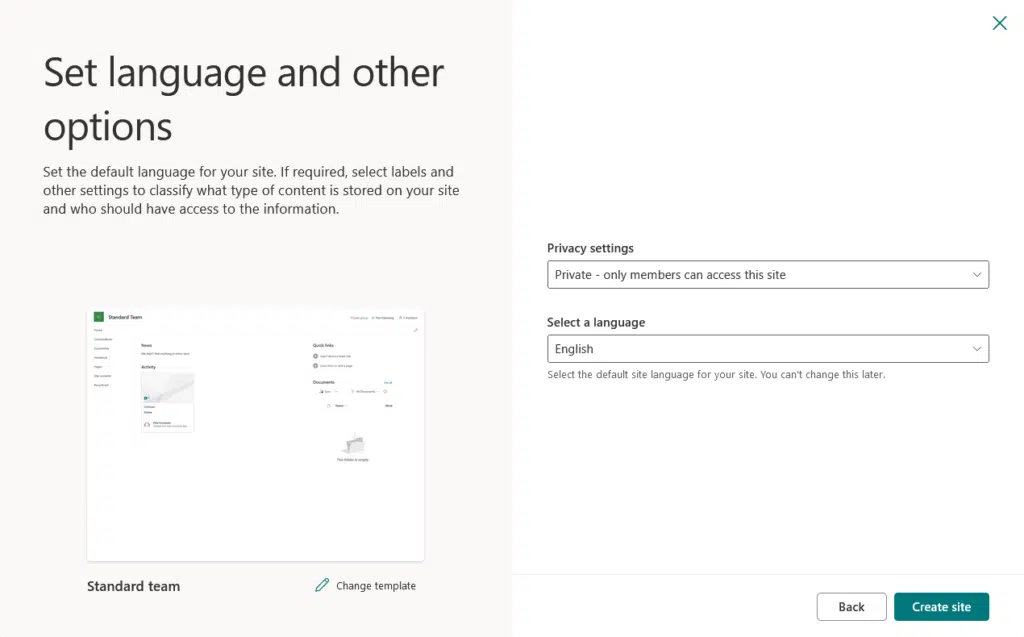
The next part will be about selecting the privacy settings and the default site language.
You have two options for privacy settings:
- Private (only members added can access the site)
- Public (anyone in the organization can access the site)
Since this is a team site, you likely want this site to be private.
Then click the “Create site” button to start creating the site:
After that, all you have to do is wait until the system finishes creating the site, and you will be redirected there.
Step 3: Add members and owners
Finally, I will show you how to add members and owners to the site.
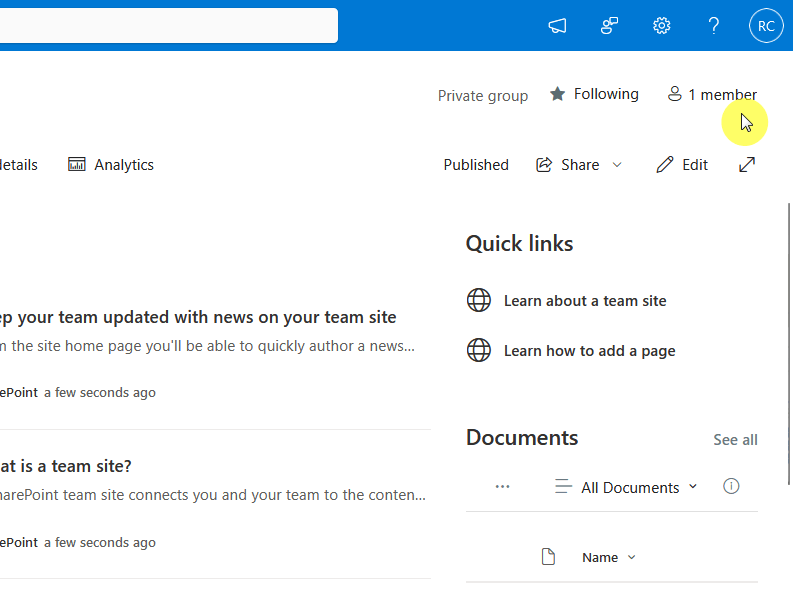
On the newly created team site, you will see the member count in the top-right corner.
Click on it:
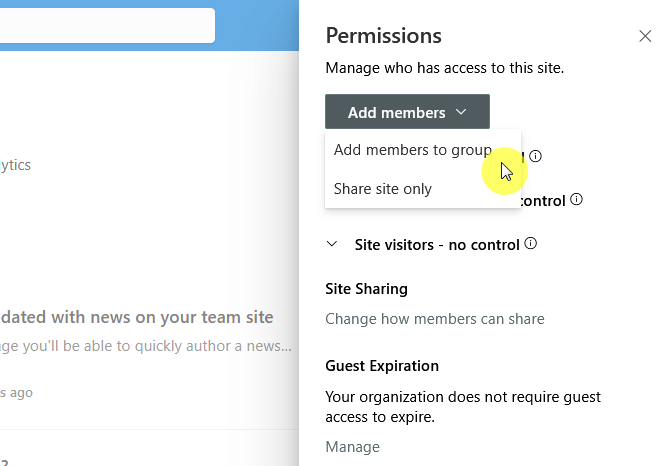
This will open the group membership page in the side panel.
You can also arrive on the same page from the gear icon > site permissions > add members to group.
Like this:
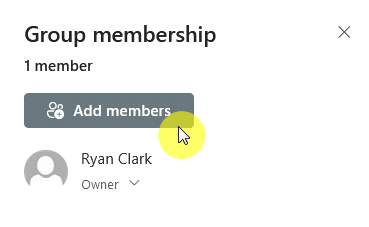
Anyway, the group membership page will give you a list of all the team or group members and owners on the site.
If you’re an owner yourself, you will be able to change the roles as well as remove anyone.
To add a member, click on the add members button:
On the next page, enter the name of the team member you want to add then choose either member or owner.
Click save to add the members:

Owners have full control over the site, while members can contribute to the team site content.
You can change them anytime as I explained.
Common Challenges and Solutions
Well, there can be challenges with SharePoint team sites (or modern sites, in general).
Here are some of them:
- Access issues (verify permissions and group memberships)
- Navigation confusion (simplify menus and add clear labels)
- Storage limits (archive older files or increase storage)
- Permission conflicts (review permission levels)
If you and the other owners and admins are proactive with site management, you will be able to reduce disruptions.
But at the same time, I recommend you train users on best practices to minimize these challenges.
Do you have any questions about creating a team site in SharePoint Online? Let me know below.
For any business-related queries or concerns, contact me through the contact form. I always reply. 🙂


