

Last Updated on October 23, 2024
Can you write formulas in SharePoint?
In this guide, I will answer the question if there are column formulas in SharePoint (and yes, there are).
Let’s get started.
Table of Contents:
Calculated Columns and Column Formulas
Calculated columns and formulas provide a way to automatically manipulate data within lists and libraries.
Well, it means that through data in other columns, you can:
- Perform calculations
- Process text
- Handle dates
- Apply conditional logic
However, take note that even if these formulas are flexible, they have limitations.
For example, they can’t pull data from other lists or reference values from other rows (more on this later).
Sign up for exclusive updates, tips, and strategies
Here are the main types of column formulas you can use:
1. Basic Calculations
Basic calculations allow you to perform simple arithmetic on numeric columns in your lists and libraries.
Some common basic calculation formulas:
- Addition (example:
=[Quantity] + [Price]) - Subtraction (example:
=[Total] - [Discount]) - Multiplication (example:
=[Quantity] * [Unit Price]) - Division (example:
=[Total] / [Items]) - Modulus (example:
=[Amount] % 3)
These formulas can automatically compute values such as totals, differences, or averages based on existing data.
They’re also useful in automating data entry and making sure they’re accurate. 🙂
2. Text Manipulation
Text manipulation in SharePoint lets you manage and modify text data across columns.
Some examples:
- Join first and last names (
=[First Name] & " " & [Last Name]) - Converts the text to uppercase (
=UPPER([Title])) - Get the first 10 characters (
=LEFT([Description], 10)) - Remove unnecessary spaces (
=TRIM([Comments])) - Update when conditions change (
=REPLACE([Status], "In Progress", "Completed"))
You can combine, extract, or transform text for easier data display and organization.
These make it easy to manipulate text, which can save you from manually formatting or editing large datasets.
3. Date Calculations
From the name, these allow you to manipulate dates for tasks like setting due dates, calculating time differences, etc.
Some examples:
- Add days (
=[Start Date] + 7) - Subtract days (
=[End Date] - 3) - Calculate age (
=YEAR([Today]) - YEAR([Birthdate])) - Find the day difference (=
DATEDIF([Start Date], [End Date], "D")) - Dynamic dates(
=IF([Due Date]<[Today], "Overdue", "On Time"))
Technically, these formulas help automate processes that involve date fields.
For uses, imagine how much time you can save by simplifying task scheduling and tracking all while ensuring accurate results.
4. Conditional Logic
Conditional logic allows you to automate decision-making within your lists.
Here are some common conditional logic formulas:
- Basic IF statement (
=IF([Score] >= 70, "Pass", "Fail")) - Multiple conditions (
=IF(AND([Score]>=60, [Attendance]>=75), "Pass", "Fail")) - Nested IF statements (
=IF([Score] >= 90, "A", IF([Score] >= 80, "B", "C"))) - Check for blanks (
=IF(ISBLANK([Due Date]), "No Due Date", [Due Date])) - True/False results(
=AND([Status]="Complete", [Approved]=TRUE))
With the IF() function and other logical operators, you can create formulas that return different results based on specific conditions.
These formulas can help you create dynamic workflows and automate data processing based on specific conditions.
👉 Related: SharePoint Column Types Explained: Overview and Use Cases
What’s amazing is that it’s not really that hard to set up, though it will take a few steps than regular column types.
Step 1: See all column types
Normally, when you click the + add column button, all you have to do is select the column to add.
Calculated columns aren’t in the list, so you need to scroll down and select the “see all column types” option.
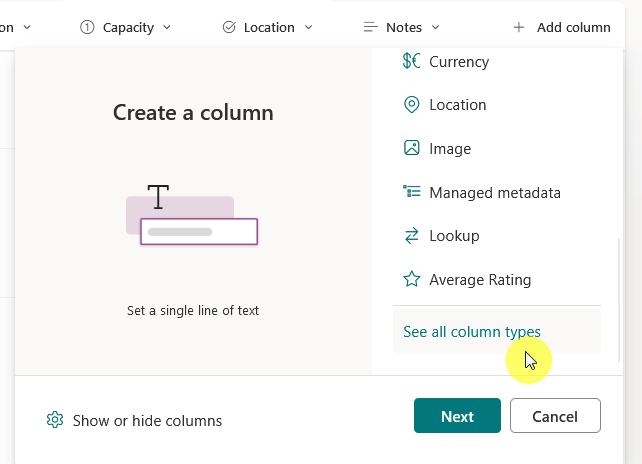
Click the next button after that.
This will now bring you to a classic-looking page where you can create a column the “old-fashioned” way. 😅
Step 2: Select Calculated
Right after the column name field (please fill it out), there’s a selection of different column types that you can add.
Make sure to select “Calculated (calculation based on other columns)” and the options below that will change.
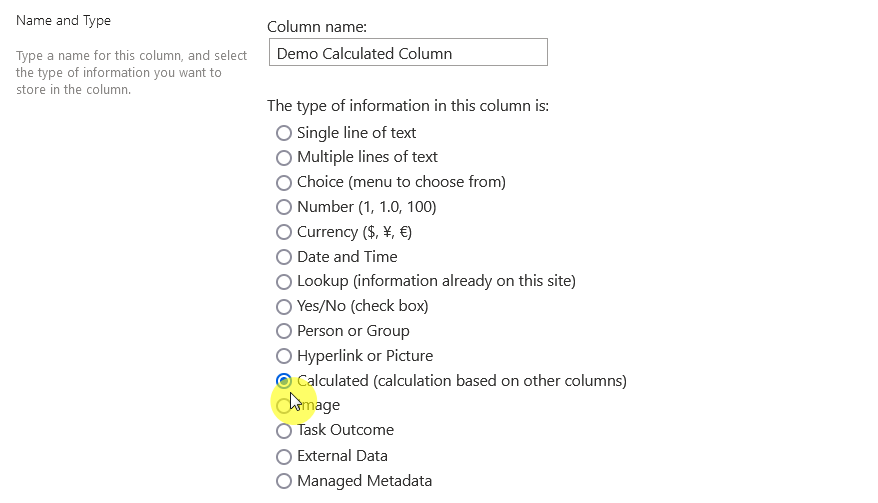
Nice! 🙂
Step 3: Enter the formula
The next step is to enter your calculation in the formula box.
As I explained earlier, you can reference other columns here by selecting them from the dropdown (or typing their names).
Here’s an example:
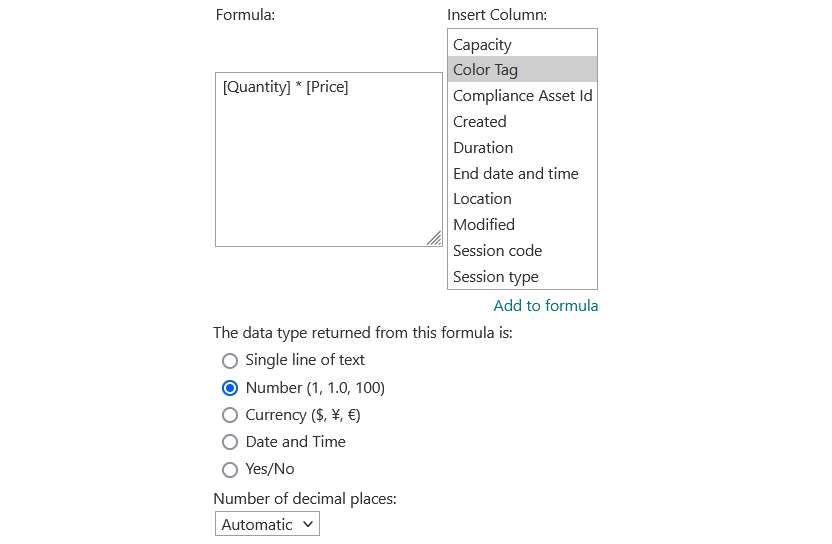
As you can see above, I have already chosen a data type for the result (which in this case should be a number).
You can play around with the other options here, like the number of decimal places or if you want to show it as a percentage.
But once you’re done, don’t forget to click the OK button.
Once created, the formula will automatically calculate the values whenever data in the referenced columns is updated.
👉 Related: SharePoint Calculated Column in a List or Library (Tutorial)
Limitations and Considerations
I mentioned this earlier,
When using calculated columns, there are some important limitations and considerations to keep in mind.
- They can only reference columns within the same list/library.
- Not all column types are supported (can’t use lookup columns).
- Many calculated columns, especially in large lists, can slow down the performance.
- SharePoint supports up to eight levels of nested functions in formulas.
These limitations mean you should carefully plan how to use calculated columns, especially in larger or more complex lists.
But considering what you can get, it’s definitely not a deal breaker (if you need more, why not use Excel anyway).
Do you have any questions about column formulas and calculated columns? Let me know below.
For any business-related queries or concerns, contact me through the contact form. I always reply. 🙂


