

Last Updated on September 14, 2024
Want to export a SharePoint list?
In this guide, I will walk you through easily exporting a SharePoint list to Excel using Power Automate.
Let’s get started.
Table of Contents:
What is Power Automate?
If you’re here, then you must already be familiar with Power Automate.
Basically, it’s a tool that would let you automate workflows between different apps and services. 🙂
Some key features include:
- Automated workflows
- Triggers and actions
- Prebuilt templates
- Integration with Microsoft 365
- User-friendly interface
Power Automate is an excellent solution if you want automation involving different apps, especially for Microsoft services.
It improves productivity by allowing you to focus on more important tasks while it handles the repetitive work in the background. 🙂
👉 Related: Key Benefits of Power Automate: Future of Automation
Sign up for exclusive updates, tips, and strategies
Fortunately, this one isn’t that complicated to implement.
Bonus: Create with Copilot
Copilot has been amazing as it can help you save time. 🤩
You can always build the flow from scratch, but if you’re comfortable with Copilot, just enter this prompt:
I want to export a SharePoint list data, once a week. The export file should be in CSV.

After clicking the generate button, you will see a suggested flow.
If you like that, simply click the “next” button and it will take you to the flow editor.
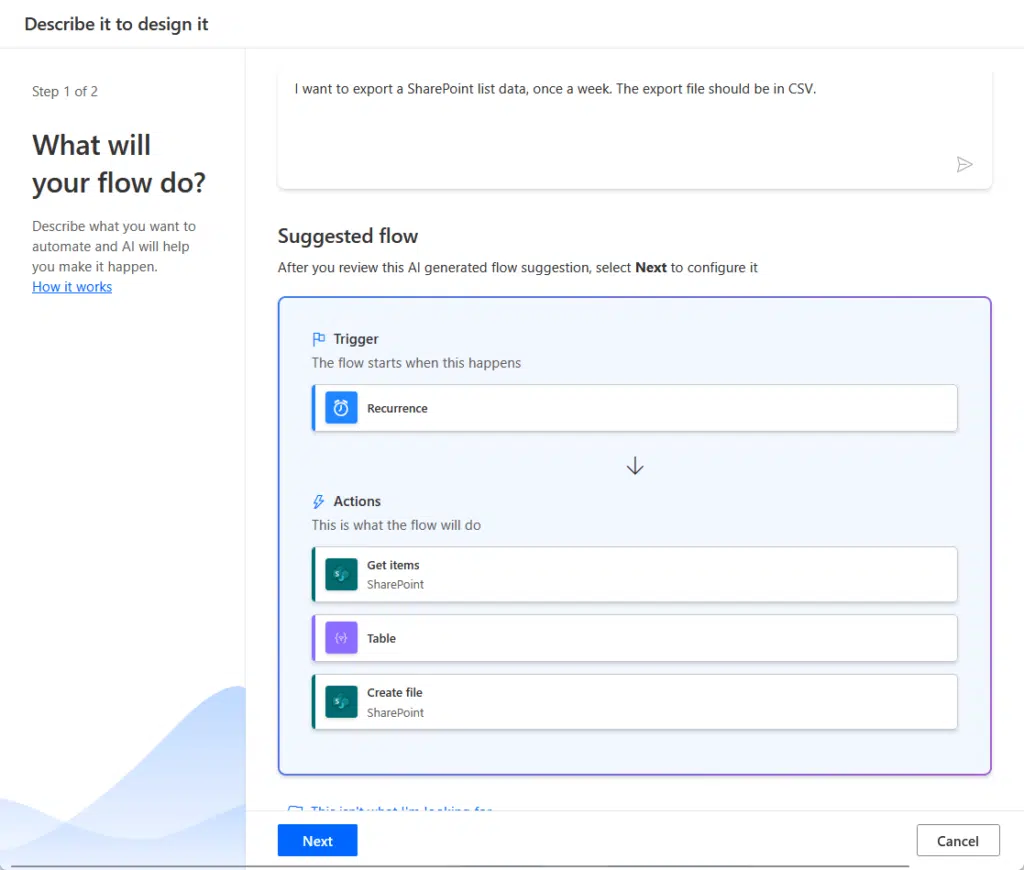
If you used the same prompt that I did, you will likely get the same suggestion. 🙂
There are some variations here in the last step, but all of them will enable you to export the file.
Step 1: Create a new instant flow
Now, whether or not you generated the flow with Copilot, you would need to enter the parameters.
Those are the same ones that you need to set up here in the steps, which starts from creating a new instant cloud flow.
Like this:
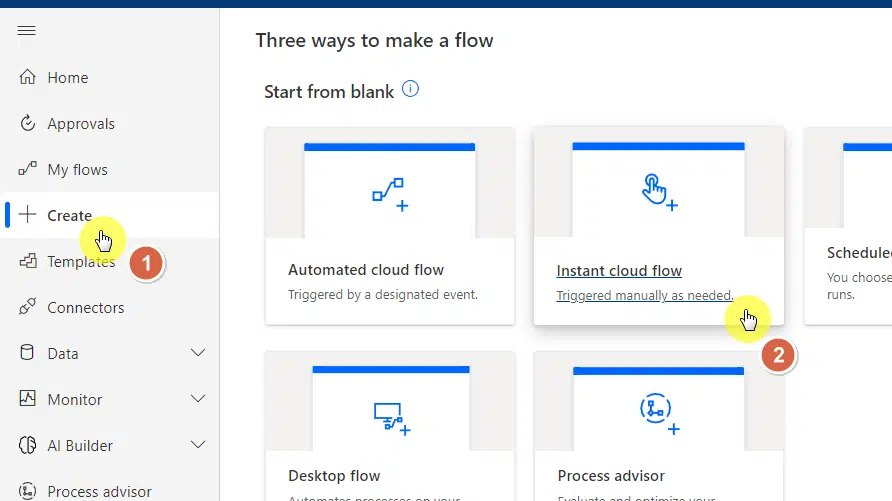
Just skip the naming part and go directly to adding a trigger.
Since you want a solution using Power Automate, it’s likely that you want this process to repeat x times.
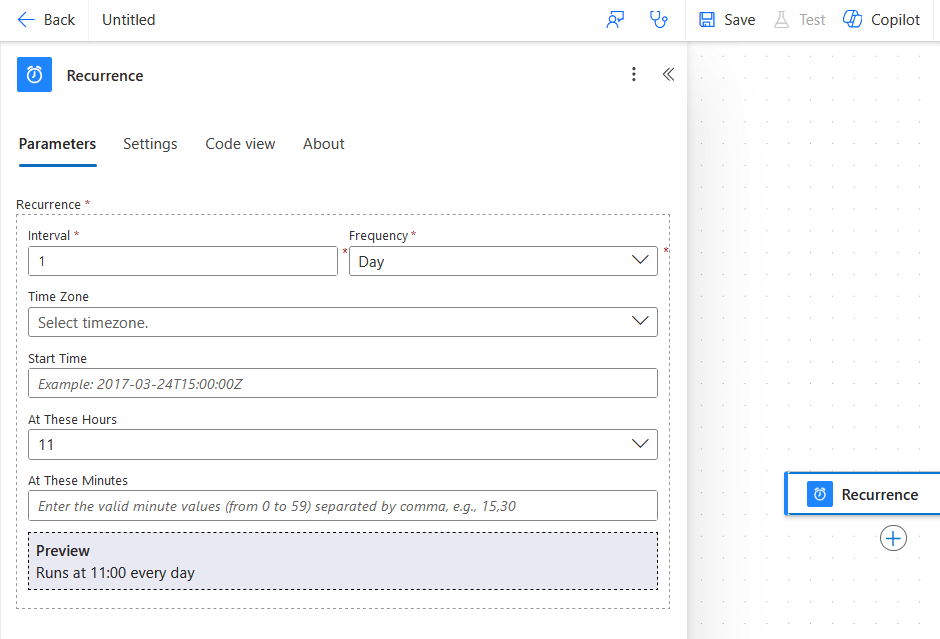
Anyway, just find the “recurrence” trigger first:
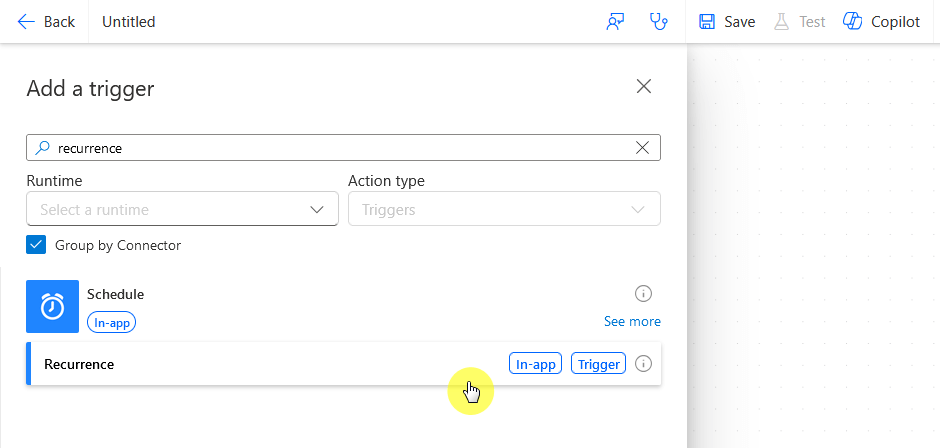
You can set this up according to your needs.
For example, you can set it up to run maybe once a day at a specific hour (you can set it up right inside the parameters).
You can even specify the minutes. 😅
Nice! 🙂
Step 2: Retrieve the list
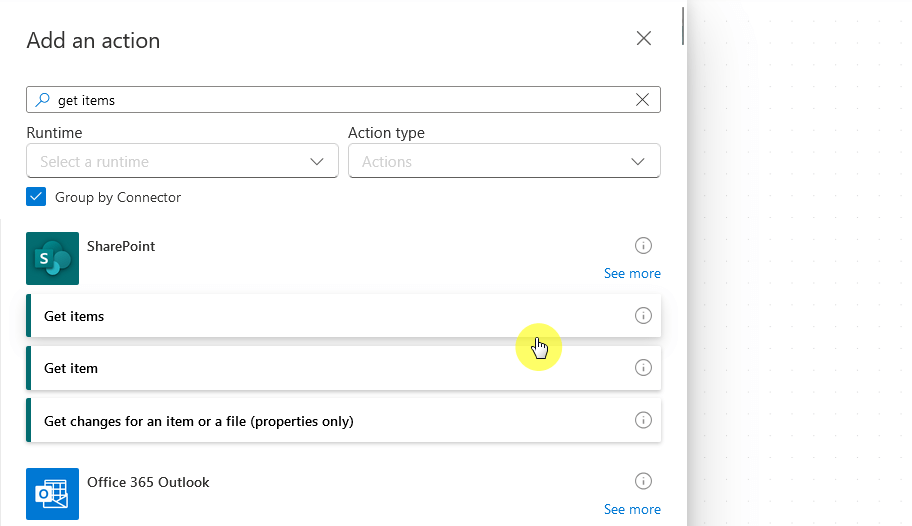
After that, you will need to add an action.
We want to keep this simple, so you can just use the “get items” action for SharePoint.
Again, you can just search for it:
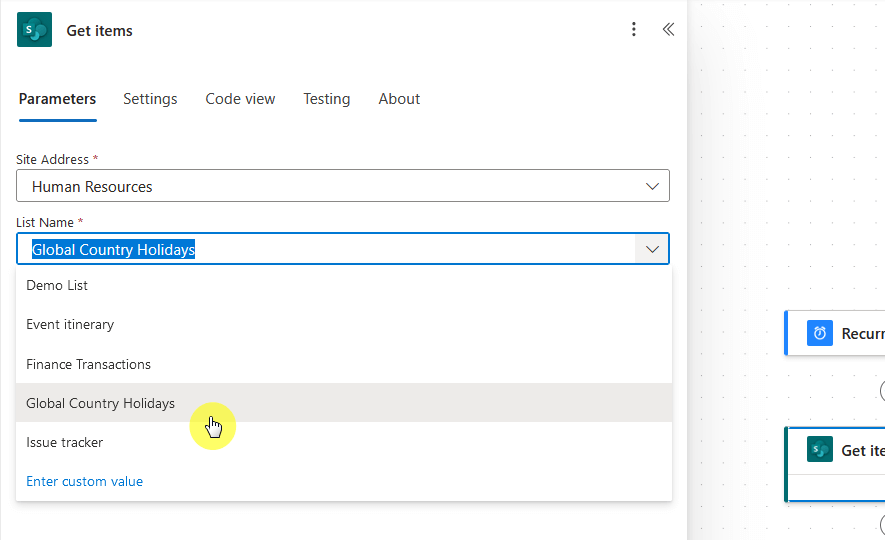
The parameters are also fairly simple.
Simply identify the SharePoint site address and then the name of the list (there’s a dropdown and just choose the right one).
Like this:
There are advanced parameters you can use to filter the results, which is important if you have so many items in the list.
Step 3: Create a table
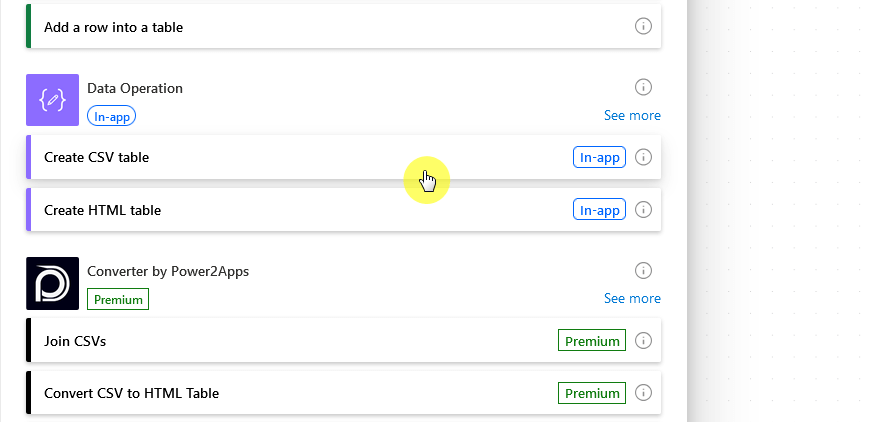
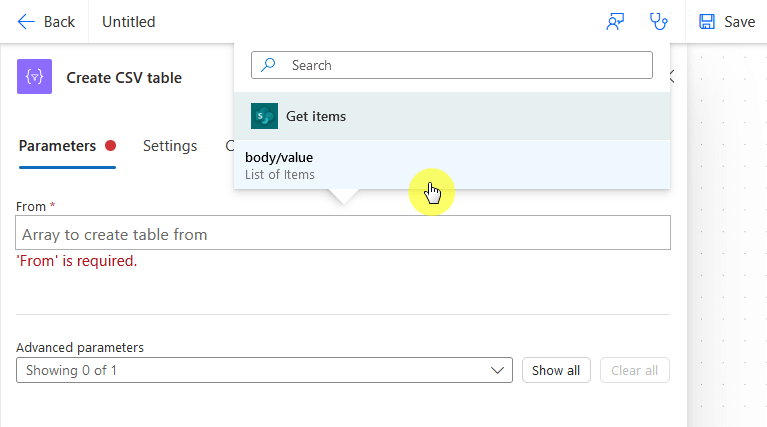
You then have to add the “create CSV table” data operation as an action.
Again, just search for it:
As for parameters, there are two settings here:
- From (source)
- Advanced parameters
For the from parameter, click the empty field then on the blue lightning to enter data from a previous step.
Then select the body/value option (it’s the only option):
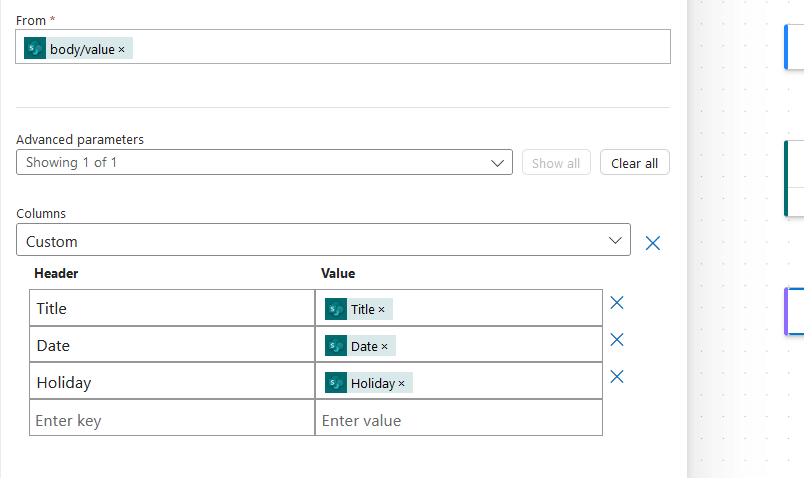
For the advanced parameters, it’s optional, but you can use it to identify which columns to display.
For example, if you have 10 columns, and you only want to show 3 columns in the Excel file, you can do it here.
Here’s what it would look like:
We’re almost there. 🙂
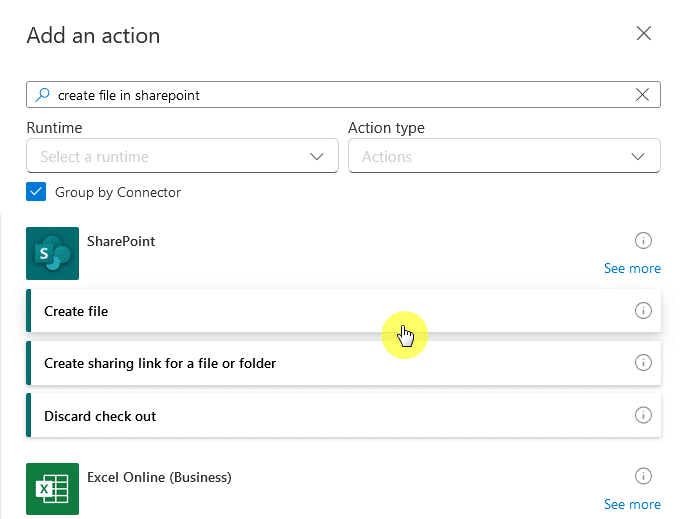
Step 4: Create the file
The last part is the creation of the file itself.
For this, we need the “create file” action in SharePoint (look for it, there are many create file actions for different apps).
Like this:
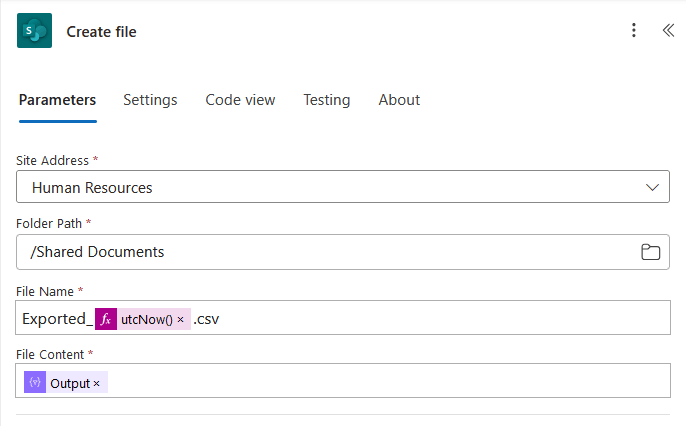
For the parameters, just choose where to save the file in SharePoint, including the folder path.
For the file name, you can put whatever you want — I added a formula on mine that would add a timestamp.
What’s important in the file name is the extension — don’t forget the .csv extension. 👈
For the file content, just select the output, similar to what you can see here:
After that, just save and test the Power Automate flow. 🙂
Here’s what I got:
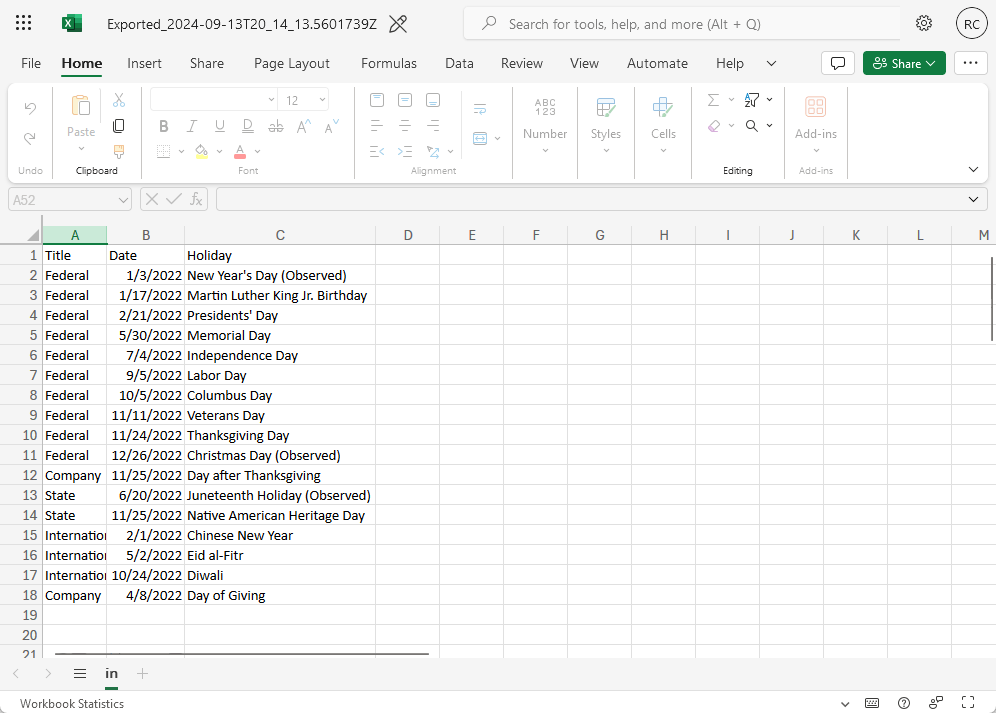
Nice and easy! 🙂
As you can see, it’s not as complicated as it seems, especially now that we can use Copilot inside Power Automate.
This flow can handle data extraction, formatting, and file saving of the list, which reduces manual effort on your side.
Anyway, got any questions regarding exporting a list to Microsoft Excel? Let me know below.
For any business-related queries or concerns, contact me through the contact form. I always reply. 🙂


