

Last Updated on August 8, 2024
Want to create a view?
In this guide, I will give you a walkthrough of creating a view in a SharePoint list in a few simple steps.
Let’s get started.
Table of Contents:
From the name itself, views allow you to display list data in different formats for various reasons.
They help present information in a way that would make them easier to understand in a more engaging style.
There are different view types available in SharePoint Online:
- List view: Shows data in rows and columns, similar to a spreadsheet.
- Calendar view: Displays data in a calendar format, useful for dates and schedules.
- Gallery view: Presents items as cards, providing a visual representation.
- Board view: Organizes items in a Kanban-style board, ideal for task management.
In addition, views can be “personalized” (private view) or public view.
Personal views are only visible to the user who created them, while public views can be seen by anyone with access to the list.
You can also filter, sort, and group data within these views to focus on the most relevant information.
Sign up for exclusive updates, tips, and strategies
How to Create a View in a List
Creating views is a basic exercise that you will be doing in SharePoint Online.
Fortunately, it’s also straightforward. 🙂
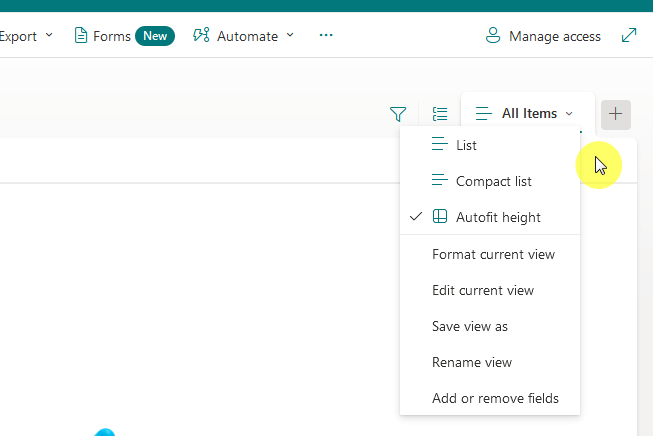
Step 1: Find the option
The first part is to find the option to create the view.
You can find the view options on the right side of the list header (the side where the filter button is located).
All SharePoint lists have a default view, whether a list has been created from blank (scratch) or was created from a template.
- If you want to view the current view, click the current tab header.
- If you want to create a new view, you can click on the add button.
They look like this on a blank list:
Nice! 🙂
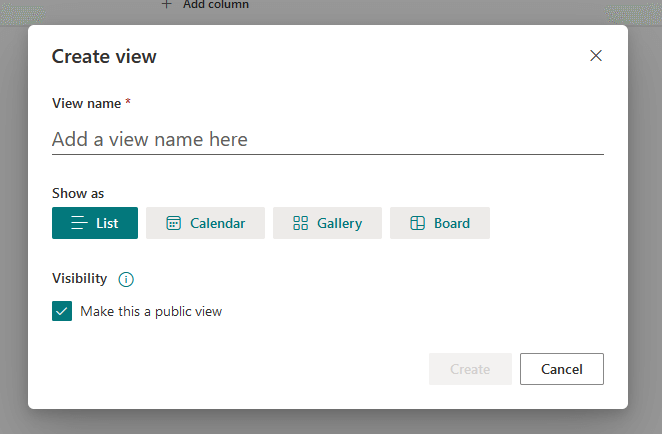
Step 2: Configure the basic settings
The next step consists of three things:
- Naming the view
- Selecting the view type
- Setting the audience
It looks like this:
The list type is the default or standard view that you know. 🙂
The calendar view provides a well, calendar, that looks like this:
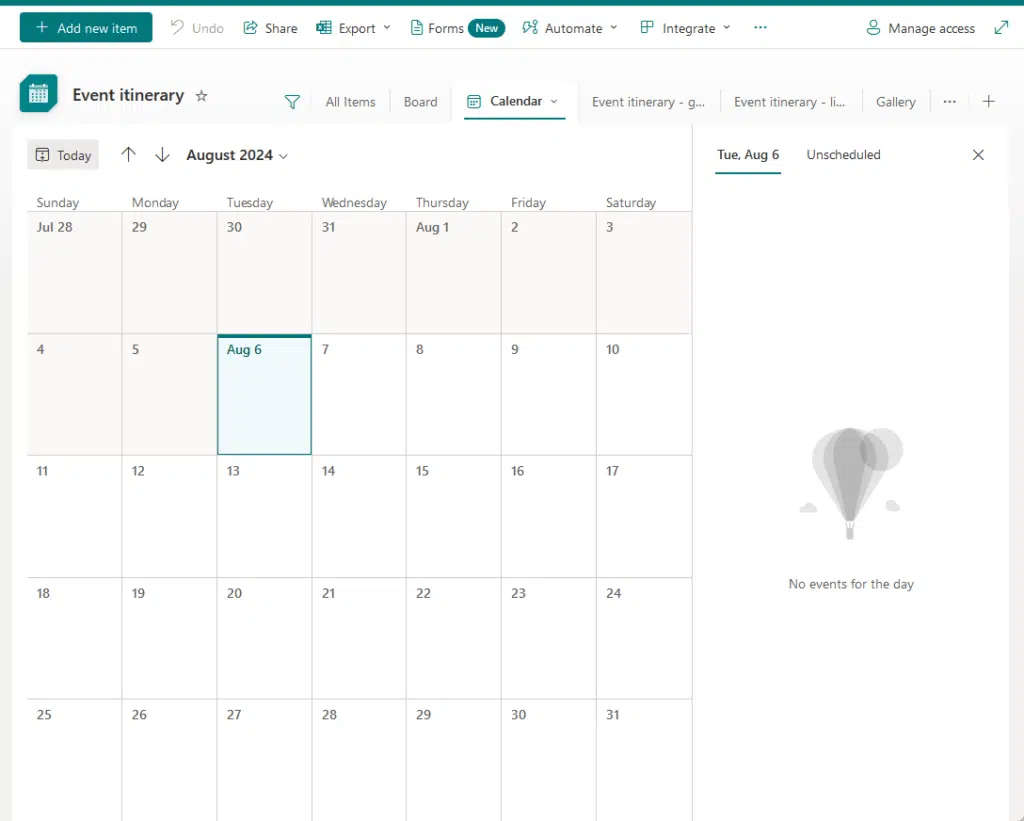
Of all the views available, the calendar option provides the most options from the default layout to the start/end date.
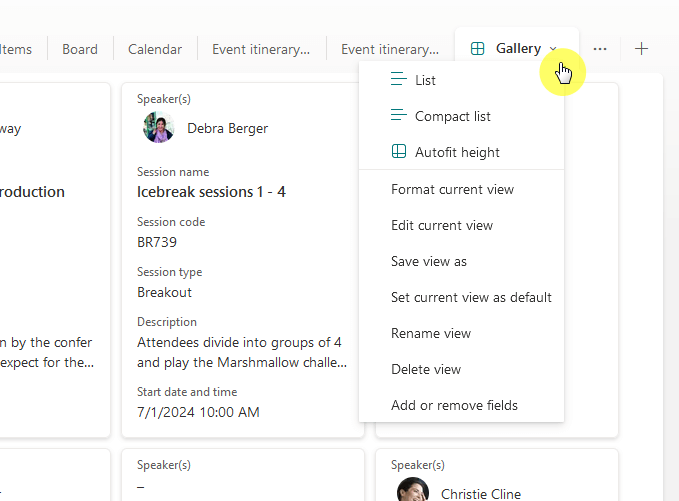
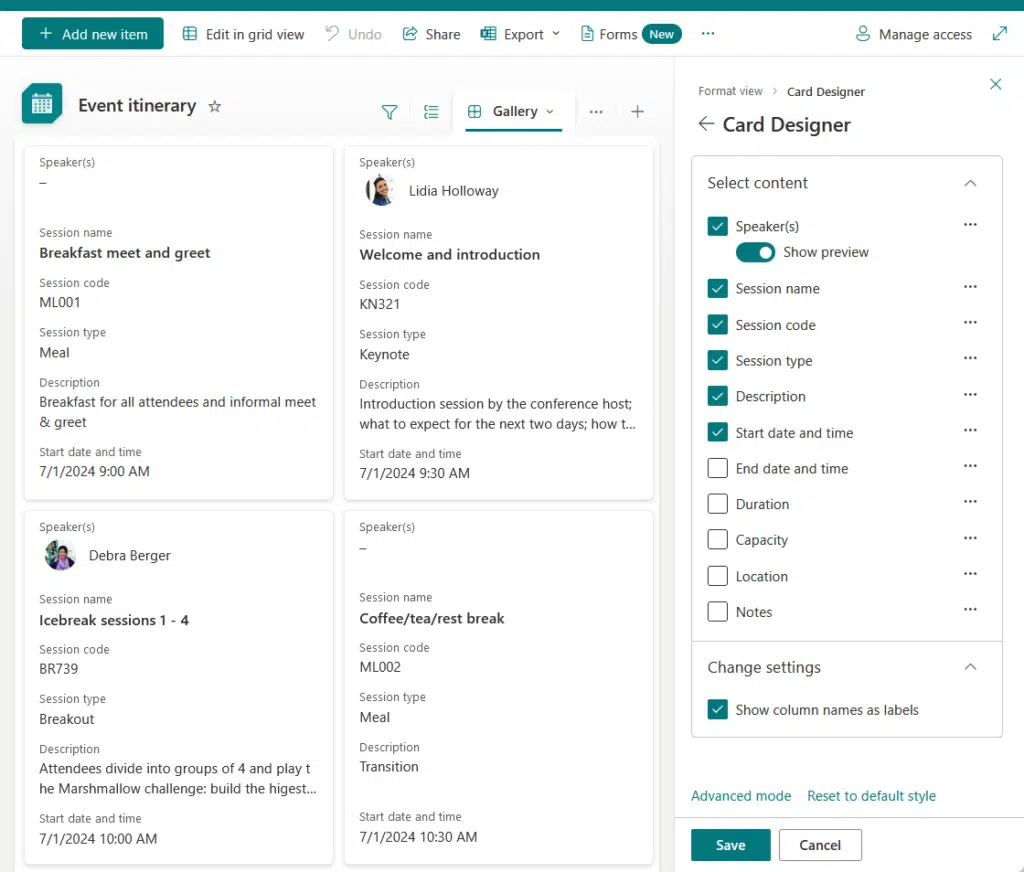
The gallery view looks like this:

It’s actually a nice replacement if you were planning to create a tile view.
👉 Related: How to Create a Modern SharePoint List Tile View (+JSON)
Lastly, here’s the board view:
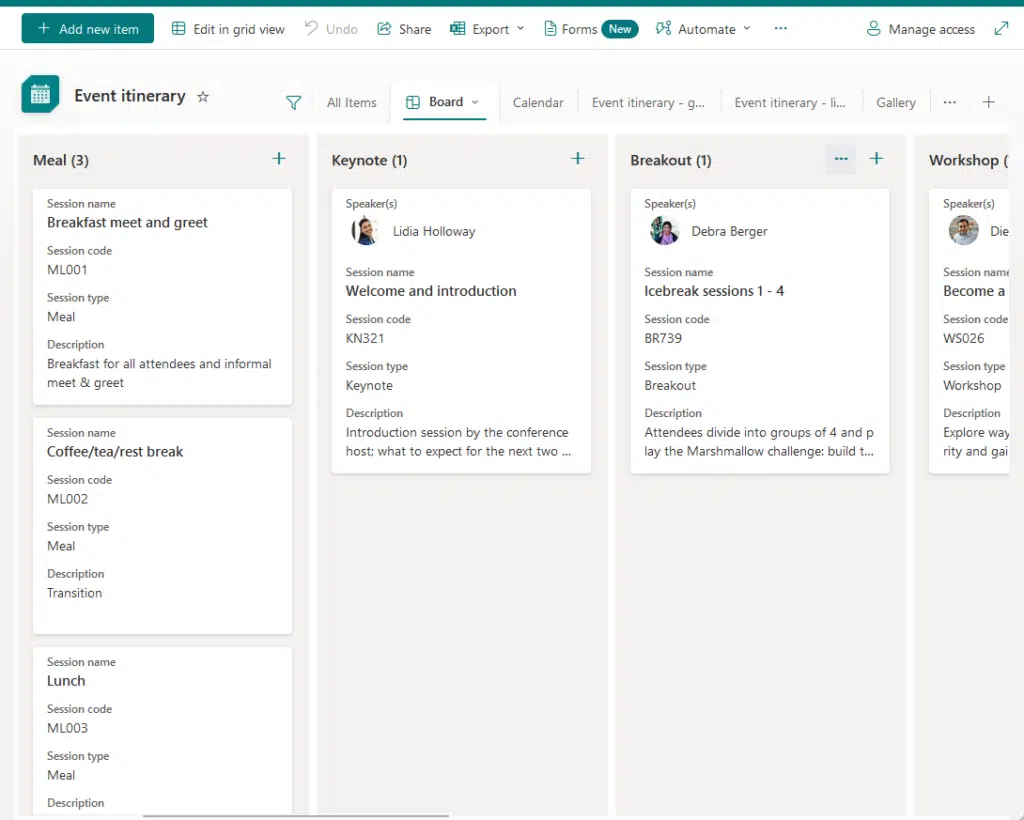
The board view is actually the newest addition here in the SharePoint views options. 🙂
Step 3: Customize the view
After you press create, it will automatically create the view for you.
The cool thing is that it doesn’t have to end there as you can do further customizations.
If you click on the current view, you can find different options there, from formatting it down to adding/removing fields.
If you click on the edit current view button, this will open another classic-looking page where you can do a lot of things.
For example, you can set up sorting and filtering options:

⚠️ Note: This page is actually accessible from the SharePoint list settings page.
Many of the settings here can’t currently be done on the modern interface.
On the other hand, it has the format current view option for access to the card designer and conditional formatting.
Like this:
What this means is that before you customize a view, it helps if you have an idea first of what you want to achieve.
When you have that, you will know which tools or features to use to format or edit the current view. 🙂
When to use views?
As I explained earlier, views are helpful if you want to display data in specific ways to meet specific needs.
Examples of scenarios where this is beneficial:
- Filtering data: Use views to display only the items that meet certain criteria.
- Sorting data: Organize items in ascending or descending order based on specific columns.
- Grouping items: Group items by metadata to simplify navigation.
- Customizing layouts: Apply different layouts like calendars or galleries for better visual representation.
An example of a situation is project management and you have a list for tracking tasks for multiple projects.
Each task has columns for project name, due date, status, priority, and assigned team members.
Creating different views (like showing tasks assigned to you and other team members) can make it more manageable.
How does a custom view differ from a regular view?
Technically, custom views are still views.
The only difference is that they were heavily edited, usually through the classic-looking edit view page I showed you.
So most likely, going forward, the meaning of “custom” views will change into views created by a third-party tool.
Anyway, got any questions about creating a view in a SharePoint list? Let me know below.
For any business-related queries or concerns, contact me through the contact form. I always reply. 🙂


