

Last Updated on July 16, 2024
Everything has a limitation, even SharePoint Online.
In this guide, I will walk you through these limitations that you may encounter, and what you can do about them.
Let’s get started.
Table of Contents:
How do these limitations impact your business?
There are a few limitations that I consider “significant” enough to mention here.
Unfortunately, these can lead to performance issues, data management challenges, and even potential disruptions.
Some of the effects of these limitations include:
- Read-only mode and halting new data additions
- Block the storage of large files and complex directory structures
- Slow down or prevent access to data
- Cause sync failures which then lead to incomplete data availability
- Degrade performance and even complicate access management
- Restrict collaboration with partners and clients.
On the bright side, you can use best practices (wrote lots of them here) to help mitigate or even resolve these issues.
You can break down large lists and SharePoint libraries into smaller ones and this will improve performance and usability.
But anyway, I will go through each one of them:
Sign up for exclusive updates, tips, and strategies
1. Storage Limits
If you didn’t know yet, SharePoint Online actually imposes a storage limit of 25 TB per site collection.
This means that each site collection can’t store more than 25 TB of data.
When you reach this limit, the site collection becomes read-only, which then prevents new data from being added to it.
⚠️ Note: The total storage for your organization might even be less than 25 TB especially if there were no additional storage purchased.
How to manage this:
Nobody wants this to happen so if you want to handle SharePoint storage limits effectively, here’s what I suggest:
- Distribute data: Spread data across multiple site collections to avoid hitting the 25 TB limit on any single site.
- Regular cleanup: Periodically delete old or unnecessary files to free up space.
- Implement archiving: Move infrequently accessed data to archive sites to keep the primary site collection lean.
I also recommend you do the following:
Regularly monitor your storage usage
There are tools that can help you track how much storage is being used and where it’s being consumed.
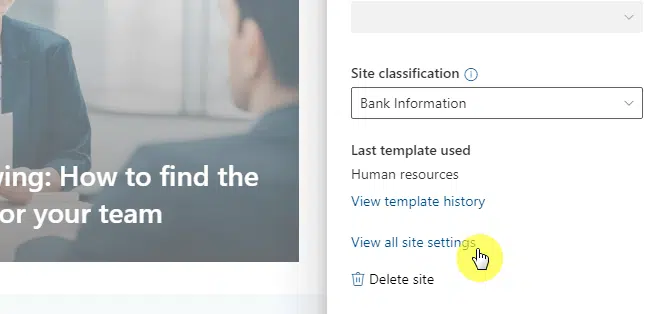
Go to the site settings from the site information:
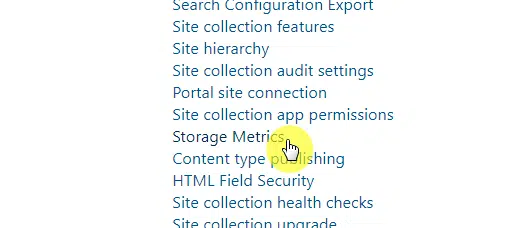
The next page lists the different site settings that you can configure.
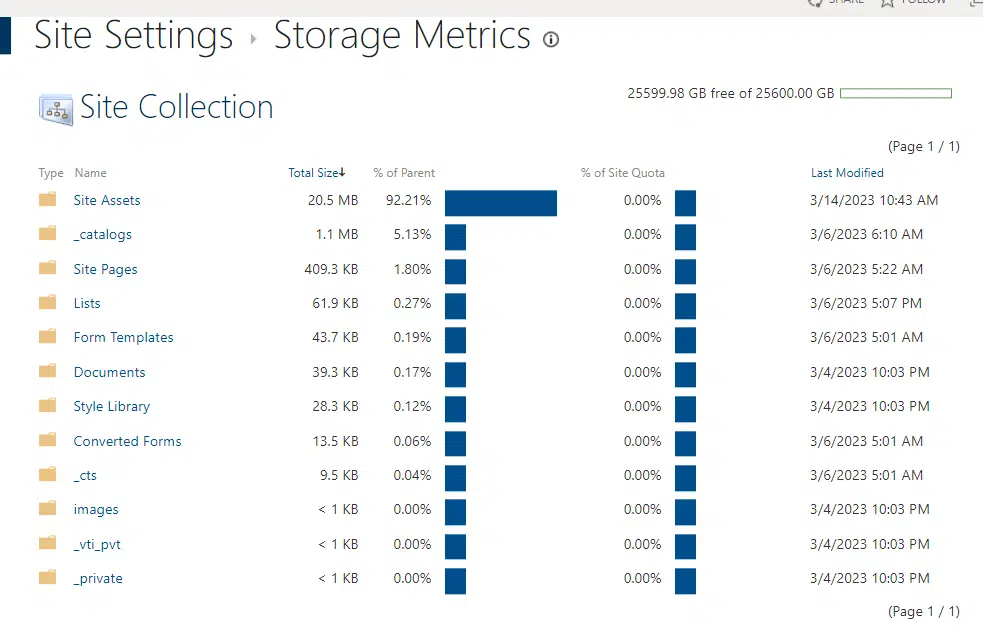
Focus on the site collection administration group features and click on the storage metrics link:
The next page will then show you the folders in the site collection as well as their total size.
This is actually the screenshot I showed earlier:
Keep an eye out on these metrics especially if you feel that a certain site collection is already reaching its maximum.
👉 Related: How to Check the Storage Metrics in SharePoint Online
Implement data retention policies
You can minimize the effort of managing your files by implementing data retention policies.
As you know, these policies will automatically manage the lifecycle of documents and files.
If you’re not sure how to do this, simply go to the compliance center:
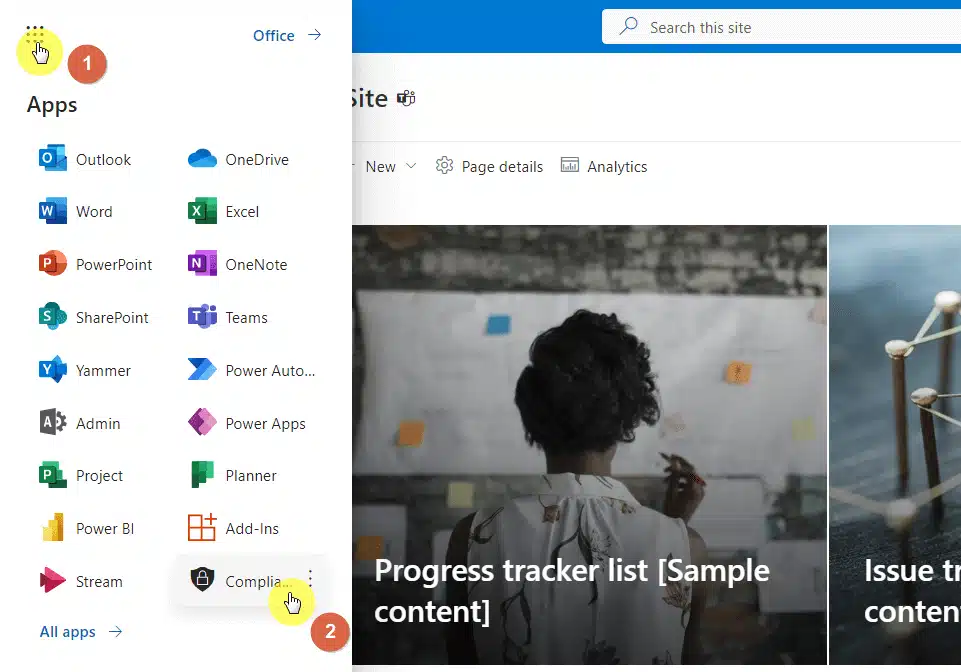
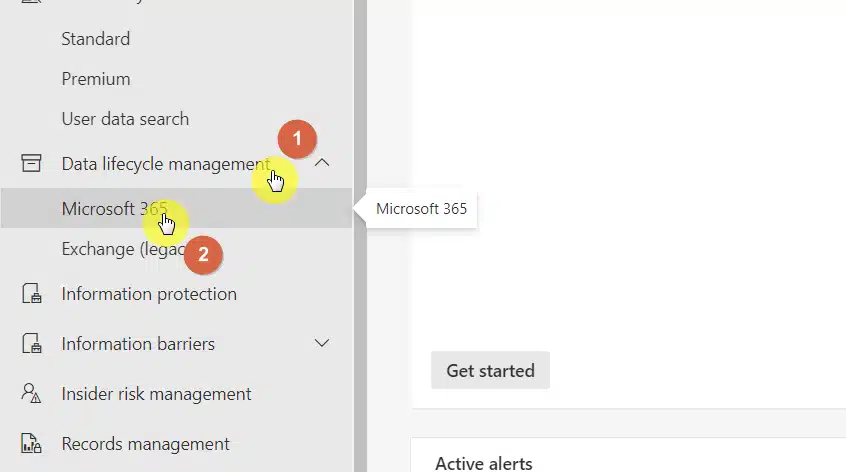
From there, open the data lifecycle management item in the left pane.
Then to Microsoft 365:
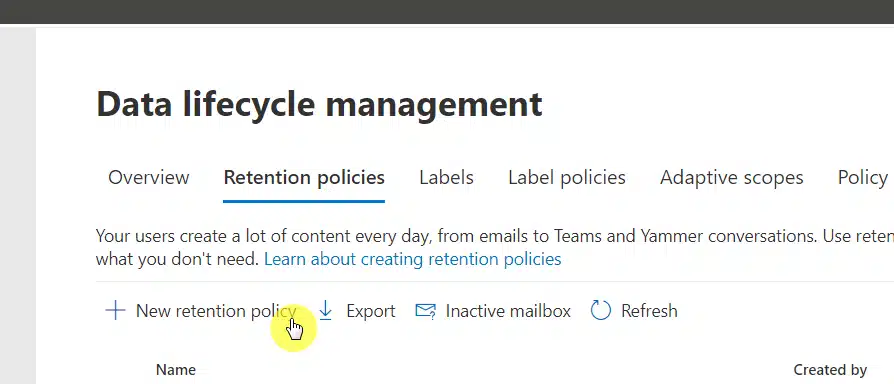
It’s then an easy ride from here as you will be able to see the retention policies tab.
Open it and click the new retention policy button:
From there, follow the prompts on the screen and continue until you finish the process.
Make sure to configure them properly so only relevant and necessary data is kept within active site collections.
If want a guide, you can refer here:
👉 Related: Admin Guide: How to Create a SharePoint Retention Policy
2. File Size Limit and Path Length
Another one is that SharePoint Online has limitations on both file size and path length.
Basically, the maximum file size for uploads is 250 GB and the total path length of URLS can’t be more than 400 characters.
If you name the file using more than 400 characters, this is what you will see:
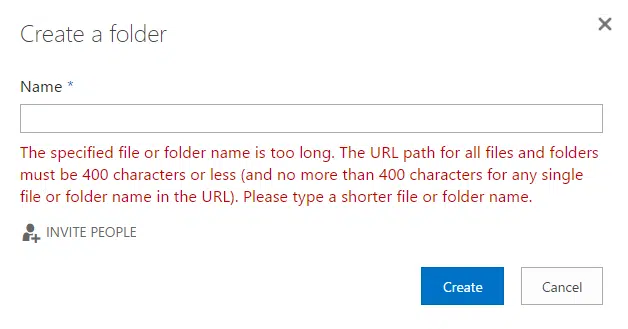
⚠️ Note: This limit doesn’t include the name of the site and the tenant, so the count starts after the file name.
👉 Related: File Size Limit SharePoint Online – The Complete Guide
How to manage this:
Fortunately, handling file size and path length limitations effectively isn’t that hard.
Some examples of what you can do:
- Compress files: Reduce file sizes before uploading.
- Shorten names: Use shorter file names for sites, folders, and files.
- Flatten structure: Avoid deep folder hierarchies to keep paths shorter.
I also recommend you do the following:
Educate your users
Although you can regularly review and audit your files, that’s not the most efficient way to manage this limitation.
The best method is to educate your users about these limitations and the best practices for file naming and structuring.
For example, they can use metadata instead of folders to manage documents more efficiently without long paths. 🙂
You can also create guidelines for users to follow so that file and folder names are kept short and meaningful.
👉 Related: SharePoint Naming Conventions: Best Practices and Guidelines
Consider third-party tools
There are times when you really need to upload large files and create somewhat complex directory structures.
Some examples include:
- AvePoint
- Metalogix Essentials
- ShareGate
These tools have additional features and even flexibility that’s more than what SharePoint’s native capabilities can offer.
It’s still best though to plan the structure of your SharePoint environment from the beginning to save yourself from trouble later.
3. Item Limits in Lists and Libraries
Besides a limit on the file size and path list, there’s also a limit on the number of items in lists and libraries.
A list can hold up to 30 million items, while a SharePoint document library can have up to 30 million files and documents.
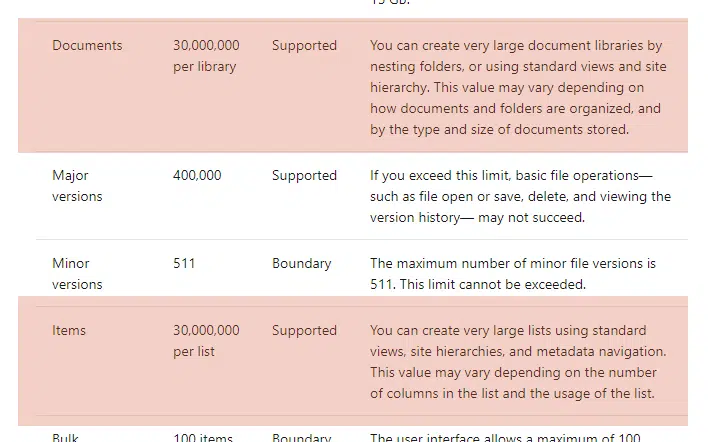
Unfortunately, despite that, performance issues arise when you try to view more than 5,000 items at a time.
You will see something like this:
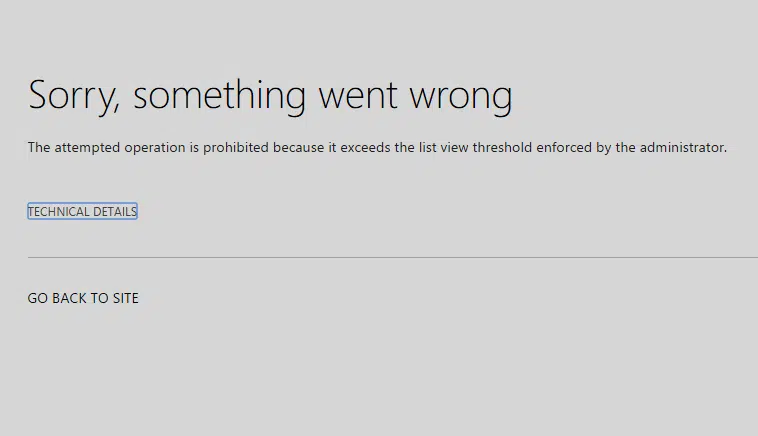
This is known as the list view threshold.
👉 Related: How to Resolve the SharePoint 5,000 Item List Limit Threshold
How to manage this:
There are a few things you can do to avoid this from happening.
Some examples:
- Use indexing: Create indexed columns to improve performance and enable efficient querying.
- Break into smaller lists: Divide large lists into smaller, more manageable lists.
- Implement folders: Use folders to organize items and reduce the number of items in a single view.
In case it really happens, there are also some things you can try to solve this.
Unfortunately, these methods would take up some time:
- Decrease the items to less than 5,000
- Reorganize your whole library
- Create metadata properties
This is another reason why educating users plays a huge part, especially in how to organize their data within SharePoint.
Use metadata
Metadata can improve searchability and organization without relying on large lists, which is ideal in this kind of situation.
Unless you already have hundreds or thousands of files, it’s also easy to start — simply create a new site column.
Like this:
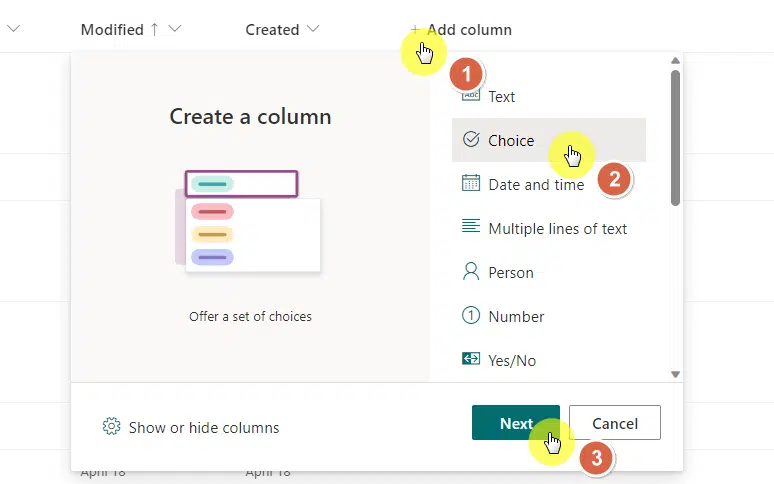
From there, you just need to edit the properties of the files that are already (or to be uploaded) in the library.
As for metadata, you can also use it to categorize and filter items efficiently and reduce extensive folder structures.
👉 Related: Metadata in SharePoint – How to use it? The Beginner’s Guide
4. OneDrive Sync Limitations
You might be wondering why there’s OneDrive here. 😅
Well, we use it to synchronize files between SharePoint document libraries and our local machines.
Unfortunately, it only has a sync limit of 300,000 files per user across all synchronized libraries.
If this is exceeded, you may experience problems like the sync client perpetually searching for file status changes.
👉 Related: How Does OneDrive Sync Work: Installation and Configuration
How to manage this:
You can easily avoid this through:
- Selective sync: Only sync necessary folders and files to reduce the total number of synced items.
- Organize data: Regularly review and reorganize data to keep the number of items in sync manageable.
- Monitor sync status: Frequently check the sync status and resolve any issues promptly.
Of course, if it’s already happening to you, simply reduce the number of files to sync and it should solve the problem 🙂
I also recommend you do the following:
Monitor the sync status
You can use OneDrive’s built-in tools to monitor the sync status and help you check and address sync issues.
Here’s an example:
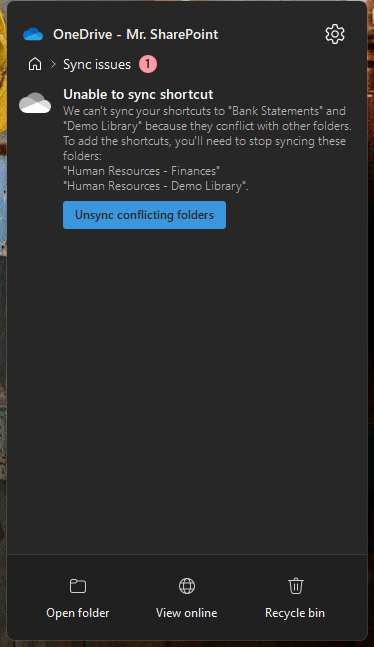
You should also educate your users to be aware of the sync icon status indicators and error messages.
As you know, these can provide valuable information on any sync problems and also have suggestions for corrections.
Check version history
Sometimes, things go weird and go wrong. 😔
If that happens to you, use SharePoint’s version history and recycle in features as backup options.
Version history and control would look like this:
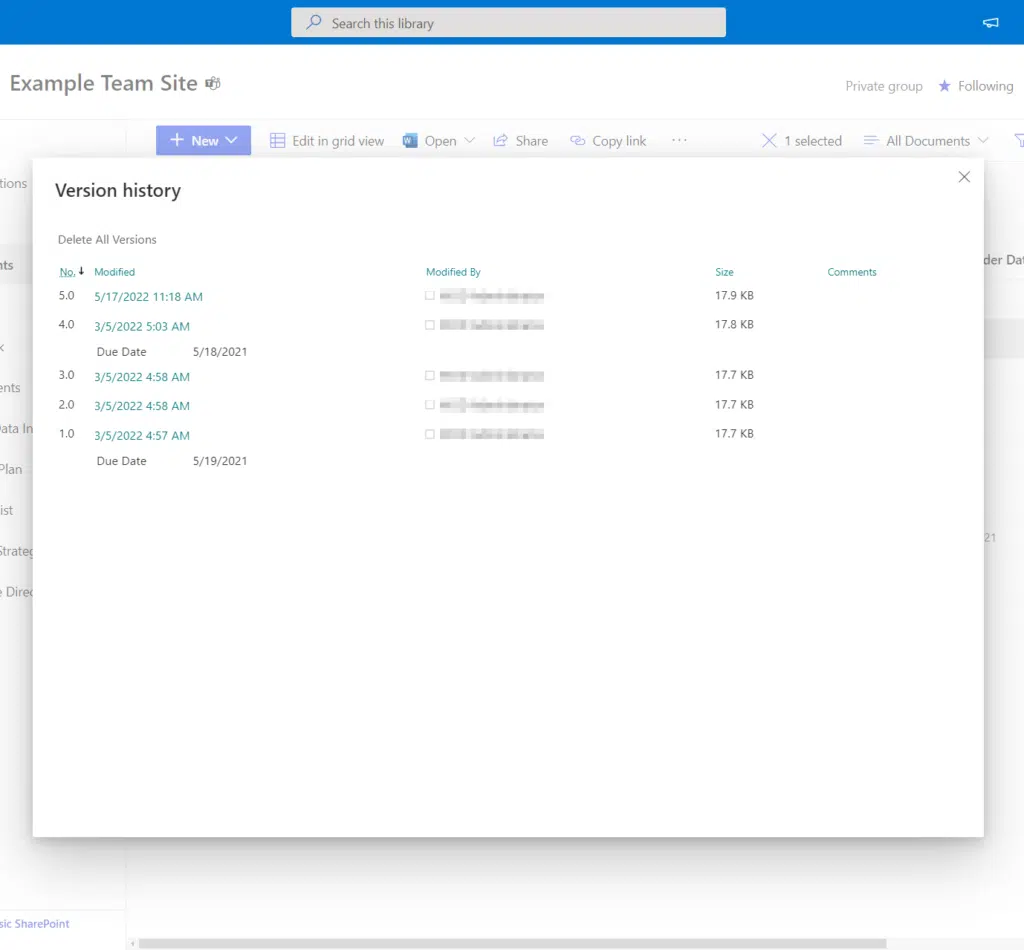
If data loss occurs, these features will allow you to restore previous versions of files or even recover deleted items.
With this though, it might also help to implement policies that can limit the creation of excessive folders and files.
You can then establish guidelines for data management to prevent users from unintentionally exceeding sync limits.
For example, you can discourage the storage of large media files directly in SharePoint and instead use specialized solutions.
👉 Related: SharePoint Version Control: The Strongest Feature?
5. Permissions and Security Scopes
This is stretching a little bit since it’s likely that you won’t hit this.
But there’s a limit of 50,000 unique permissions per list or library, with a recommendation of less than 5,000.
If you exceed 5,000 permissions, it might result in slower performance and increased complexity in managing permissions.
👉 Related: How to Create a SharePoint Custom Permission Level (Guide)
How to manage this:
Here are some suggestions on how to manage this:
- Simplify permissions: Use fewer unique permissions to reduce complexity.
- Group users: Assign permissions to groups rather than individuals to streamline management.
- Regular audits: Review and update permissions periodically to ensure they are still appropriate.
It helps if you create security groups in a site collection so you can have an easier time managing permissions.
That’s because instead of managing each user’s permissions, you can simply change the group permissions.
That will then affect everyone who is a member of that group. 🙂
👉 Related: SharePoint Permissions: Best Practices to Implement
I also recommend you do the following:
Regular audits
Doing regular audits can help you identify and correct any unnecessary or complicated permission settings.
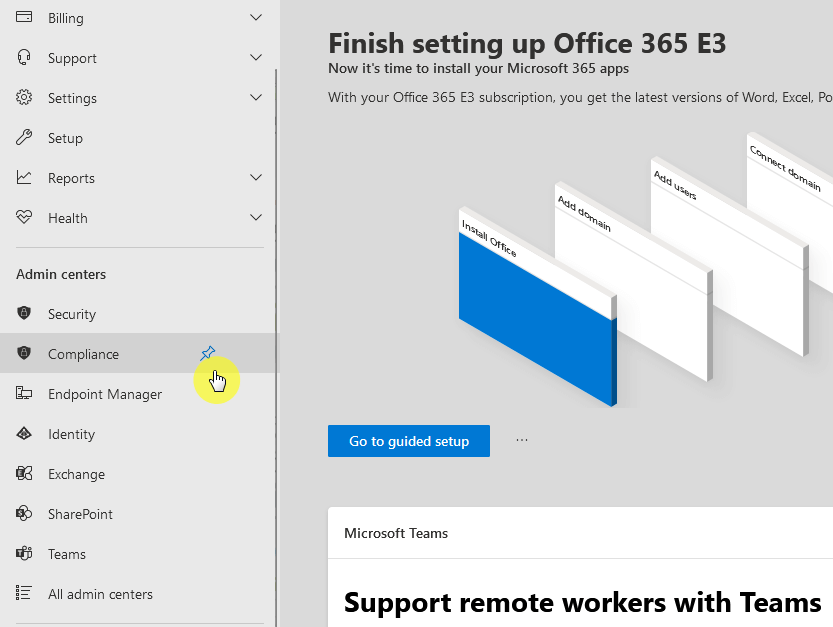
You may need to set this up through the Purview app first and go to the audit solution:
If you haven’t done any auditing in the past yet, it’s likely that the audit log tracking is off.
On the screen, click the start recording user and admin activity button and it will start recording user activities.
You can find that button in the search tab:
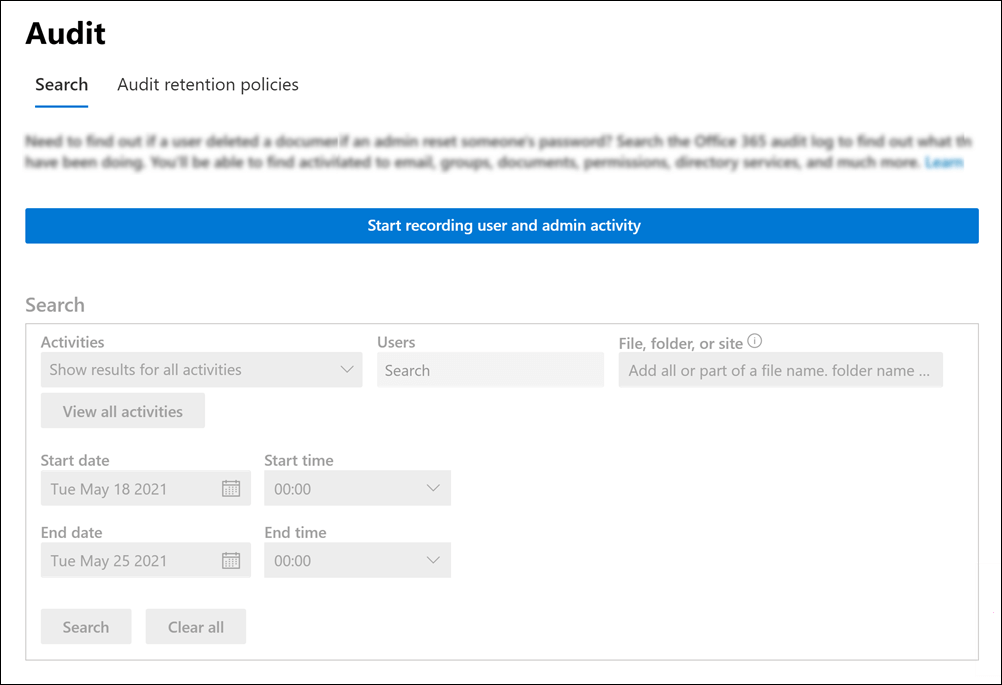
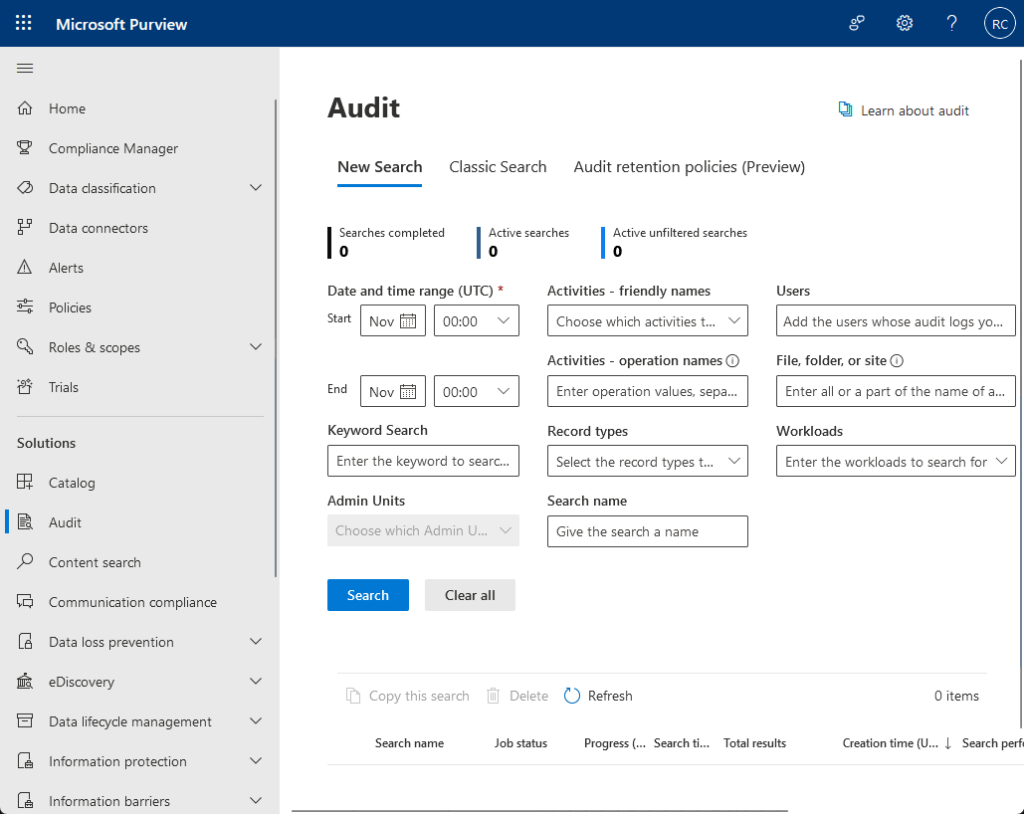
The page will then look different.
Give it a few days so you have sufficient data, and then you can create a new search with custom search parameters.
Like this:
Your audits should include reviewing which users and groups have access to sensitive information.
Then make sure that those permissions are appropriately assigned based on what their roles and responsibilities are.
Permission management policy
Lastly, you can implement a clear permission management policy to help with permission management.
This policy must outline the process for:
- Requesting permissions
- Approving permissions
- Assigning permissions
You can then train and help users understand how to follow those procedures and why the structure is important.
👉 Related: How to View SharePoint Online Audit Logs: Beginner’s Guide
Anyway, got any questions about the different SharePoint Online limitations? Let me know.
For any business-related queries or concerns, contact me through the contact form. I always reply. 🙂


